As I sort and cull my tools (and life) I want to share some past projects that may seem too simple to consider. I am not always on the path to a handmade life but I’m also never far from it.
Adventures of an Imperfect Man In Search of a Handmade Life
As I sort and cull my tools (and life) I want to share some past projects that may seem too simple to consider. I am not always on the path to a handmade life but I’m also never far from it.
It’s coming together…
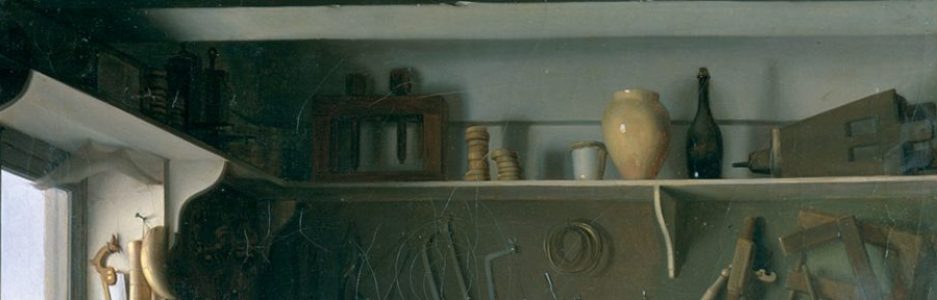
Looking through old books online I’m constantly reminded of how easy we have it in the 21st Century. I still remember seeing my grandfather and great-grandfather ripping the occasional board by hand. Neither had a table saw and it was often too much trouble for a single cut to replace the blade in the circular saw. I feel like I have rip-sawed miles of lumber in my life and many projects I have undertaken wouldn’t have occurred without the table saw. As I have cut down on the large power tools I own I have a difficult time dismissing even the small table saw.

So, I’ve been putting off resawing a wide mahogany plank intended for an instrument back and, because of the width, it will need to be done by hand. I have put it off for over a week now as I realize there is some dread about diving in. It’s a skill that needs practice like any other and isn’t going to kill me. Time to take a deep breath, clamp it down, and start cutting.
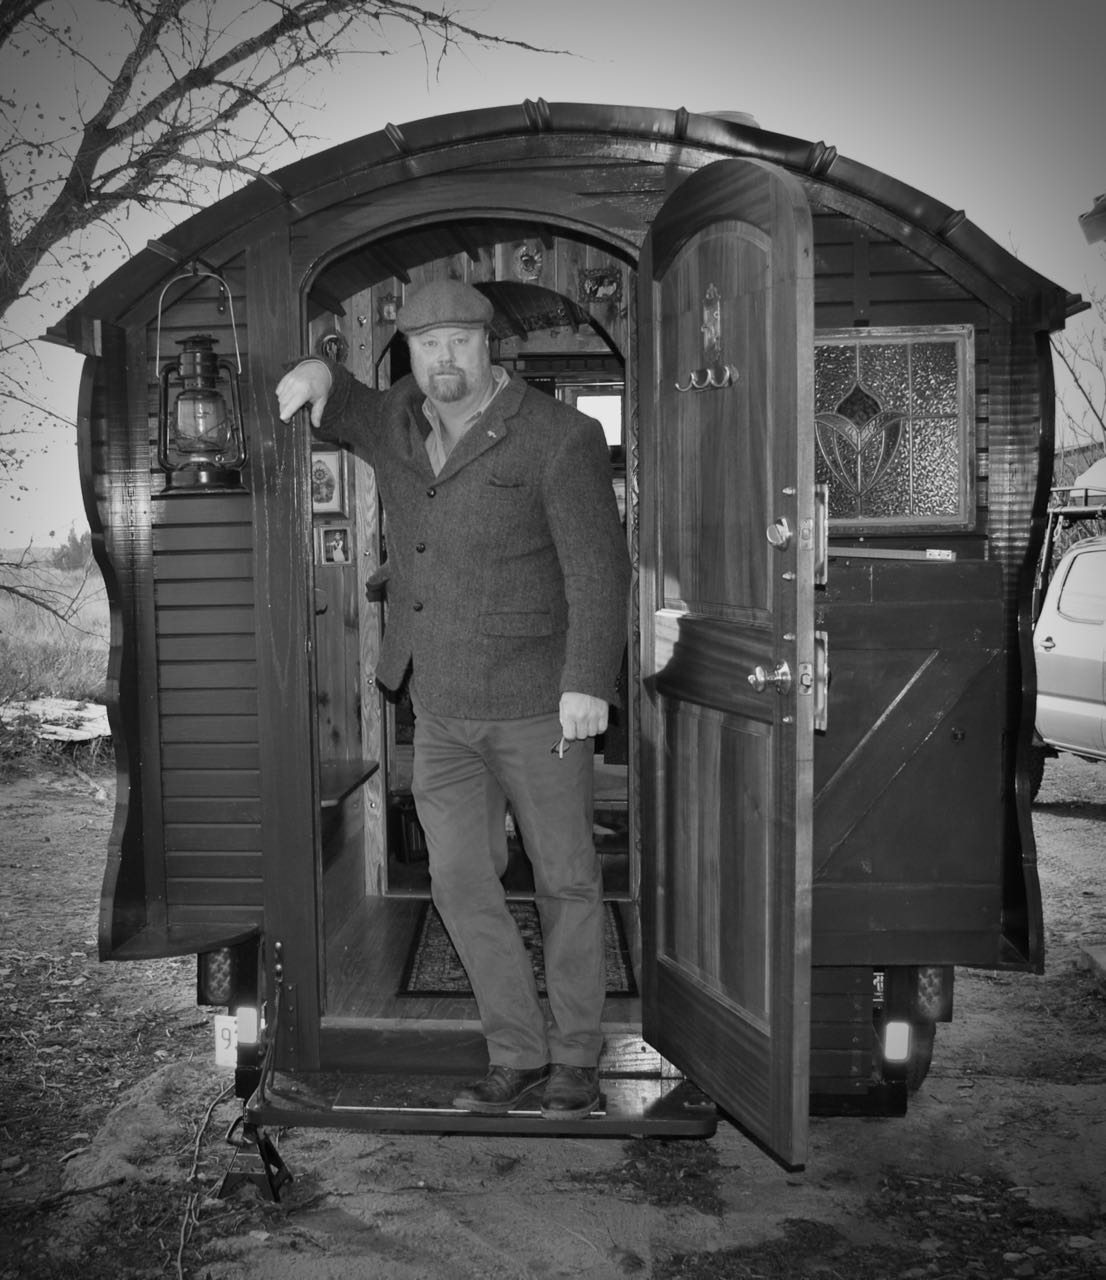
A beautiful, dark, wintery day spent in the Vardo, getting things in shape and spending some quality time reading led me to thinking about shooting a few photos. The place is a bit unkempt but I think it shows how the space is used in real life.


Power Tools and Preindustrial Technology
Recently, I realized I needed to make a new batch of darts (spears) for an annual atlatl event at Blackwater Draw. This is a recurring problem when teaching large groups, so several years ago I came up with a system that works well for mass producing these Ice-Age weapons with just a few common power tools. Nothing about this project is particularly difficult but if you need to produce darts by the dozen, it can get pretty tedious and take many hours. Power tools, in this case, decrease the necessary time and energy allowing free time to pursue more satisfying occupations.
After several decades teaching and demonstrating primitive technology I have learned that people are not careful with other people’s hand-made items (kids doubly so) so making robust and easily replaced models is a real time-saver. Also, having tried many designs with kids and adults, I have found a size, weight, and flexibility that I think covers a wide range of body types and skill sets so that most people, most of the time, can have some success in just a few throws (except Jim Gnapp, he’ll just never get it). After promising to do this for several years now, I put together a recipe for mass producing atlatl darts.
GEORGE’S RECIPE FOR LARGE BATCH ATLATL DARTS –
INGREDIENTS:
TOOLS:

Preparing the Shafts: Rip board into 1/2″ strips, then re-saw to create 1/2″ square cross-section.

Set table saw to 45° to further re-saw shaft into octagon section. This can then be smoothed by hand with sandpaper or on the belt sander.

Cut shafts to length. I generally cut them to 7′ (84″).

At this point you will notice that the shaft is far to wide for standard arrow field points so some free-hand shaping on the sander will be required. Taper the final 3-6″gently down to a scant 3/8″ diameter, rounding the shaft as you go.

Taper the shaft to fit the field point and test fit a point.

Repeat until board is consumed and all shafts are all prepared. At this point, further shaping of the shaft can be accomplished on the bench sander to round out the octagon shape.

Mix a small batch of epoxy and attach the heads to the dart. I give them a final tap after insertion by holding the dart point down over a hardwood scrap and dropping it a couple feet, sealing the point. Wipe off any excess epoxy and wait the recommended cure time.

Fletching: Tear off about 1/2 inch of the vane or barbs from the quill (the barb is the hairy or fuzzy part). Place a dab of super-glue on the forward end of the quill and hold down about 7-8″ forward of hind part of the shaft. Once this sets, repeat two more times placing the feathers evenly around the shaft (one-third way around). Trim the rear of the feather to make all three match in length.

Using a scant quantity of glue, attach each feather to the shaft. You can skip this and just tie them down but the glue makes for a robust and neat-looking fletching. Whip down the front and rear of the feather with thread and coat lightly with super glue to prevent unraveling.

Using the tapered countersink bit, create a notch in the base of the dart. For security and strength, I recommend whipping the final 3/8″ of the shaft with thread and coating with super glue to strengthen to wood.
Take a break, drink a beverage, and congratulate yourself on a job adequately done. You now have a set of tough darts for play and learning that should, with some care, last for several years of hard use.
THROWERS:


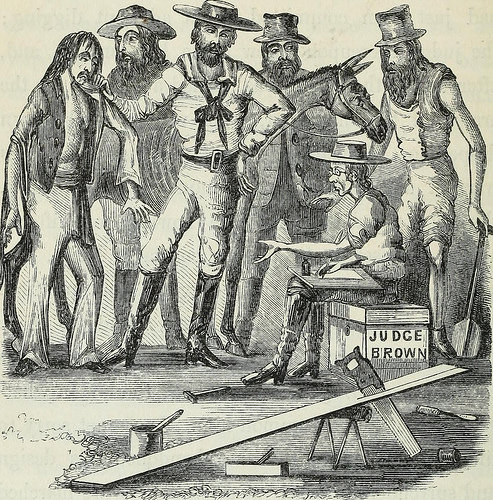
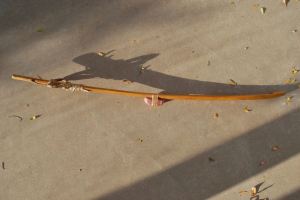
Now for the thrower… “It is to be created in the usual fashion, neither too long or too short, too heavy or too long.” ~pt
")
")
")
")
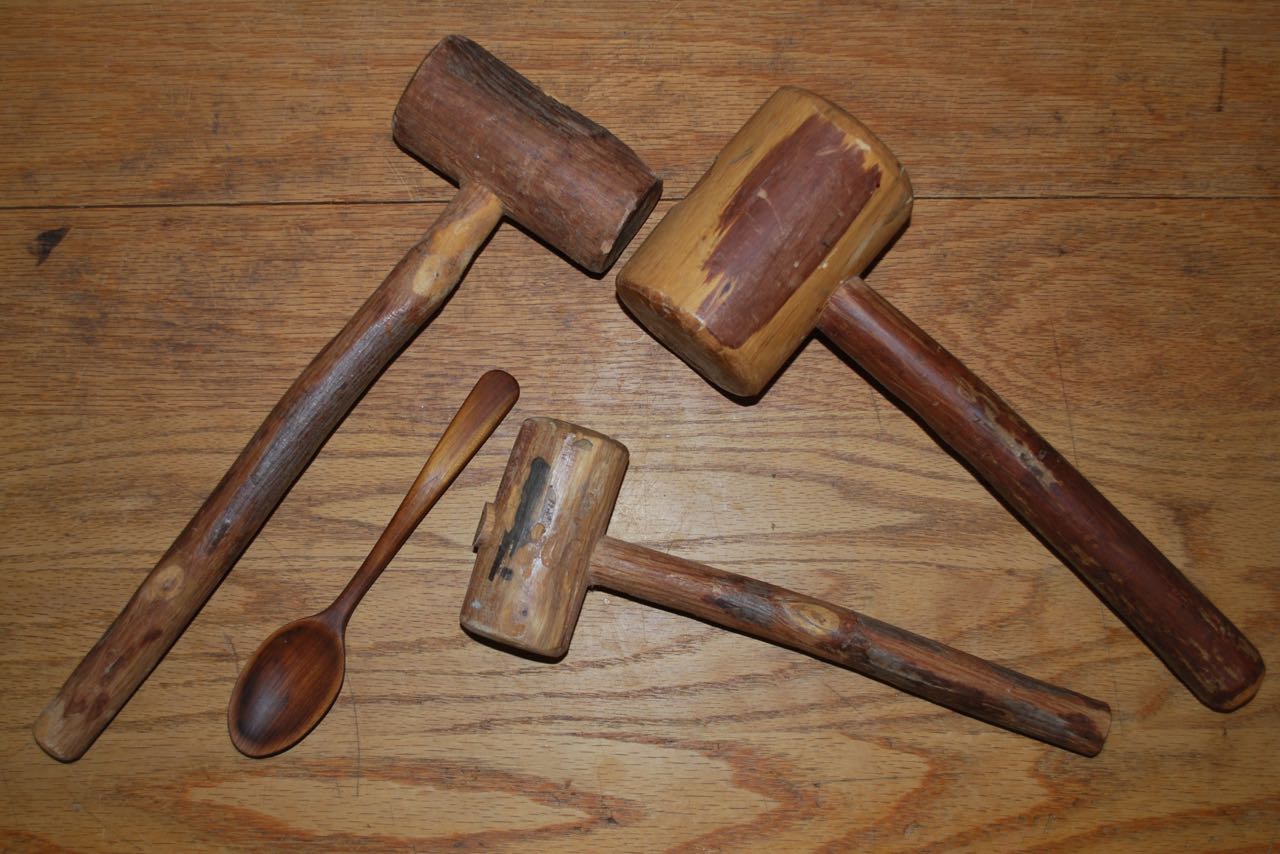
Seriously though, there are myriad ways to create a stick with a hooked end and I won’t go into the finer points here. I will say that this is really the simple part and can be achieved with either hand or power tools in a short time. There is much about spear thrower design (atlatls) on the web and it is important to remember that most cultures world-wide used these efficient tools. As their prey and use varied, the styles varied as well. They broadly fall into a few categories but the most common in the U.S. are variations on the “Basketmaker” or “Great Basin” styles and what I like to think of as the hammer-handle styles (above). The latter are more akin to the early designs from the Ice Age and are found throughout Europe, often make from reindeer antler, over many millennia.
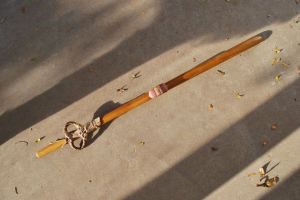
My second favorite; Osage orange wood, buckskin, sinew, pitch glue and red argylite.
As for style, I personally recommend finding a cultural group you are interested in or just a design that strikes your fancy and dive in. Wood is cheap, easily worked and plentiful. Worry about the details later.

FINALLY, FIELD TESTING:


They work! and all survived a day of heavy use.
Oh but wait! There’s more! Here are a couple other respectable links to get you started:

I have not been entirely idle on the vardo project but have not had time to post here. Work life has been eating up my spare time with travel, and fun though that may be, it means nothing else gets done outside the work day. Cutting a hole in my nice, dry roof haunted me for several months but with the aid of a high-temperature silicone stove-pipe flange, I was ready to dive in. I didn’t want to remove the roofing panels so the cutting was difficult. I did what I could with the circular saw and gnawed the rest out by hand with a chisel. Not pretty, but it worked in the end. Then it was just a matter or cutting a hole through the steel and cleaning it up with a file.

I created a cover for the hole from an old, solid copper serving platter (see photo below) that looks nice, and will cover the ugly. The gap between the layers was filled with stove gasket insulation.
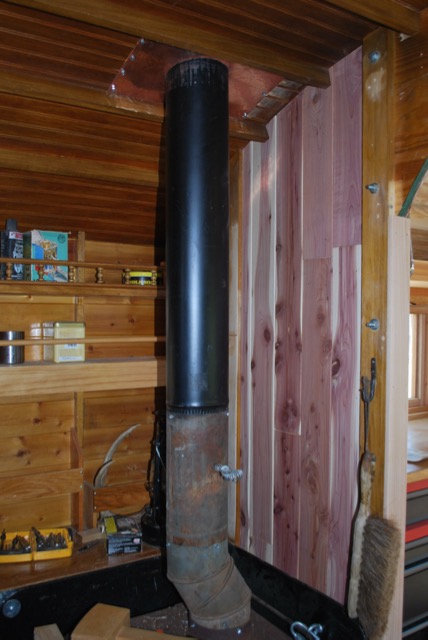
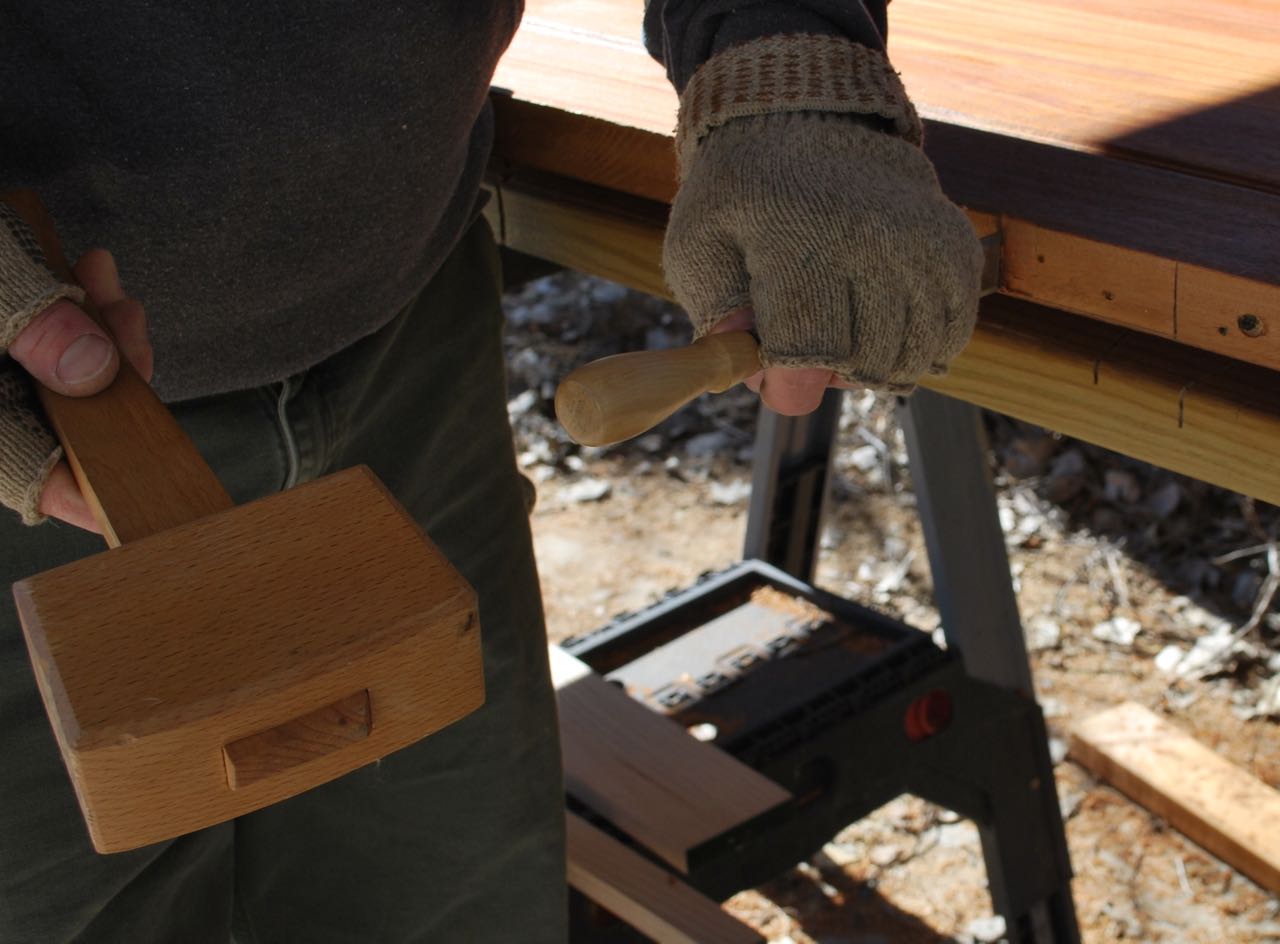
The upper pipe will get a coat of high heat paint while the lower portion will get stove polish along with the stove itself. In the background, the new juniper paneling is visible. Otherwise, the place looks like a wreck. The mallet is handy to solve all measurement problems.

Learning from experience, I created this new chimney setup so that the outside pipe could be easily removed, if necessary, for off-road travel. I will probably shorten the pipe by a few inches as it sticks up fairly high. Once this was completed, I could get back to the good stuff.

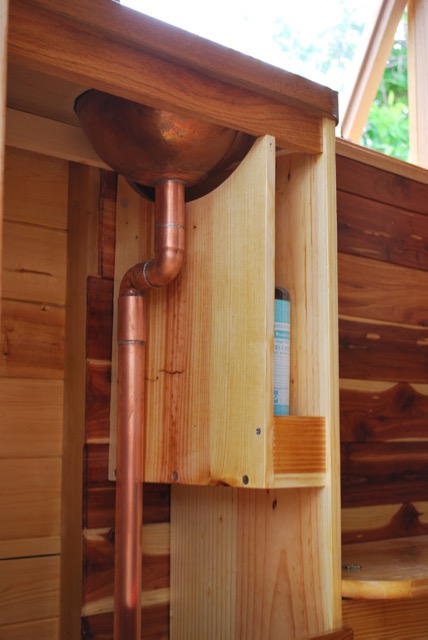
In order to maximize storage space a small shelf was created to hold soap. The size was determined by a standard Bronner’s soap bottle and it holds two comfortably.
Some scraps from the wood pile were recovered and planed down to rejuvenate them for use. Nothing fancy here, just utility.

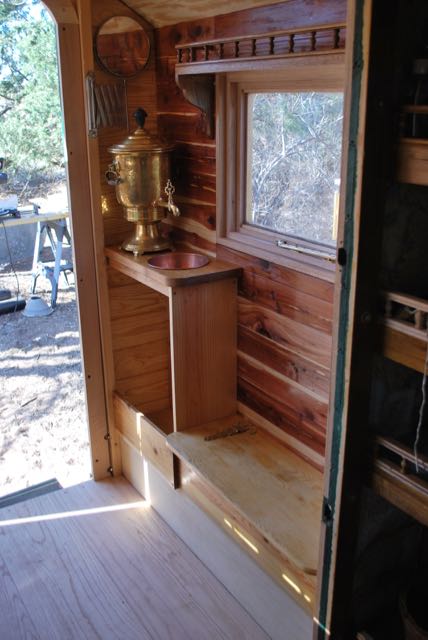
Everything in the area has another coat of varnish so as soon as create a method of securing the Samovar, the washing-up area will be complete.

Finally, I have begun varnishing the floor. The new oak contrasts with the old but will darken soon enough.
Sink, seating, and storage galore – I’m finally moving onto the luxuries that make this addition what it is meant to be; essentially moving some outdoor activities and living indoors with more amenities and easier foul-weather living.

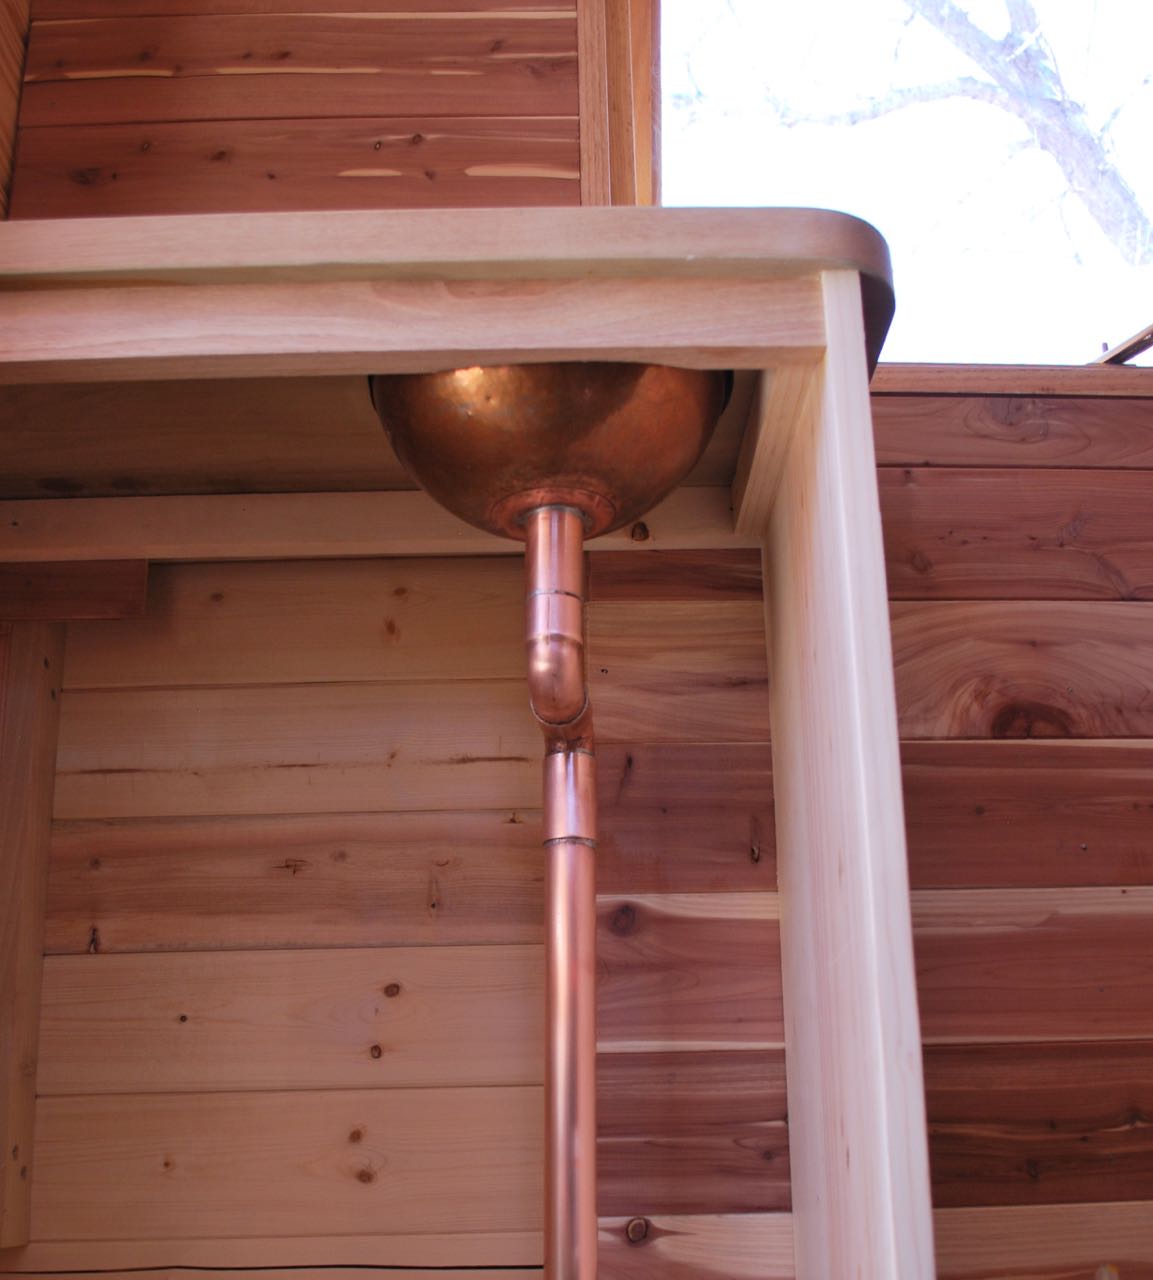
Beginning with a little sink re-purposed from an old copper mixing bowl set – This one was the middle size and fit the area perfectly. I’m certainly not taking credit for the idea as I took this freely from Mick’s vardo. The bowl is a perfect size for some personal hygiene, tooth-brushing, etc. while on the road while the bigger cleaning can still be done outside with the old washtubs and in the future, with an outside shower.
Drilling the hole – I was concerned about this step as there were several things that could go wrong; hole placement, dented bottom, rough fit, and so on. In the end I did my best to find the exact center with a tailor’s tape, from the outside, and marking the location with an awl. I then flipped the bowl over, set it up in a scrap board, and while holding it with my feet used a hand brace with a Forestner bit to slowly cut the hole. This worked surprisingly well and required only a little sanding and smoothing before moving on.
The bowl is not very heavy copper so I was concerned about the solder strength at the joint. There should not be much real strain on it but to ensure a larger surface area to sweat the solder, I sleeved the short pipe with a heavy coupling. I flowed the solder deep into the sleeve before attaching to the so they should be united forever now.

Some serious tugging and testing leads me to believe this is a solid joint.
A couple elbows and a short run of pipe completed the plumbing “system” and installation was a breeze. A small shelf to hold a couple Dr. Bronner’s bottles and a towel bar will be added soon to complete the set-up. The storage area to the left was sized to hold the beautiful new copper cistern during travel. The cistern will live outside in the kitchen area when encamped.
A note of caution – Although not really discussed here, the oak-framed windows are visible in some of the images. These were recently added and are glazed with Lexan for its light weight and excellent strength. Keeping the weight low is still a major priority, even in the addition and, if you are building something like this, remember: EVERY SINGLE POUND COUNTS! Fasteners, glass, hardware, accoutrements; they all add up and will be paid for in the final weight. If I could build everything with oak and walnut and hickory for durability, I would. However, the weight will add danger in towing, lower the fuel efficiency and have a cumulative effect on the overall structure.
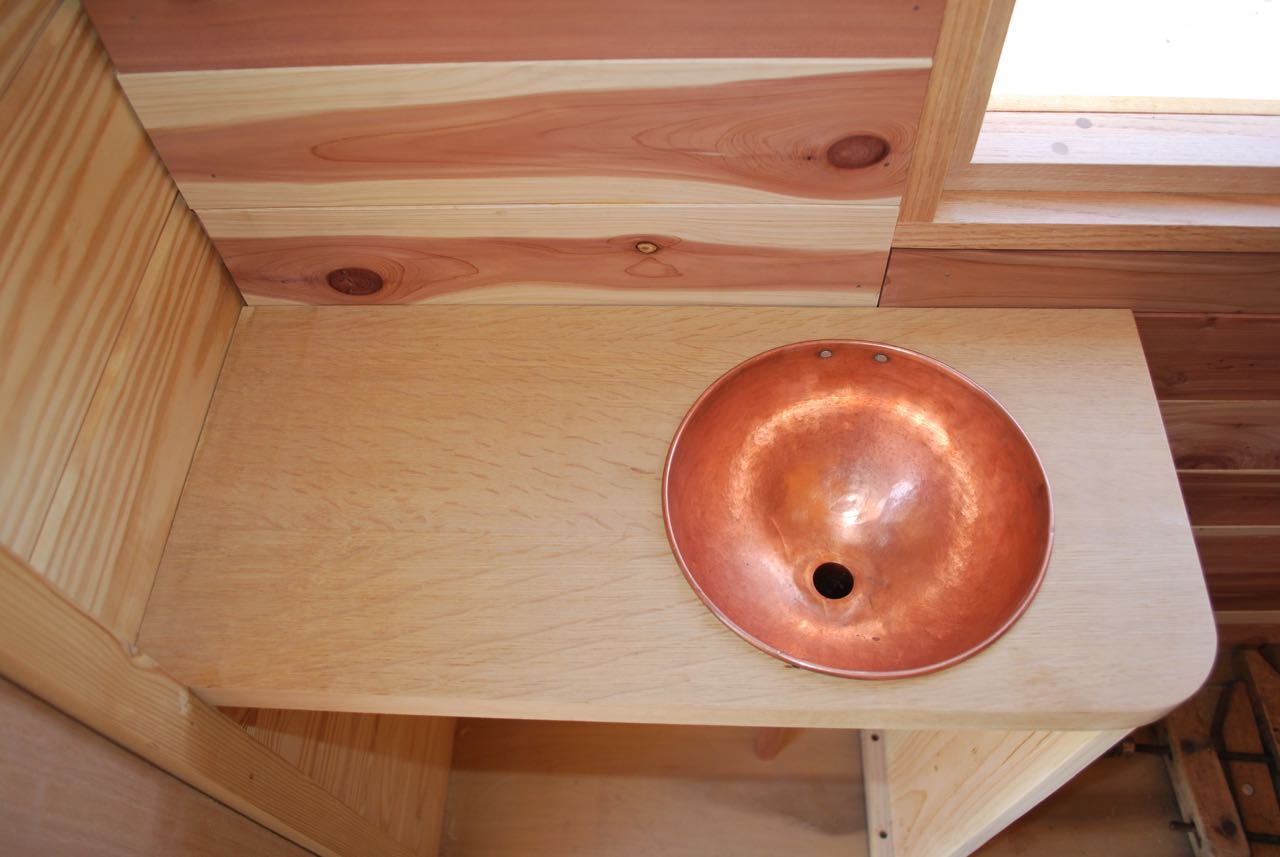
The sink was fitted into place and a outflow pipe seated in the hole drilled by the same Forestner bit used in the bowl. This counter is a re-purposed old office desk top from the 1930s or 40s that I’ve had for many years. It is a white oak laminate over a red-oak core (when things were built to last). A couple passes through the planer yielded a beautiful and sturdy surface to work with. The rest of the desk top was turned into the large counter on the starboard side that will be included in the next post.

This old Samovar was a lucky find for us and fits the location perfectly. It’s high pedestal provides clearance that would otherwise need to be created with some sort of shelf. Otherwise, it’s simply a beautiful and functional piece.

The next step was to create a small bench with the idea that this would give room when two or more people were inside as the floor space is limited in the main cabin. This area will serve as something of a mud room for the rest of wagon. The hinges were an Ebay find of solid brass under a hundred or more years of varnish and tarnish. I think Stacey really enjoyed making these shine again. This wood is some very solid pine reclaimed from an antique child’s desk and again, a planer made short work of cleaning it up for use.

I would have preferred the seat to be a little deeper for comfort but didn’t want to interfere with the traffic-way through the door. Nobody wants a shin-buster in such a small space.

The bench provides another small storage compartment for items that may need to be readily accessible; it’s not large but every bit counts.
For Part 1 of the rebuild/addition then CLICK HERE.
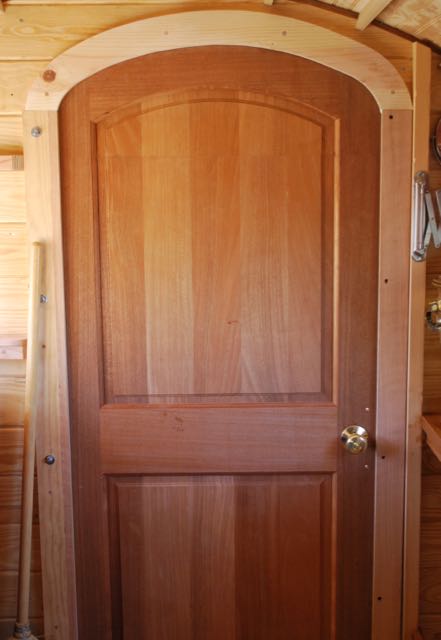
Every home needs a door. It’s a tricky bit that must fit well, open and close easily, provide some security, and hopefully, look good doing it.
We found a mahogany, two-panel door at the Habitat Re-Store in Lubbock a couple months ago and since the price was right ($10), we bought it. It was clearly well-made and I suspect it ended up at Habitat due to a largish scratch near the bottom on one of the rails. The only down-side for me was it’s height. At 94″ (2.38 m), it was far too tall for a simple, tiny vardo. I knew I had to cut it down and was willing to risk the $10 as it went to a good cause either way. I suspected the panels were solid but, as is usual with this type of door, the rails and styles would be laminate over pine (or similar). I had not initially considered a professionally made door but the final selling point was the nice arch-shape to the top of the upper panel. It was an arc that I could match when came to finishing the door.
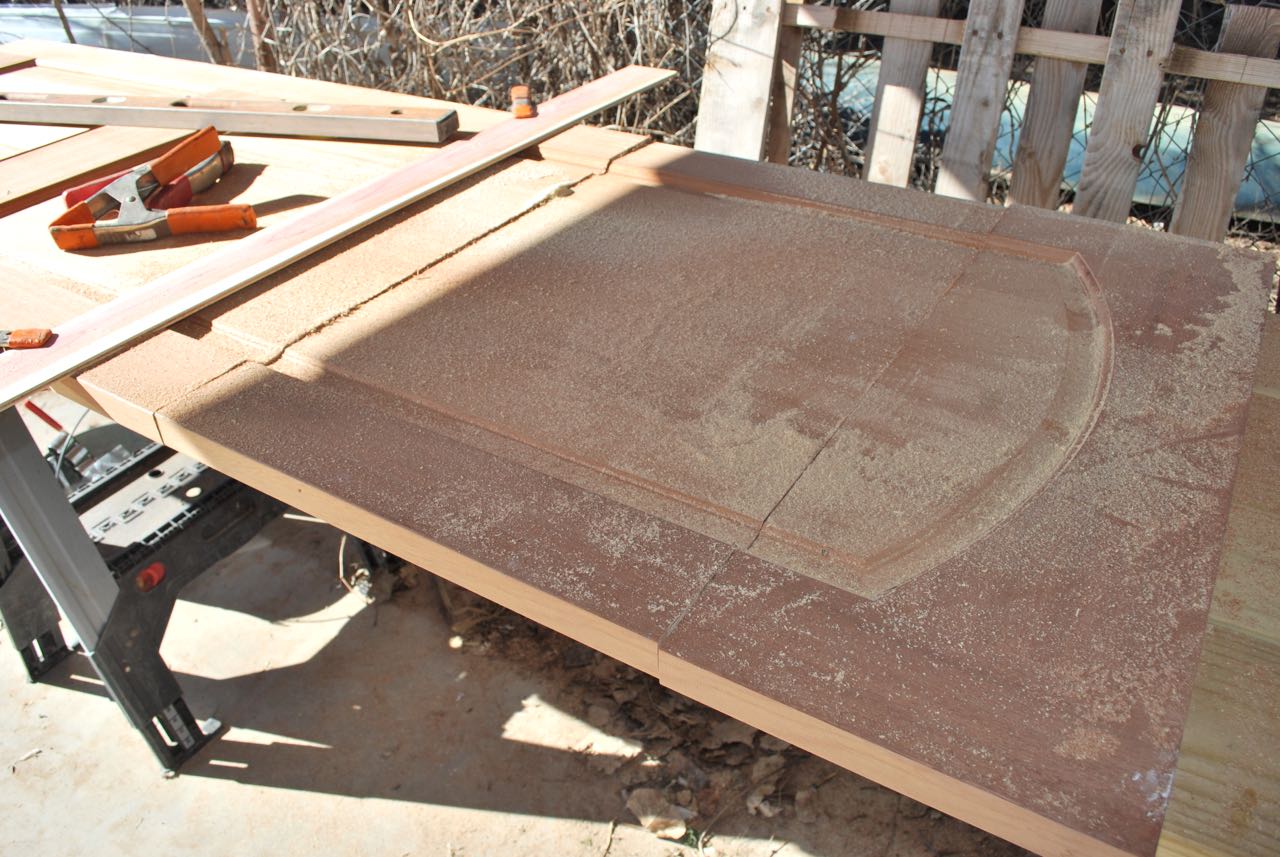
The circular saw seemed the obvious choice for a long, straight cut like this so I set up a board as a guide and went at it, taking a full 20 inches out of the middle.

The top was then folded down for planing to get a precise fit for gluing surface. This part took a lot of fidgeting and tweaking to get it correct over the entire run, but I achieved it in the end with only a little frustration and some muttering.

To hold it all together, I decided to use polyurethane Gorilla Glue. I don’t use this for much but it can make an extremely strong and waterproof bond. A couple very long screw completed the hillbilly engineering and I was confident with the result. With the loss of 20 inches from the middle, the grain no longer lined up perfectly, but at a short distance, it isn’t very noticeable. Hey, it’s a $10 solid mahogany door after all. Talk about some good and frugal recycling.

I cut the top of the door to match the arc of the inset panel and I think it’s a great match for the curves of the wagon. But now, it came down to making a door frame, after the fact, to match the new door shape, compound arc and all.
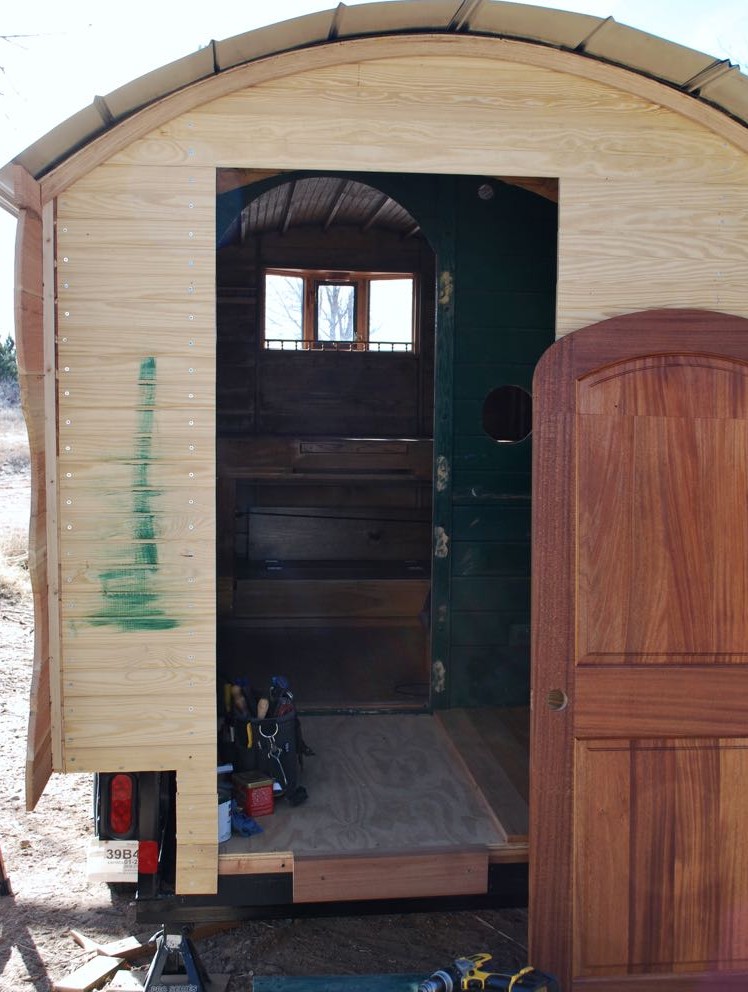
Obviously, the hole for the frame was the next step; requiring another stressful free-hand cutting job.

Cutting and sanding complete, it was time to build up the frame from oak to provide stiffness and stops to seal the interior. Fortunately, outside of a couple fierce storms, the weather has been extremely clement this winter, making for good working conditions.
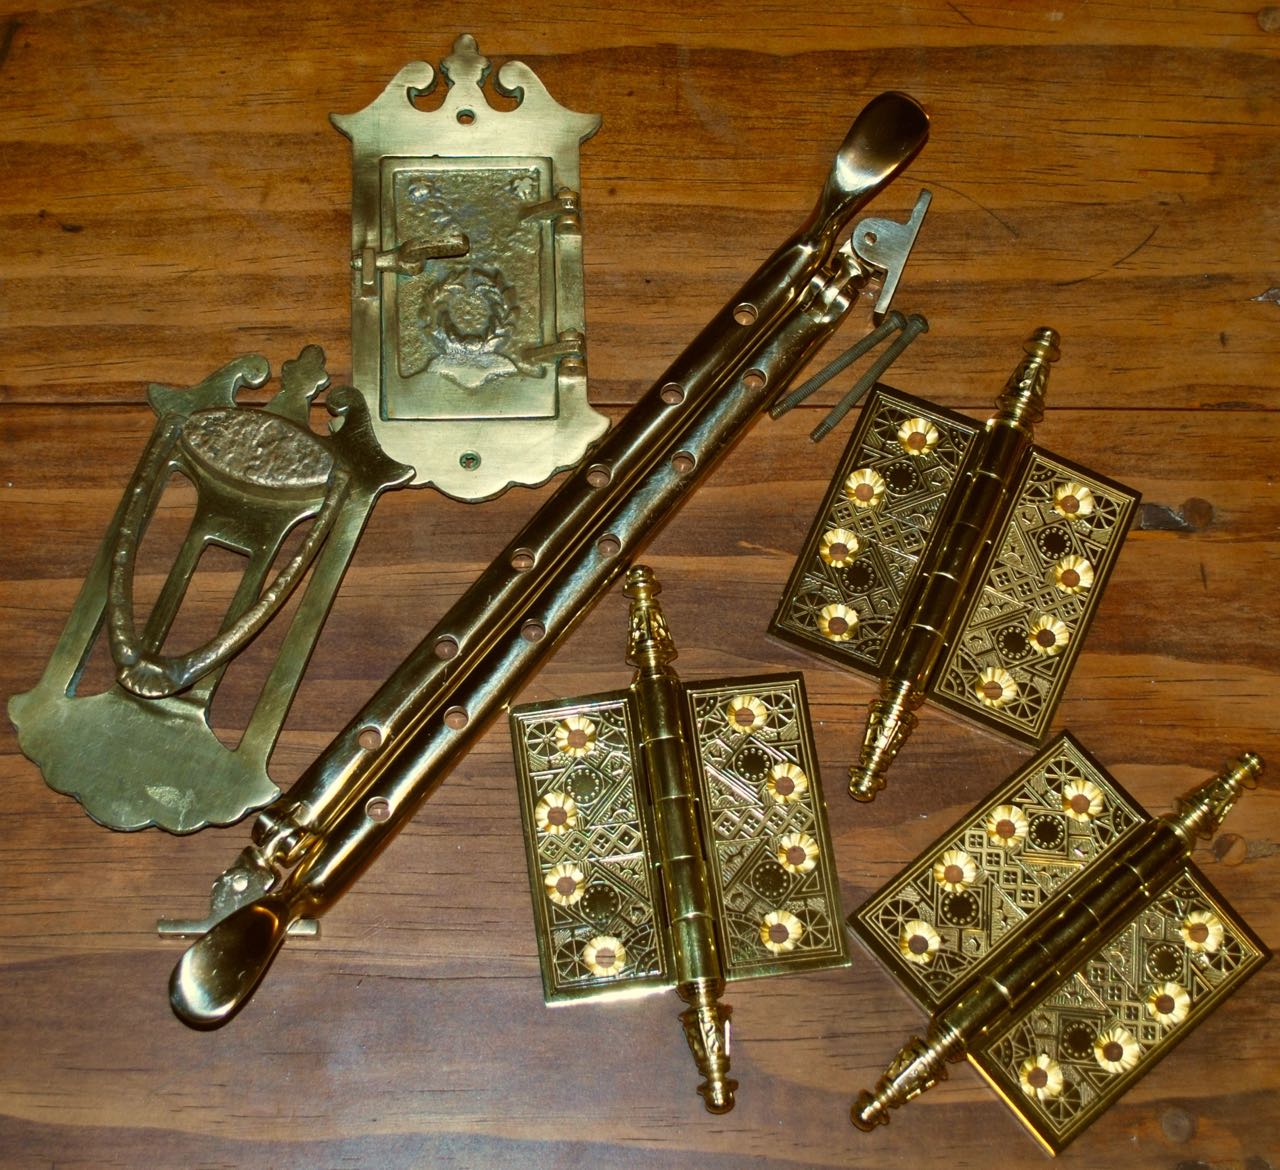
I both got lucky and splurged a bit on new hardware. The hinges are real beauties and very sturdily built. There is no perceptible play in them whatsoever and they operate very smoothly. I went with a 19th century Eastlake pattern from House of Antique Hardware in Portland, Oregon. Great stuff, great service, just too much to choose from.

I’ll admit that this tricky bit of framing isn’t perfect but is far better than I could have hoped for and suits us fine. A small speakeasy grill will complete the door and even serve as a small vent when necessary.


There are lots of small steps that still need to happen but at least there a door in the hole.
There is a lot more to report and I’ll get it posted as soon as I can. Great things are afoot and I can even see a distant light at the end of the tunnel.
For Part 1 of the rebuild/addition then CLICK HERE.
Or on to PART 9.
“God gave us the gift of life; it is up to us to give ourselves the gift of living well.”
~Voltaire
Voltaire was on to something there. Here is a very inspirational family making good in the wilds of Wisconsin. I would love to see more as they sound like some truly genuine artisans and keep craftsmanship alive in this consumer era.
I want to continue being inspired by people like this with positive spirits and keeping an eye on the important things in life. Feel free to submit links like this or comment if you have feeling about a handmade life.

And don’t forget to check out their own web-page, photos, and blog by clicking the image below.

The weekend was cold, I was tired (read lazy), and other things had to be attended to so this update is just baby steps in the big scheme.

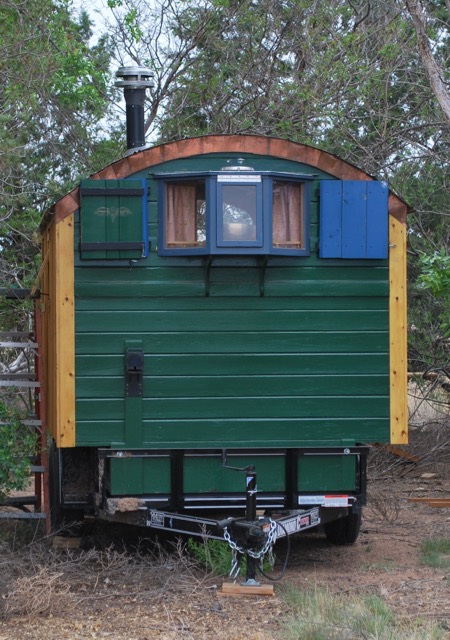
Although mine is a purely pragmatic build, I wanted an homage to the classic Dunton Reading wagon.

Taking a plain profile and giving it simple compass curves jazzes up the entire look, or so I hope. If you notice the roof, there is a seam. This is not a measuring error but the result of switching to off-the-shelf roofing steel.
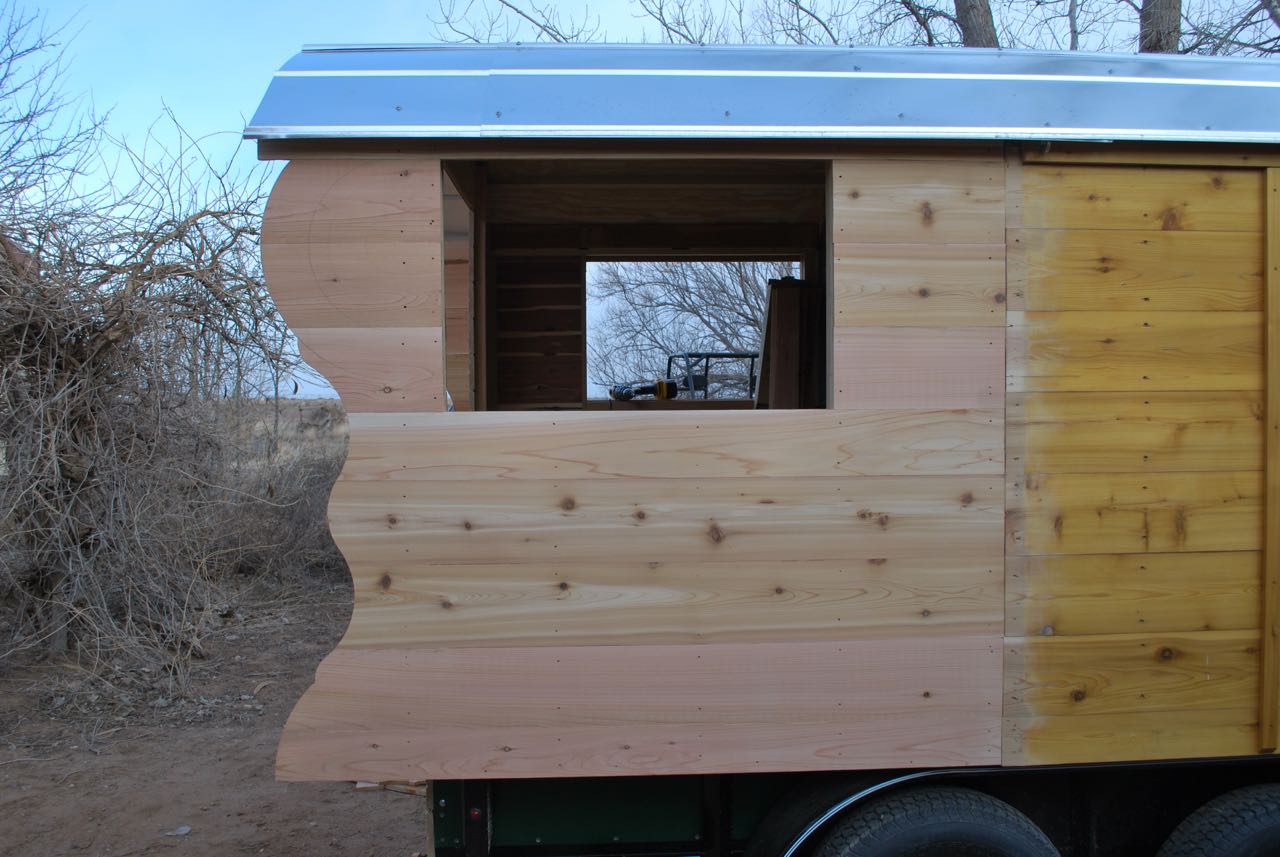
We wanted large windows for light and ventilation in the new room. This one looks big enough to sell tacos and coffee from.

I plan to take a day off work this coming week for important business in the afternoon. However, if the weather holds, I should get a few hours under my belt for significant progress. We made what I think is an interesting decision about cabinetry which may be surprising. Also, I am re-purposing a couple old desk tops as counters and I hope they look as good as I imagine they will.

If you are looking for Part 1 of the rebuild/addition then CLICK HERE.
