Part 3: Just start with a frame then build yourself a wagon box. Everything goes up from there (if you missed the beginning, START HERE)
But first, I like to make mock-ups…


I made several 1:12 mock-ups to help me understand the space relative to a cardboard human figure. Can I stand fully? Can I kneel on the bed? Is there enough space for two people to comfortably sit? In the end, this was the model I drew from.
Following is the construction process in photos. I was fortunate to have some clear and dry weather in January.


And then it began… I pulled the trailer frame around, cut the box off with a Tiger Saw and grinder, stripped it down, and painted it black. The frame was ultimately extended to accommodate the design but isn’t documented here.


Clear pine and poplar were chosen as the ledge foundation. At this point I was “all in” and fully committed. I felt like something was truly happening here and wondering if this wasn’t absolutely crazy. I started documenting the process in order to have something on the web for others to work from.


In this style construction the end walls become foundational. All other work grows from them.


This was a make-or-break stage for me. If it didn’t “feel right” I was prepared to pull it apart and start over. Lucky for me, it felt awesome. My own little home on wheels.


The reinforcing struts are being added (below) after the roof was made secure. Snow in the forecast helped determine this. The struts are 1″ thick poplar, inside and outside the wall and place a 1 foot intervals. These are fastened with screws at about 6″ intervals. This created a very stiff and solid structure.

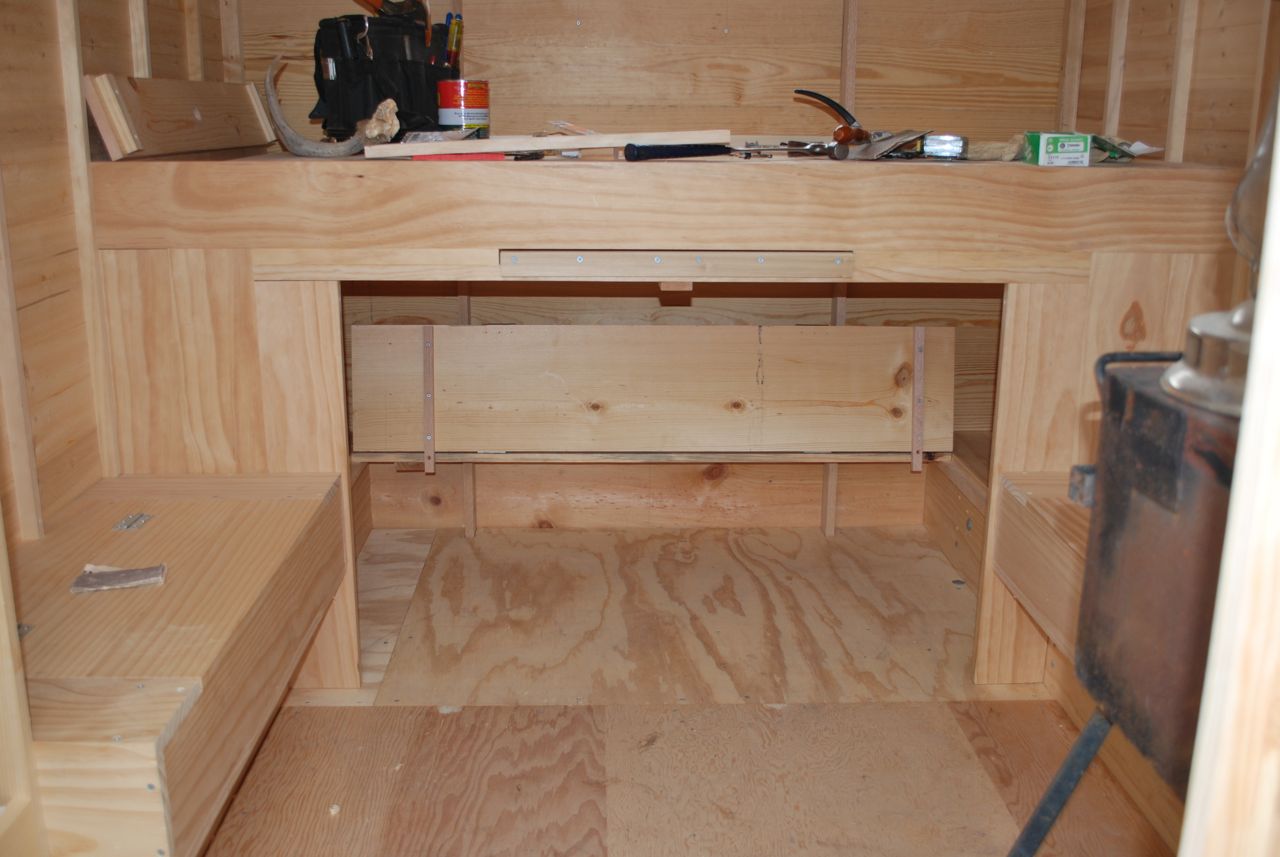
Once the box is closed in something magic happens. You can sit inside and actually imagine the space and how it will function. The bed frame was integral to the entire structure and ties three walls together. The benches and shelves function in the same way to buttress the walls.


I didn’t know if I would like this table but it ended up being just perfect for my needs.


The bay window was important to me and I think it really adds something nice to the design. The frame was built as a single unit then fitted onto the wall opening. The windows are Lexan for durability. These are shuttered for travel to avoid scratching.


February rolled around and it was time for my annual journey to southern Arizona for the Society of Primitive Technology Winter Count gathering. A six hundred mile drive seemed like a good shakedown cruise for the little wagon. I had no paint, no roofing, and it was mostly unfinished inside but the urge was upon me so I tacked down a heavy canvas truck tarp for the roof and took off.


Fortunately, we had a fairly dry week. I hate to think of what might have happened if the raw wood got saturated. Paint was next on the agenda to protect my investment against weather the best I could. I went with hunter green oil-based paint for the exterior and varnish for the interior. The light colored wood was mostly stained to add to the richness of the wood grain. The oak floor was a heavy but good choice for me as it is tough and can be easily refinished as necessary (it’s been done twice now).
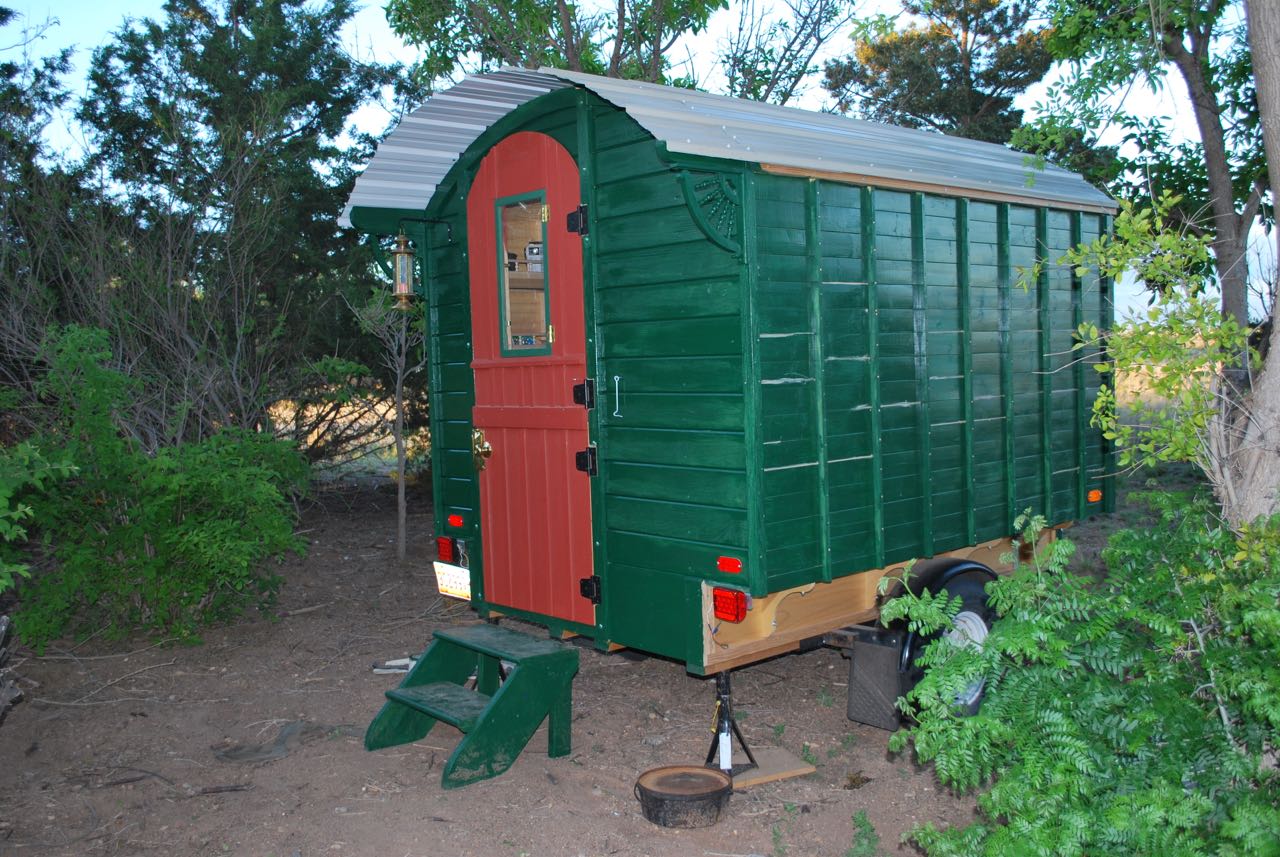


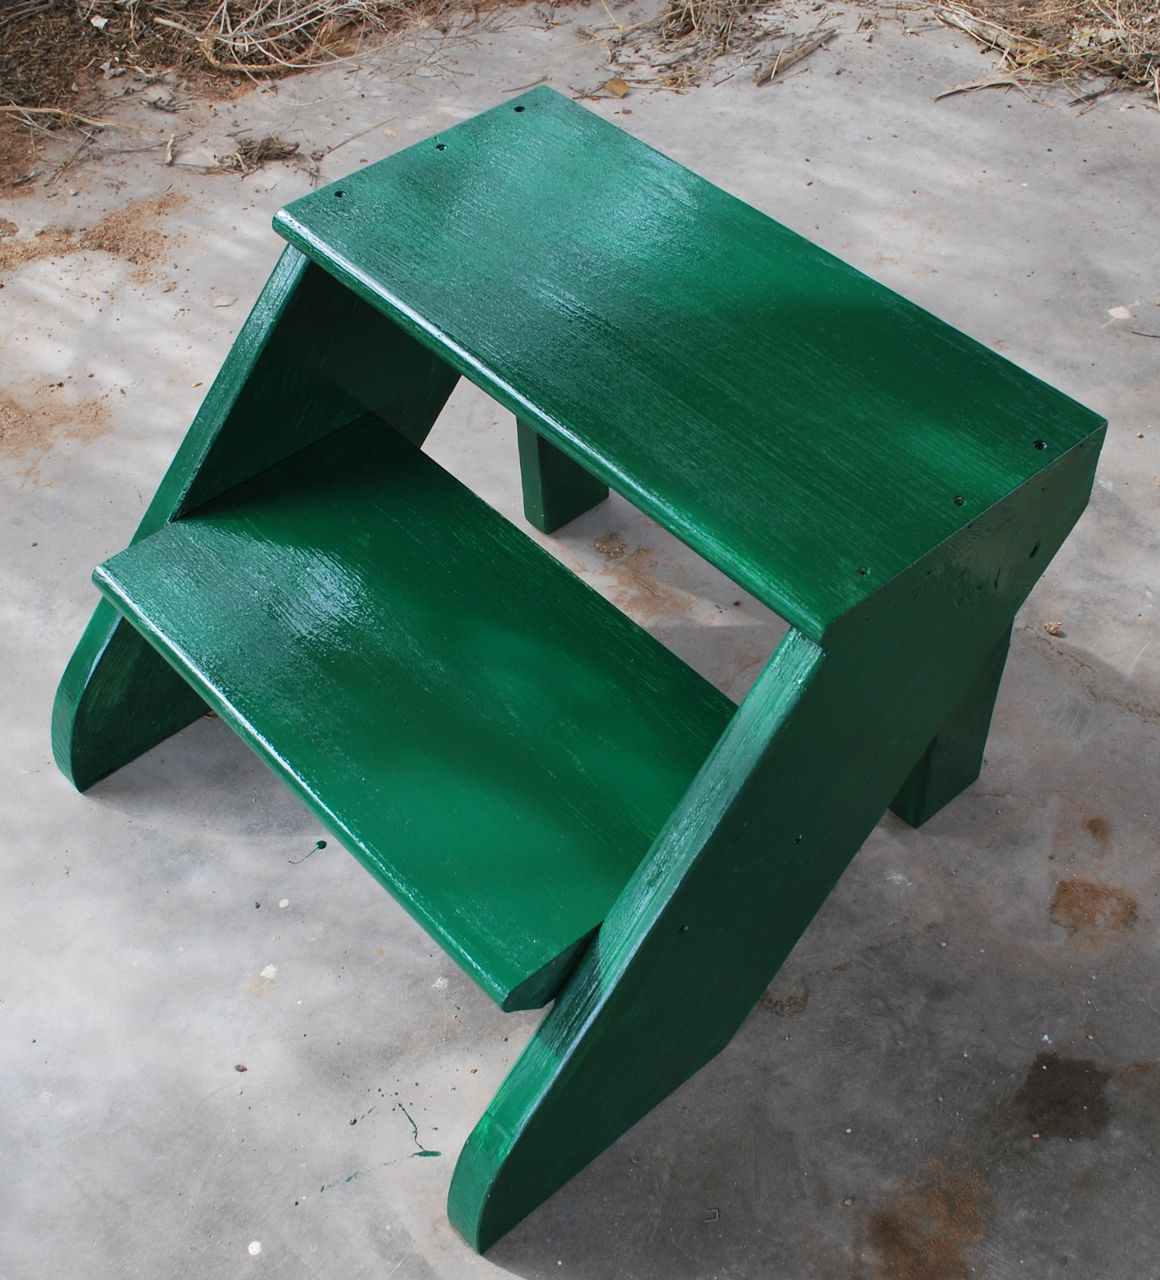
Finally, a set of stairs were constructed to make access a little easier.