

Sink, seating, and storage galore – I’m finally moving onto the luxuries that make this addition what it is meant to be; essentially moving some outdoor activities and living indoors with more amenities and easier foul-weather living.

Beginning with a little sink re-purposed from an old copper mixing bowl set – This one was the middle size and fit the area perfectly. I’m certainly not taking credit for the idea as I took this freely from Mick’s vardo. The bowl is a perfect size for some personal hygiene, tooth-brushing, etc. while on the road while the bigger cleaning can still be done outside with the old washtubs and in the future, with an outside shower.
Drilling the hole – I was concerned about this step as there were several things that could go wrong; hole placement, dented bottom, rough fit, and so on. In the end I did my best to find the exact center with a tailor’s tape, from the outside, and marking the location with an awl. I then flipped the bowl over, set it up in a scrap board, and while holding it with my feet used a hand brace with a Forestner bit to slowly cut the hole. This worked surprisingly well and required only a little sanding and smoothing before moving on.
The bowl is not very heavy copper so I was concerned about the solder strength at the joint. There should not be much real strain on it but to ensure a larger surface area to sweat the solder, I sleeved the short pipe with a heavy coupling. I flowed the solder deep into the sleeve before attaching to the so they should be united forever now.

Some serious tugging and testing leads me to believe this is a solid joint.
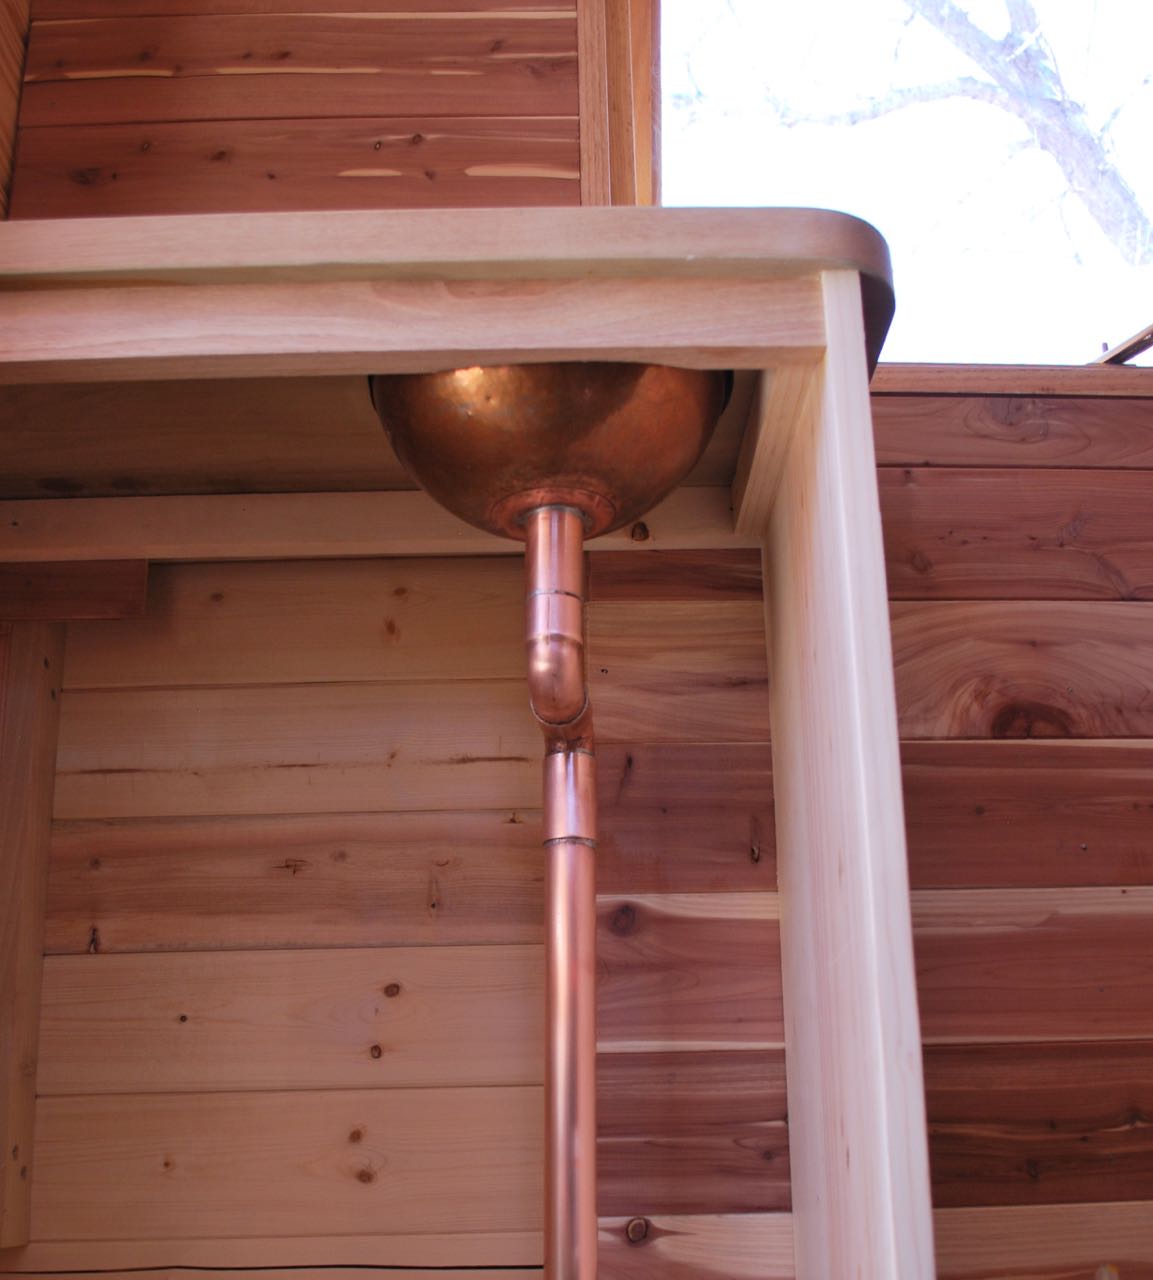
A couple elbows and a short run of pipe completed the plumbing “system” and installation was a breeze. A small shelf to hold a couple Dr. Bronner’s bottles and a towel bar will be added soon to complete the set-up. The storage area to the left was sized to hold the beautiful new copper cistern during travel. The cistern will live outside in the kitchen area when encamped.
A note of caution – Although not really discussed here, the oak-framed windows are visible in some of the images. These were recently added and are glazed with Lexan for its light weight and excellent strength. Keeping the weight low is still a major priority, even in the addition and, if you are building something like this, remember: EVERY SINGLE POUND COUNTS! Fasteners, glass, hardware, accoutrements; they all add up and will be paid for in the final weight. If I could build everything with oak and walnut and hickory for durability, I would. However, the weight will add danger in towing, lower the fuel efficiency and have a cumulative effect on the overall structure.
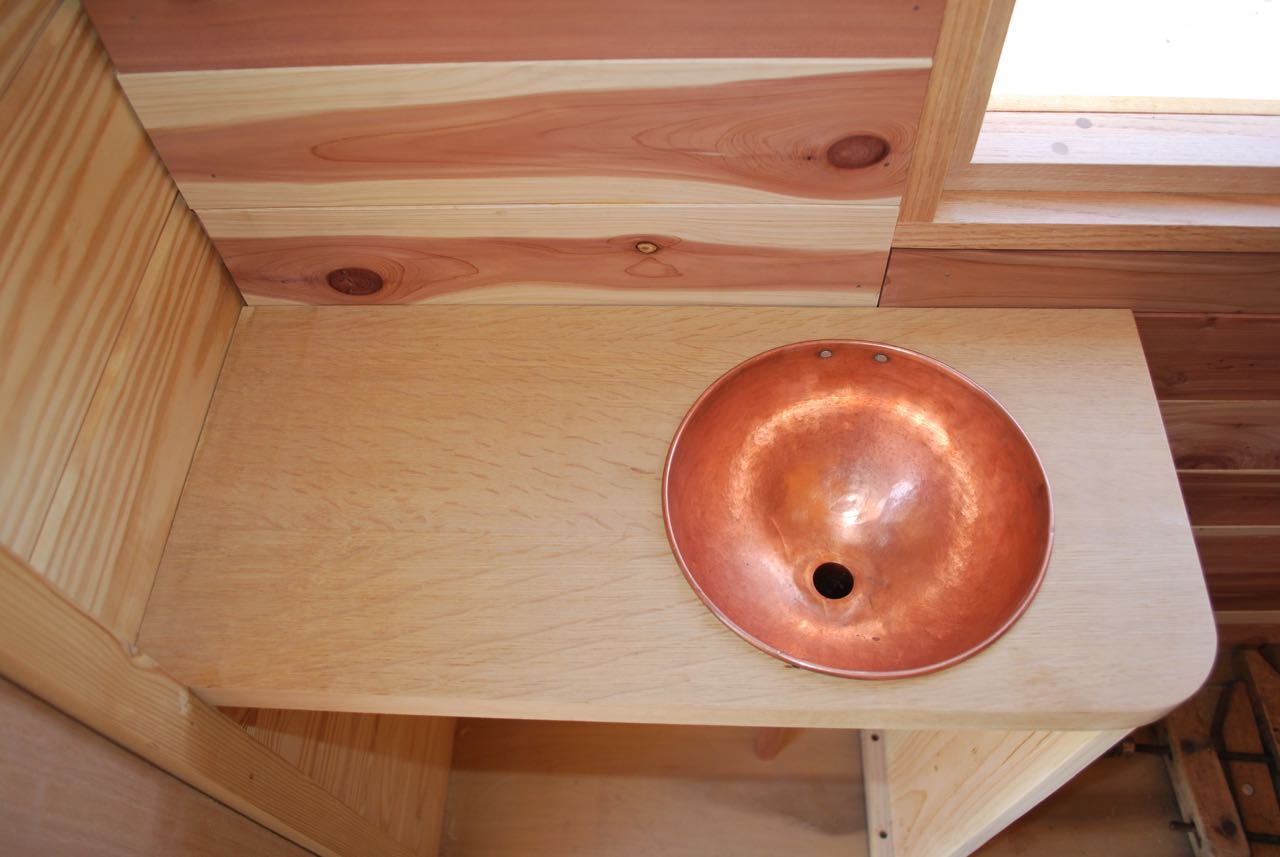
The sink was fitted into place and a outflow pipe seated in the hole drilled by the same Forestner bit used in the bowl. This counter is a re-purposed old office desk top from the 1930s or 40s that I’ve had for many years. It is a white oak laminate over a red-oak core (when things were built to last). A couple passes through the planer yielded a beautiful and sturdy surface to work with. The rest of the desk top was turned into the large counter on the starboard side that will be included in the next post.

This old Samovar was a lucky find for us and fits the location perfectly. It’s high pedestal provides clearance that would otherwise need to be created with some sort of shelf. Otherwise, it’s simply a beautiful and functional piece.

The next step was to create a small bench with the idea that this would give room when two or more people were inside as the floor space is limited in the main cabin. This area will serve as something of a mud room for the rest of wagon. The hinges were an Ebay find of solid brass under a hundred or more years of varnish and tarnish. I think Stacey really enjoyed making these shine again. This wood is some very solid pine reclaimed from an antique child’s desk and again, a planer made short work of cleaning it up for use.

I would have preferred the seat to be a little deeper for comfort but didn’t want to interfere with the traffic-way through the door. Nobody wants a shin-buster in such a small space.

The bench provides another small storage compartment for items that may need to be readily accessible; it’s not large but every bit counts.
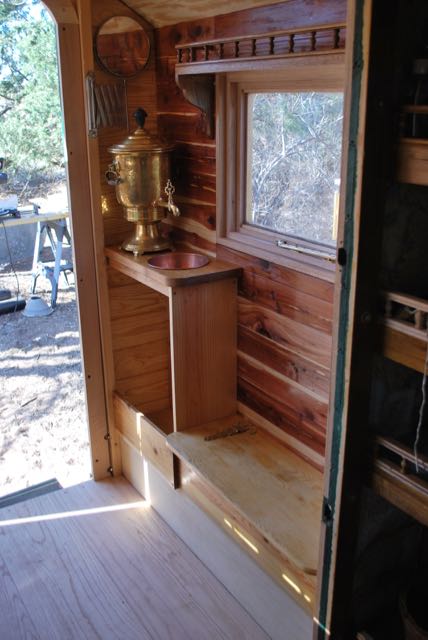
It’s always difficult to get a clear picture of arrangements in such a small space but this shot from the main cabin gives a general impression of the area and the relative size the new window.
For Part 1 of the rebuild/addition then CLICK HERE.

About time! That little bench is awesome, not what I figured you were going to do there. Awesome!
LOOKS SO GOOD!!!! I can’t wait to see the rest! Re: weight, are you keeping the leader glass windows in the original area?
Yes. The Stained leaded glass was a real splurge in several ways. It looks so nice.
George, The sink and setup is crazy cool! Thanks for sending this out. Very best, Jim
George, your work is spectacular! Everything is advancing so beautifully, thank you! I sure do love seeing those shiny brass hinges 😉
Everything is just….perfect!
I’ll be in Portales for the next couple of weeks, any chance some fresh roasted coffee
in trade for a tour of the Vardo?
Bob, I emailed you at bobmckeand@riseup.net.