Door and Frame, Vardo Remodel Part 8

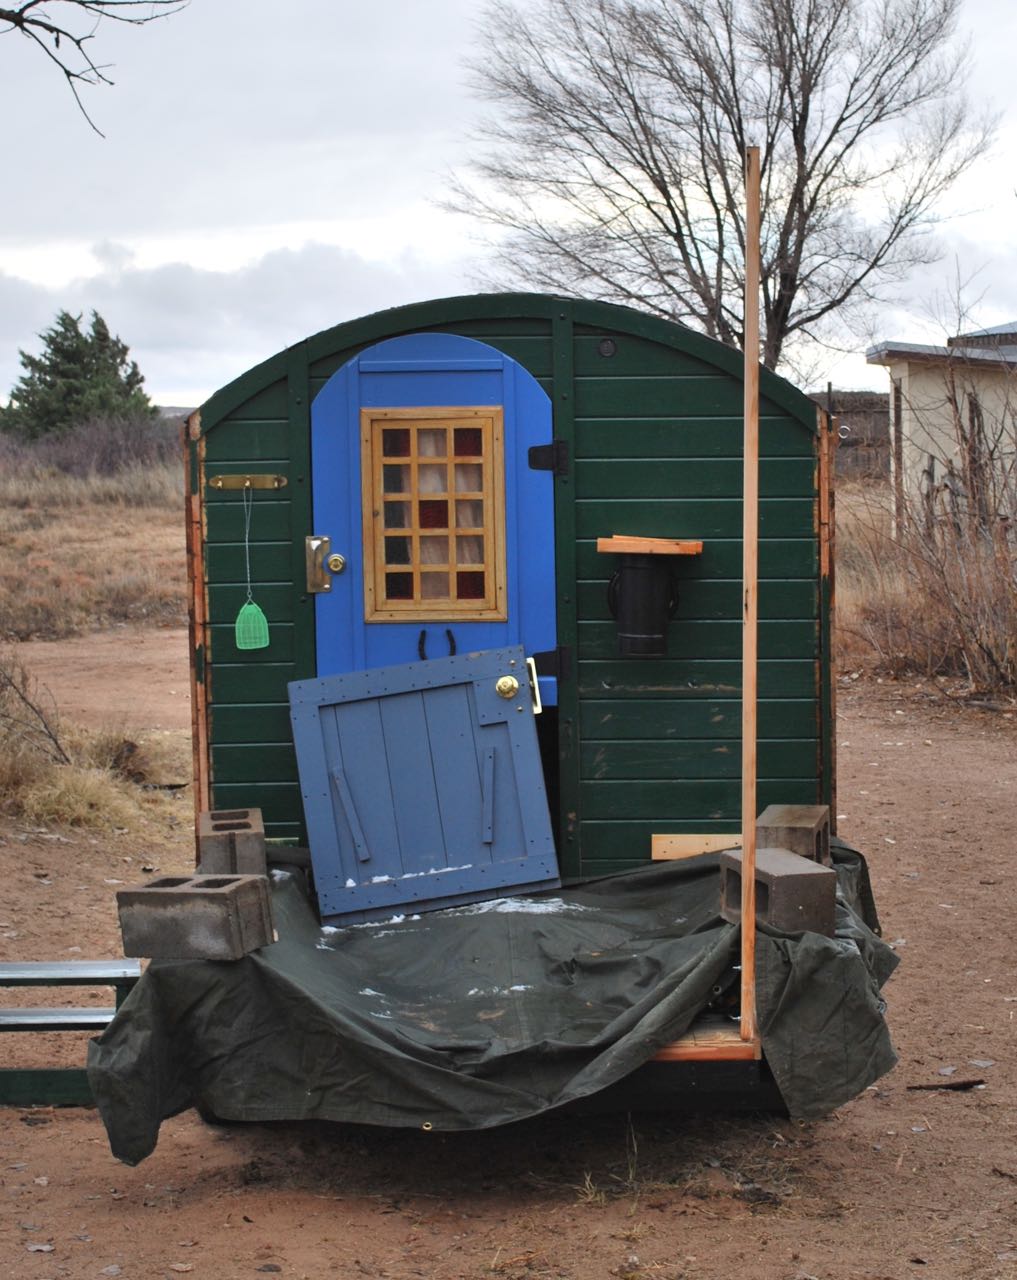
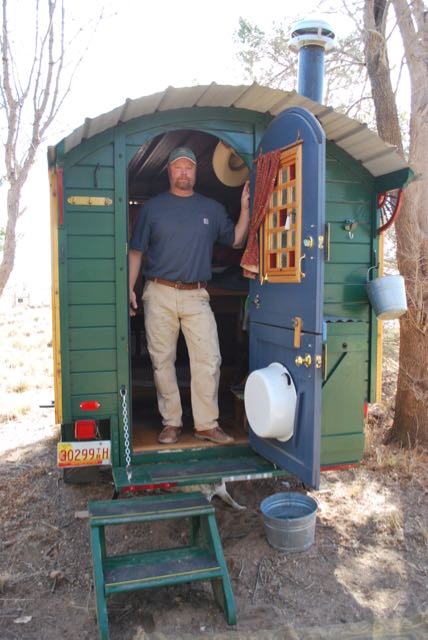
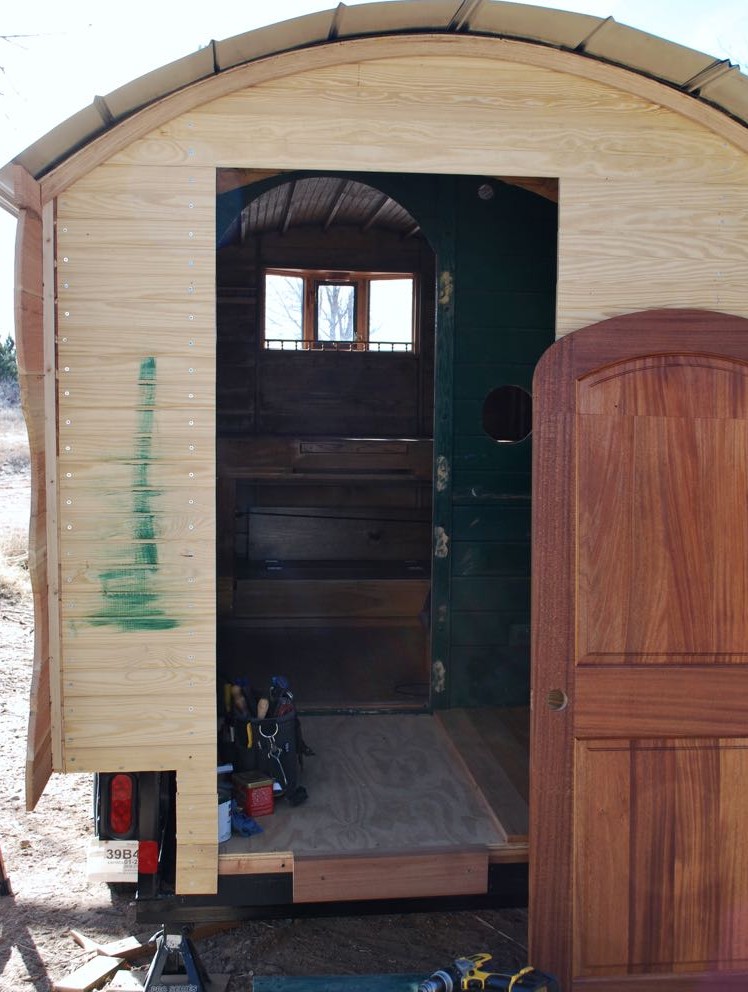
Every home needs a door.  It’s a tricky bit that must fit well, open and close easily, provide some security, and hopefully, look good doing it.  

We found a mahogany, two-panel door at the Habitat Re-Store in Lubbock a couple months ago and since the price was right ($10), we bought it.  It was clearly well-made and I suspect it ended up at Habitat due to a largish scratch near the bottom on one of the rails.  The only down-side for me was it’s height.  At 94″ (2.38 m), it was far too tall for a simple,  tiny vardo.  I knew I had to cut it down and was willing to risk the $10 as it went to a good cause either way.  I suspected the panels were solid but, as is usual with this type of door, the rails and styles would be laminate over pine (or similar).  I had not initially considered a professionally made door but the final selling point was the nice arch-shape to the top of the upper panel.  It was an arc that I could match when came to finishing the door.

DSC_0032 (2)
Some stressful cutting; 20 inches removed.

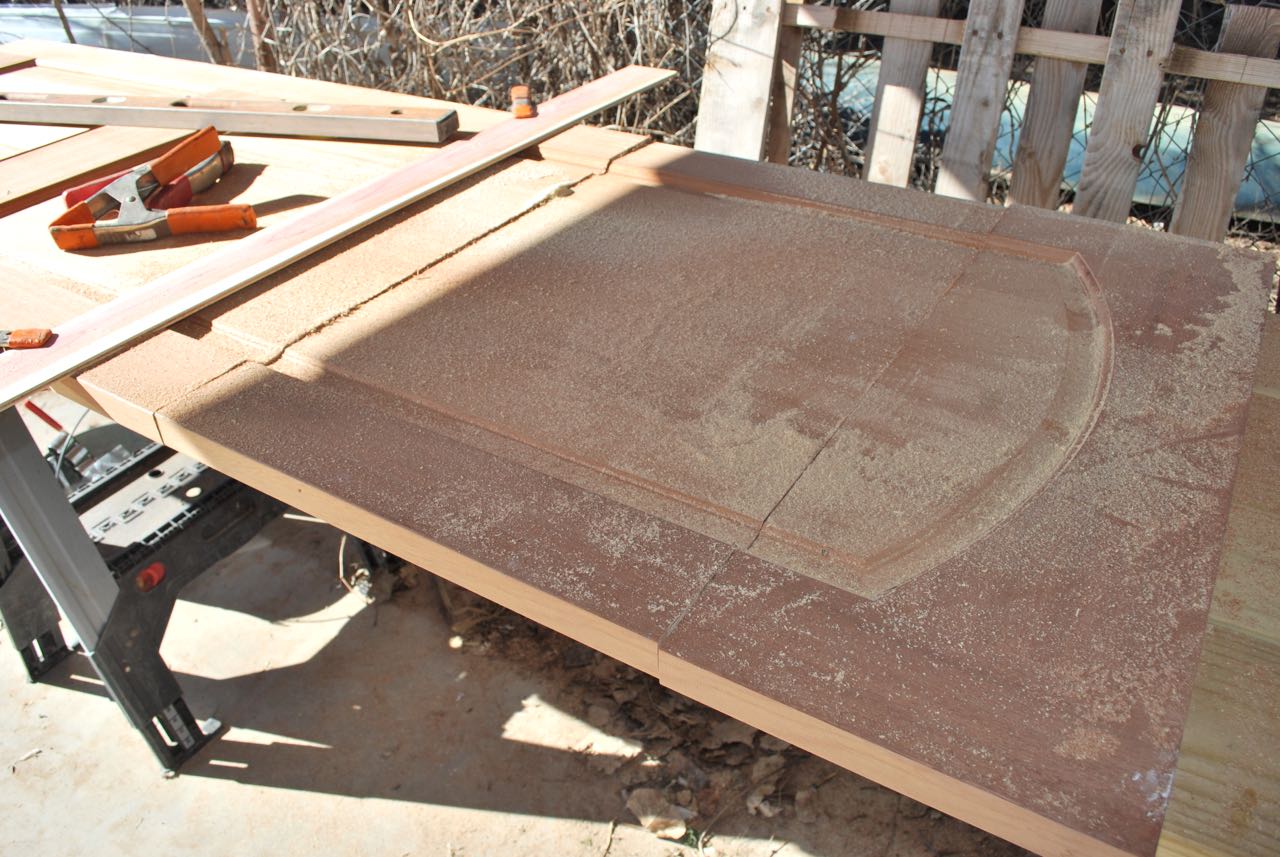
The circular saw seemed the obvious choice for a long, straight cut like this so I set up a board as a guide and went at it, taking a full 20 inches out of the middle.

Matching the glue surface.

The top was then folded down for planing to get a precise fit for gluing surface.  This part took a lot of fidgeting and tweaking to get it correct over the entire run, but I achieved it in the end with only a little frustration and some muttering.

Clamping it back together.

To hold it all together, I decided to use polyurethane Gorilla Glue. I don’t use this for much but it can make an extremely strong and waterproof bond.  A couple very long screw completed the hillbilly engineering and I was confident with the result.  With the loss of 20 inches from the middle, the grain no longer lined up perfectly, but at a short distance, it isn’t very noticeable.  Hey, it’s a $10 solid mahogany door after all.  Talk about some good and frugal recycling.

Top arc is cut and the glue line looks pretty clear here. It's a lot less noticeable in real life.
Top arc is cut and the glue line looks pretty clear here. It’s less noticeable in real life and will be less so as the door darkens with age.

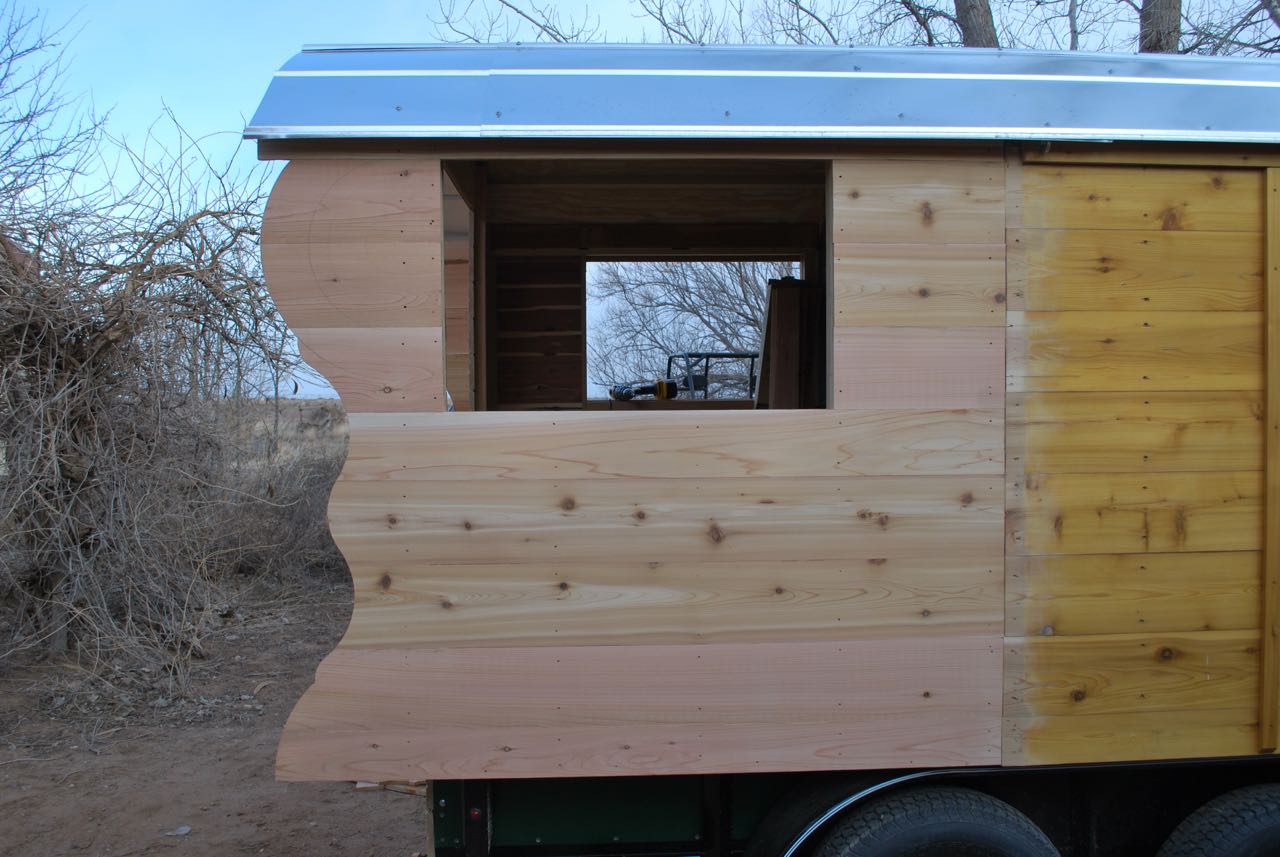
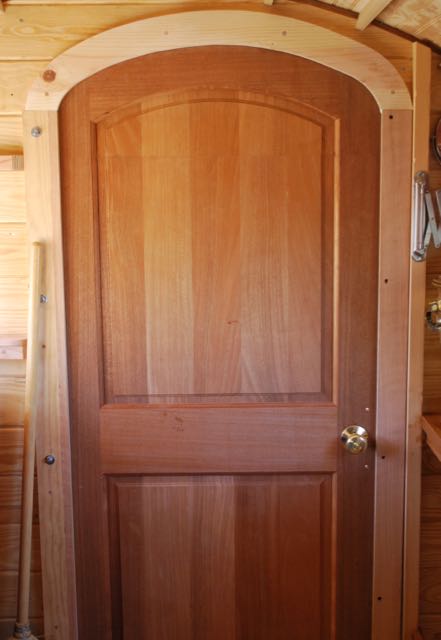
I cut the top of the door to match the arc of the inset panel and I think it’s a great match for the curves of the wagon.  But now, it came down to making a door frame, after the fact, to match the new door shape, compound arc and all.

Square hole, round door.
Square hole, rounded  door.  A scrap of wood was secured to hold the door in position while fitting and marking for the frame.

Obviously, the hole for the frame was the next step; requiring another stressful free-hand cutting job.

Matching the arc in the opening.
Matching the arc in the opening.  There is hope for the new door.

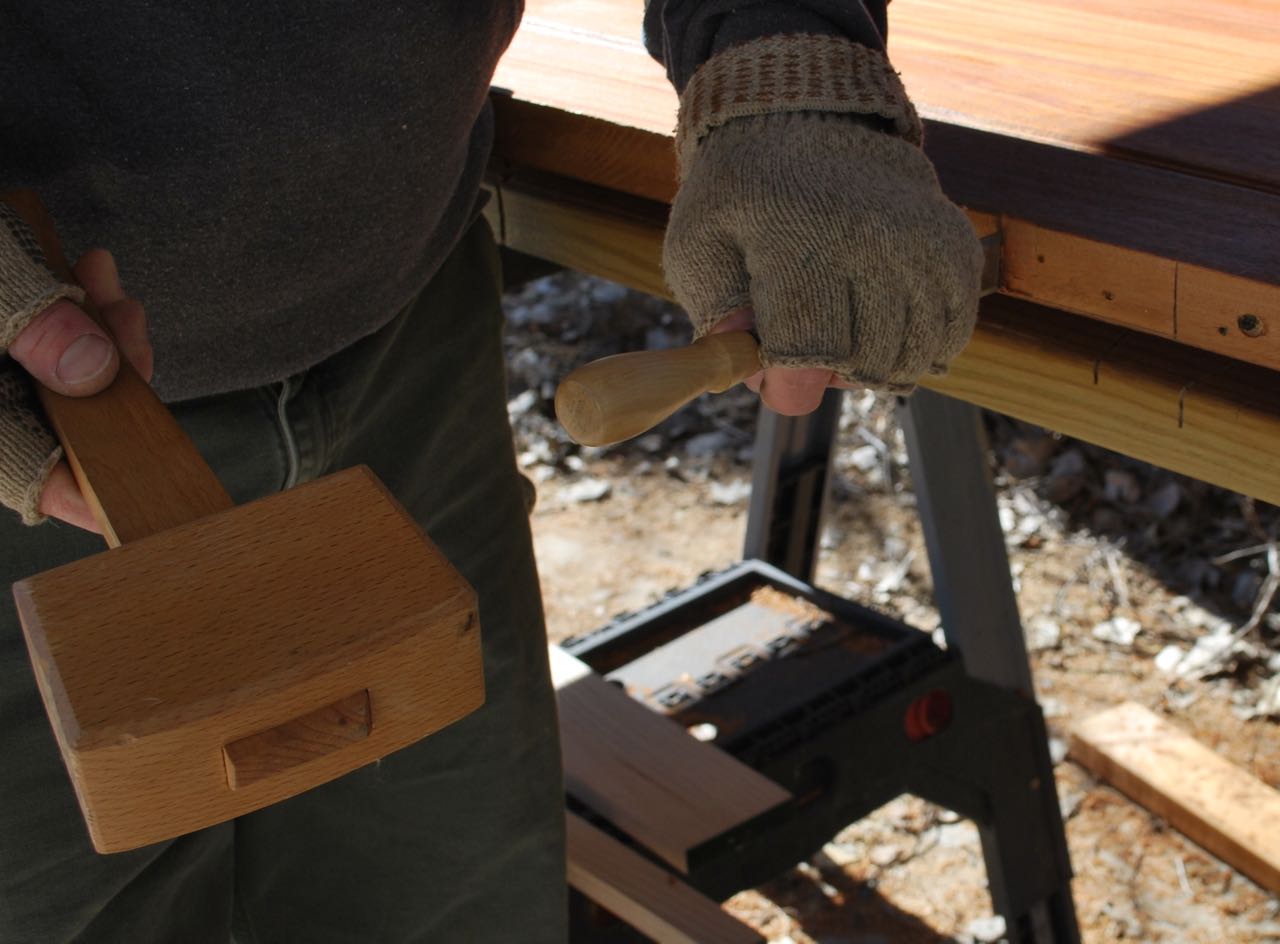
Cutting and sanding complete, it was time to build up the frame from oak to provide stiffness and stops to seal the interior.  Fortunately, outside of a couple fierce storms, the weather has been extremely clement this winter, making for good working conditions.

Mortising for the hinge.
A smattering of new and old hardware.

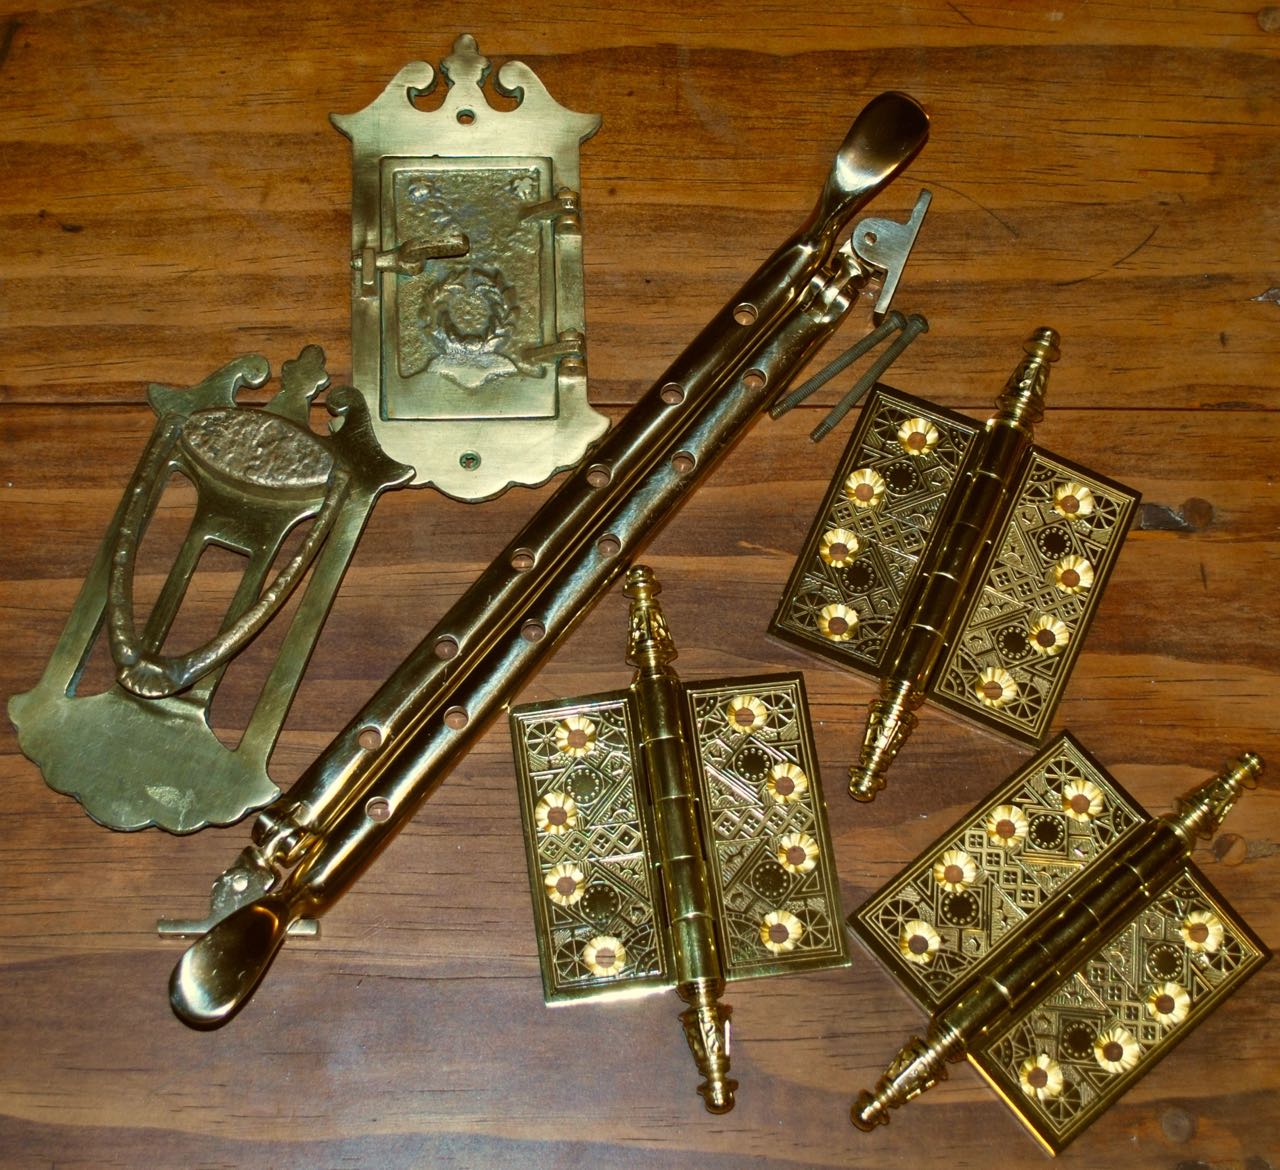
I both got lucky and splurged a bit on new hardware.  The hinges are real beauties and very sturdily built. There is no perceptible play in them whatsoever and they operate very smoothly.  I went with a 19th century Eastlake pattern from House of Antique Hardware in Portland, Oregon.  Great stuff, great service, just too much to choose from.

DSC_0031 (2)
The door is nearly fitted into it’s final position in this photo. High quality hinges not only look nice but function so much better than the cheap, temporary ones they replaced.

I’ll admit that this tricky bit of framing isn’t perfect but is far better than I could have hoped for and suits us fine.  A small speakeasy grill will complete the door and even serve as a small vent when necessary.

DSC_0032 (3)
Eastlake style.  Notice the beauty of the natural mahogany next to the oak.
DSC_0033 (4)
Test-fitting the new hinge mortises.  I just couldn’t pass these beauties up.  Still some finishing work to be done on the door but without an indoor shop, something had to be in place.

There are lots of small steps that still need to happen but at least there a door in the hole.

DSC_0118 (4)
Piecing together the door jamb and frame.

There is a lot more to report and I’ll get it posted as soon as I can.  Great things are afoot and I can even see a distant light at the end of the tunnel.

For Part 1 of the rebuild/addition then CLICK HERE.

Or on to PART 9.

Progress is slow but steady, Vardo Remodel Part 7

The weekend was cold, I was tired (read lazy), and other things had to be attended to so this update is just baby steps in the big scheme.

DSC_0031 (1)
Inspired by the true pinnacle of Victorian wagon design.

Although mine is a purely pragmatic build, I wanted an homage to the classic Dunton Reading wagon.

Suffolk_Reading_Wagon_1887

Taking a plain profile and giving it simple compass curves jazzes up the entire look, or so I hope.  If you notice the roof, there is a seam.  This is not a measuring error but the result of switching to off-the-shelf roofing steel.

DSC_0033 (1)
Sanding and finishing still required.

We wanted large windows for light and ventilation in the new room.  This one looks big enough to sell tacos and coffee from.

DSC_0034 (1)
I think I am liking where this is going.

I plan to take a day off work this coming week for important business in the afternoon.  However, if the weather holds, I should get a few hours under my belt for significant progressWe made what I think is an interesting decision about cabinetry which may be surprising.  Also, I am re-purposing a couple old desk tops as counters and I hope they look as good as I imagine they will.

Dreaming of travels to come...
Dreaming of travels to come…

If you are looking for Part 1 of the rebuild/addition then CLICK HERE.

On to Part 8!

Detailed to the Last Dollar

desk4

Not a pretty little Victorian-style caravan here today but a sturdy, well-thought-out modern living accommodation for someone looking to escape the mortgage anchor most of us have felt.

Here is an extremely well-documented van conversion into a very frugal but comfortable micro house created in 38 days from 2014-2015.  Sean (the builder) has done a remarkable job of tracking nearly every aspect of this life-changing event from the decisions that made this happen, to getting rid of everything that didn’t work in his 60 square foot dream, to purchasing and building his version of the perfect live-in rolling home.  There’s even a downloadable spreadsheet of the expenses incurred and great details for those seeking some real “how-to” guidance.

Sean’s blog takes us from the emptying and selling of THIS:

house

To the purchase and planning of THIS:

And through the entire build and beyond:

first-night2

It’s a remarkable journey and I thank him for sharing this with the world.  If you don’t have time or want just a quick overview, watch the short video:

And the entire write-up can be found here at:

F*ck the Banks, I’ll Build My Own Damn House


Tying it all together, Vardo Remodel Part 5

DSC_0002 (6)
Diving into the next stage of construction.

All earthly structures begin with a foundation of some sort, even living wagons. In our case, the trailer frame is the earth, the ledge and subfloor serve as the foundation upon which, all is built.  I proposed to attach the new section pretty much the same way and addition is connected to a house, by supplementing the structure at the joining lines and creating “nailers” to provide fastening surfaces for the new wood.

DSC_0001 (8)
With an afternoon that included a 30 degree temperature drop, an unexpected rain shower changing to freezing rain changing to snow we had to switch gears, tarp up the project, and retreat indoors. New Mexico in the winter!

Going back to the day job for the week left me with only limited work times.  No real workshop means no light and submitting to the ever-changing weather.  This became the perfect time to make lumber from the piles of miscellaneous scrap and recycled boards I have been hoarding the past couple years.  This is boring work and requires a lot of noisy time with the table saw and planer but yields a lots of free, well-seasoned lumber for building great things.

DSC_0004 (5)
Building up the back wall.

It’s satisfying to begin seeing real progress, even if it’s only just a shell going up.  Pre-cut tongue-and-groove pine makes for easy work at this stage.  The sad old door is being kept in place to help shelter the interior from unforeseen weather.  We hope to get the bedroom area cleaned up, repairs made, and some re-varnishing done in the coming weekend.

DSC_0006 (5)
Framing out the plan.

Corner posts were secured and, unlike the first edition of the build, framed walls were created and await their double layer skin.  I took this opportunity to mock-up the arch from plywood and test fitted it against the existing wall.  Finally, it feels like real progress.

If you are looking for Part 1 of the rebuild/addition then CLICK HERE.

On to Part 6!

“Give me a long enough lever and a place to stand and I will move the Earth” Remodeling the Vardo, Part 4

I had a plan, and it involved leverage.

Taking the Biggest Step of All; Transferring the old vardo to the new trailer.

Now that I was confident that the box was going to hold up under the stress of the transfer I was ready to slip the trailer under the body.  It was a whole lot less dramatic than I was afraid it would be, and that was a good thing.

And here we are; naked, and a little afraid.
And here we are again; naked, and a little afraid.

With the vardo teetering on it’s blocks we prepared to slide the trailer under it. For safety sake, we did this by hand to decrease the chance of bumping the structure or blocks.  Because of the layout of the tail light assembly and fenders we couldn’t just suspend the entire body and make the transfer in one run.

DSC_0006 (4)
Taking the strain with the Hi-Lift jack in order to move the blocks around the frame.

I used the Hi-Lift jack to easily support the body while we shifted the blocks around.  I wanted to get the trailer as far under as possible to ease the final move.

DSC_0009 (4)
Step three, after moving the blocks around the light assembly.

I was feeling pretty accomplished at this point and we were nearly ready for the final push.

DSC_0010 (4)
As far as it goes.

Since there were only two of us, we greased the rails under the vardo body to limit the friction while pushing.  This made a huge difference and allowed us to slide it into place with relative ease.

DSC_0020 (3)
Looking on in slight amazement that it actually worked.

You can see that everything possible was stripped off the body to lighten the weight including the metal roof, stove-pipe, and door.  Bolts were used to secure the body to the frame but I’ll likely add a couple more steel straps as we near completion.

DSC_0013 (2)
Ready to move on.

I intend to make the addition look as seamless as possible and to keep the same aesthetic in the addition.  For me, it’s a modern living accommodation informed and inspired by the late Nineteenth Century caravans and Sheepherder wagons.  They were ultra-modern in their time but had a certain warmth, comfort, and hand-made quality that most modern day RVs lack.  Even on a small budget, a solid, warm, and safe home can be built by nearly anyone.

If you are looking for Part 1 of the rebuild/addition then CLICK HERE.

Onward to Part 5!

Naked and Afraid! Remodel of the Little Green Vardo, Part 3

Caution – suggested nudity, implied whiskey, and some old-fashioned Scottish engineering to liven up the day.

scotch
K.O. Munson – “Just a case of Excellent Scotch” – November 1946 Artist Sketch Pad Calendar

Now that I have your attention:

DSC_0014 (3)
Last day in the “before” stage. Lucky for all of you, I’m not naked, just afraid of the BIG move.

Saturday morning came and it was time to start stripping down to the bare essentials (hence the first part of the title, suggested by SB).

After an evening of pulling everything out of the wagon (the first time it has been absolutely bare in over five years) it was time to commence preparations for the move onto the new trailer.  This afforded me an opportunity to really look over the entire structure for movement, wear, water damage, etc. and to make changes if necessary.  Happily, the structure has held up quite well considering the many thousands of miles and the extensive off-roading I have put it through.  Examining the roof, walls, and under sides, the only water marks discovered were those from some seepage through the tongue-and-groove on the front wall from several years back.  High-speed driving through torrential downpours really test the tightness of any wooden vessel.  As I already knew about this, there were no surprises.

Disassembling parts of the structure that were not meant to be removed become complicated puzzles.

The exterior ledge bracing, storage boxes, and some trim pieces had to be removed to facilitate the fit on the new trailer bed.  Stacey hunkered down and puzzled out how they were all connected and spent several hours turning nuts, removing bolts, and unscrewing screws, forming a mighty pile of wood, filling buckets with hardware, and pitching out old fasteners.

After removing the boxes and tie-downs, there were holes to be filled and a fresh coat of paint was in order.
After removing the boxes and tie-downs, a fresh coat of paint was in order.

After a thorough examination for wear and damage (we found none), screw holes were filled and a fresh coat of oil paint was applied to the nether regions as some parts will become difficult to access once on the new trailer.

The beginnings of attachment; I sprinkled a half dozen Simpson Strong Ties around for security.
The beginnings of attachment.

I sprinkled a half dozen Simpson Strong Ties around the frame for strength and safety; all recycled from the original wagon and an old barn project.  The vardo will be fastened directly to the steel frame as well but when it comes to this sort of safety “too much is never enough.”

It was an opportune time to deal with many little scars, dings, and damaged bits.

Although no major injuries were discovered in the 20,000 mile check-up, a lot of little issues were dealt with while we had the opportunity.  It really drove home to me how much of the original build was done with salvaged lumber and recycled hardware.  I have been slowly replacing standard fasteners with stainless, especially below the water-line; this gave me the opportunity to continue this practice (expensive but far-sighted).

While Stacey continued her exterior work, I crawled around underneath disconnecting bolts and steel straps to dismount from the frame.  A handful of these could no longer be accessed from inside and had to be persuaded with a Sawzall.

Separating the rear portion of the frame.

How did I remove the frame?  Not owning a forklift or other heavy machinery I used the simplest method I could think of.  By using the tongue jack and some concrete blocks I was able to first lower the front, thus raising the rear-end.  While the rear was up high, I stuffed the blocks and wood under the body to hold it at an appropriate height.  Raising the front then disconnected the frame from the rear and allowed blocks to be placed under the front.  My only fears revolved around the overall strength and stiffness of the body; would it take the stress in places the appropriate places?  As I lowered the unit down, freeing the trailer, I was relieved to hear no creaks or see any flex anywhere.

Using the leveling jack to separate the from portion of the frame.
Using the leveling jack to separate the front portion of the frame.

Now for the Eureka moment…

Over the past couple weeks I have racked my waking brain for an easy and safe way to move the box from one frame to the other.  It was at 3:30 in the morning a few days before the move when it came to me.  Knowing my wagon fairly intimately, I knew that it was very close to neutrally balanced (i.e., the balance point was very near the center of the body) and this might be used to my advantage.  If I could load the back end with enough weight to counterbalance the structure, the body could be cantilevered by 50% or more, like a big kid on a see-saw.  The only concern I had then was the overall strength of the vardo body after the steel frame was removed.  The fulcrum point would bear a lot of strain.

physics
Envisioning weight distribution.

To sum up this rambling explanation, YES, it dis indeed work!

Voila! I felt like a stage magician levitating his beautiful assistant for an audience full of suckers; in this case, a dog, cat, and a slew of poultry.
My floating vardo body, waiting for it’s new trailer.

Voila! I felt like a stage magician levitating his beautiful assistant for an audience full of suckers; in this case, a dog, cat, and a slew of poultry.  The old trailer was pulled away to be sold on Craigslist.

And here we are; naked, and a little afraid.

I secured about 400 pounds of weight near the door allowing the front end to float while we prepared to maneuver the new gear into place.

With the early winter sunset I decided the next step would have to wait for morning.  Don’t worry, I re-jacked the front end overnight for safety sake.  I didn’t want a crushed dog should the worst occur.

If you are looking for Part 1 of the rebuild/addition then CLICK HERE.

PART 4, coming up…

Remodel of the Little Green Vardo, Part 2

Preparing the trailer and laying the foundation for the Vardo.

A couple of issues had to be addressed before any real construction could begin.  Unfortunately, a day job and early sunsets dictate my work hours so I only have a short time each night to get something done throughout the week.  Here’s the summary:

DSC_0003 (3)
The fresh slate, as delivered from the factory.

The trailer arrived at about 990 pounds.  I liked the floor but the extra weight was not desirable.  I was going to need to lift the old ledge body about 1 1/2″ anyway (to get the current ledges over the welded rails) so I decided to replace the original floor with a wooden frame to provide the proper height.  Does anybody want to buy some 2 x 8s for cheap?

Unnecessary floorboards removed.

A half hour of work, after locating the proper T40 screw driver head for the drill, and the boards were free.  Removing the floor boards from the flatbed relieved us of 209 unnecessary pounds, bringing the trailer down to about 780 pounds.  That weight-savings can be better used elsewhere and we already have a plan for it.

DSC_0004 (2)
Test fitting the treated lumber under-framing to build upon.

I’m not a fan of the chemicals in treated lumber but I bow to it’s remarkable ability to survive some pretty harsh treatment.  My desired dimensions overhang this trailer by a couple of inches and this was a pretty good way to support that plan without compromising any length.  Every inch counts, right?  Before you ask, the asymmetrical layout is due to old habits of building on standard centers (16″ in this case).  It will only really benefit the laying down of the sub-floor but it saved me some arithmetic.  It’s comforting to slip back into zen construction mind.

The coming weekend will hopefully yield some real progress as we are now coming into the difficult bit… moving the old vardo onto the new frame.

If you are looking for Part 1 of the rebuild/addition then CLICK HERE.

ON TO PART 3

Finally…

A perfect rolling home.

And a place for everything!

Bundesarchiv. Bild 183-1987-1002-510 Foto 1 November 1922.

The details here are remarkable including the decorative framing around the windows and planter boxes … with plants!  I believe this sits on solid rubber teeth-rattling tires.  You can probably tell from the caption but this is apparently from Germany in 1922.  I wish I knew what the function of the trailer was; workshop, spare bedroom, animals, kitchen?

A Vardo Build Recap

DSC_0253 copy
Conception. After years of doodles and illustration, mock-up a few models and decide what works best.

This post is a re-cap of the Vardo build.  I get questions about this project at least three times per week and I think it has inspired a few other people to make the leap.  I still consider it a work in progress even though it is four years old and has 18,000 miles under it.  New and improved ideas are being added right now but maybe this will help somebody get started.

DSC_0046After the sketch-up, start making parts.  This was a momentous occasion for me.

DSC_0083 Assembly begins.  Mild panic sets in; “will this work?” and “am I crazy to dive into this?”

DSC_0086At this point, I took some time to ponder.  “Is the size and layout really going to work?”

DSC_0089 copyAttaching the ledge to the prepared frame.

DSC_0102 copyBuild, build, build.  Using a window of good weather in January.

DSC_0093Even relatively easy details, like door placement and size, were still up for change.

DSC_0109Finally, I can get a real sense of scale.

DSC_0121I fell in love with the design once the box was built.

DSC_0161Working alone means lots of clamps.

DSC_0155Gawkers were willing to take pictures.

DSC_0122The bed framing becomes integral to the structure.

DSC_0125Seats were designed and tested for size and functionality.

DSC_0126The first storage is done.

DSC_0182Wood is good!

DSC_0169The shell becomes complete.

DSC_0189 copyNow for the details.

DSC_0289Temporary window inserted for a quick trip to the desert.

DSC_0108-2Quick coat of paint and off we went.

DSCN2446A little living helped bring together the details.

DSC_0404Spending time in the space gives an idea of where things are needed.

DSC_0399Finish work is a process, not an event.

SternThe Vardo becomes a home.

DSC_0814A safe and cozy nest on the road.

DSC_0743Still far from done, I took her cross-country anyway.

DSC_0700Things began to come together after a few thousand miles travel.

DSC_0198Finishing touches are added constantly.

closedAs are safety details.

DSC_0066DSC_0064Still making changes and additions four years down the road.

More big changes are happening and I hope to get up some new information very soon.  I think an important fact that this project showed was that, for a relatively low-budget, and a little patience, a little home can be built over time but still be usable along the way.  I didn’t wait for every last detail to be completed before putting this house to good use or I’d still be waiting today.