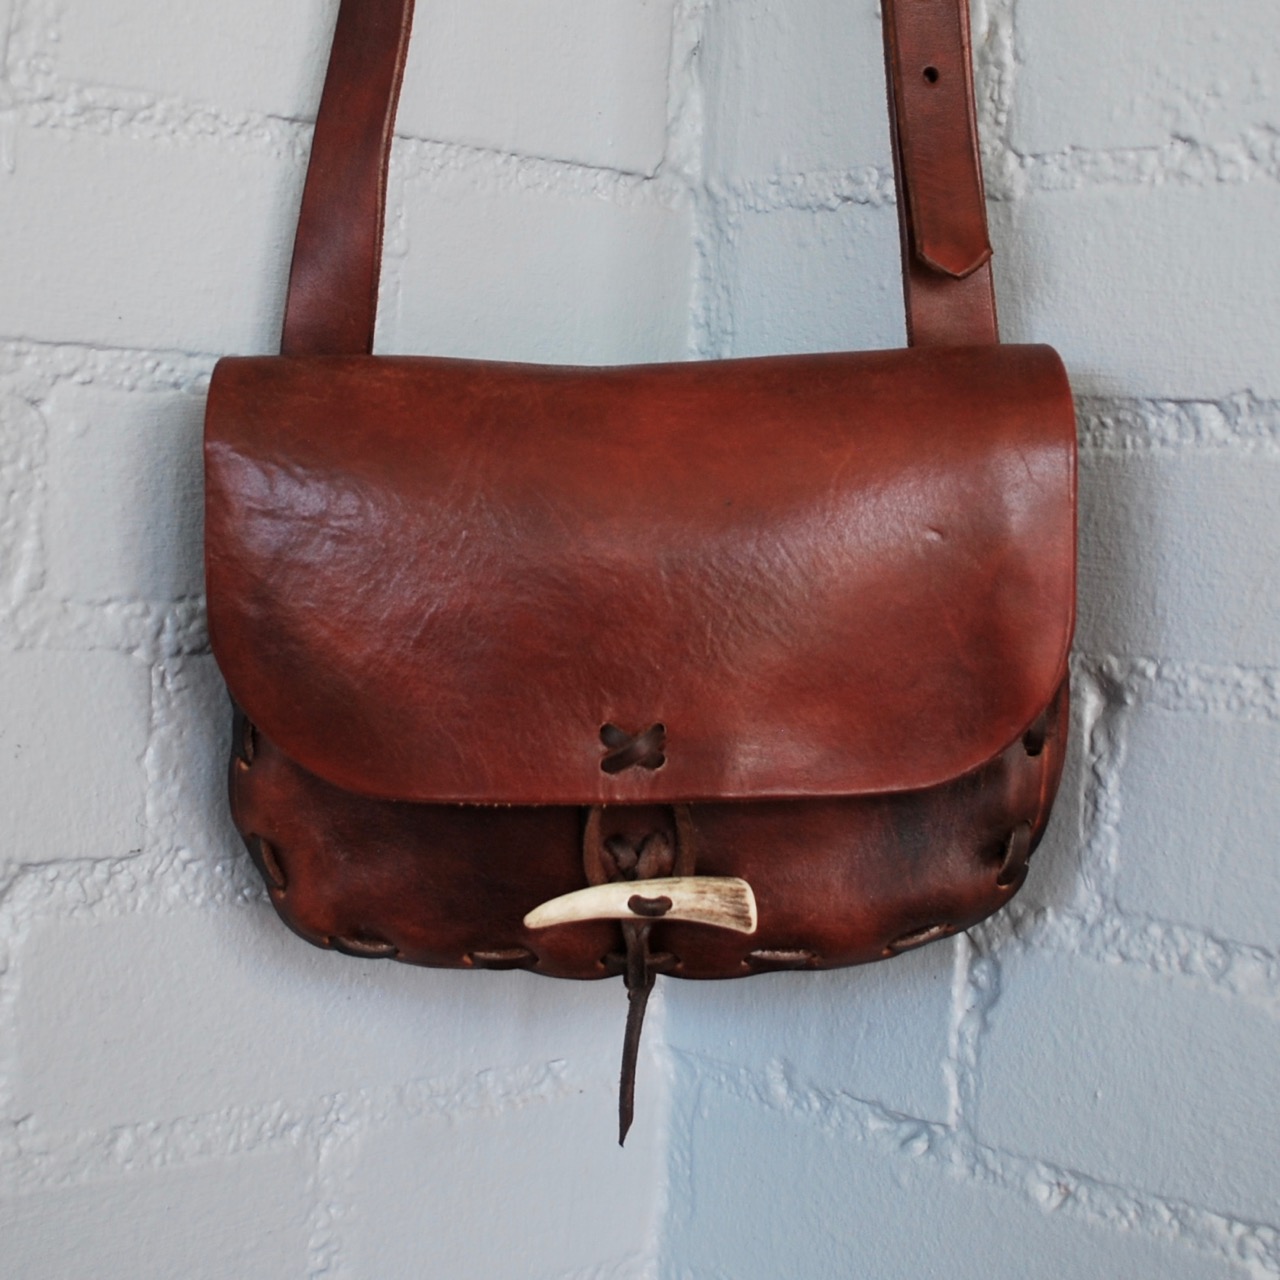
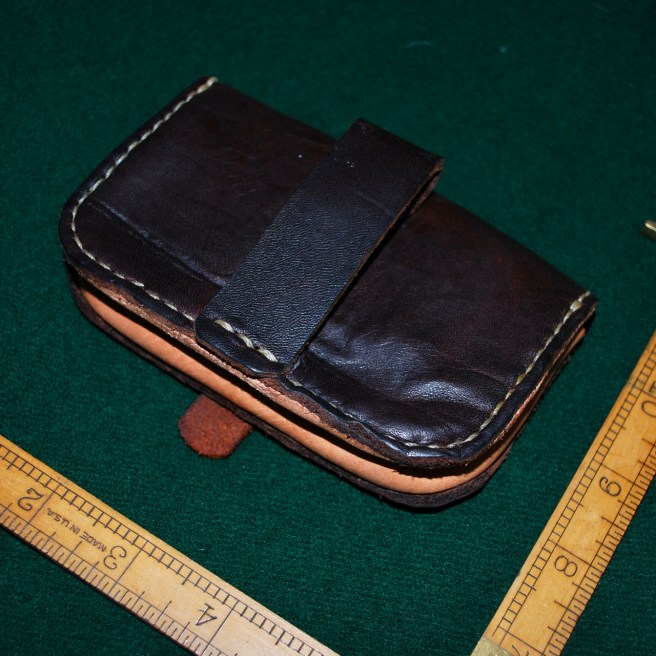
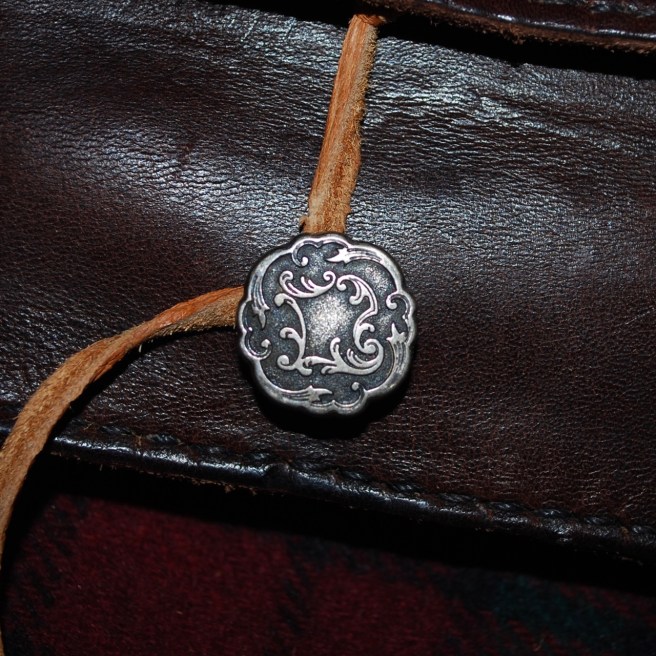
I think of this type of bag as a forager bag, mainly because it is the type I carried in the late 80s while working on a High Adventure summer program teaching outdoor skills. It’s really just a classic shooting bag; the type that could be found just about anywhere in North America or Europe for the past three hundred years in similar form.
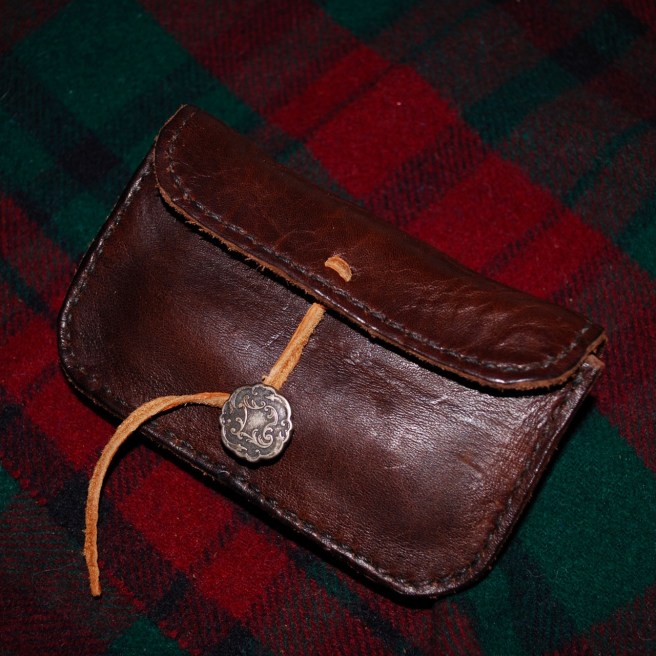
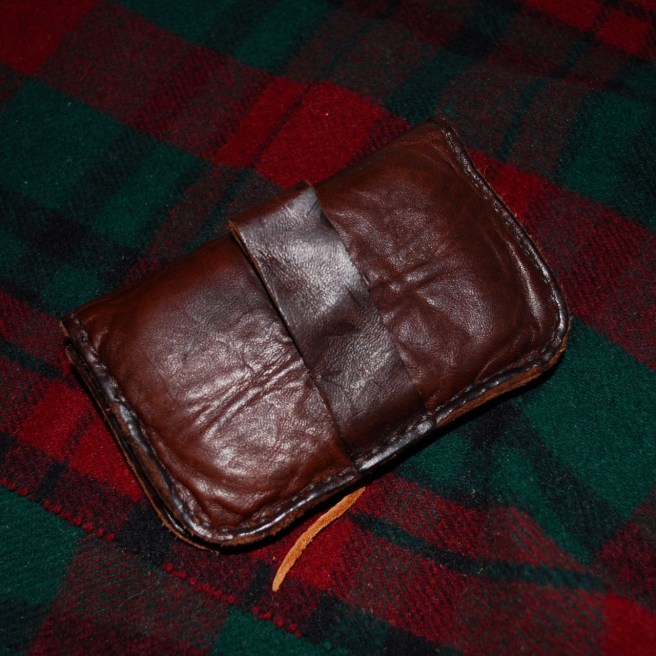
7 ounce Hermann Oak leather is thick but supple. Antler toggle closure keeps contents secure.
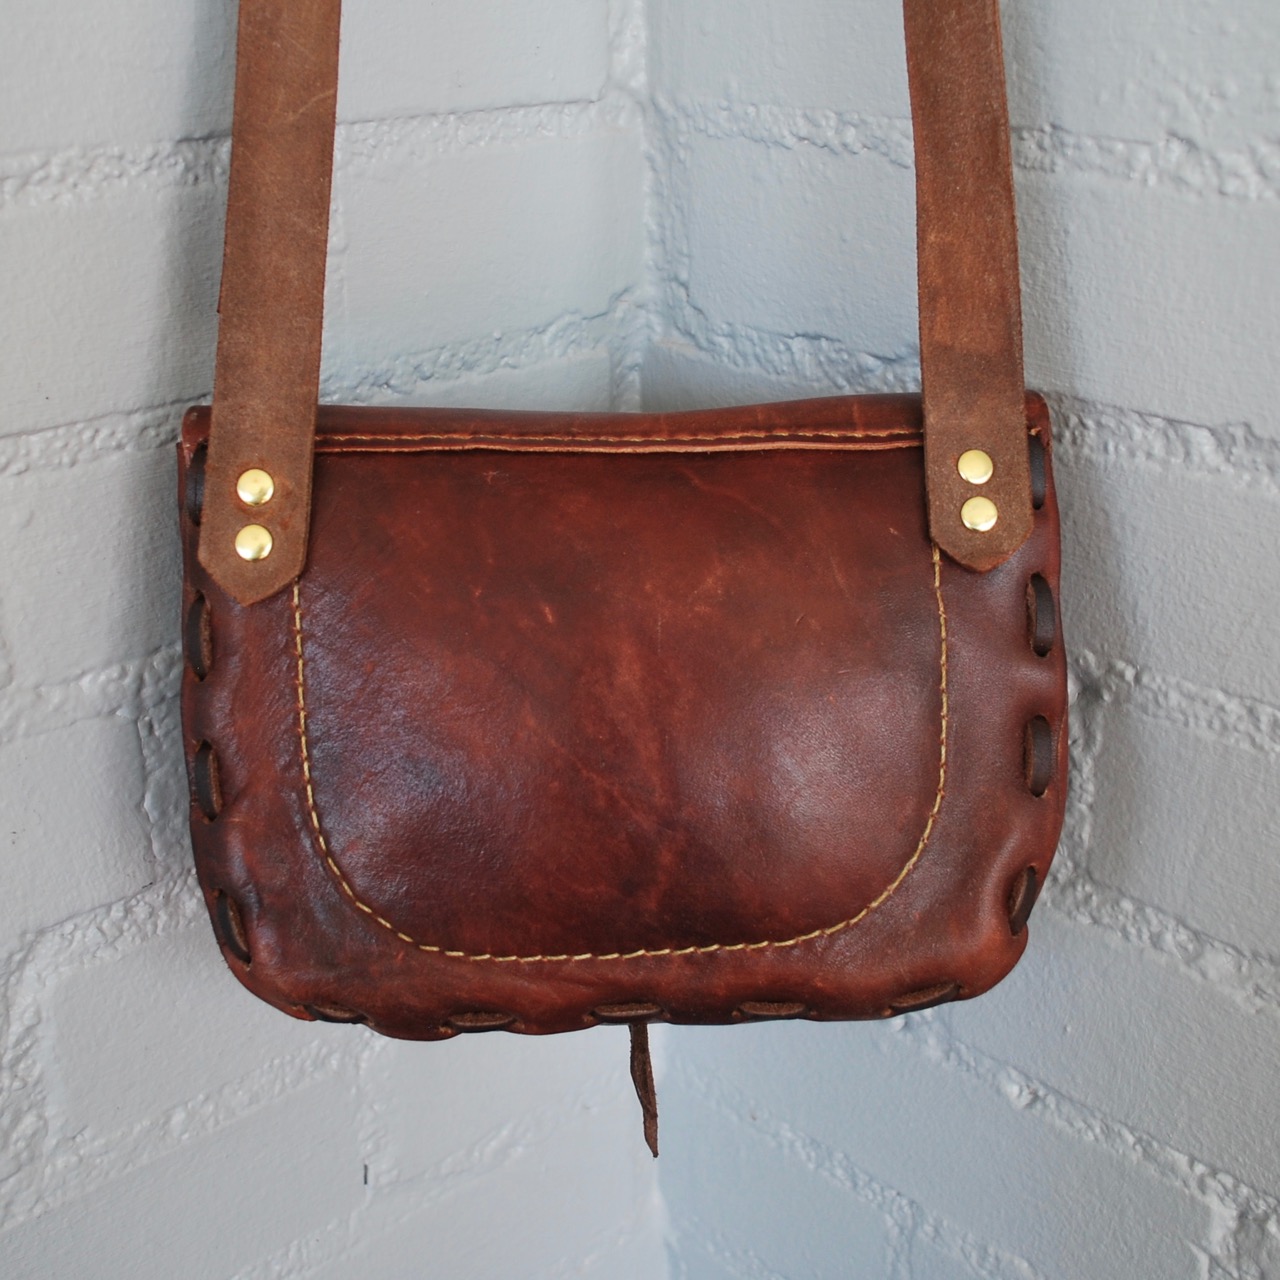
Double needle saddle stitching for flap and pocket.
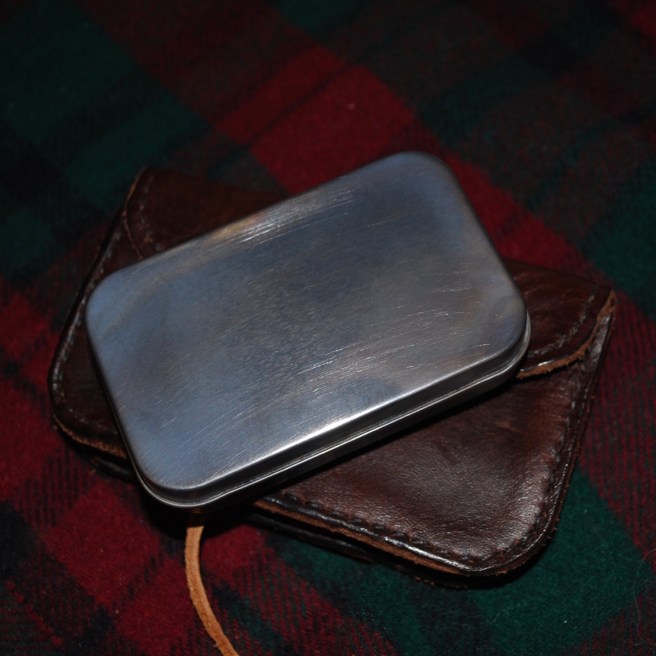
Interior pocket to separate small items.
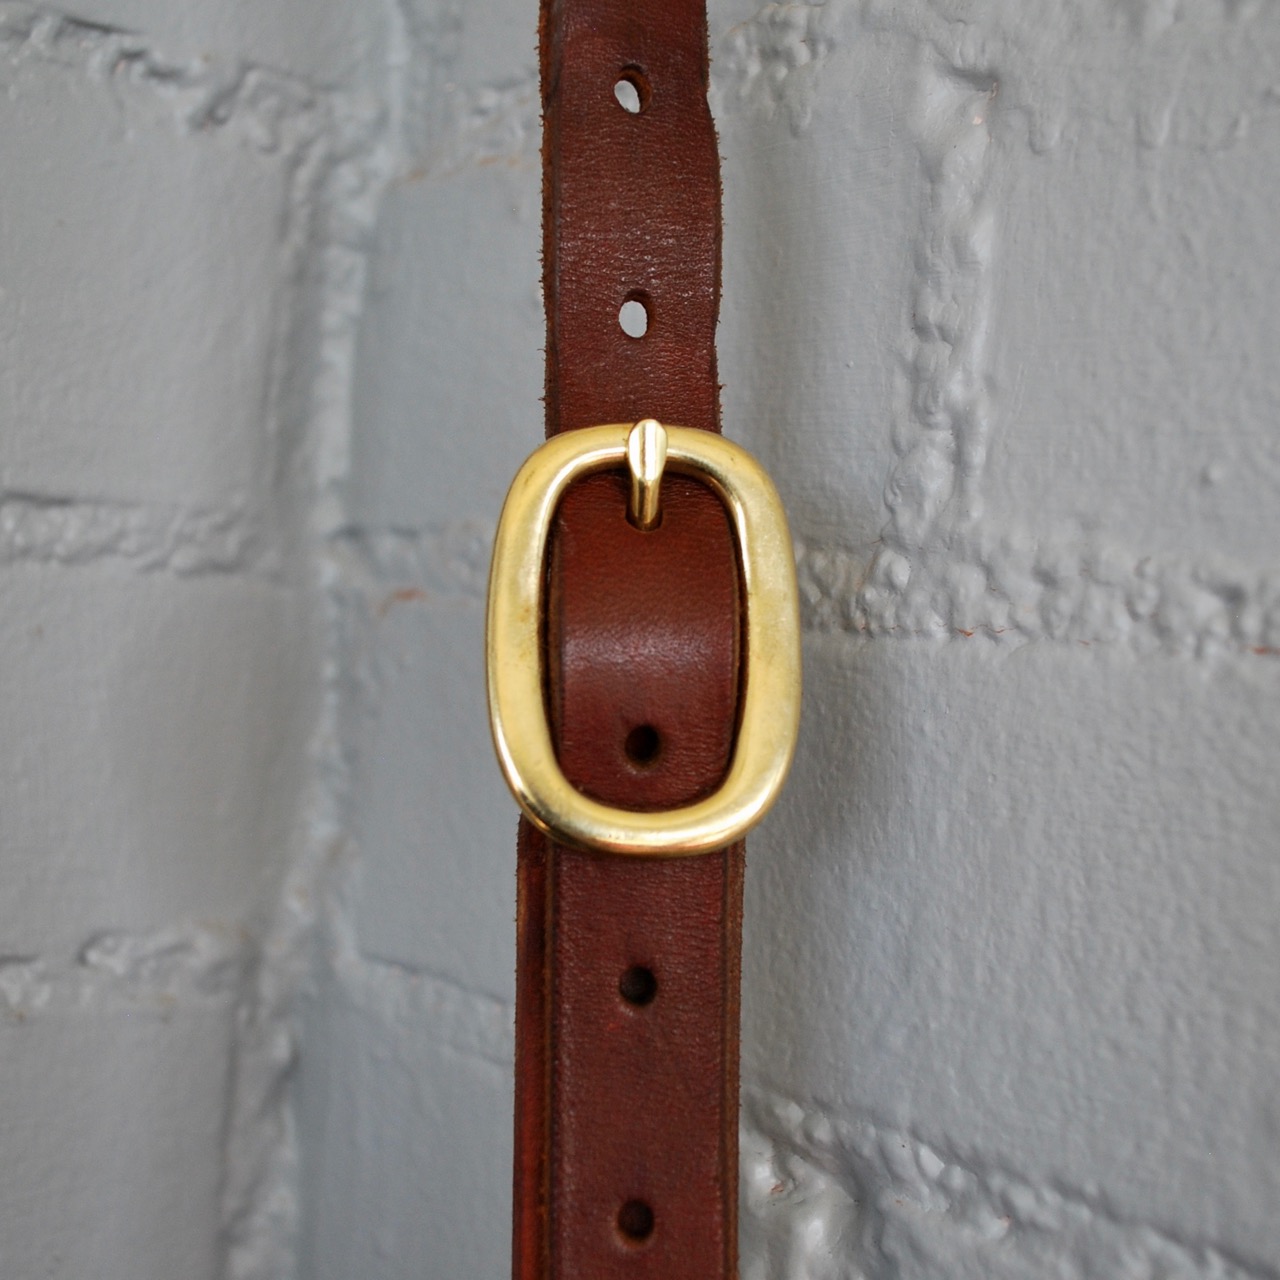
Heavy, harness brass buckle and pure brass rivets complete the bag.
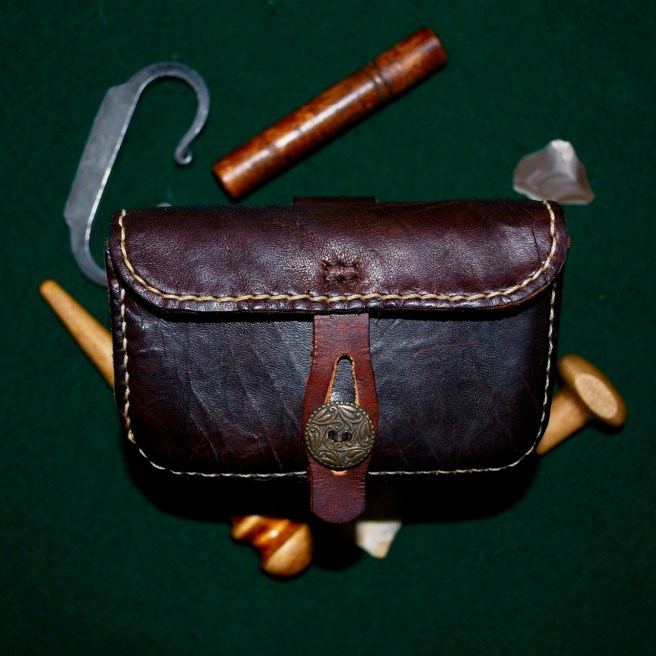
I like to add a little character and variety, even if I’m just making the same thing again and again. I want to believe that this is what my ancestors would have done, toiling away in the craft to make a living. It keeps things interesting and more human than the soulless, mass-produced consumables.
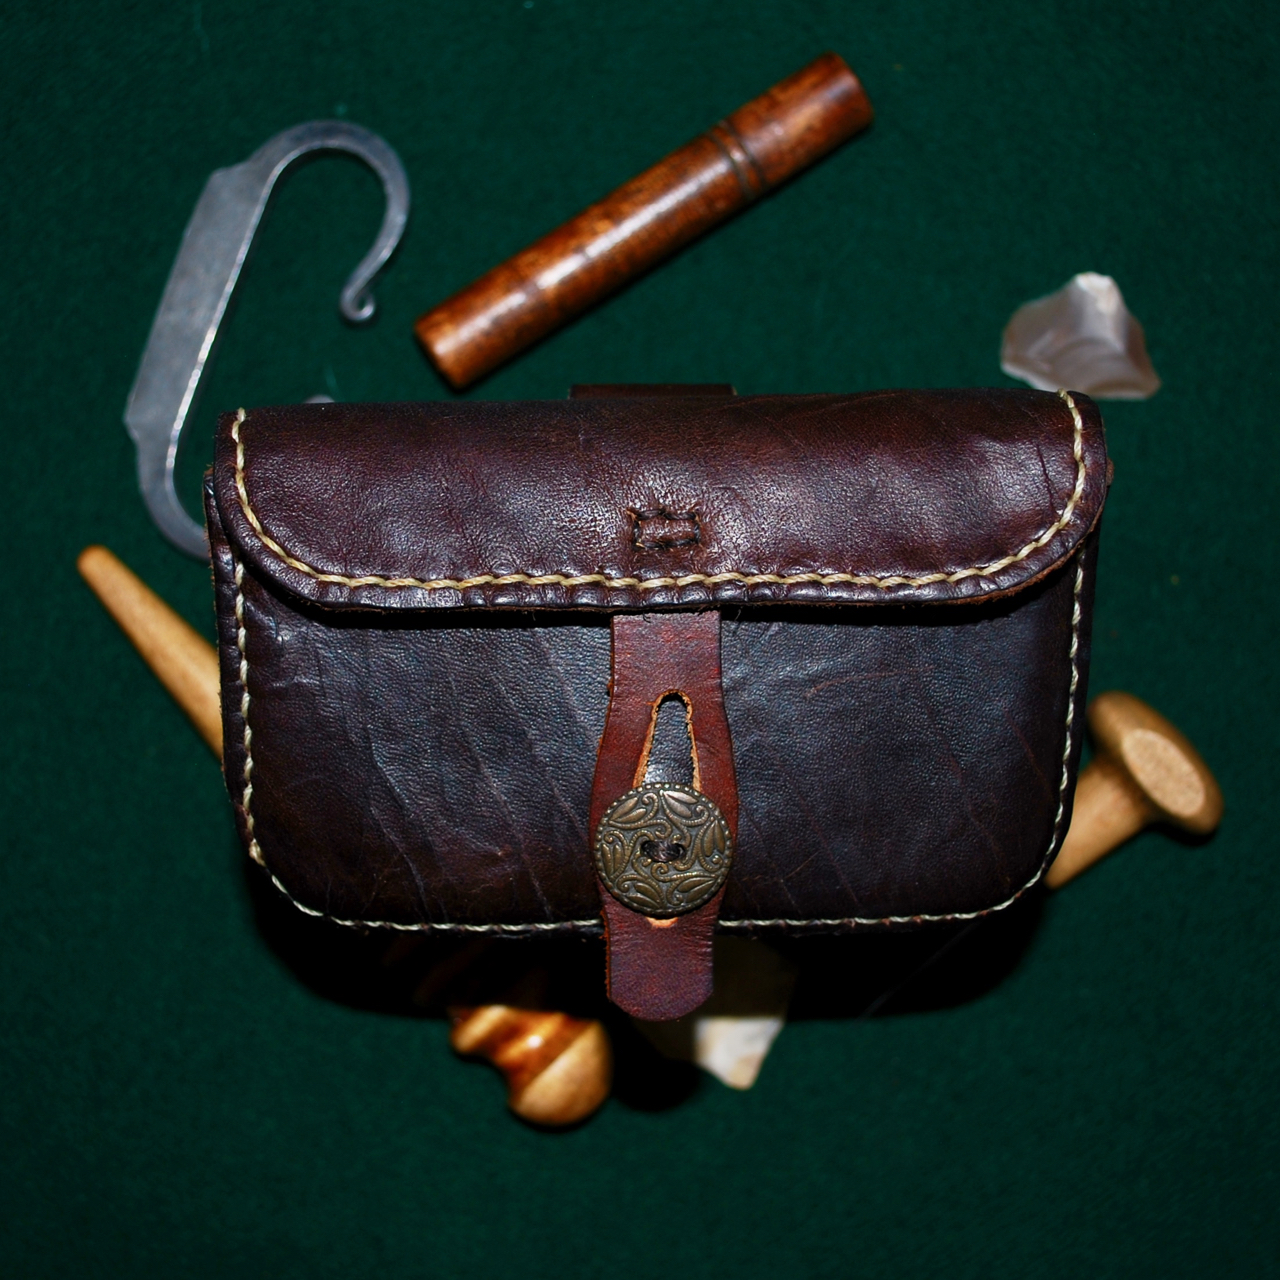
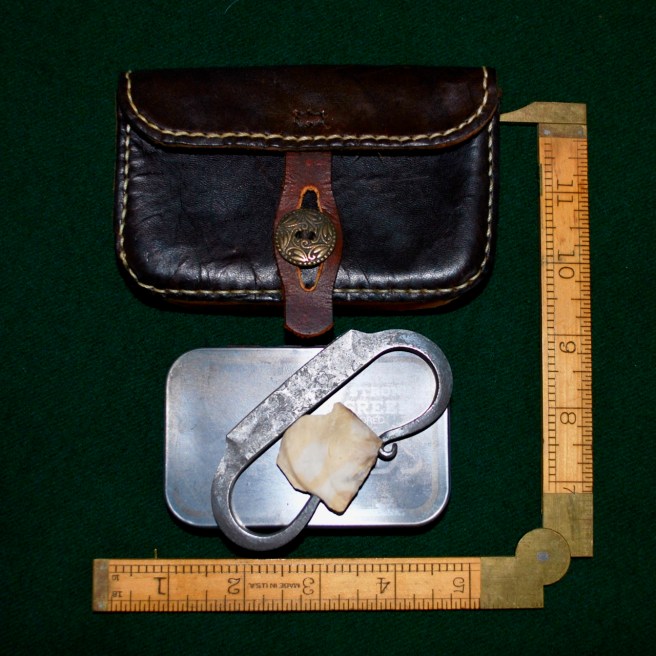
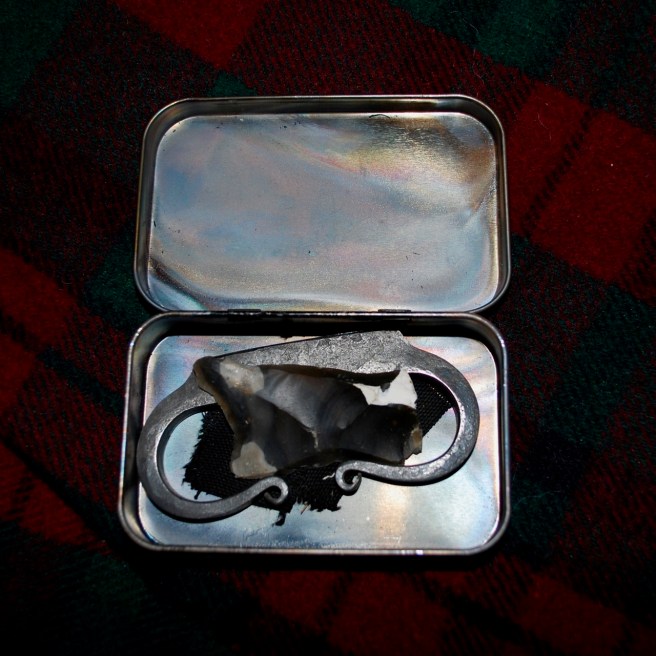
Here’s the most recent fire-kit with another beautiful vintage button. This will be sold through the Etsy shop at LostWorldCrafts: https://www.etsy.com/shop/LostWorldCraftsMade from 7 oz. Hermann Oak leather drum-dyed for the brown part and natural for gusset.
Thanks for looking. If you are interested, these generally don’t last a day on Etsy so check it out soon if you want one. Please follow the shop if you would like to keep up with the latest offerings.
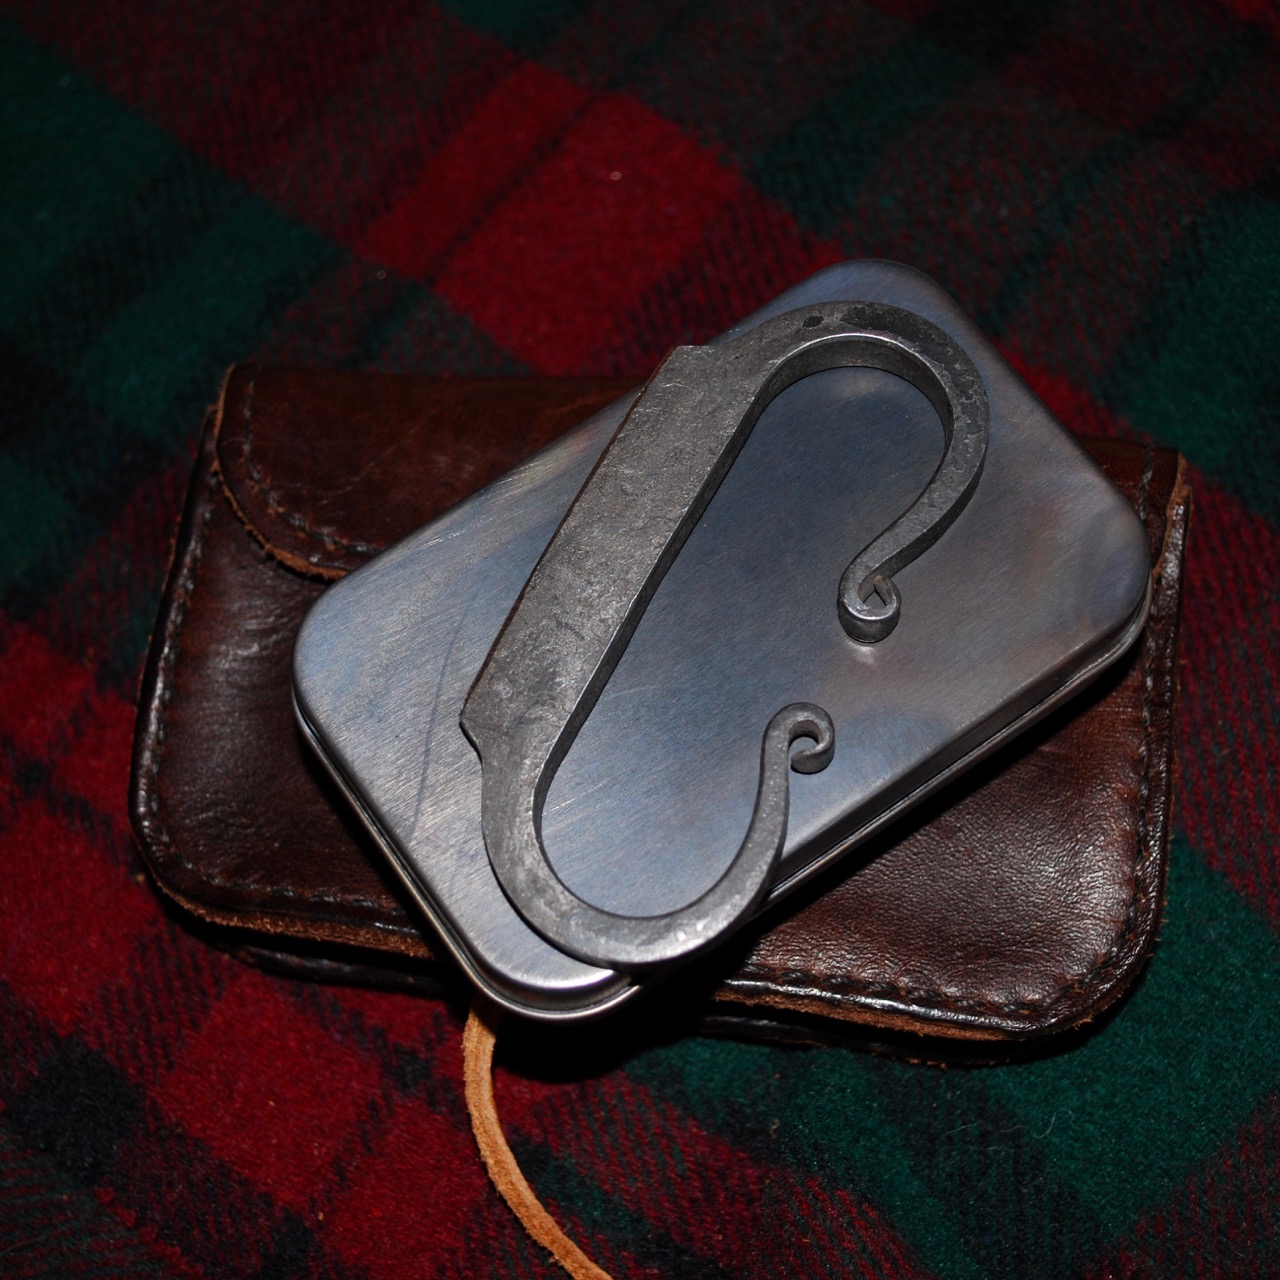
These Flint and Steel Fire Kits are hard to keep in stock. Since I don’t mass-produce things, I’m pretty slow at filling the shop. We did well enough last year that I still haven’t caught up but hope to in the coming weeks and months. Please check out the shop and consider making it a Favorite to keep up on the new listings.
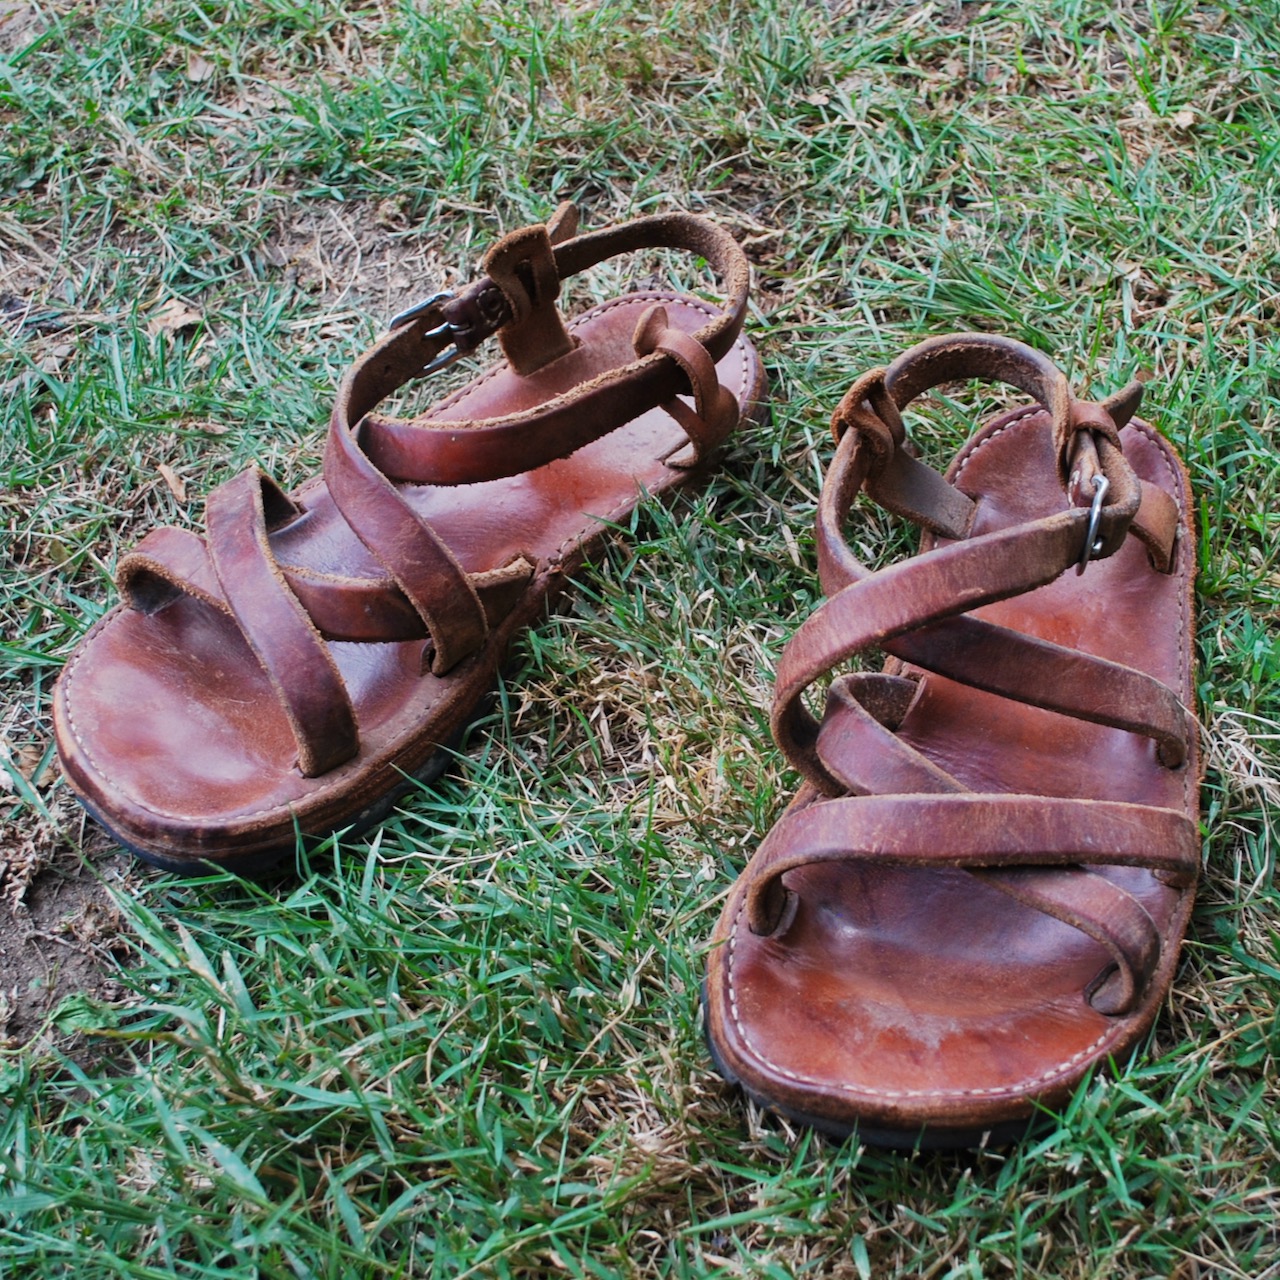
If you have ever taken a class with me you might know that all the intimidating sewing isn’t as bad as it looks. The sole is three layers thick but the use of a good, sharp awl makes the double needle sewing go quickly. A lot more work goes into these than I would have initially thought but I really think they come out great in the end. It took several pairs to get the pattern just right but research into design and construction led me to this final design. The sole is three layers thick (or more historically) and have been made this way in Europe and North Africa for more than 2,000 years.
The thickness of additional layers isn’t just to provide safety for the feet but the central layer provides a path for the straps to travel through without lumping under the feet. The parts consist of an insole (medium weight oak tan leather), mid-sole to allow tunneling the straps through, and an outer sole, in this case, leather. The straps are 48″ per foot plus the heel yoke.
This is how they looked when I thought I was finished. Shortly after, I added buckles and have since been through a few more soles. Currently they are shod with rubber.
Nine years on and still going strong. The patina that good leather takes on cannot be simulated. They get a coat of dubbin every six months or so but otherwise, need little care. I hope to get back to a time when I can wear them daily again.
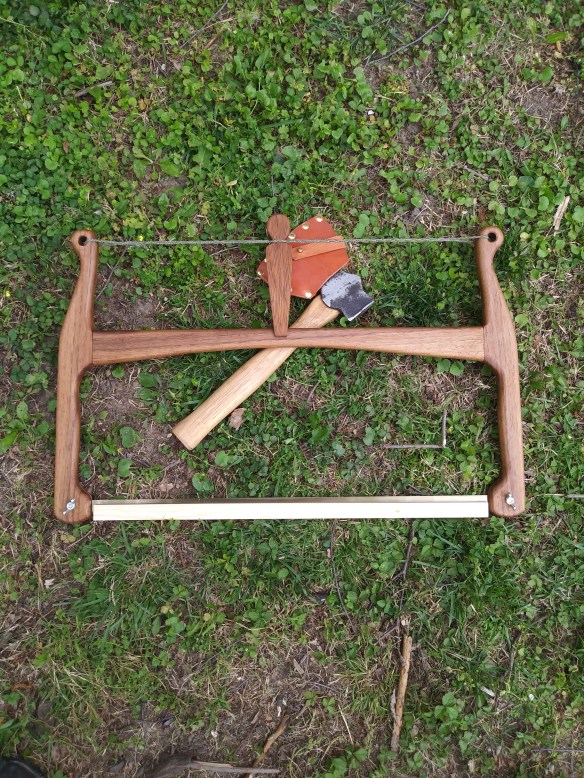
Here’s another small project happening amidst all the “real work” that needs to get done during this quarantine.
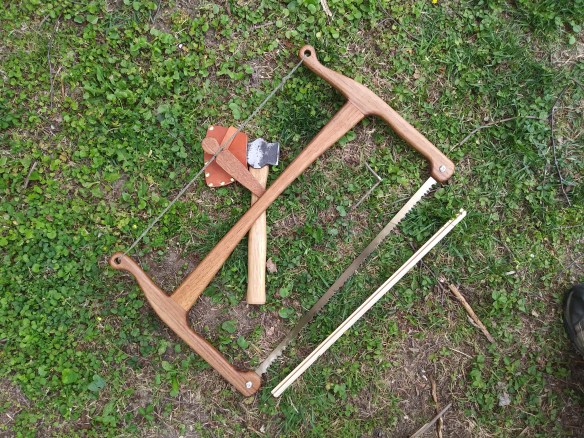
24 inch frame saw made from Missouri grown walnut. The “hanged man” style flapper is a scrap of mahogany from some repurposed shelves. The sheath here is pine.
I seem to sell or occasionally give away the saws I make. I needed a new one. The last one went into the Winter Count raffle as the prizes were looking a little scant this year.
I went into the workshop without much of a specific plan but came out with this little gem. Just a matter of removing the unnecessary bits really.
Finally, the pin sheath is stained and a canvas quiver is made to cover the saw when broken down for travel. This one is from old,, heavyweight canvas salvaged from a truck tarp. It will all fit into a neat 24 inch bundle.
I want to keep this one but after inquiries rolling in, it may go into the shop (or another just like it).
Be Safe!
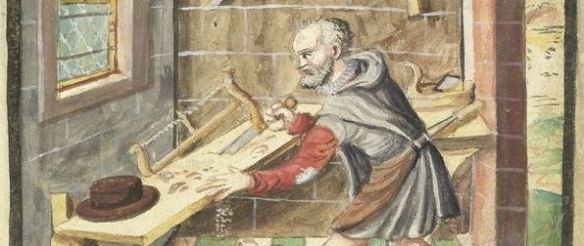
For your enjoyment: a Carpenter from 1589, Mendel Manuscript.
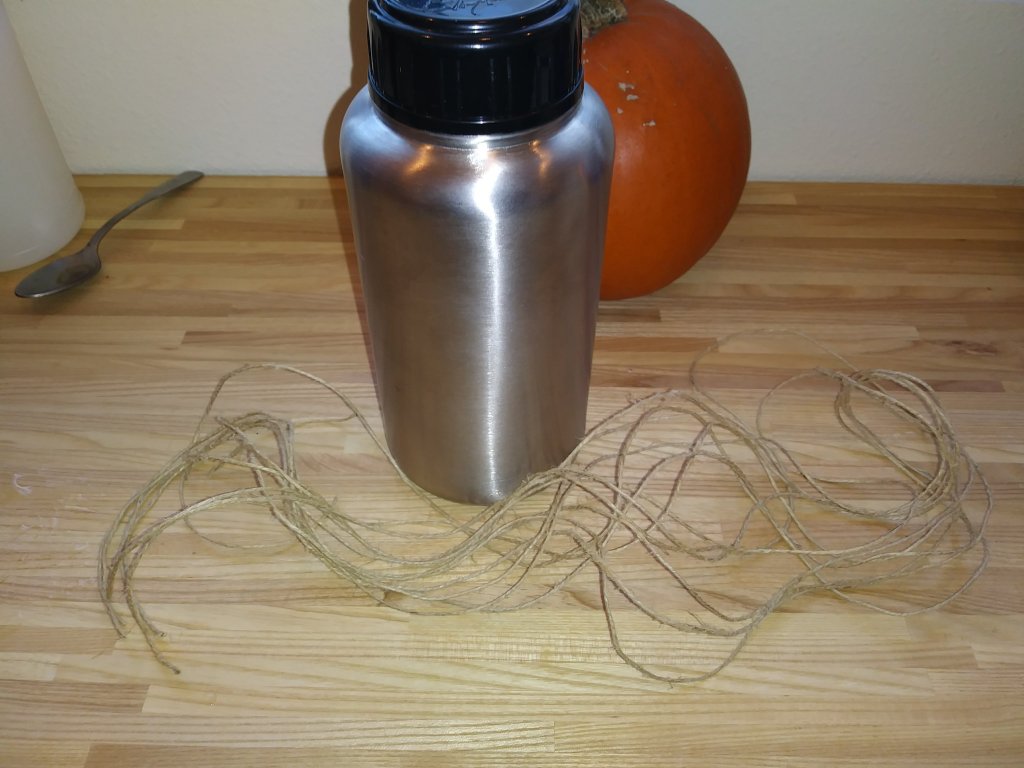
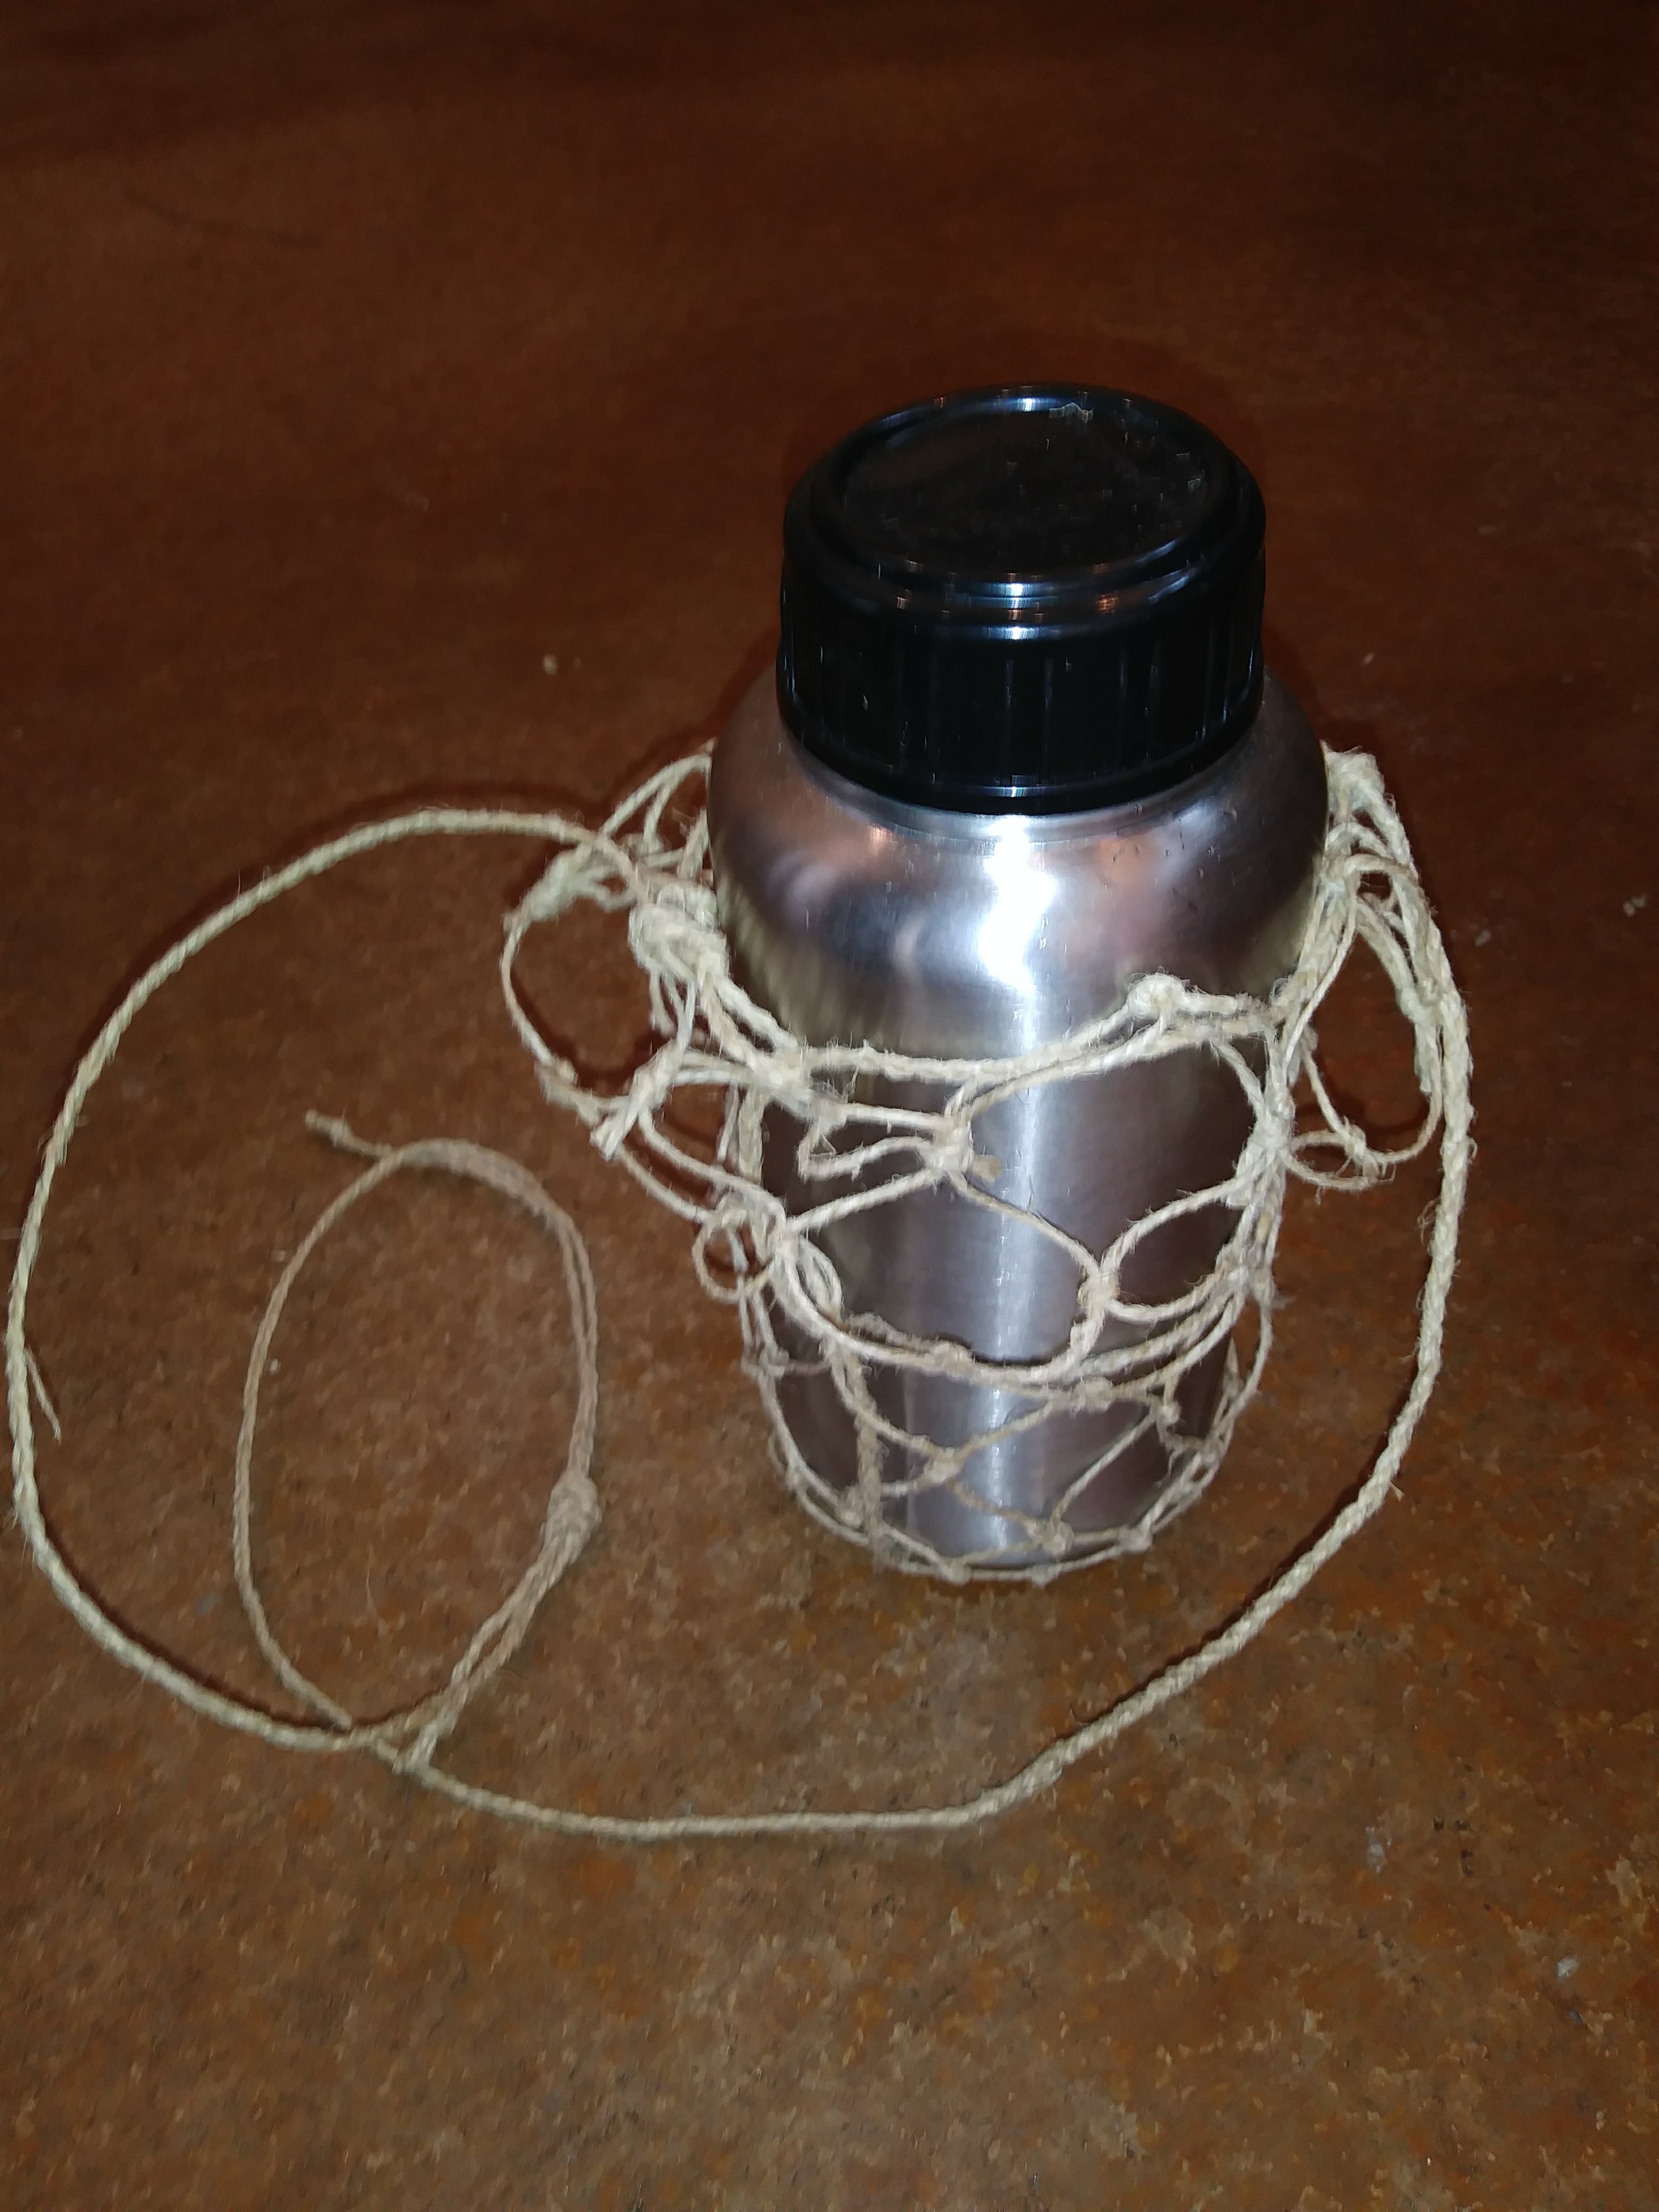
And also the solution. I needed a net bag for my water bottle while I’m on the road. I knew this was going to be a problem when I left home so I threw in a ball of string in case I had some time on my hands. I almost always bring something to keep myself busy. Idle hands are the something’s something, or whatever.The bottle in need and the raw material to make it happen.I’ve been making nets and net bags for a very long time. Decades in fact. Some are fancy but most are quite plain and utilitarian. This one definitely falls into the latter category. However, it will serve the purpose and I suspect will be around for quite some time.
I took a few photos along the way and thought I would make a short tutorial as even simple knot work is often mysterious to the uninitiated. I hope this helps someone. It’s a great introductory project.
INSTRUCTIONS –
This little bag uses a simple overhand knot technique and is probably the simplest mesh you can make. Other than a cutting instrument there really are no required tools for this so gather your string, fetch the object that will be held (in this case a water bottle), grab your knife and we can begin.
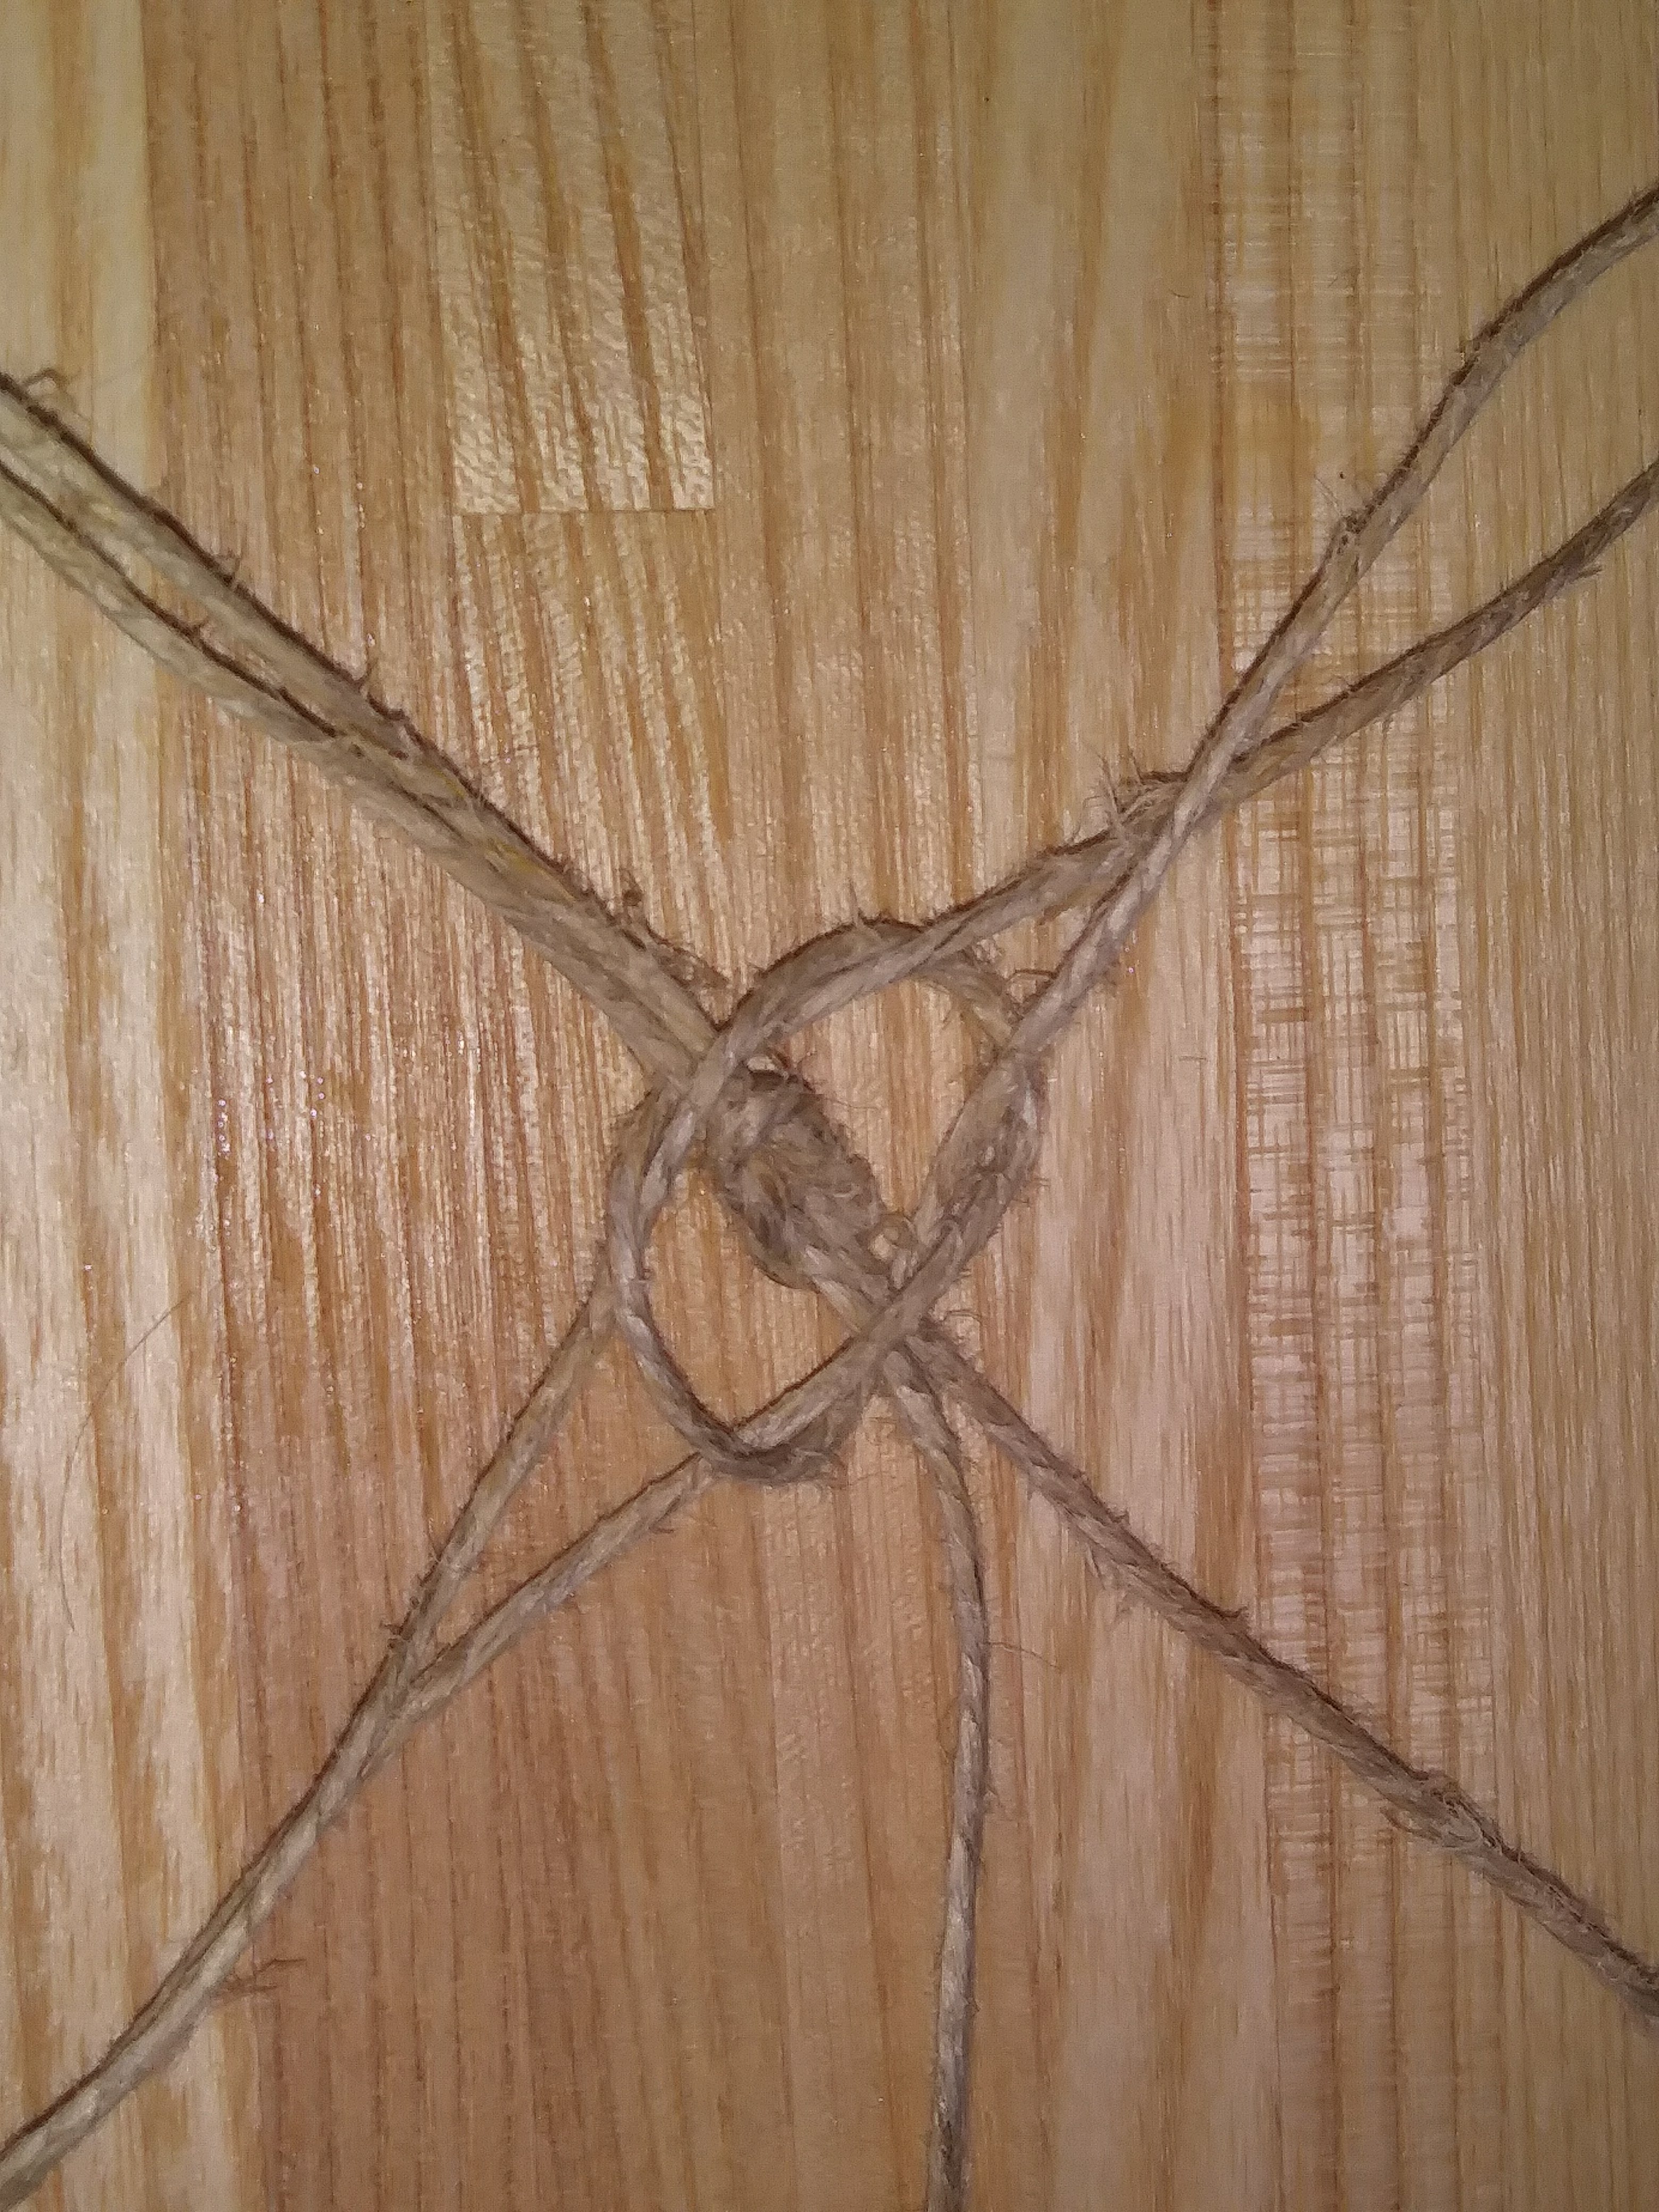
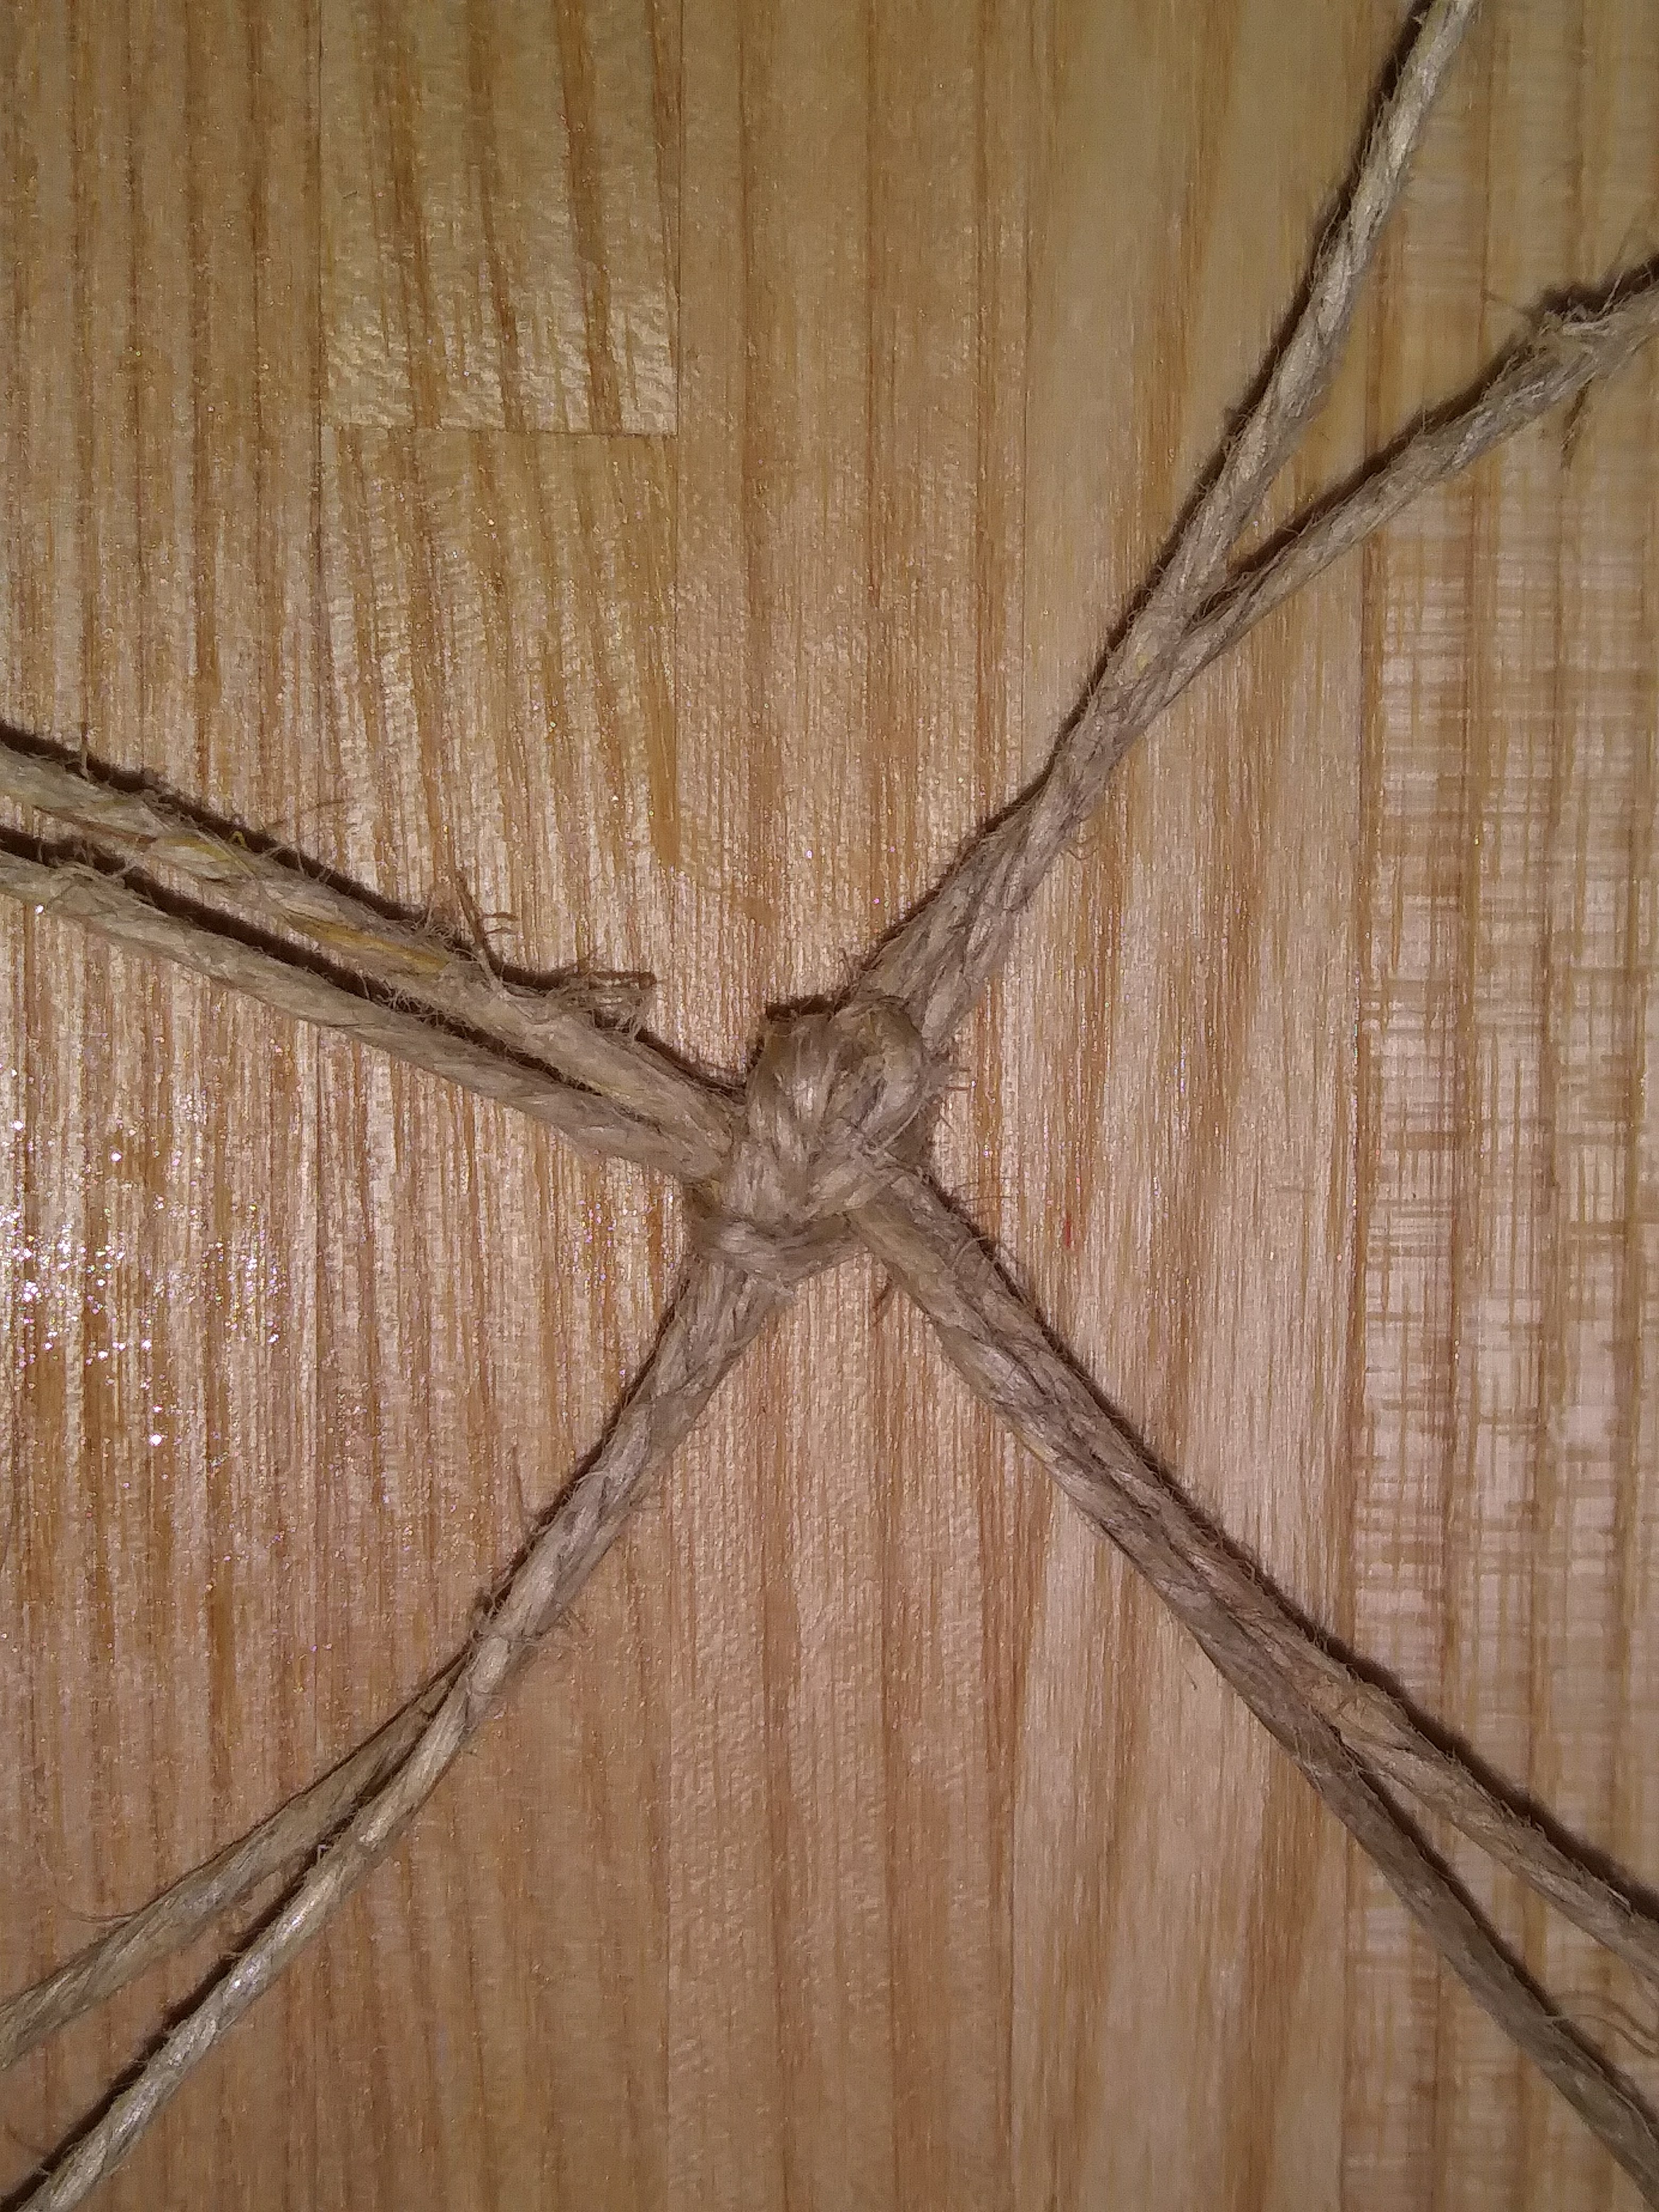
String is measured and cut. For a regular cylinder that’s about 3:1 height to width you need to have at least twice its height in netting material. Each string will doubled so that they meet at the bottom without a complex knot.Centers of the first strings are joined in a square knot. The next thing to figure out is how many strings you will need. Much of this will have to do with how small you want the holes in your net; more holes, more strings. I estimate this bottle is about 12 inches in circumference and I thought the minimum number of strings I could get away with would be about 16. Since they’re doubled in the middle that means there will be 8 strings cut at least four times the length of the bottle.
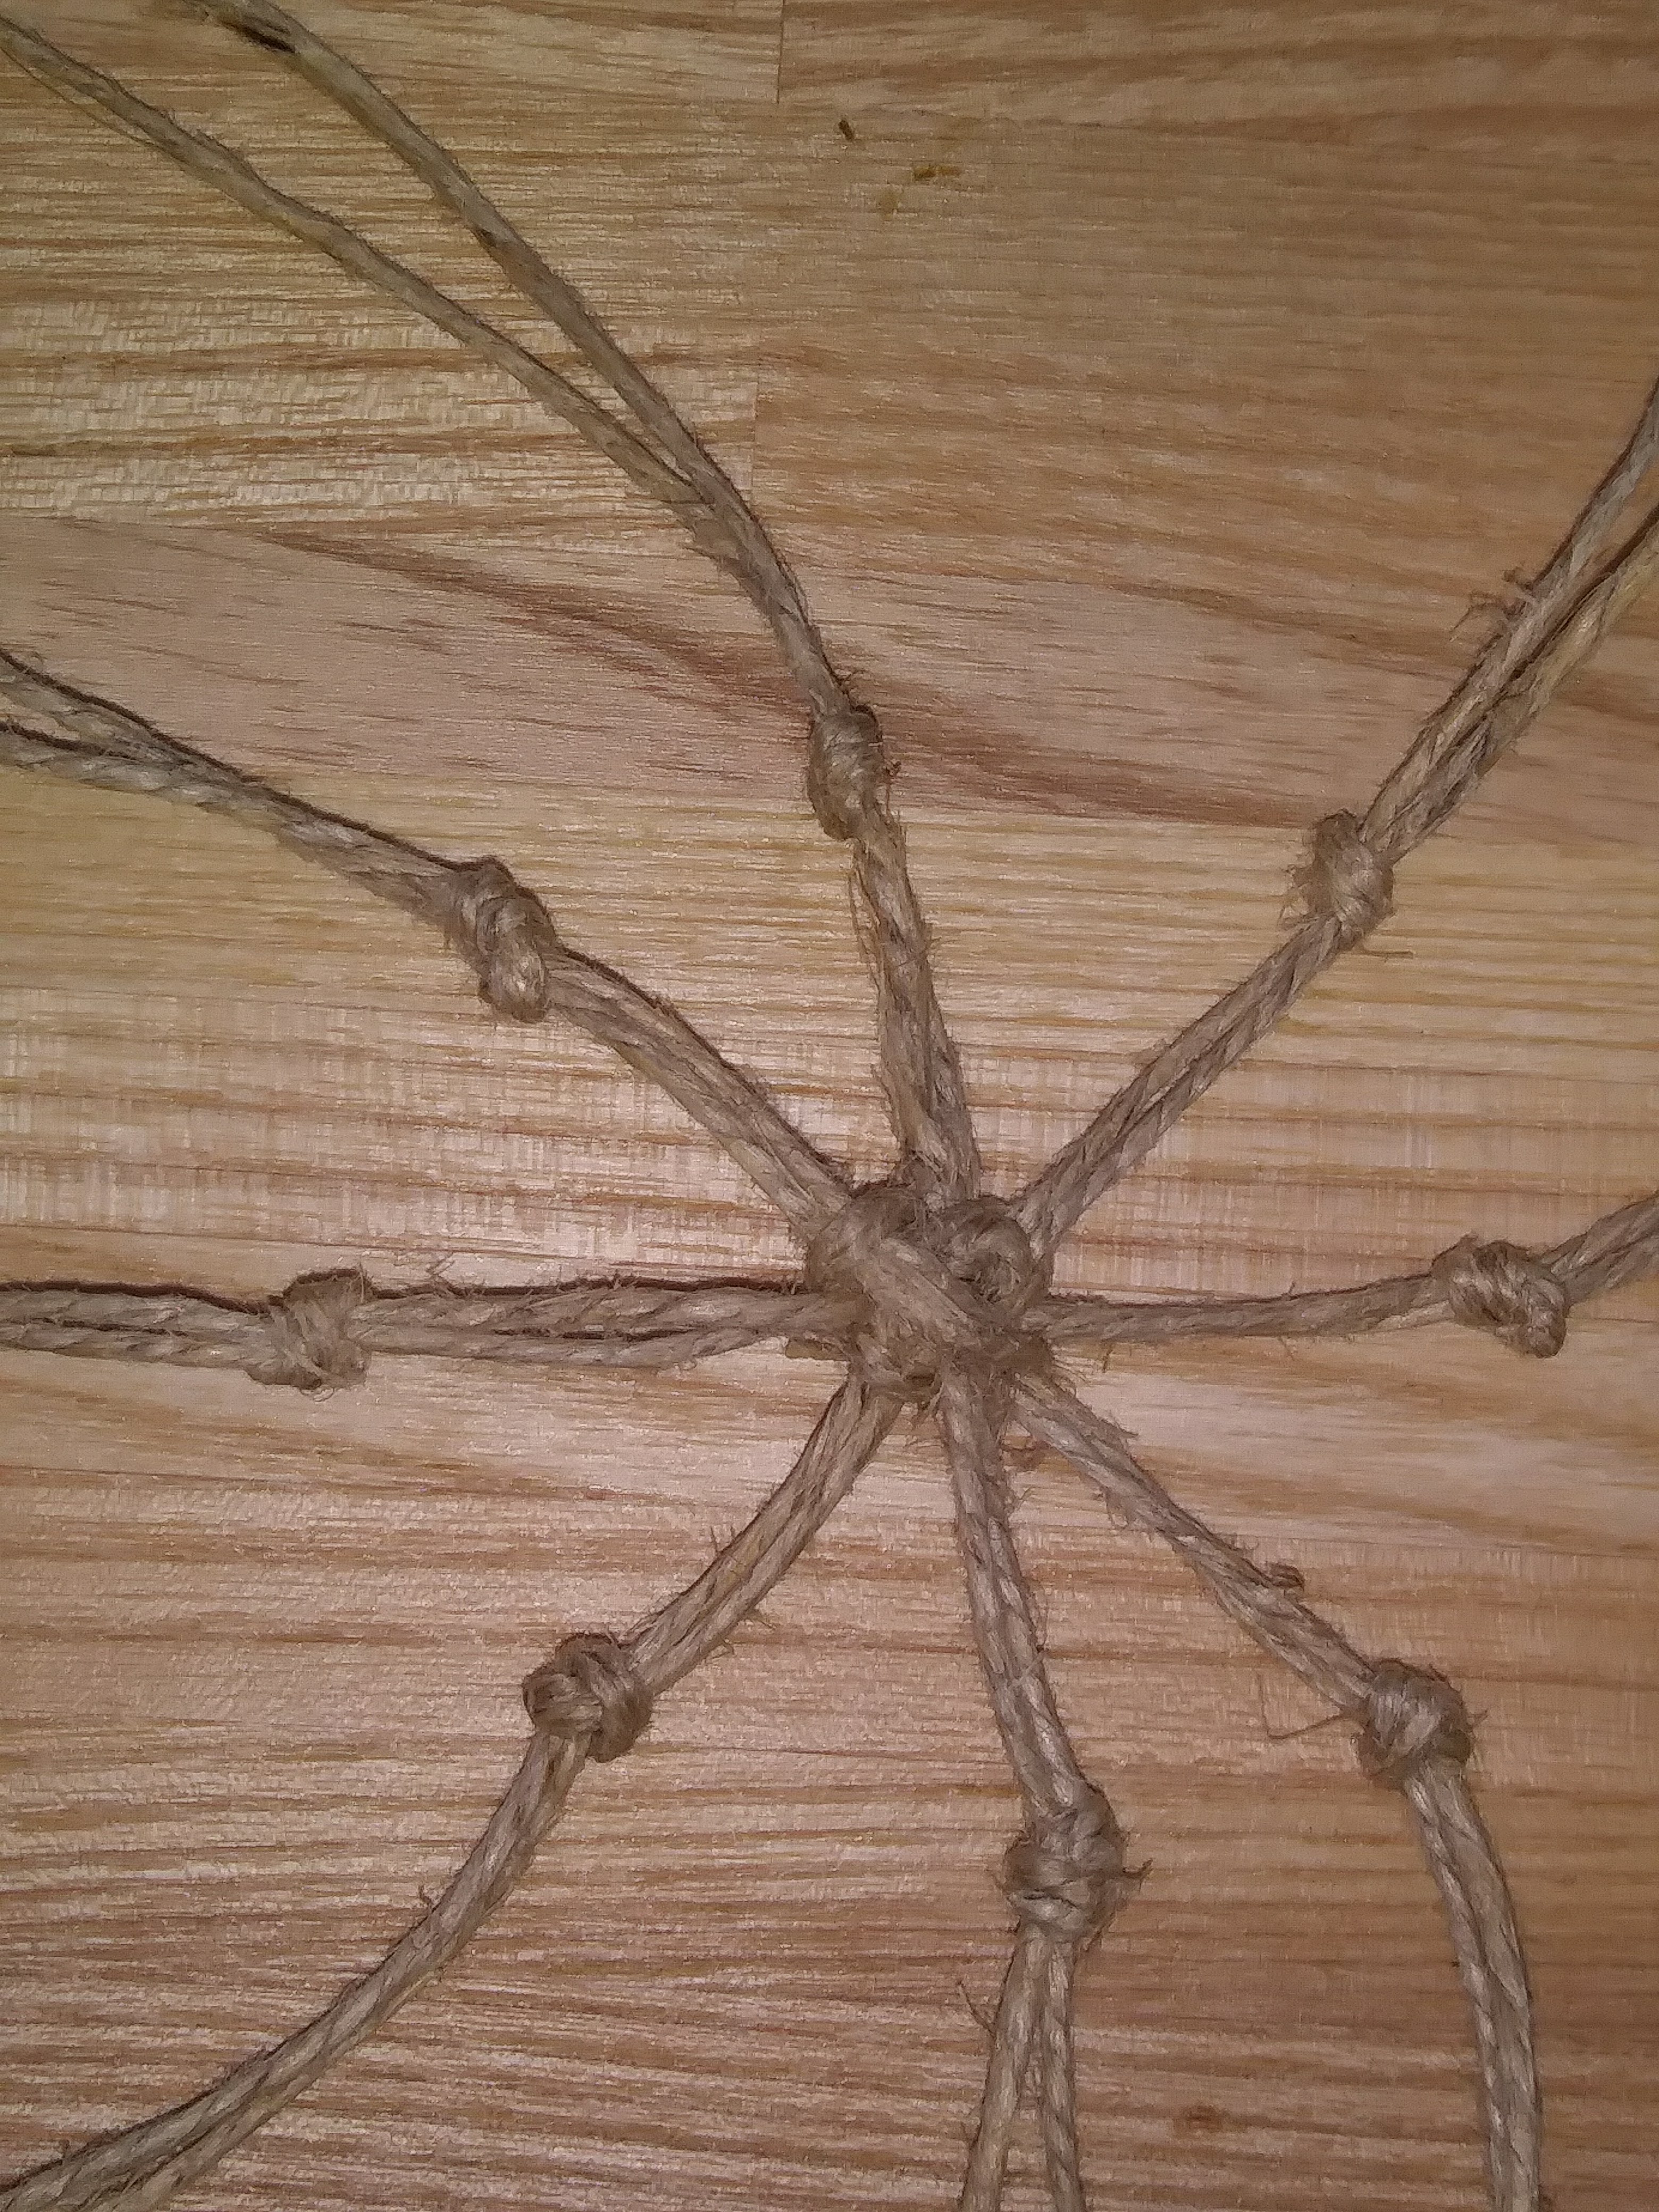
The second pair of strings is added across the first. And pulled tight. After the first two sets of strings are put together the remainder are added like spokes on a wheel. If you’re going to use a lot of strings, say to make a cast net in this way, you would need to add a ring of cordage as the center to attach all the spokes to. Otherwise, you would end up with a bulky knot in the middle.
After all the spokes are added it becomes a simple project of making overhand knots in pairs.
The first set of knots made. Here’s where it seems to get tricky for some people. The next step is to connect neighboring strings to create a diamond pattern. That is to say, each half of a knotted pair will join its neighbor.
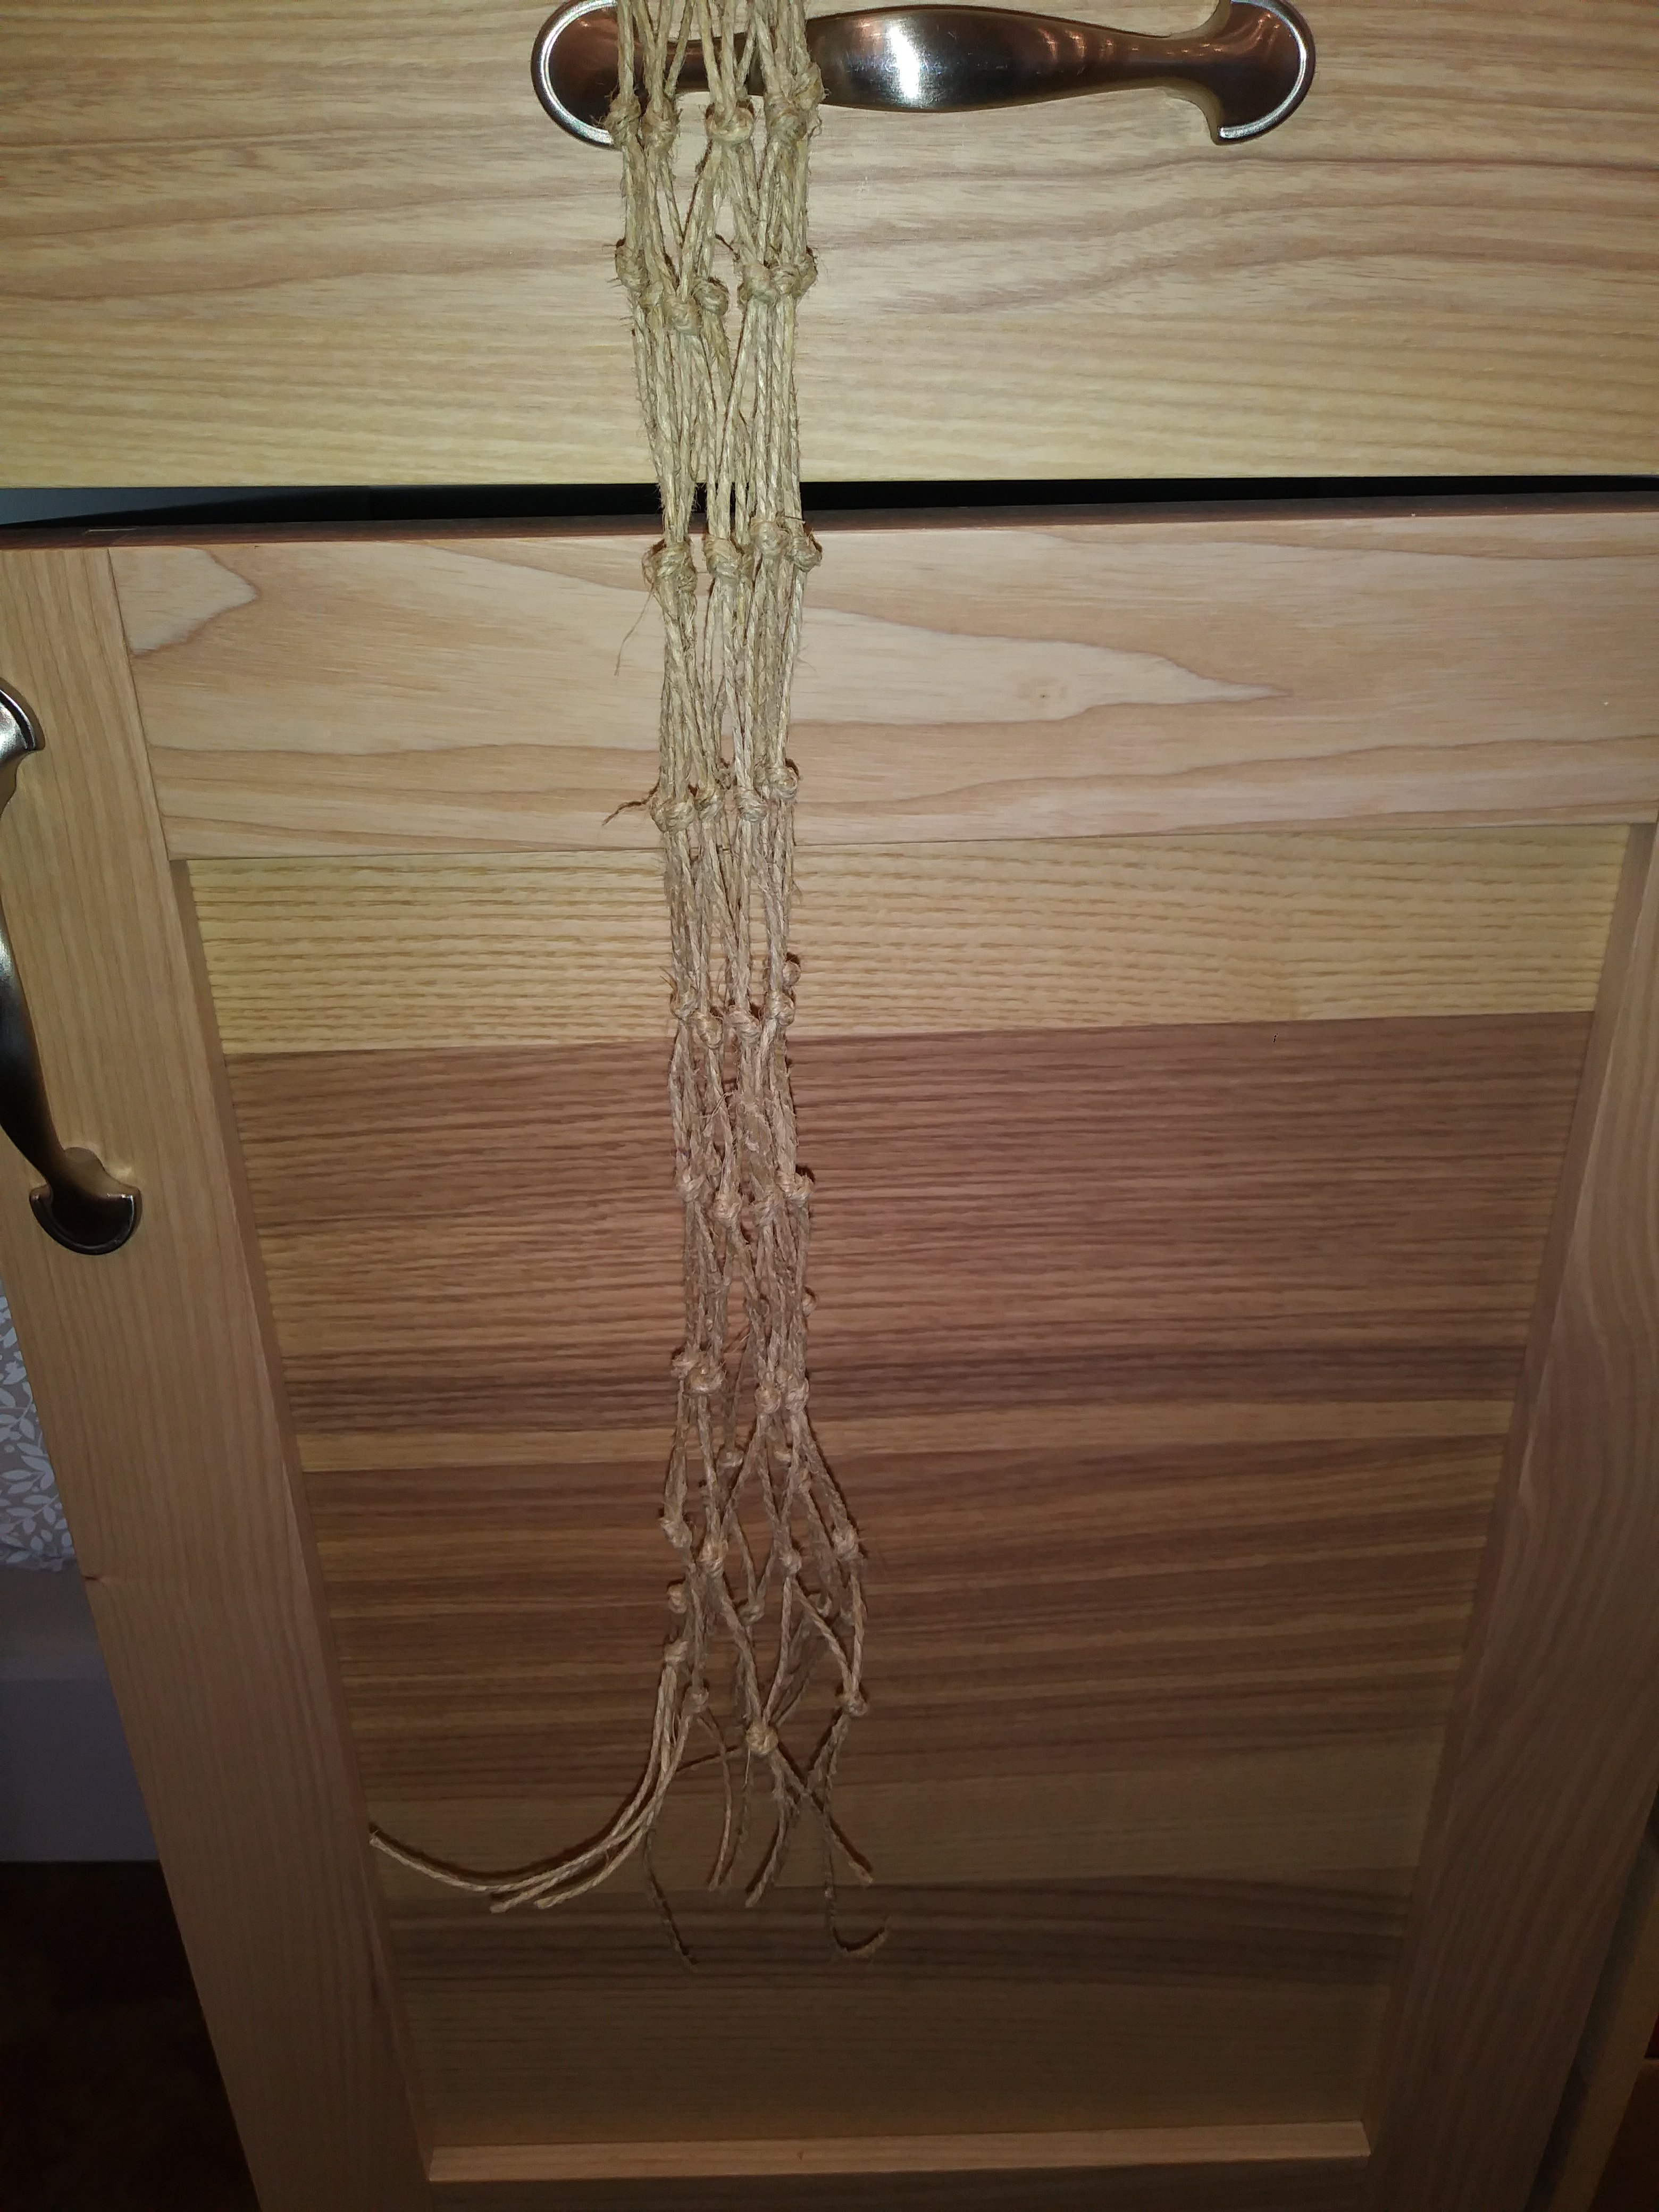
It’s helpful to tie it to something when you’re working. Connecting the alternate pairs. Repeat ad nauseam. If you notice your bag is coming out too skinny you need to space the knots further apart. If you need to taper it in at the base or the top, make the knots closer together.
The body of the net is finished. Instead of binding the top in any fancy way I simply ended the last round of knots folded back to the previous. See the picture above.
I added reinforcement. All I had was the string to work with so I had to make a heavier cord from this for a drawstring and strap. The simplest solution was to just braid up a heavier cord. In this case I just did a simple three strand braid. If I were making something more lasting I would probably finger weave a strap or maybe use a thicker, more complex braid.
Three 10 ft lengths of string become an 8-foot cord.
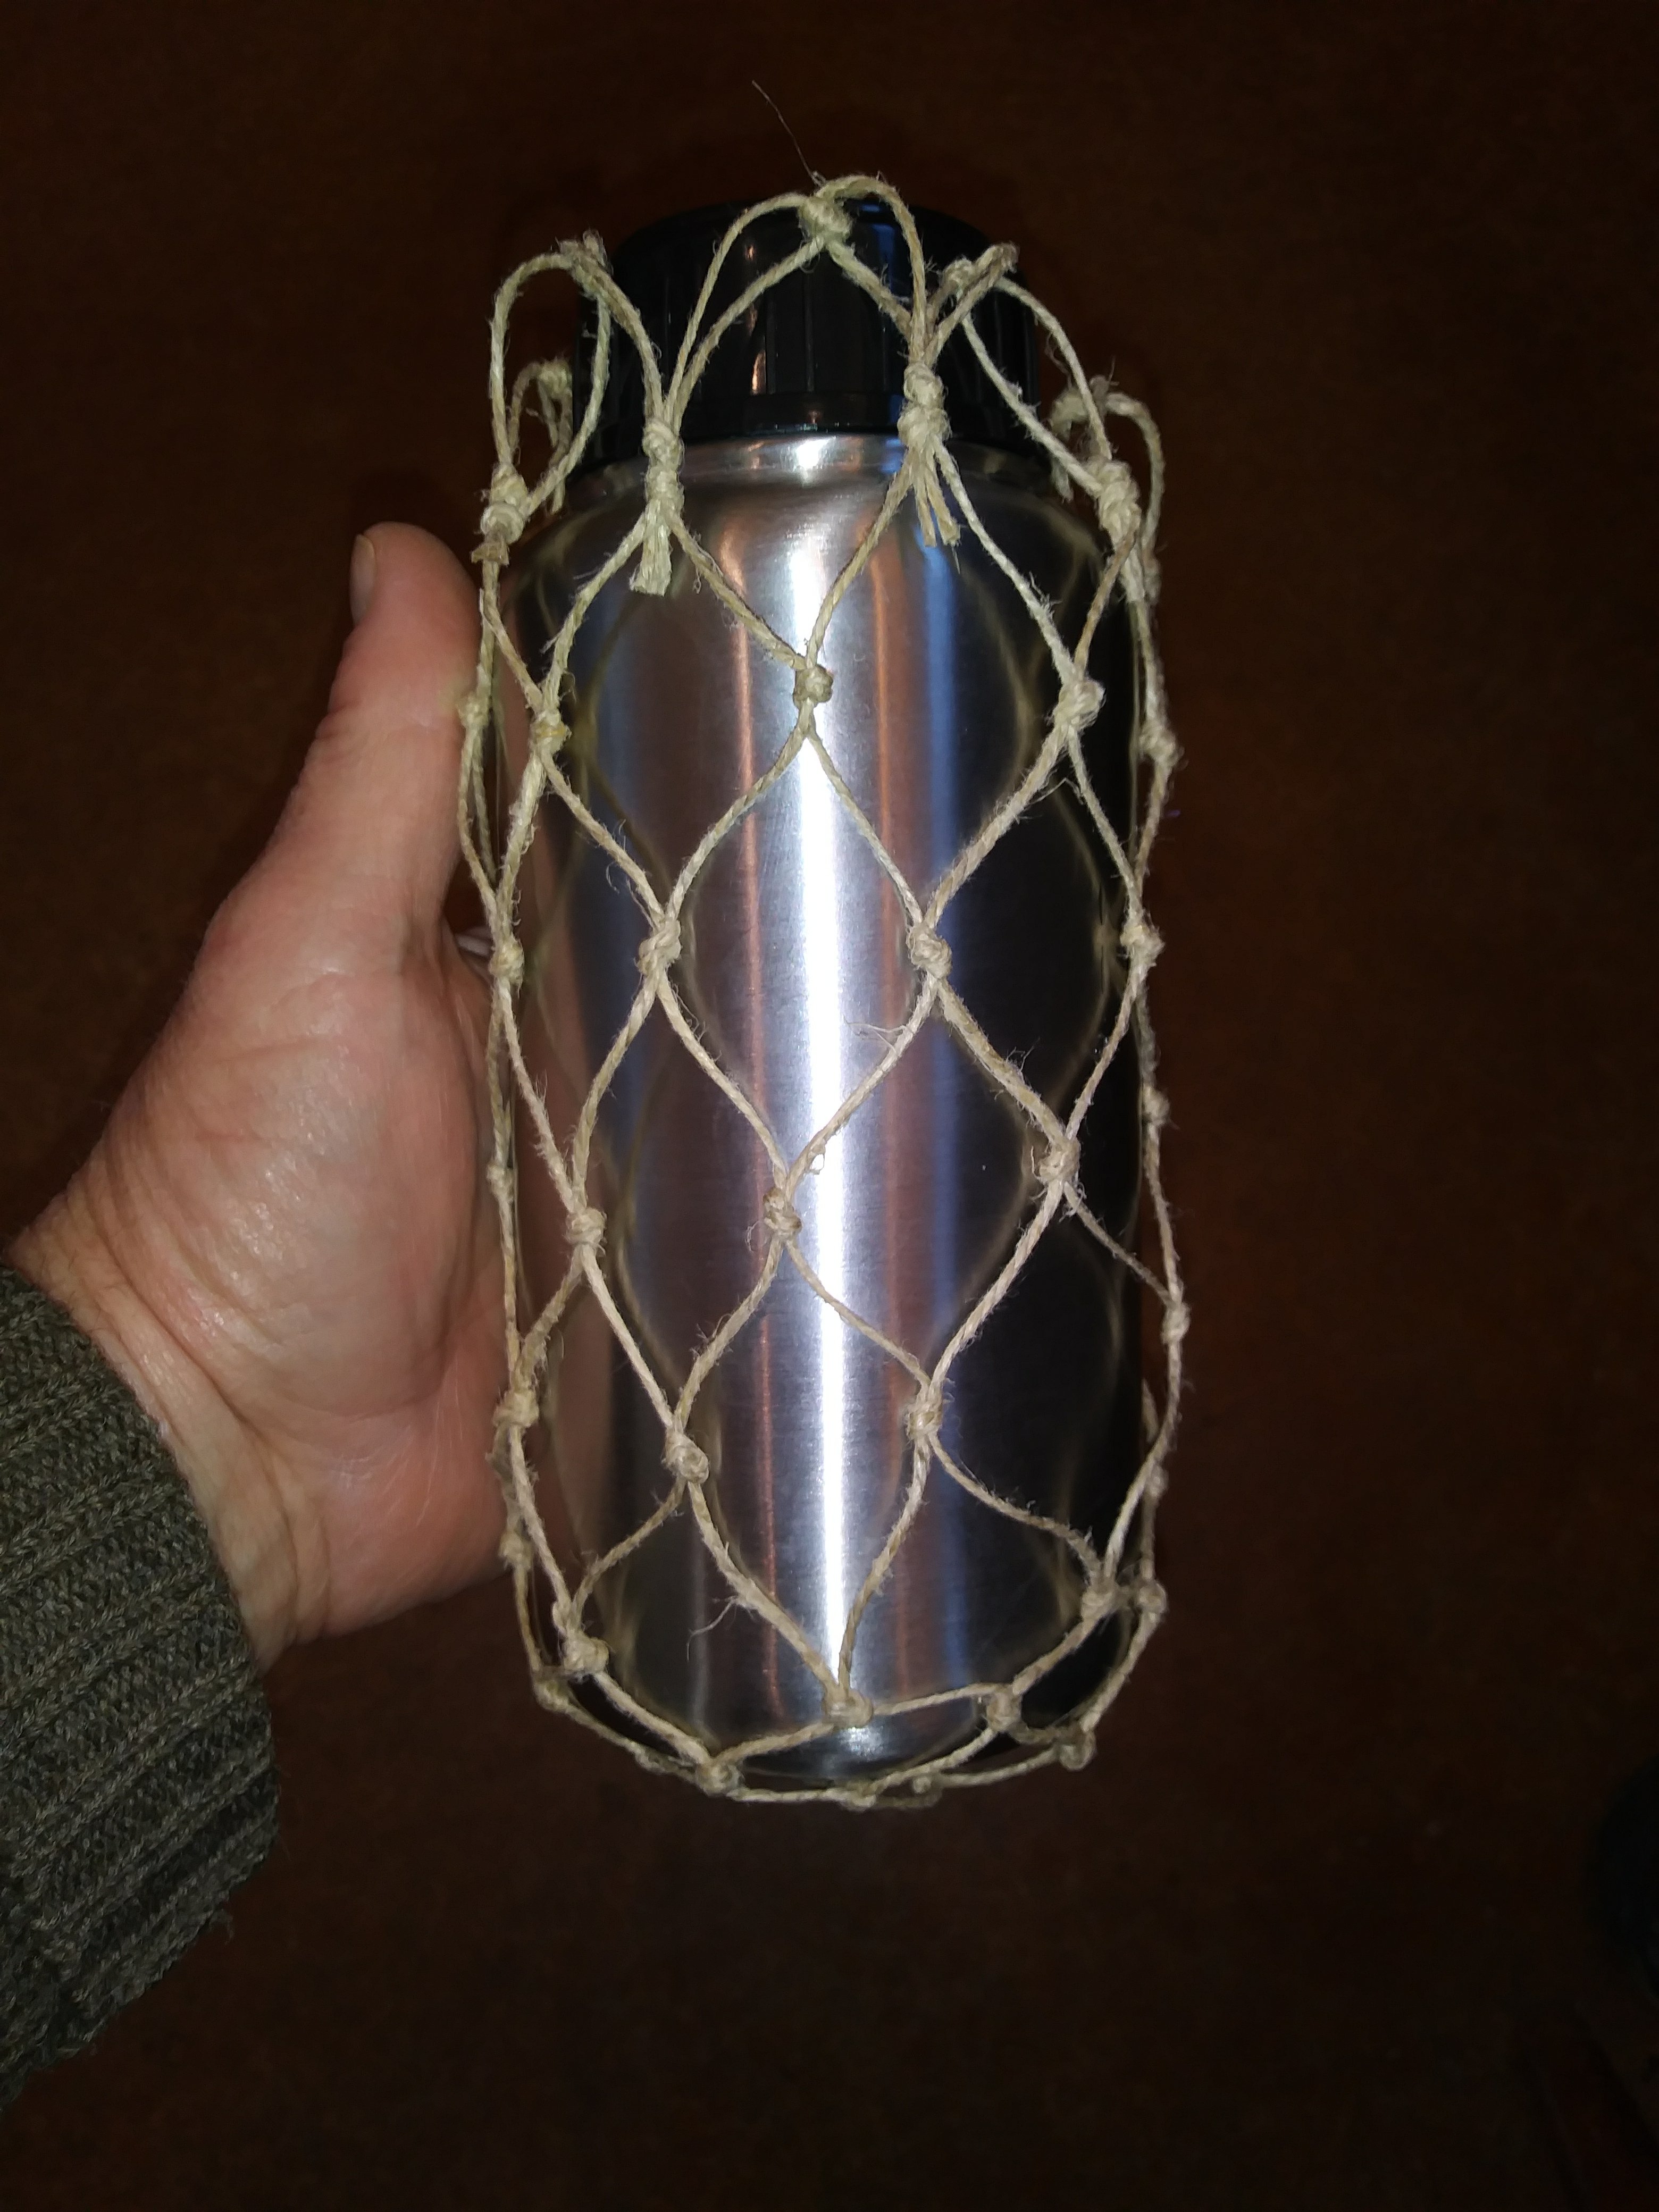
I ran the strap underneath the canteen to help support the weight. The finished product closed. And open. Ready for the trail again. I realize these instructions are not very detailed but this level of Technology is extremely simple and has been reinvented time and time again. It needs a little detailing if you are willing to spend the time and experiment a bit. Don’t be afraid to tie and untie things, to add more string, to have a less than perfect outcome.
This is how we truly learn. When we have to make decisions on our own based on the skills, materials, and information we have at hand.
“When you feel you are sleeping on the breast of your mother, the earth, while your father, the sky, with his millions of eyes is watching over you, and that you are surrounded by your brother, the plants, the wilderness is no longer lonesome even to the solitary traveler.”
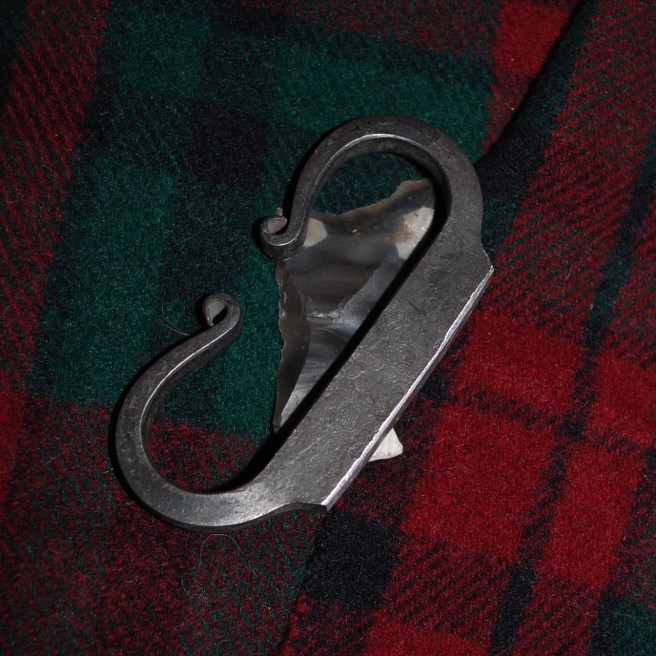
These are securely set in mule deer antler and are fitted with a loop for suspension.
I bought a small batch of unhafted Ferrocerrum rods recently. This came after finding out what a hit they were with some of my recent demonstrations. Being able to produce a ridiculously hot spark with little effort in all weather amazes even the most distracted student. Since the explosion of survival shows on television and internet media it seems these have not only become popular again but are getting bigger and bigger and bigger all the time.
Size isn’t everything folks!
And I’m not just saying that for the obvious reasons… For the minimalist hiker, camper, or general outdoorsperson, carrying a striker that will make tens of thousands of fires is generally enough. Seriously, how long do think you’re going to live anyway?
If you are not yet familiar with this technology it is essentially a metal striker made from iron and cerium, that when crumbled, shaved, or otherwise shredded to expose the inner materials, produces a spark about 3,000°C (5,430°F) and can directly light most small tinder. They have been around about 100 years but have really come back with the rise of the bushcraft and survival popularity.
This batch will probably sell fast but more will be on the way soon.
I like to keep one that easily fits into a pocket or can be tied to a backpack or worn around the neck. these meet all those requirements and more so, if you are interested in one for yourself or need the perfect stocking stuffer this yuletide season, take a trip to our Etsy shop and have a look https://www.etsy.com/shop/lostworldcrafts/.
After you have carefully selected the tree, cut it down, and (hopefully) had time to age the wood it is time to prep the bow staves.
Prepping bow staves is a fair amount of work but made easier with the right tools and a little experience. The examples below aged for nearly seven years in a dark, dry barn. These are nearly all hickory and therefore, are generally easy to split if the grain is respected. I use an old froe, mallet, and hammer for most of my splitting and only resort to steel wedges or power tools in rare, generally green cases. As most of the staves that I cut personally are 6’6″ – 7′ long, this is the time when they are sawed to a rough length; generally 65 – 70″. They are left long initially to account for any splitting of the ends that occurs during the drying process that will interfere with the finished bow.
Splitting hickory.
These staves were massive and can generally be made into two or three bows in the end; two from the outer portion and one from the inner. This isn’t always true for some older hickories as the heartwood “sets” and becomes dark and brittle. Taken in a deep valley, this tree was large enough and fast growing so doesn’t seem to be a problem. It is difficult to tell from the photo above but this is an extremely large piece of wood. It was weighed a few days after felling at 79.5 lbs. It was weighed again, just prior to splitting, almost seven years later at 48 lbs. That is nearly 30 lbs (5 gallons) of water that evaporated.
A clean break with the froe.
The above photo shows the froe in use, prying the two halves apart without much effort. Once started with a mallet in the end, it is just a matter of prying and moving down the staff.
I was doing these rather quickly and didn’t even move to my work shed for the process as they would be loaded up almost immediately.
The staves can now be safely de-barked and are generally ready to be roughed out, a relatively easy task on hickory, but not so with Osage orange (photo below). Osage needs to be shaved down to a single layer within the wood. In this case about a half inch inside the bark to find a suitable growth ring.
Osage orange, showing the contrast between the new and old growth.
One of the troubles with Osage orange wood is the transitional new growth on the outer (back) of the stave, visible as the white rings. This wood is not useful for bow making and needs to be cleanly removed down to a single growth ring. In the case above, several old growth rings will be removed as well as they are inconsistent and pinch out on the right side of this stave. It is generally wise to choose one of the thicker rings to serve as the back as it is under a lot of tension during the draw.
New bow blanks stand next to a full-size stave as they are roughed out.
This is about half the useful bow staves made in a single run with a “whole” stave on the right to show how they begin. This one weighed about 80 lbs green but only about 50 lbs dry.
A pictorial step-by-step of the bow-making process.
This quick look isn’t intended to replace the one-on-one learning of a real teacher or to cover all aspects of the art that come from years of practice. Expect both success and failure and don’t let either one dominate your learning. Education is a process, not an instance.
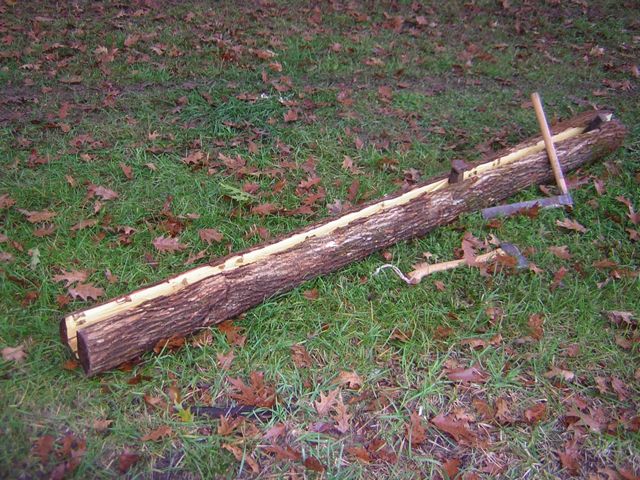
Felled stave that has aged a couple years in the dark and relative dryness of the barn.
Splitting the seasoned Osage orange (Bois d’Arc) stave is shown above. Not visible here are short hickory wedges that are jammed into the growing crack to keep the stave from snapping shut. With some woods the staves will simply pop apart but it seems that, more often than not, the splitter must overcome the tenacity of the fibrous wood. Power sawing is definitely a possibility but requires more tools, more energy, and does not show the irregularities as well. Splitting puts you in touch with the soul of the wood.
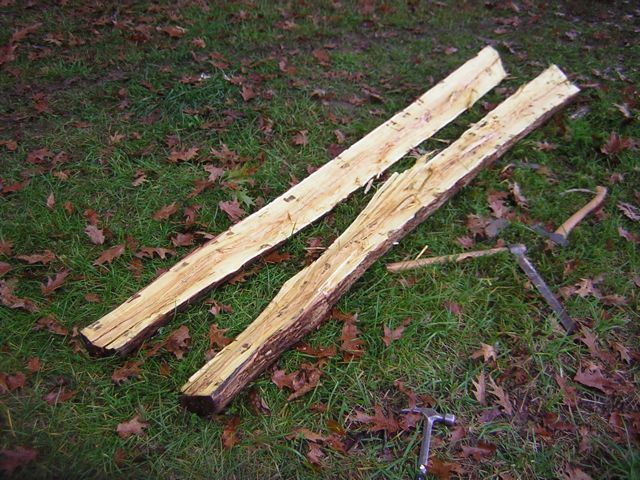
Laid open, it is time to examine for undiscovered twists, knots, and other irregularities.
Splitting can be a tough process. As can be seen in the photo above, I use an axe, froe, and hammer. I’m awful when it comes t remembering to stop and take photographs. After cleaning up and heading to the next phase, I had to re-stage this photo and forgot to put the wedges back in.
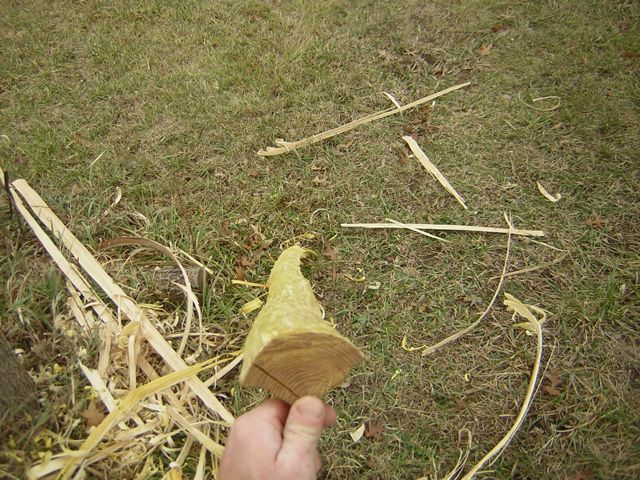
Stripping down to reveal the beauty underneath.
Some species of white woods debark quite easily and the bow can be made directly from the outer growth rings. Not so with Osage orange. The whiter new wood is visible in the stave above as the outer rings are worked down to a single thick growth ring. This process is easiest with a sharp draw knife working downward. Your weight can be used to pull through the bark. Gravity is your friend.
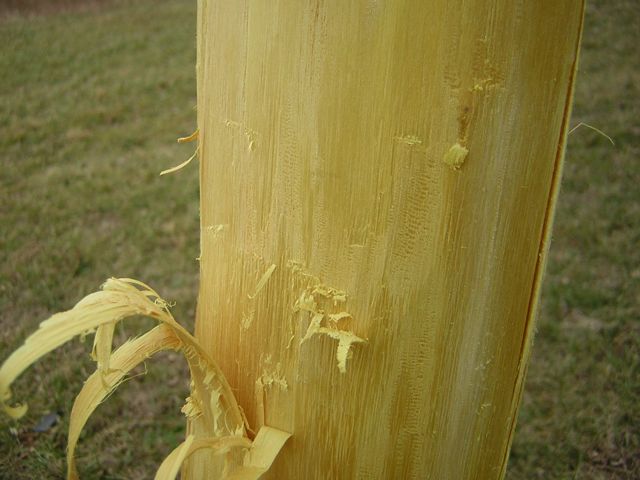
Revealing the different look, color, and texture of the growth rings.
Above is a close-up of working down to a single growth ring. With Osage, there is a white, porous, vesicular layer between hard wood rings. This is just visible here as the white wood. It should be worked down to a single, dark and dense layer; preferably a thick, slow-growth year ring.
Sighting down the clean stave.
Not perfectly straight, but then it would hardly be Osage otherwise. I can work with this. It’s time to imagine a perfectly straight line down the back of the bow. This will be your starting point when laying it out.
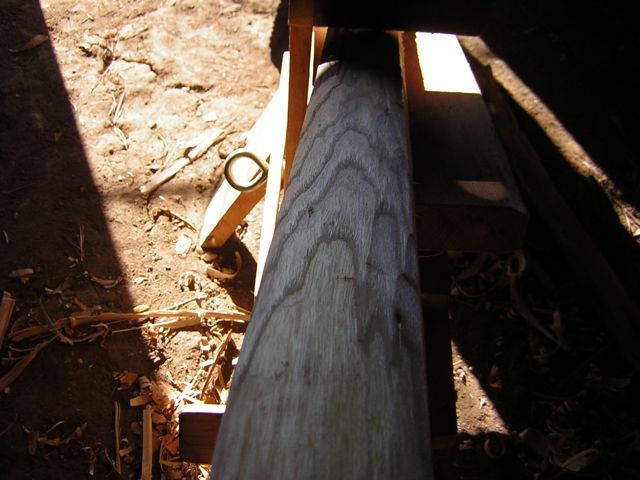
Another look at growth rings revealed.
The growth rings are quite visible in this low, raking light. The smooth area nearest the viewer is down to the desired ring. This will be the “back” of the bow, meaning the side facing away from the shooter. Crossing the rings could cause the limb to “lift” and crack as the rings are stressed and pulled apart.
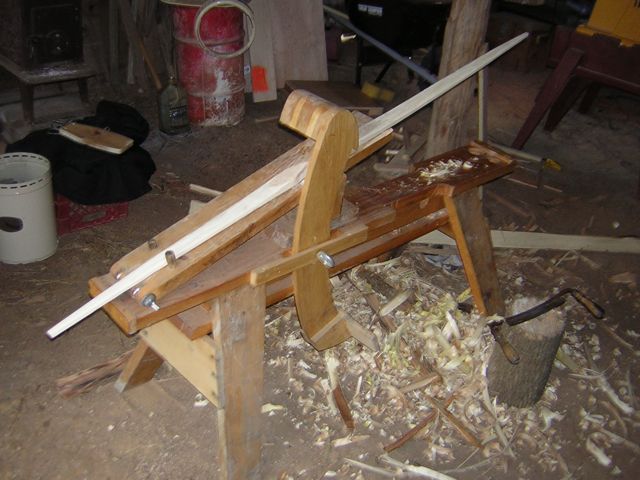
Shaping and thinning.
This is nearing its final shape. This is a different stave from the one shown above but gets the point across. I’ve documented the next part of the process elsewhere but will recap soon.
If you want to make a bow, dive in, don’t be afraid. Get a piece of wood and go to it.