There are some new projects coming off the bench.Here’s a new minimalist traveler’s wallet. I’m still working through the design and construction process but like it so far. Simple three-pocket design; a vertical a horizontal card pocket as well as a large one for bills.
A bucket purse made from an oil-tanned leather. Welted and bound with thin harness-grade bark tanned leather with a heavier leather shoulder strap.
I try to put some sort of bling into projects. This is a historic heart design was cut freehand and balances the antler toggle on the other side.
Fully lined with a batik print my daughter bought for a skirt.
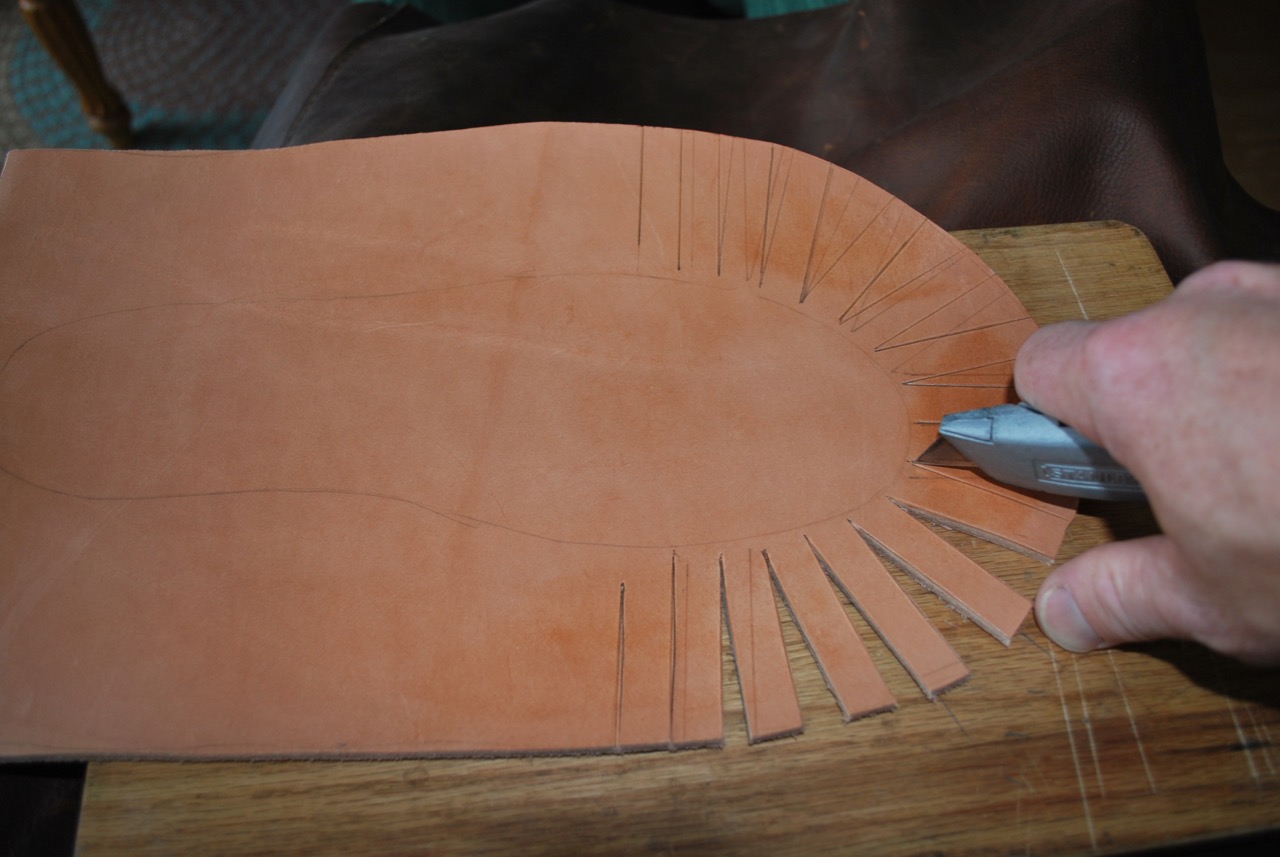
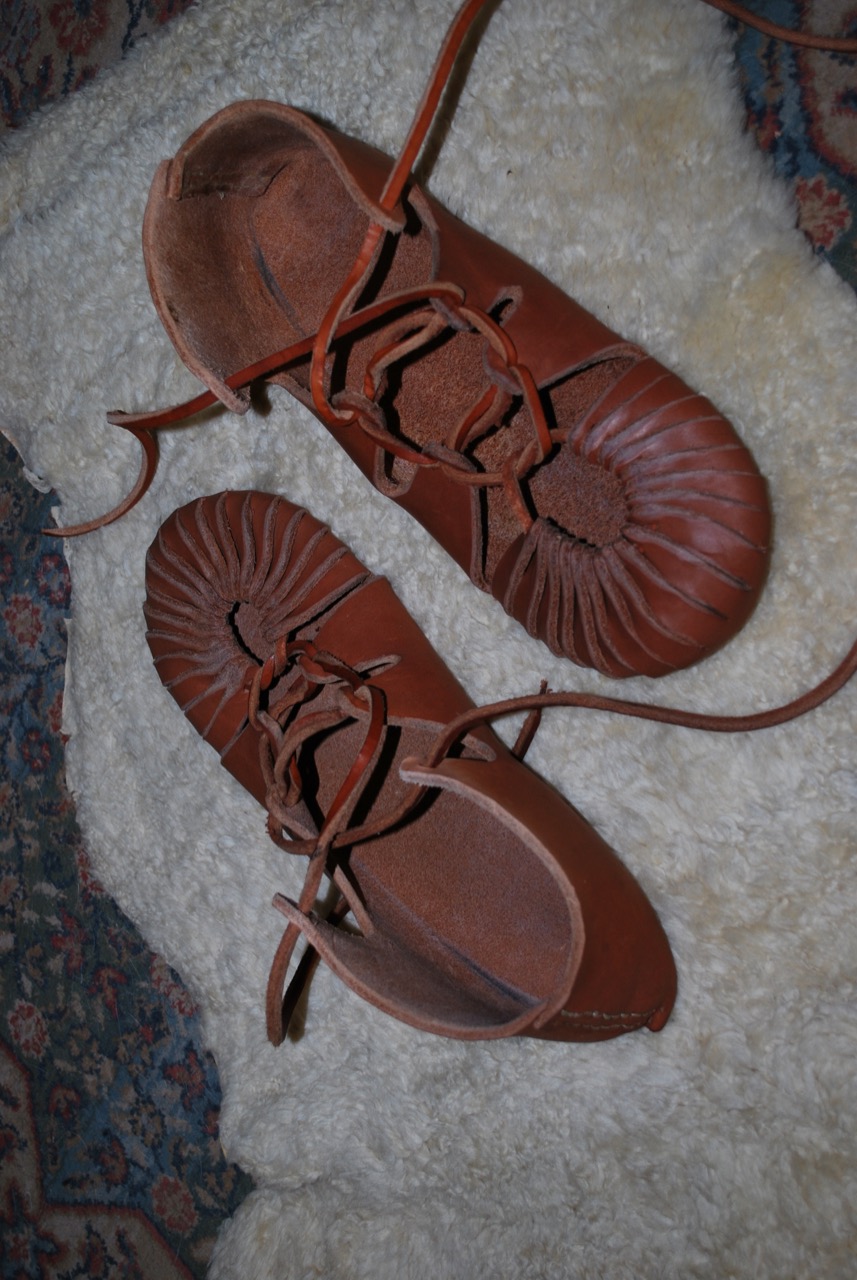
A while ago I received a request to make a pair of carbatinae (ghillie shoes) for a reenactor. It was the first time I have done this long-distance without being able to measure the foot directly. Luckily, we had good communication and I had a shoe last in his size so with these factors and the fact that this style is a fairly forgiving fit, I was able to create something he was happy with.
Being constructed from 12 oz Hermann-Oak harness leather, these should last for a very long time if not worn extensively on wet concrete.
I really love the simplicity of this design and continue to learn and modify my technique with each new pair. With high quality commercially tanned leather, they can’t be made particularly cheap, but with high quality materials you certainly get what you pay for.
Very little sewing makes this shoe a fairly quick project to complete once the cutting is done.
This was the first time I used a last to make this type shoe but it was a big help in the forming stage.
Setting the pattern and cutting them out is most of the battle.
Once they’re broken in, they fit your foot like a leather stocking, allowing for a barefoot, but well-protected feel. I certainly like this shoe.
I have needed a stitching pony for a long time now…
The two-hour stitching pony.
Like so many other undone projects, this one has been stirring around in my head for several years. Since my efforts have been so focused on sewing leather lately, the time had come for a new and useful tool in the shop. I’ve looked at plenty stitching horses and ponies over the years and even used a few n person so I understood the basics of what I needed and began eyeing up the scrap pile for obvious parts.
Not absolutely necessary, but it’s nice to be able to open the jaws fully.
I decided to keep the project simple, small, and portable while making as few purchases as possible. I was able to gather up the lumber, leather, hinge, screws, glue, and tacks in just a few minutes and get to work. Power tools make jobs like this easy so the boards were quickly ripped, cut, and clamped up to dry overnight. A little cleanup in the morning yielded a working model suggesting a few minor changes. The opening of the throat was widened by 1/2″and I decided a longer bolt would be useful for fat projects.
This meant a trip to the actual hardware store setting the project bill up to $1.07 with a total work time of about two hours. We’re good to go…
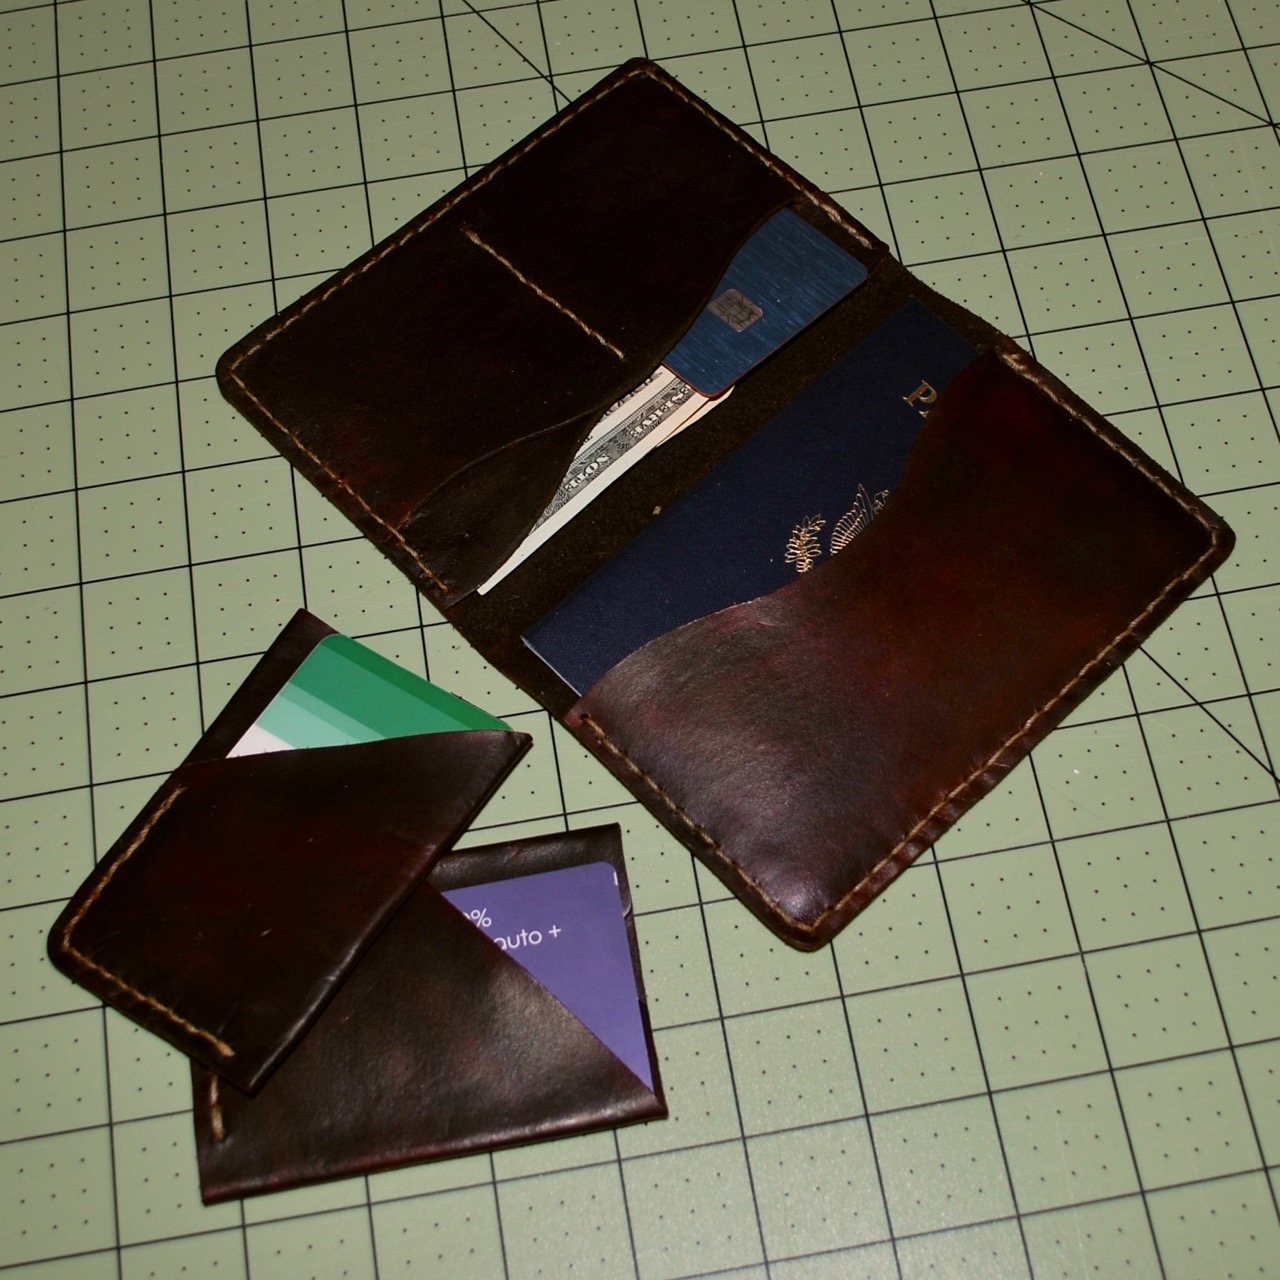
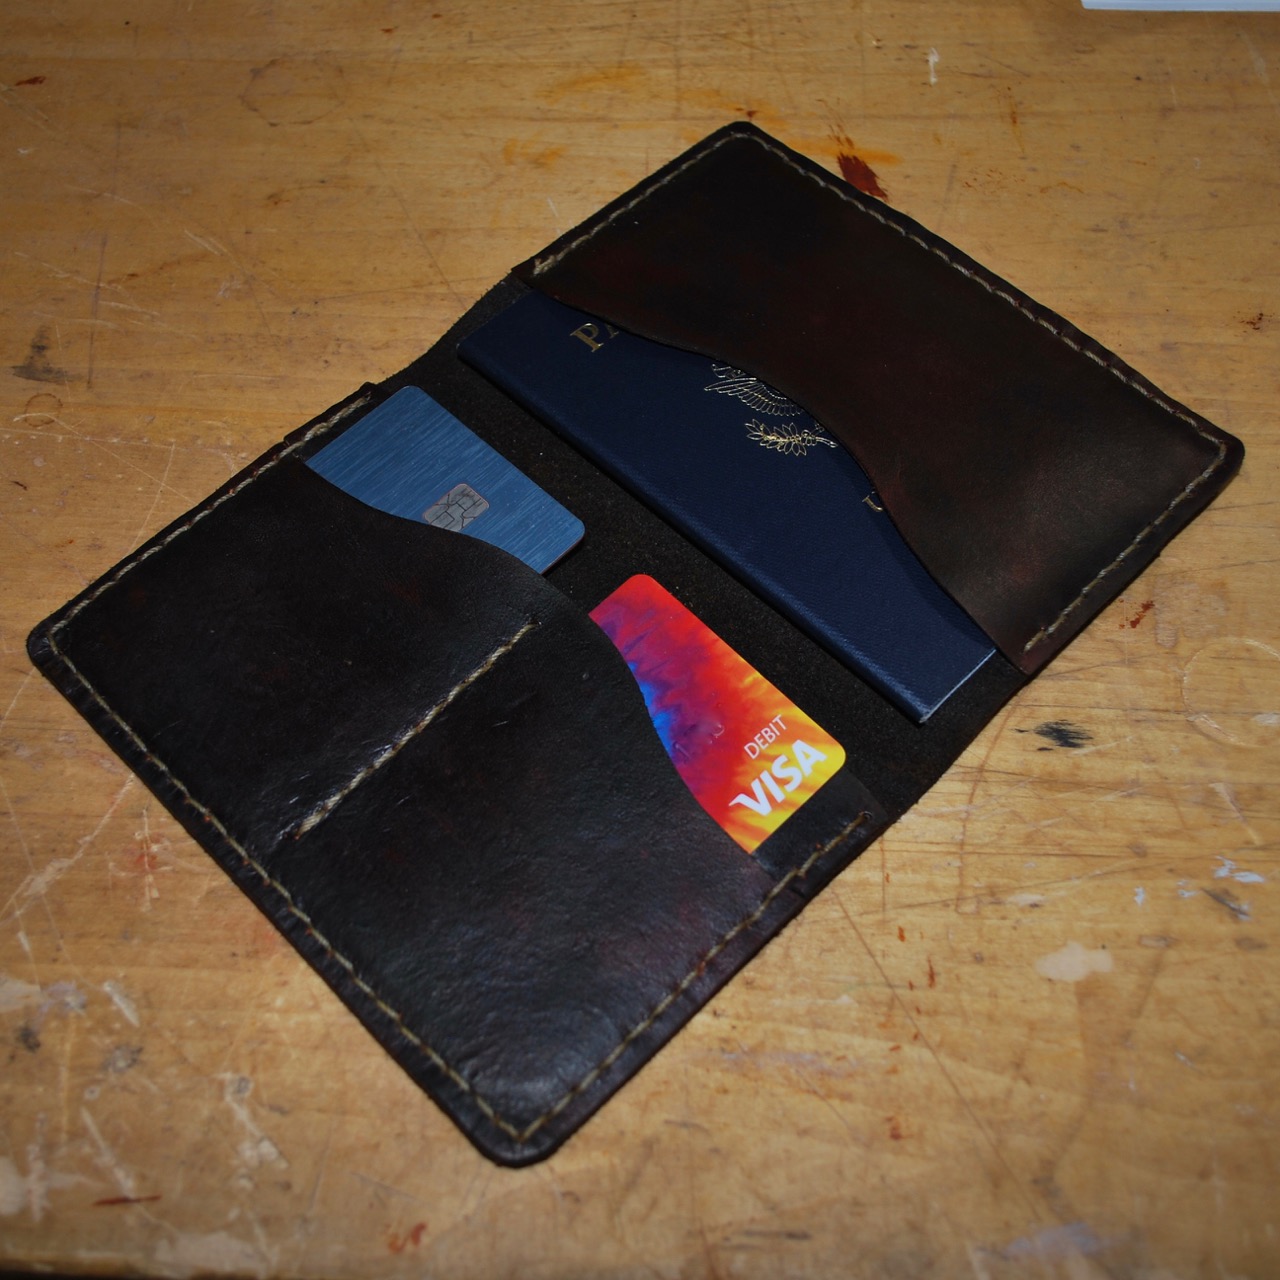
Maybe this is a little mundane but I’ve been using the cold and snowy weather as an excuse to do some cutting and sewing of leather. I completed a passport wallet and finished up another minimalist wallet design. I got the pattern for the larger travel wallet from Tony, the owner/designer at DieselpunkRo. He sells finished goods, patterns, and gives a lot of good advice for makers working from his patterns on his Facebook group page.
My three newest creations.
If you follow his Facebook group, he will occasionally share free, downloadable patterns. I have two patterns from him so far and they are both great.
The large wallet is a handy, four pocket affair that snugly holds a standard passport, cards, and cash.
This is another good starter project that easily yields a great product.
We were acting like shut-ins today because of a surprise snow storm so I’ve been able to jump to another leather-related project. I’ll share some photos soon.
I try to live by the creed of learning and making something good every day.
The Minimalist Wallet
As we have been pondering the holiday season it seemed a good time to get a jump on some leatherworking projects I’ve had in mind the past few months. This morning, before getting to work on other chores, I decided to take a little time and work out a slightly modified Minimalist Wallet. If you have followed this blog for long, you may have seen a couple earlier wallet projects we shared HERE and HERE. This isn’t a complicated project and might be a good one to start with if you trying your hand at leatherworking for the first time.
The All-Encompassing Symbol of the Age
Making the Pattern –
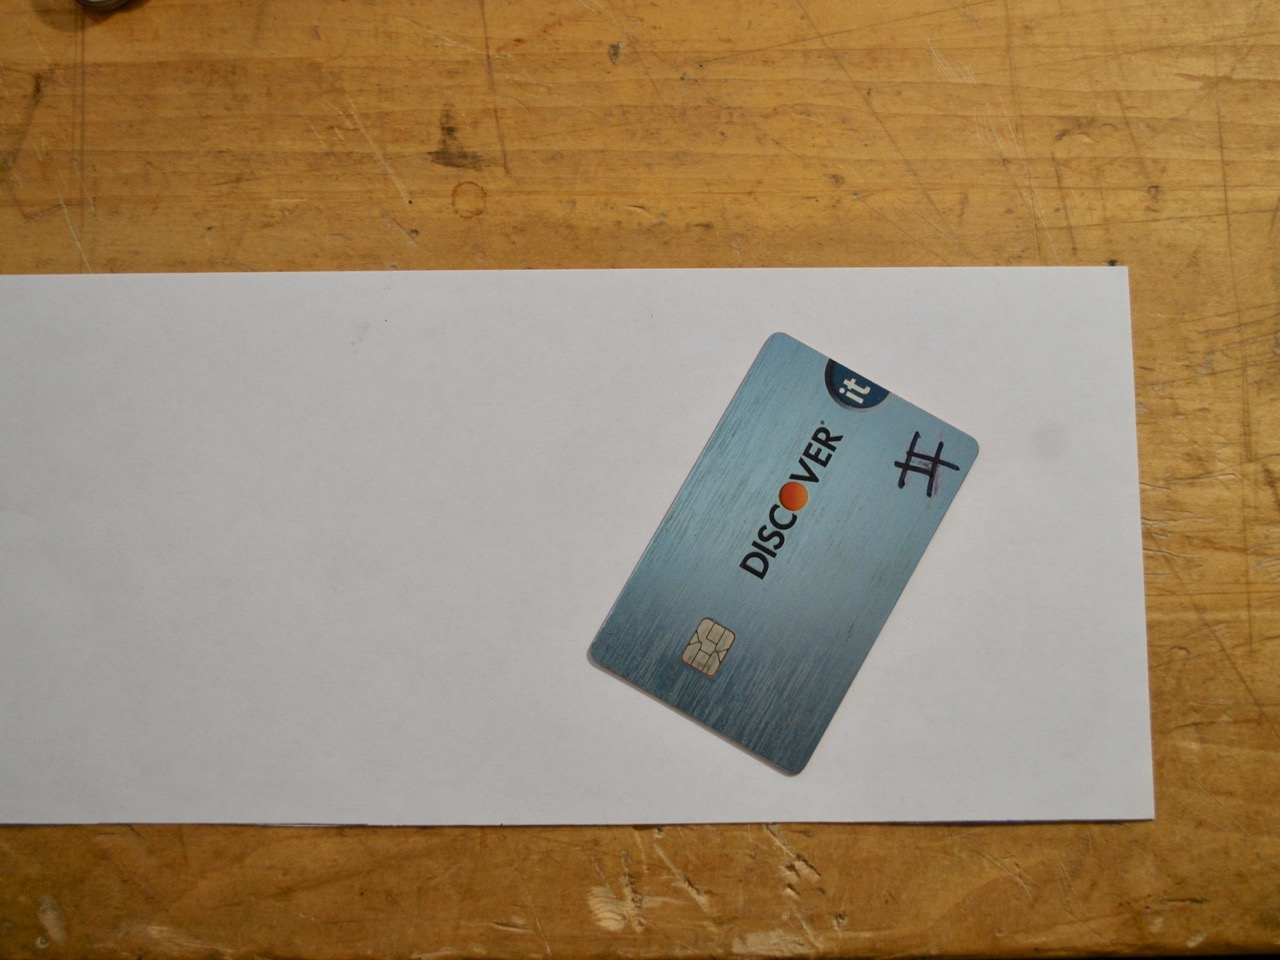
It would be pretty optimistic to just dive in and start cutting out a wallet without knowing what needs to fit. I used a debit card for scale as there will inevitably be a couple of these in just about any modern traveler’s pocket. I didn’t put a lot of time into the pattern as I have made a similar style before and knew the basics of what I wanted; essentially two pockets and very little sewing.
A Bit of Sloppy Origami to Test the Dimensions
To create two pockets, there needs to be three layers; two on the outside and one to divide. To make the cards more accessible, the outer pocket will be a “reveal” and I chose to do this the simplest way possible, by a diagonal straight line.
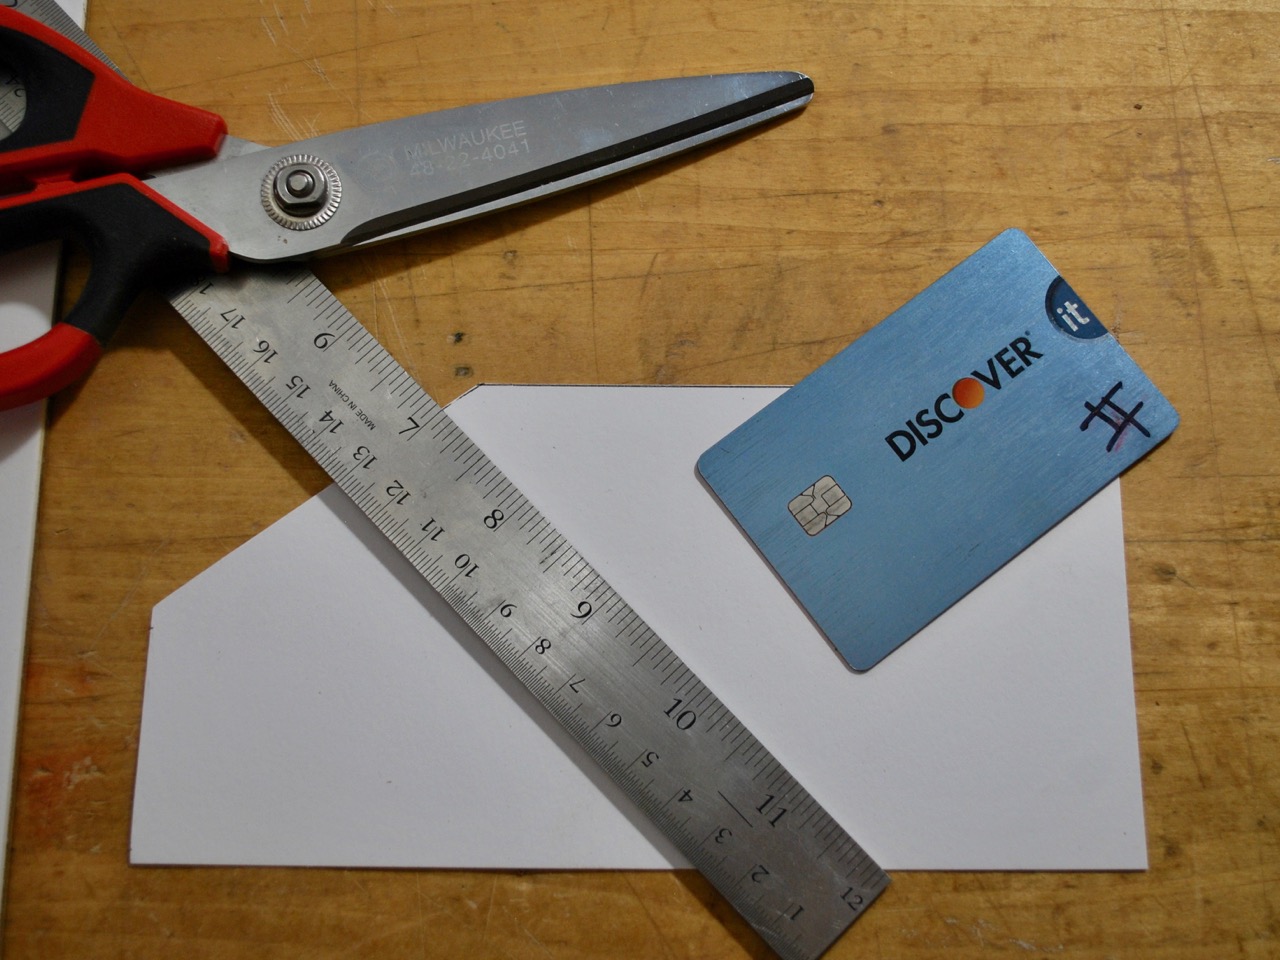
Test Fitting and Trimming the Draft Pattern
I ended up tightening the width and lengthening the entirety just a bit from my original estimates for a better fit. The difficult part is over.
The Draft is Transferred to Stiff Bristol Board for Multiple Uses
After the pattern is transferred to the card stock, it can be used many times without fuss. It is a good idea to label your patterns before storage as they begin to look alike when you amass a large folder of them (was this a pocket, part of a shoe, some sort of handle cover?).
Getting Down to Business –
The next step is to cut out the pattern on appropriate leather. I’m using Hermann Oak 1.5 mm tooling side that was leftover from an earlier project. Neatness in cutting is very important as it will affect the look of the entire piece if the cuts are even a millimeter or two off or wavering in any way. Since most people seem to prefer dark leathers for this sort of thing I chose to dye it Medium Brown with Fiebings Leather Dye.
Wet with Dye
After the dye sets you’re free to move on. I started by marking and awling the stitching holes at about a 5 mm increment. I will admit, this was not my straightest set of stitching lines ever.
Punching the Holes
I almost always use a double needle saddle stitch when sewing leather as it is the best and strongest choice in most cases. I chose a contrasting thread to give it a fine finished look.
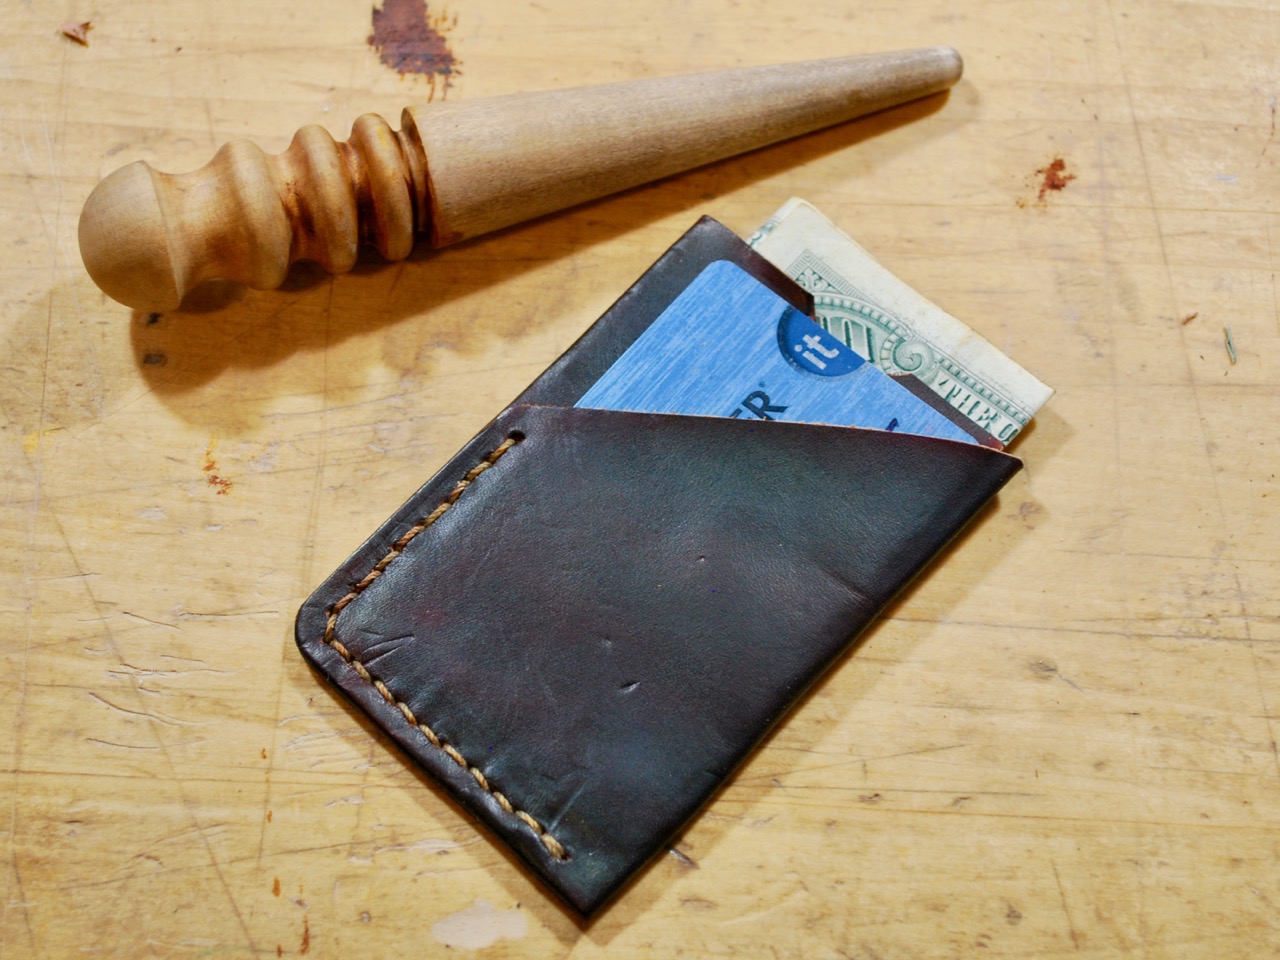
Finishing Up
And finally, the edges were dyed again and burnished to create a smooth, finished look. Overall, I’m quite satisfied with the outcome. This one will be the prototype to work from and I’ll be able to take a little more care now that I have learned from this one. If I ever get around to making enough to sell, I’ll put them on my Etsy Store.
To view this project on Instructables, click the link here: Minimalist Wallet
I have a slightly more complex project laid out for later. If I take the time to document it, I’ll post it up here.
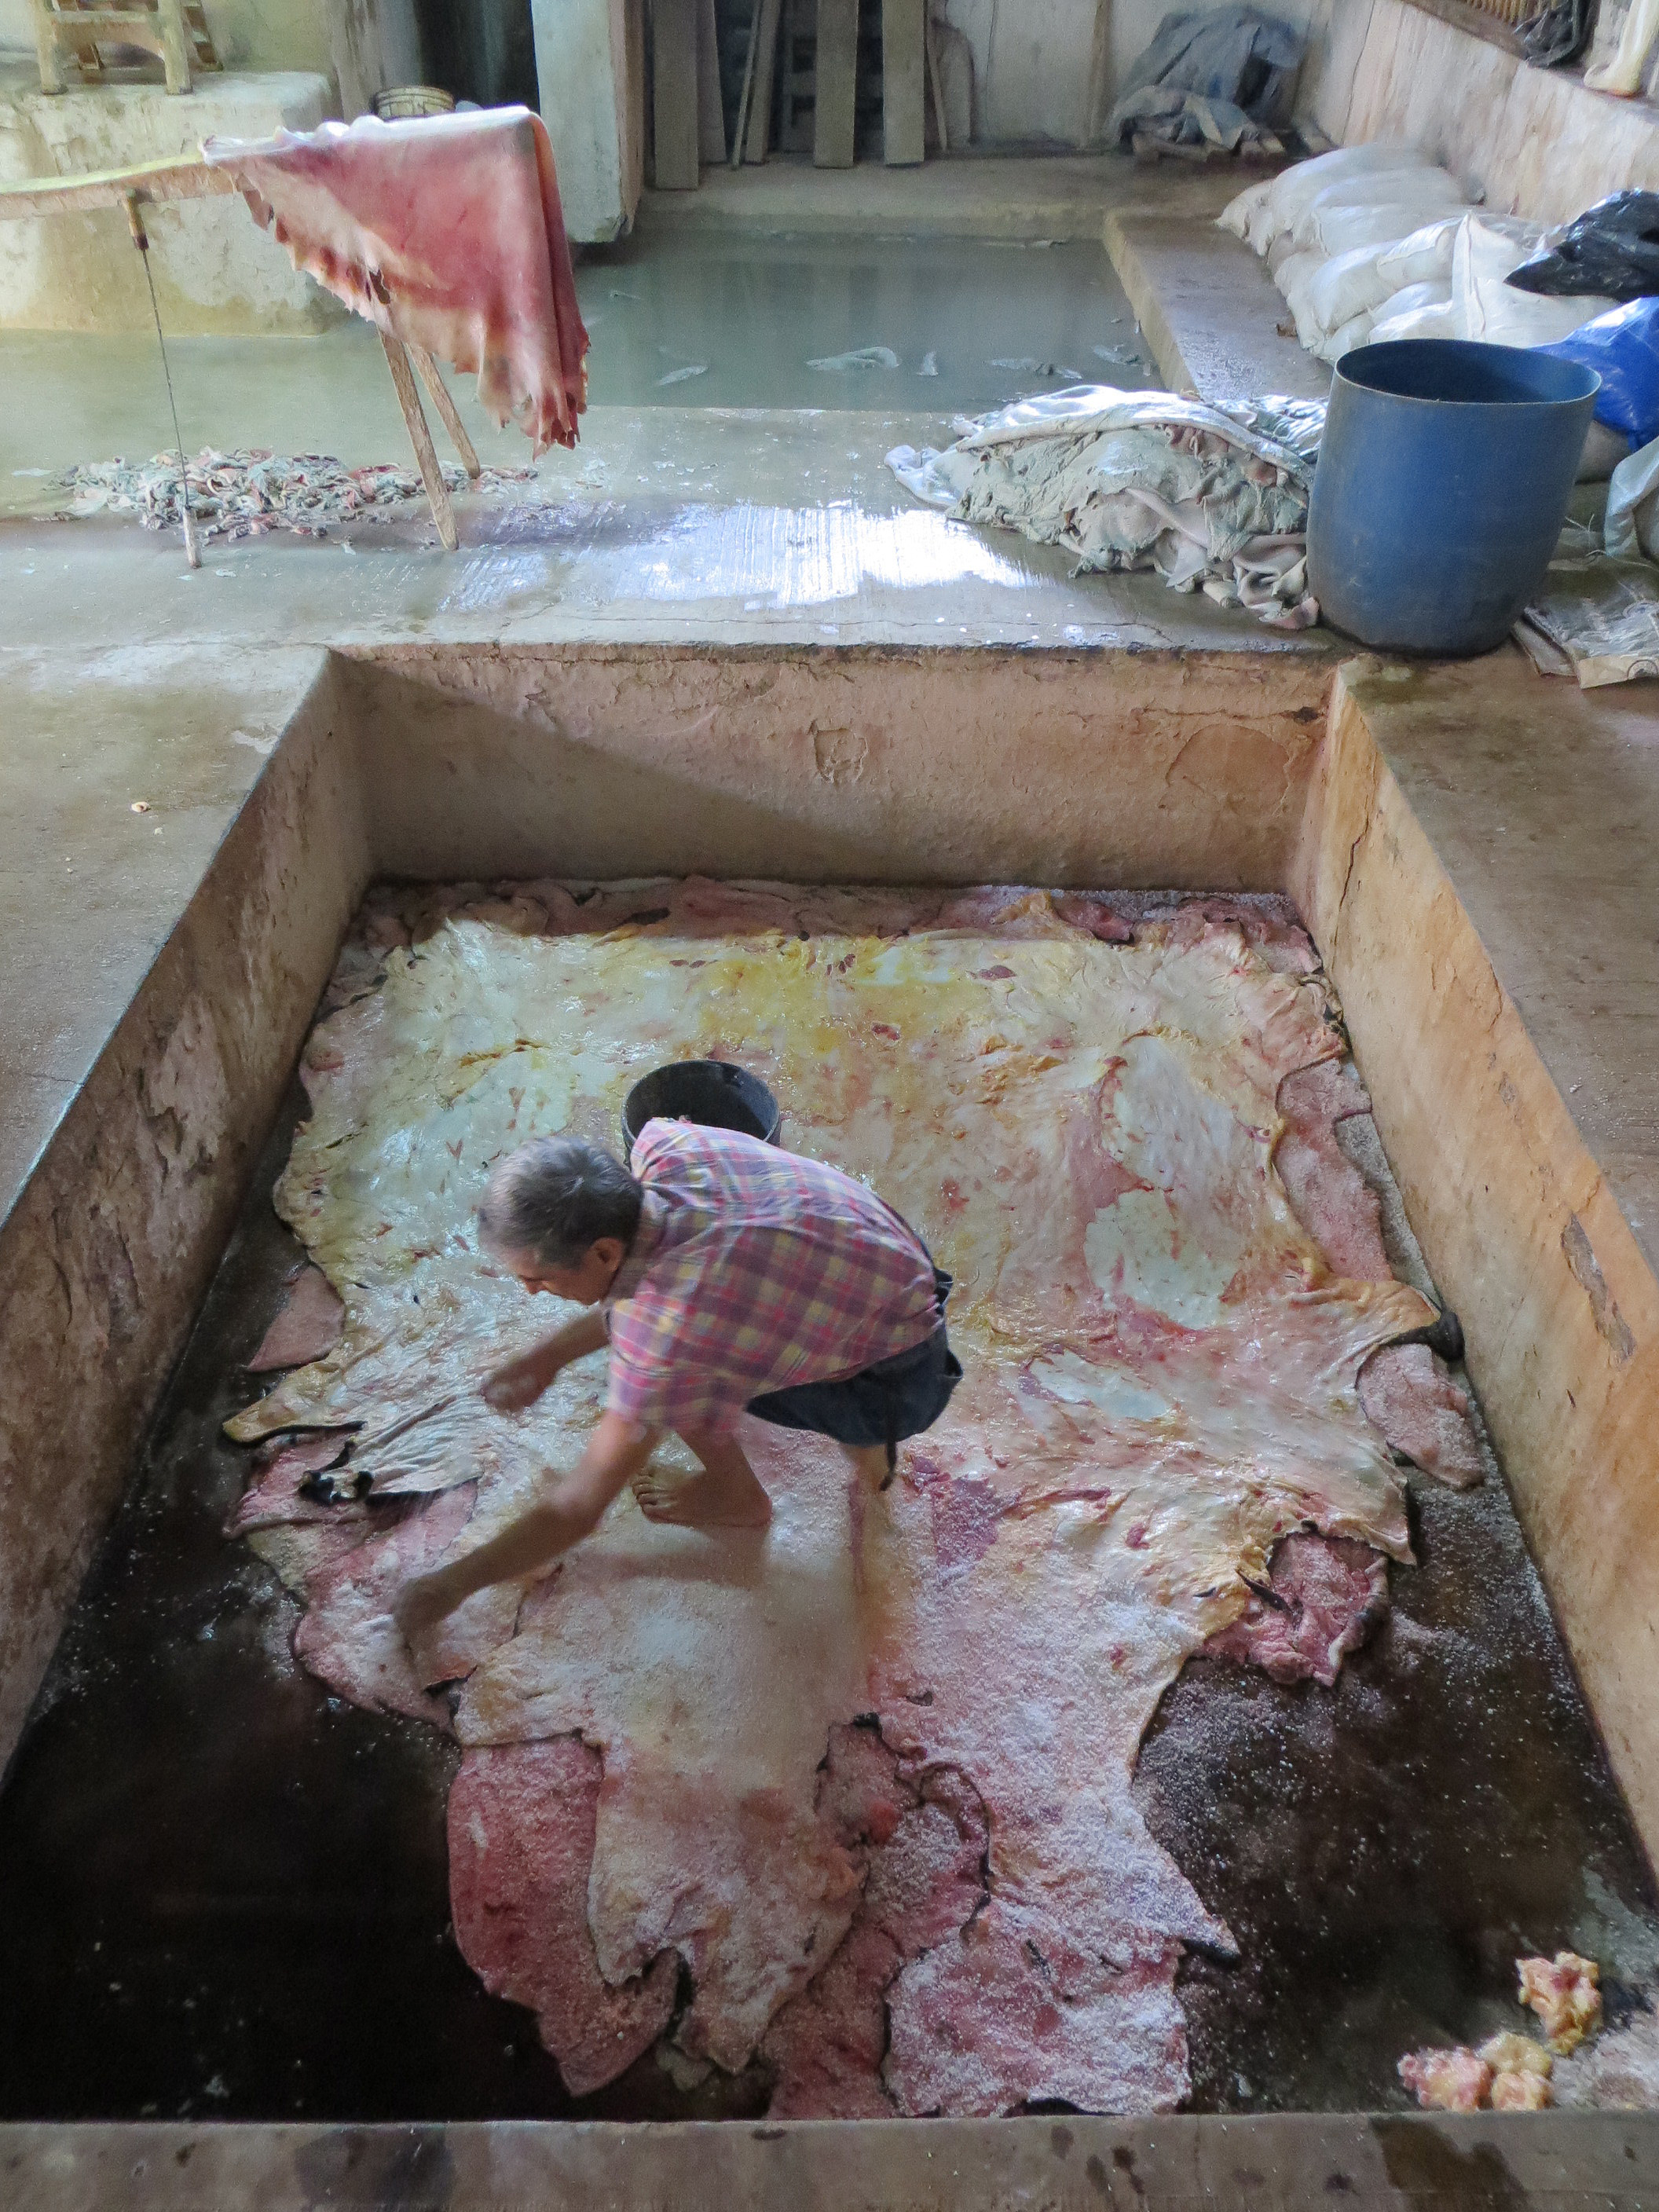
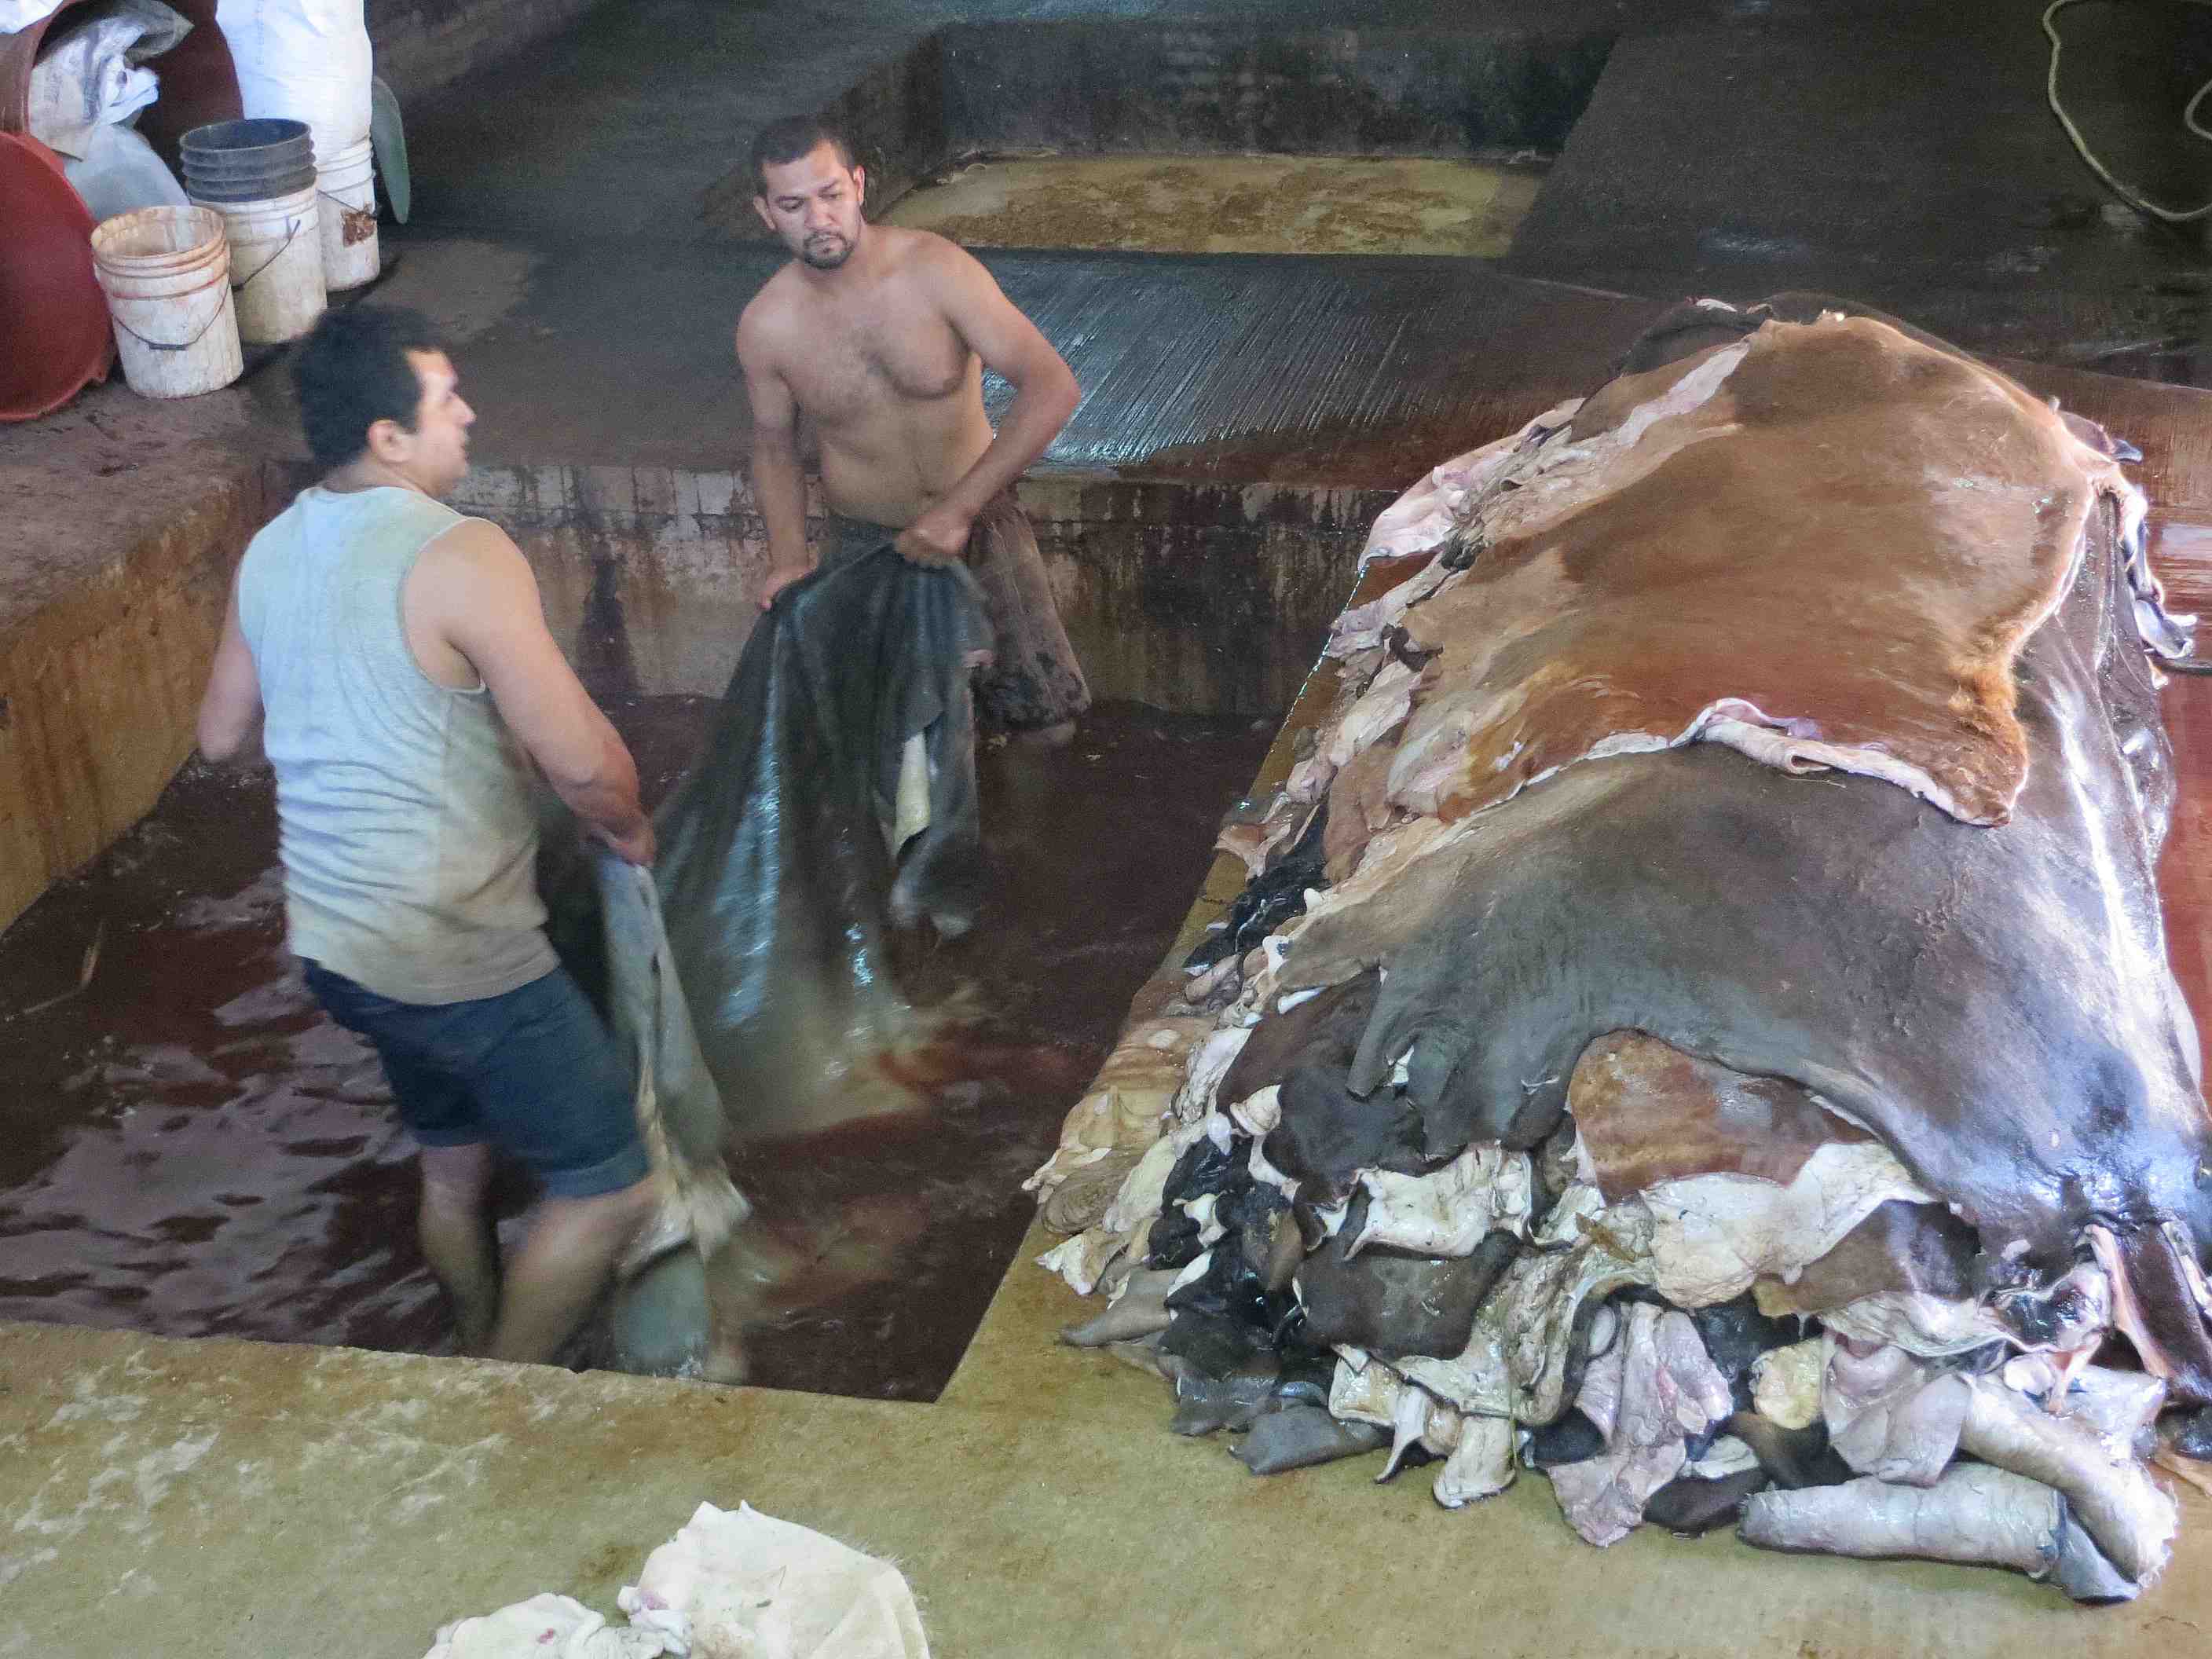
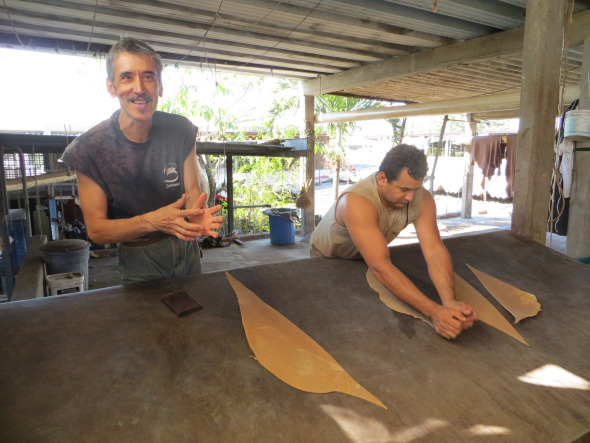
Many years ago, in Morocco, I was able to tour an ancient tannery and see some of the process of creating beautiful leather. I use leather for many projects and although I do some brain tanning myself, I purchase all of my truly “tanned” leathers from others.
Click the image to visit the Moroccan National Tourist Office on Facebook. If you are interested in a description of the tannery at Fez, have a look at Becca’s post about it over on AlwaysCarryOn.
One very important lesson about tanning I learned in Africa was that I never want to work in a African tannery when it’s 100 degrees in the shade. The smell makes a feed lot in Texas almost seem habitable and hits one in the face like a dense fog.
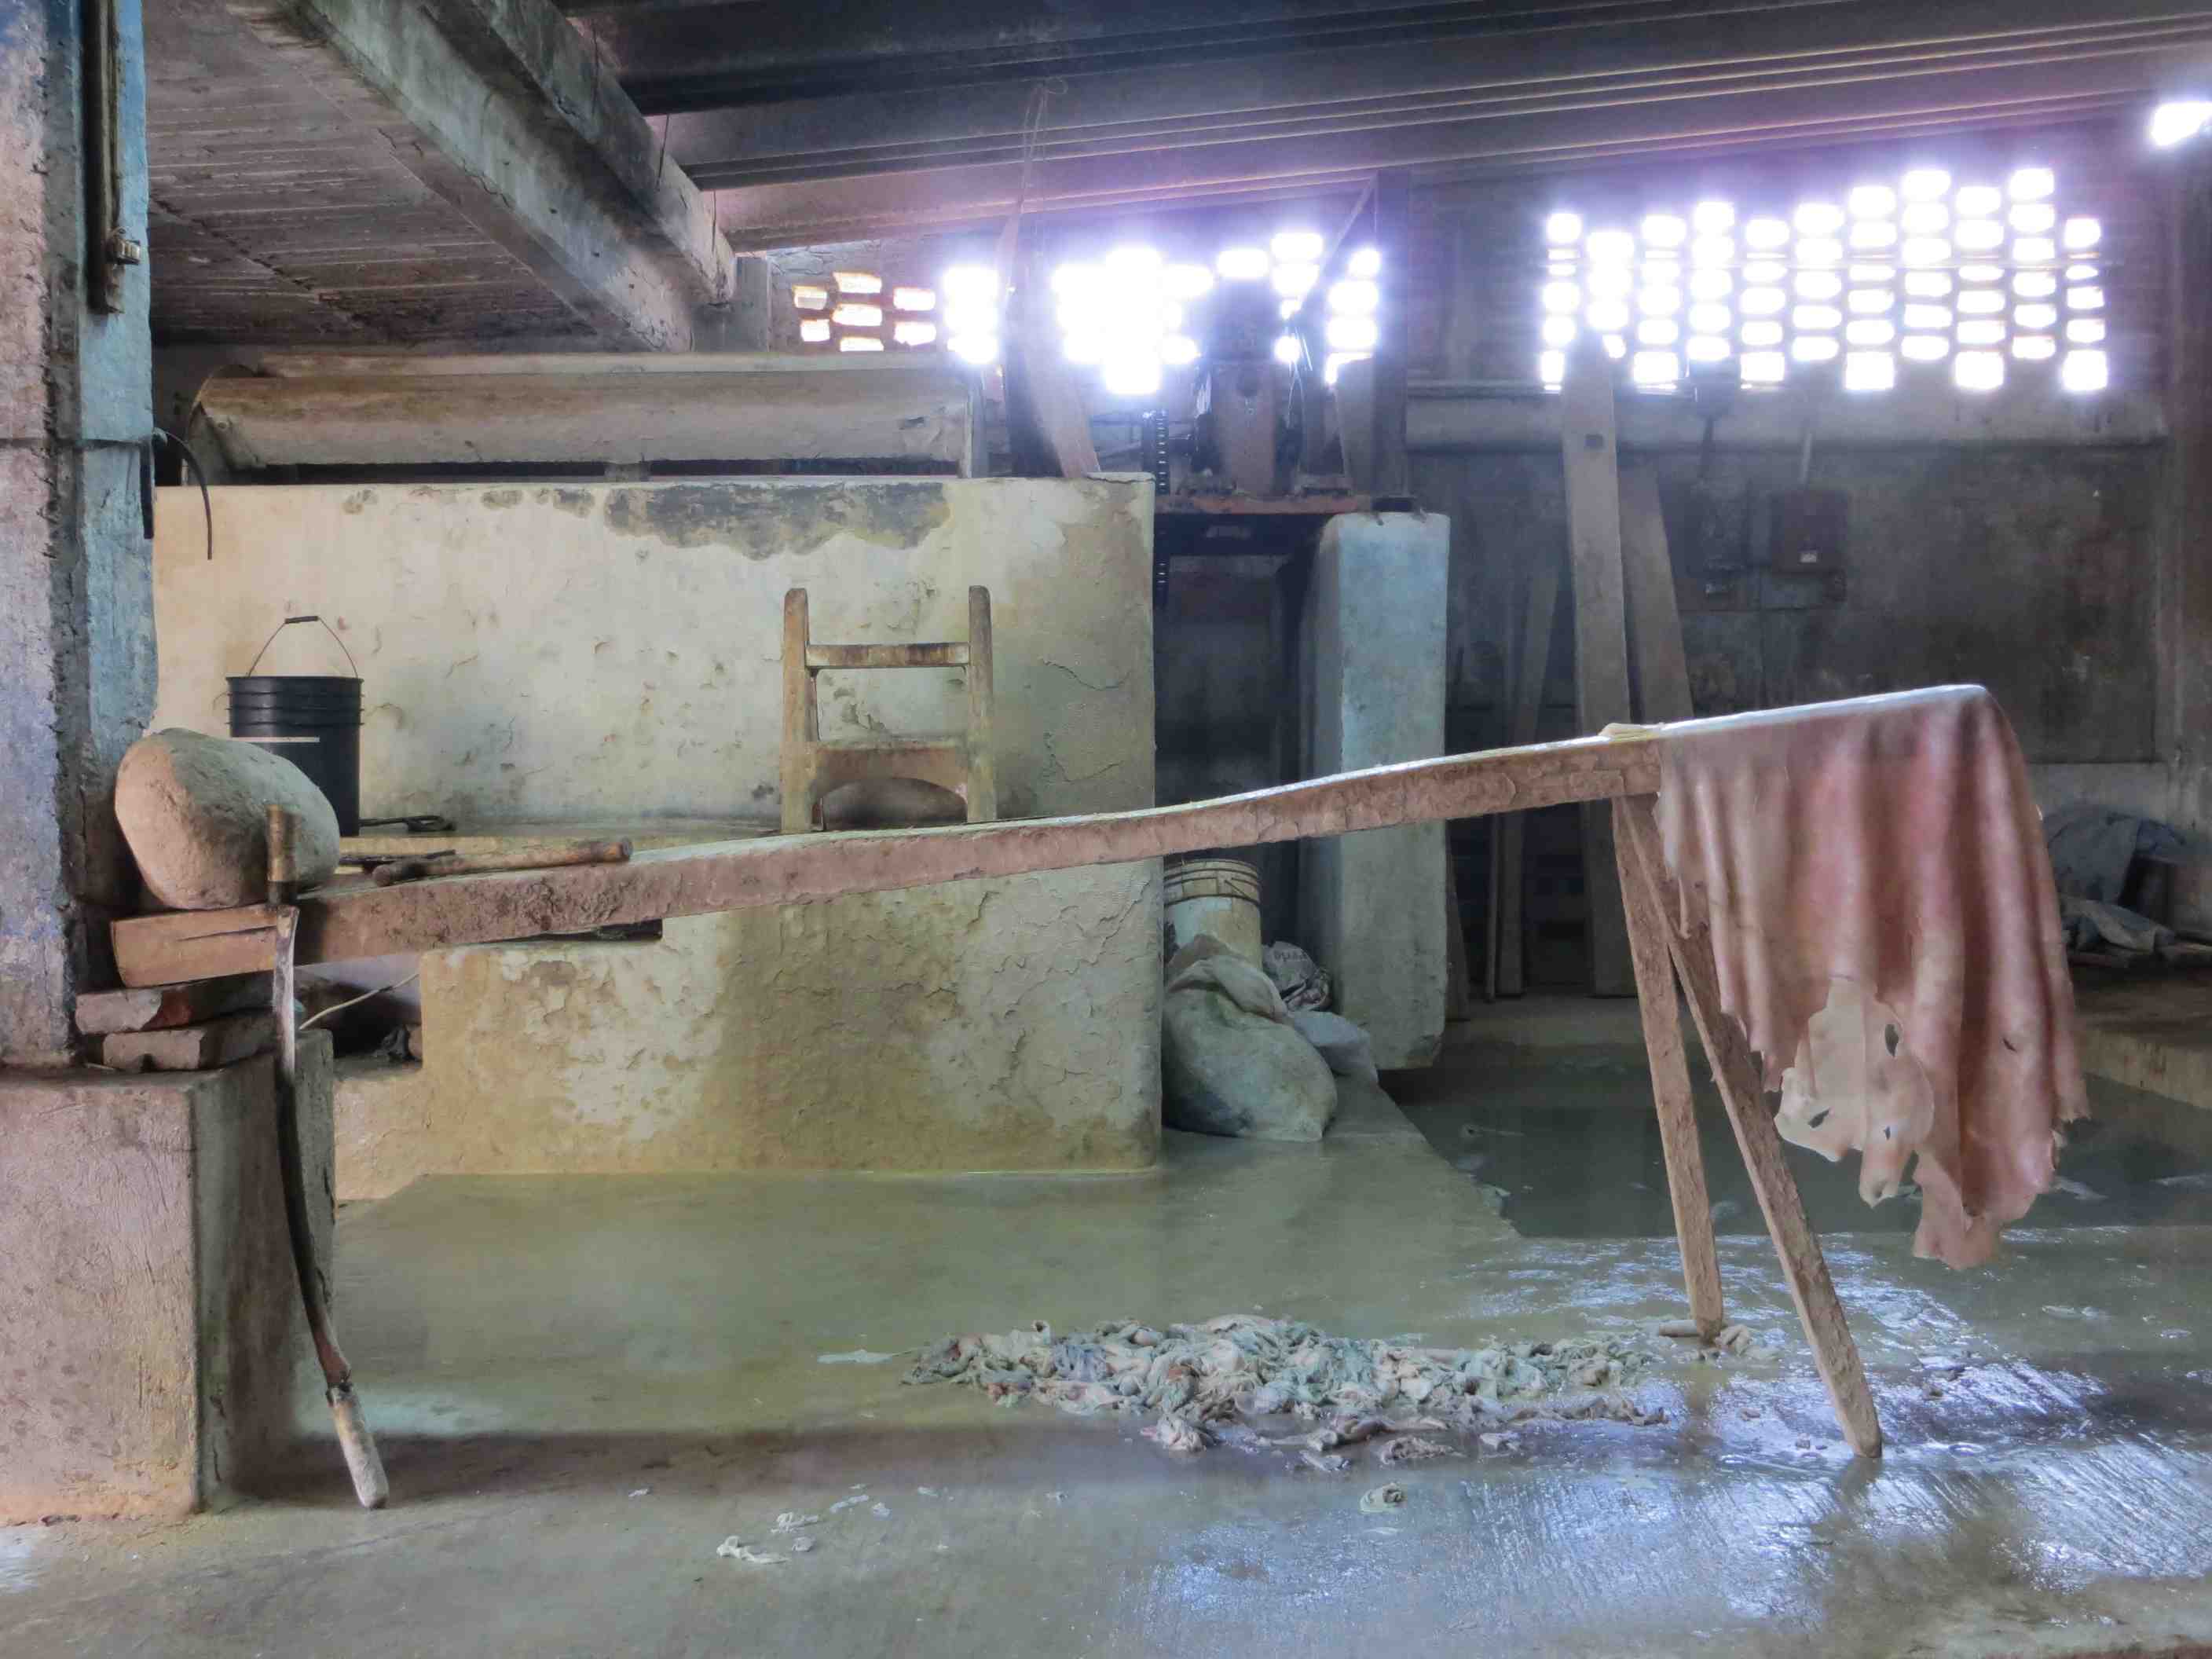
Well anyway, Markus at the huarache blog has done it again… forced me to steal his excellent article and link to his great research in Mexico. The post gets a very close inside look into the tanning process; a somewhat secretive business in my experience.
Great set-up for the beams. Spacious, indoors with a cleanable floor.
I think anyone who has tanned hides will appreciate this solid set-up.
This is just a picture preview. For much more in-depth information, have a look at the article on the Huarache Blog by clicking here.
I appreciate this work so much for having done some myself. Tanning hides is tough, back-breaking labor that goes unappreciated. It’s good to know that there are still folks out there keeping these important skills alive. More importantly, to know that there are alternatives to corporate factories producing little more than garbage and waste. It must be tough on these small family businesses but I hope, for all our sakes, that they find a way to survive.
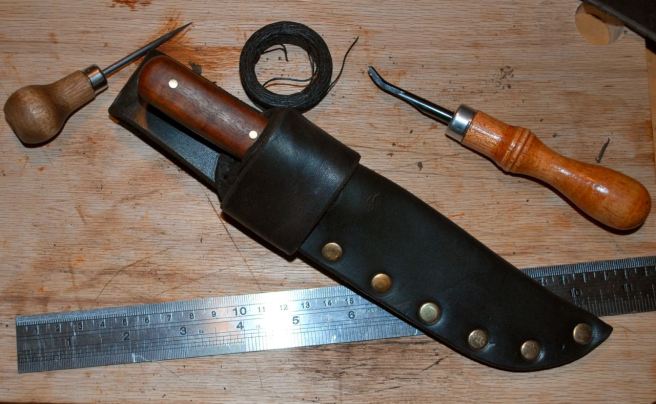
I realize this isn’t the most exiting project of the year but a necessary one nonetheless. My knife sheath for the “regular” camp knife was a sloppily done remake of the original. The knife maker did an excellent job on the knife itself but the sheath wasn’t up to the standard of this fine tool.
No surprisingly, I have quite a lot of leather around for small projects like this so after some searching I chose a very thick and solid, wax stuffed leather that was batch dyed a very dark brown. For durability I decided to rivet this sheath with brass which makes for fairly quick work as well. The only real issue is getting the fit just right; tight enough to hold upside down but loose enough to come out when called upon.
After construction, a bit of hot water was poured over the body to shrink it up a bit and the well-oiled knife left in it for form-fitting. Now, we’re ready for the woods again.
Taking a break from work to make something for myself…
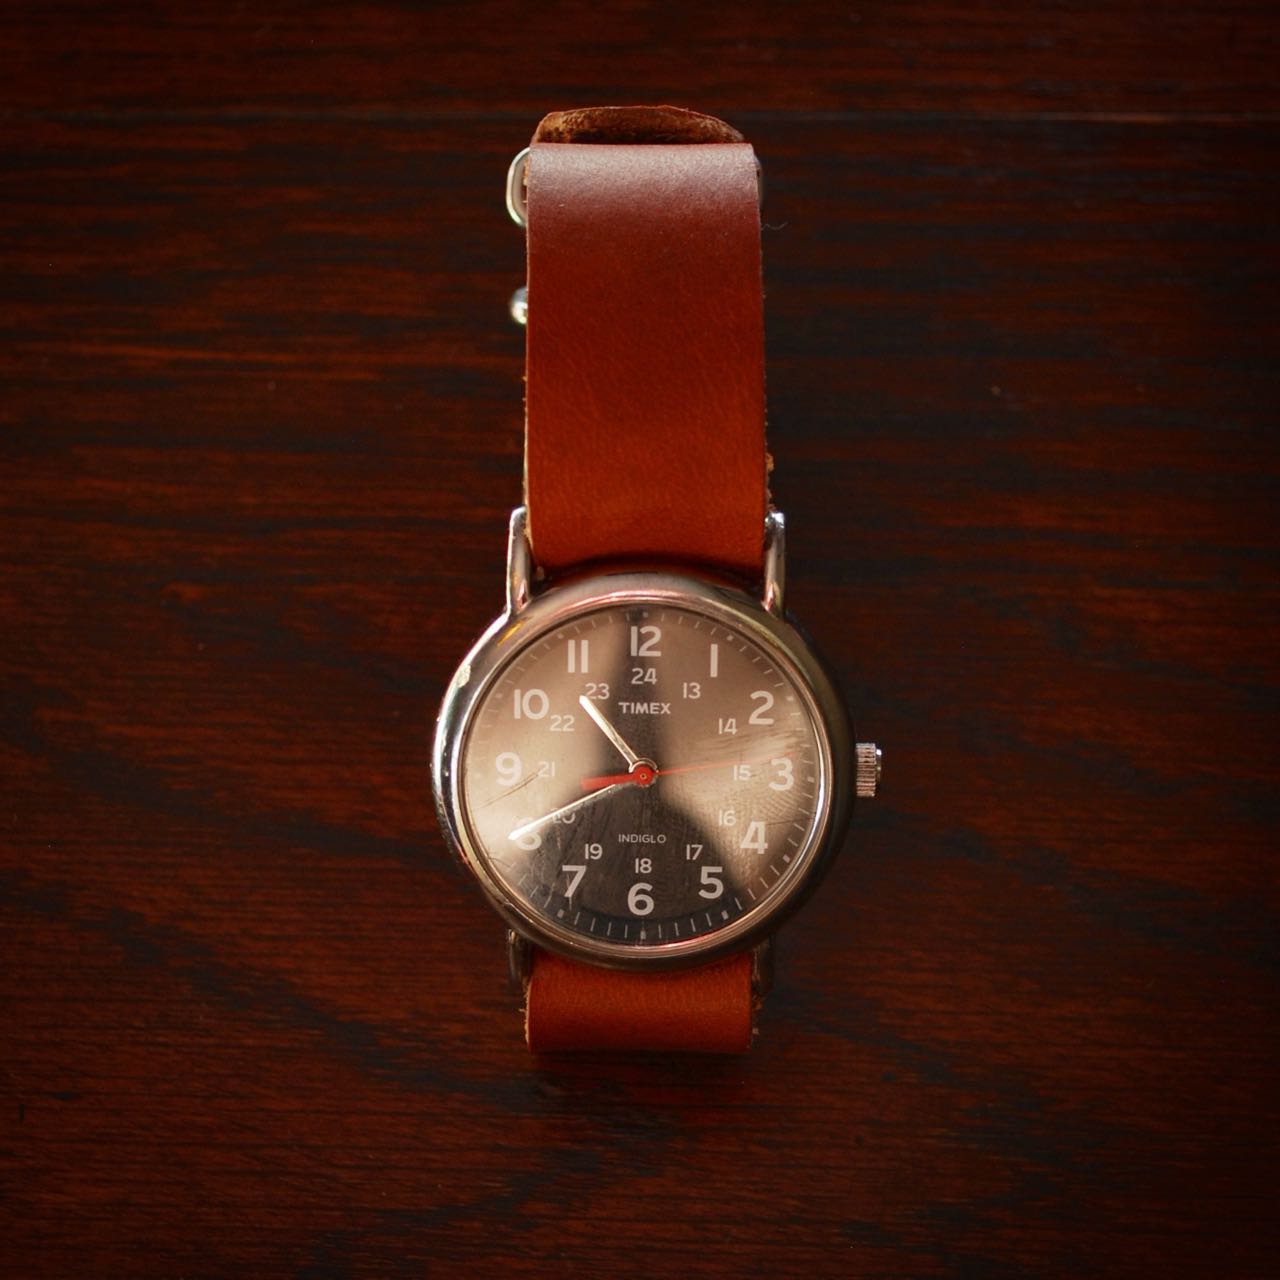
I don’t wear a watch every day but when I do, I like it to be comfortable and not at all flashy. I was never a fan of wearing a watch when I wasn’t working but having a crew who expect regular breaks and a lunch hour made sure I owned one most of my adult life. Now we live in an era of cell phones with fancy clock features, timers, and alarms which makes the humble wrist watch an anachronism at barely 100 years old.
My inexpensive but excellently serviceable watch.
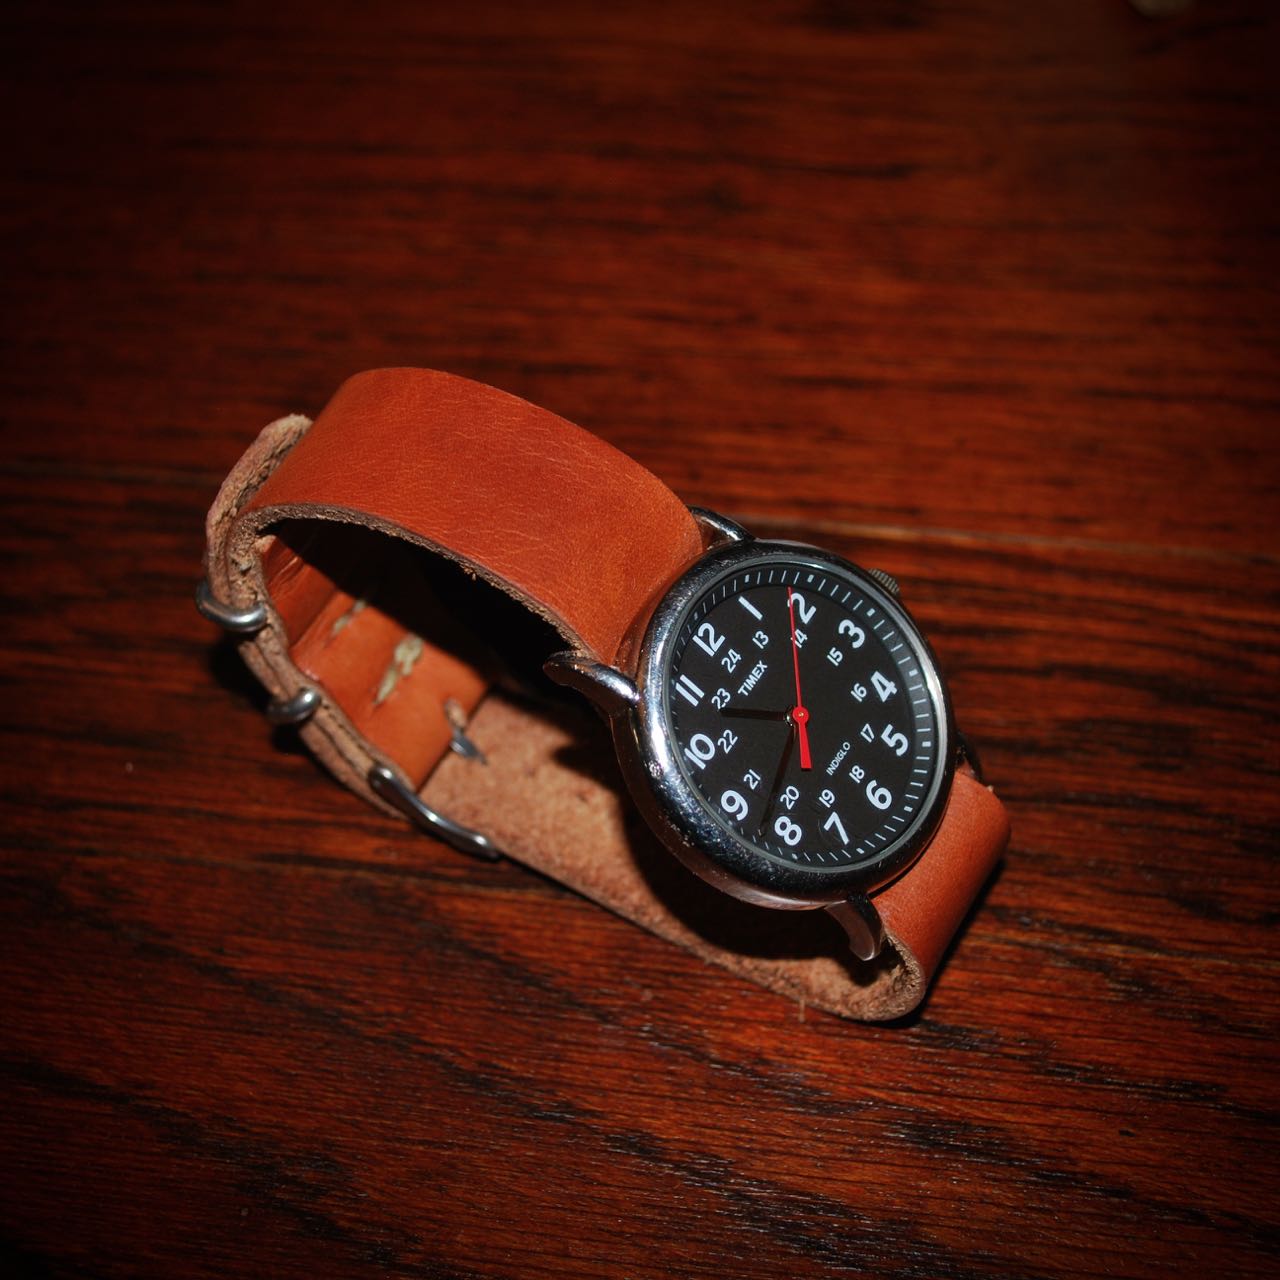
I don’t desire or need an expensive watch and have always considered them to be somewhat disposable. I bang them up pretty badly so it is rare that I ever have one costing more than about $40. If you’ve ever changed a modern band and don’t like to fidget around with the little pop-off axles that hold the strap on you should consider this simple and elegant design long-favored by the military. A quick search on the internet will yield you plenty of cheap and interesting versions of this type and they can be changed in a matter of seconds. It’s even fashionable to have several styles and interchange them regularly. Imagine that… I’m a fashionista.
I made this one before dinner.
I considered making an extremely simple tutorial for this style but it is so incredibly simple, I think actual words would only confuse the matter.
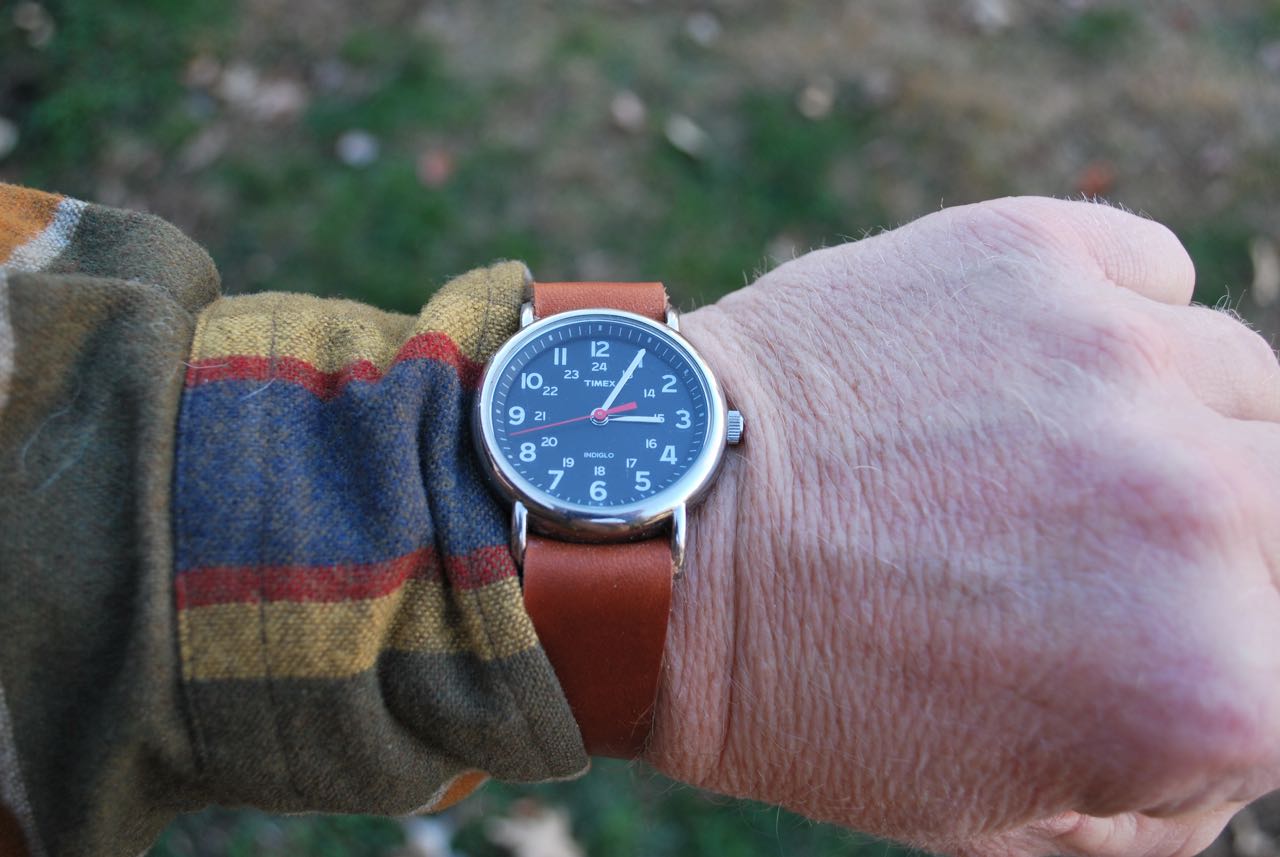
Threaded onto the watch.
The real genius of this design is that it is a single belt that goes behind the watch, keeping the metal mostly off of the skin. It should be clear from the photo above that there is really no trick to attaching it to the watch itself. I have rather thick wrists, so I add about an inch and a half to my bands when I make them for a better fit.
Completed strap.
And finally (I know, you shouldn’t start a sentence with a conjunction but we all do it) you don’t have to even limit this design to leather. You can make it from cotton or nylon flat webbing or could even branch out to making your own cloth band. Just save back the buckles and keepers from any old watch and sew them to your own creation.
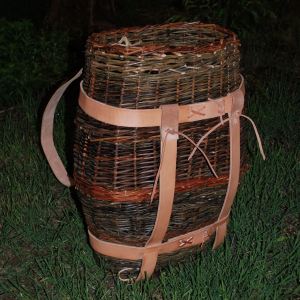
In a fit of energy I got around to putting proper and better shoulder straps on my pack basket made last summer. The pack is willow and the leather work is approximately 10 oz. Hermann Oak harness leather.
Willow pack basket I made several years ago. The straps were obviously new then.
Once the leather ages a bit they will be beautiful and rustic-looking.
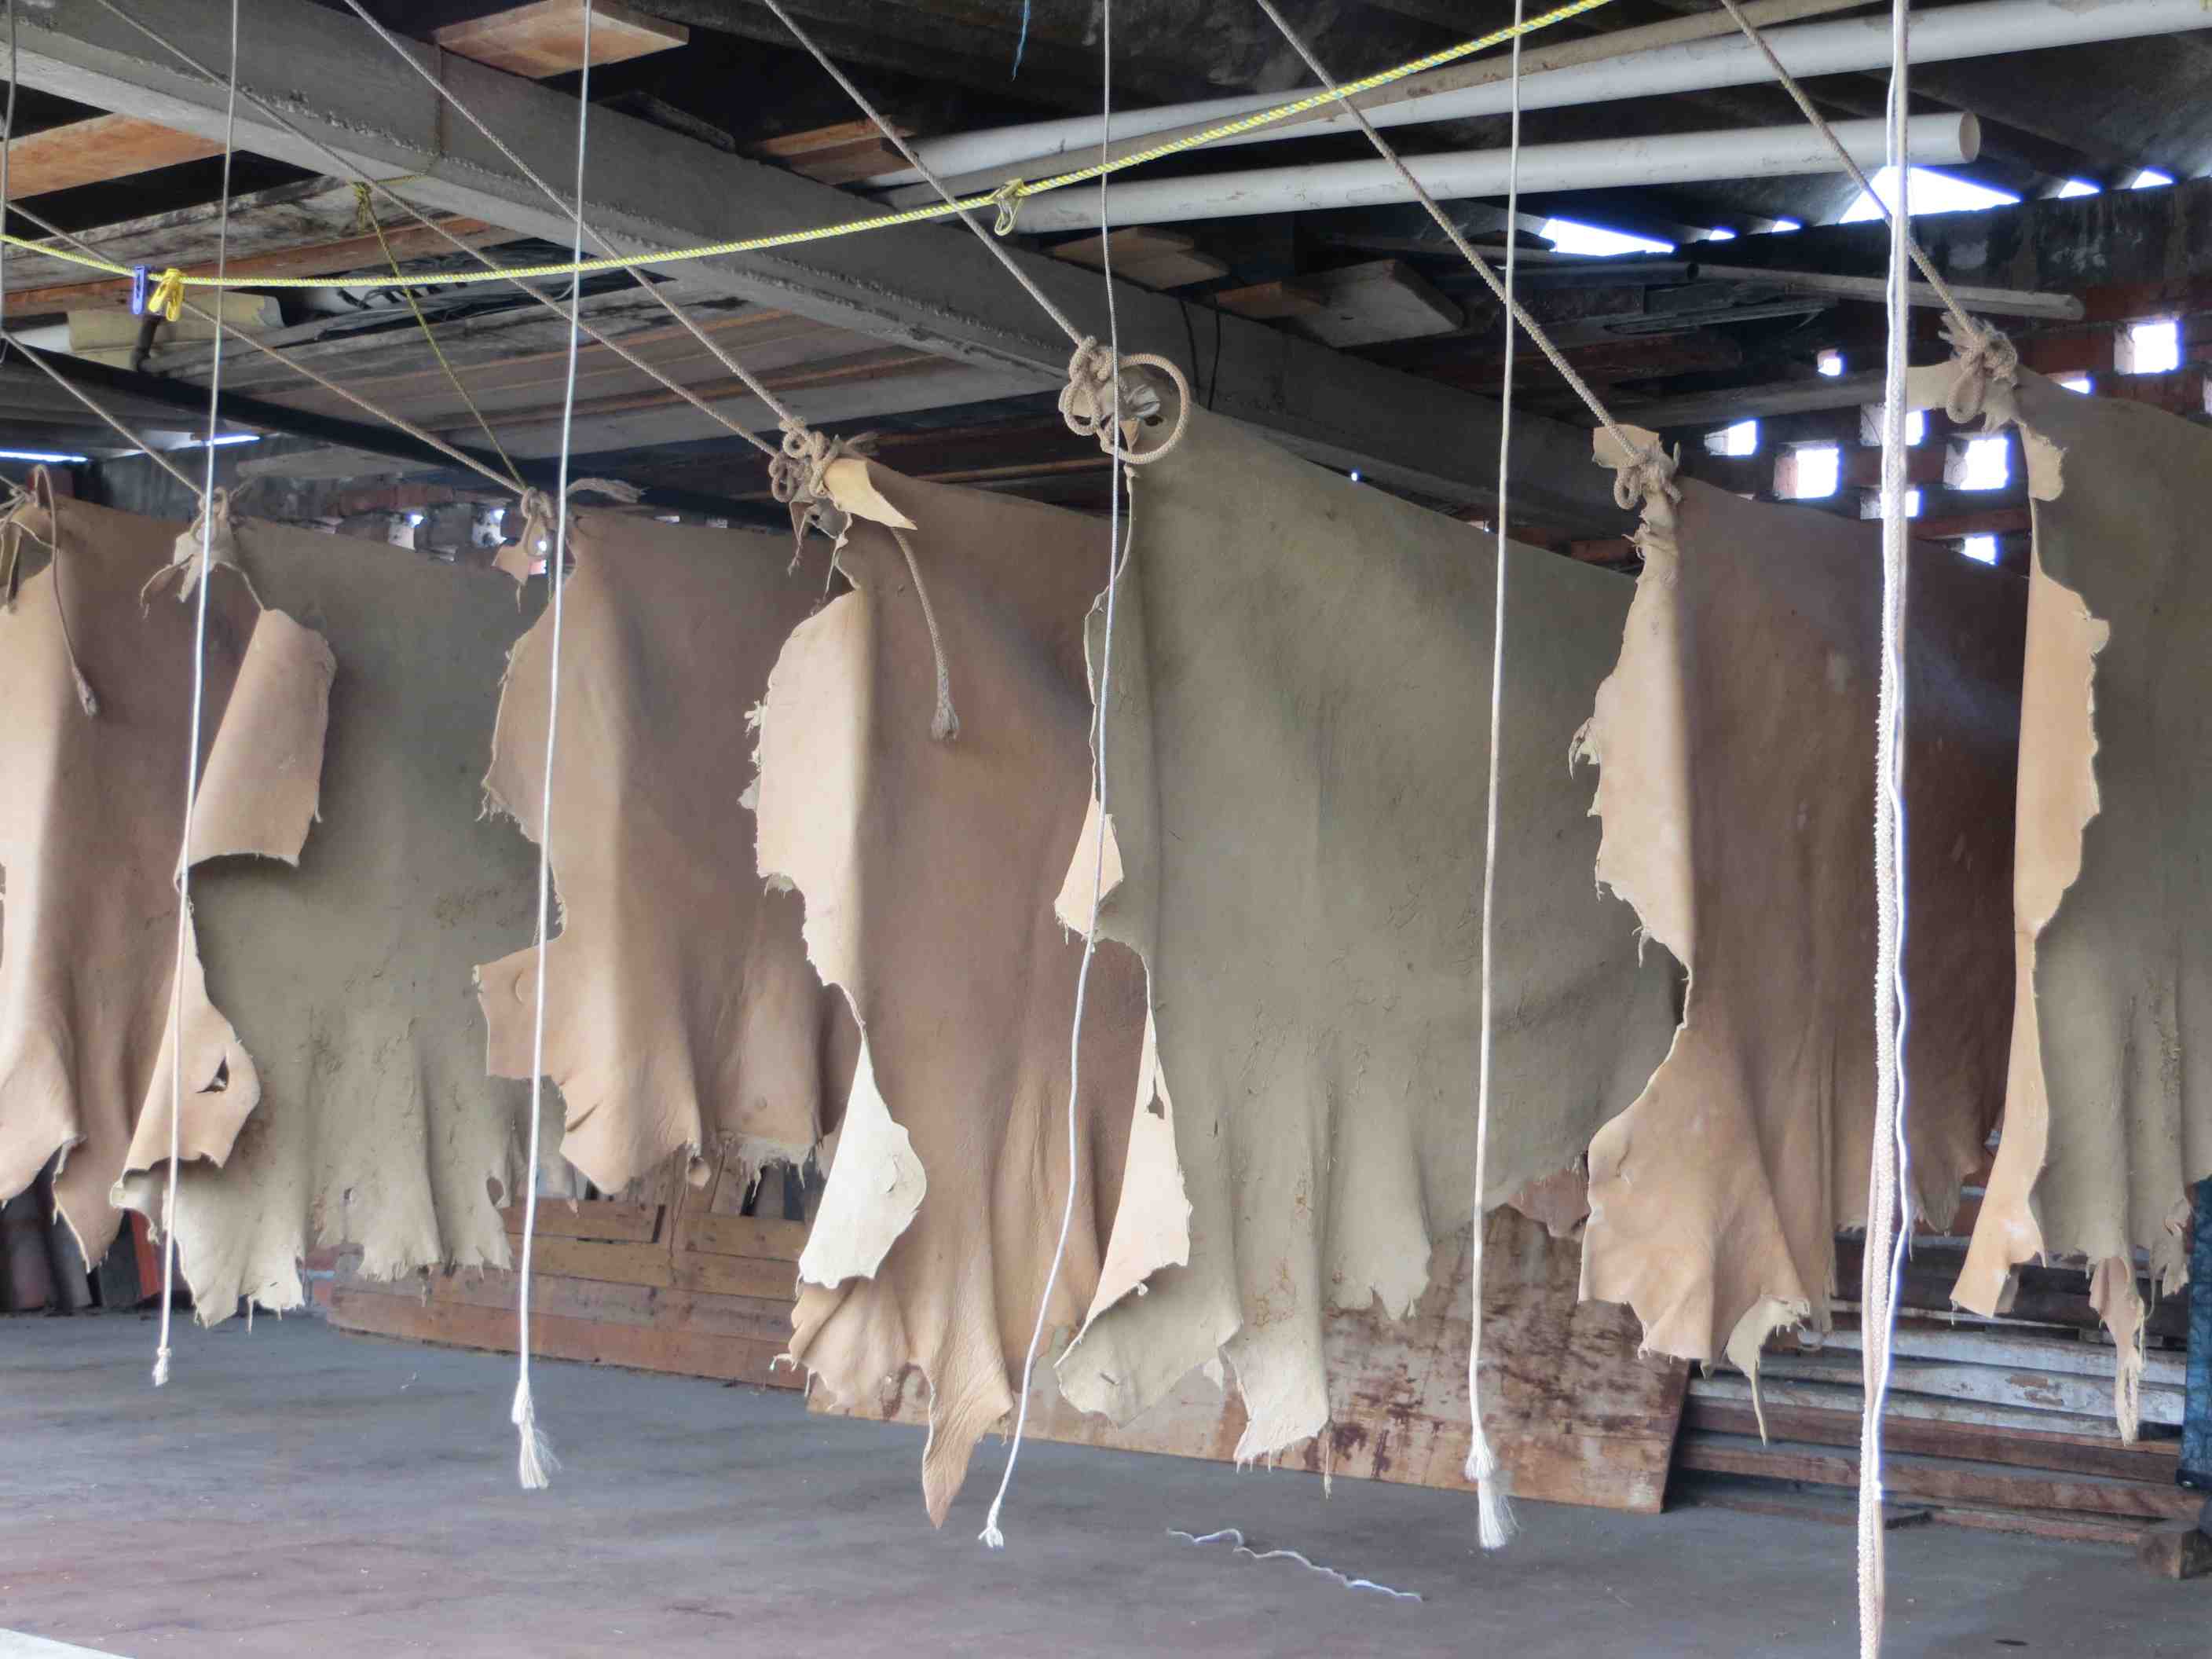
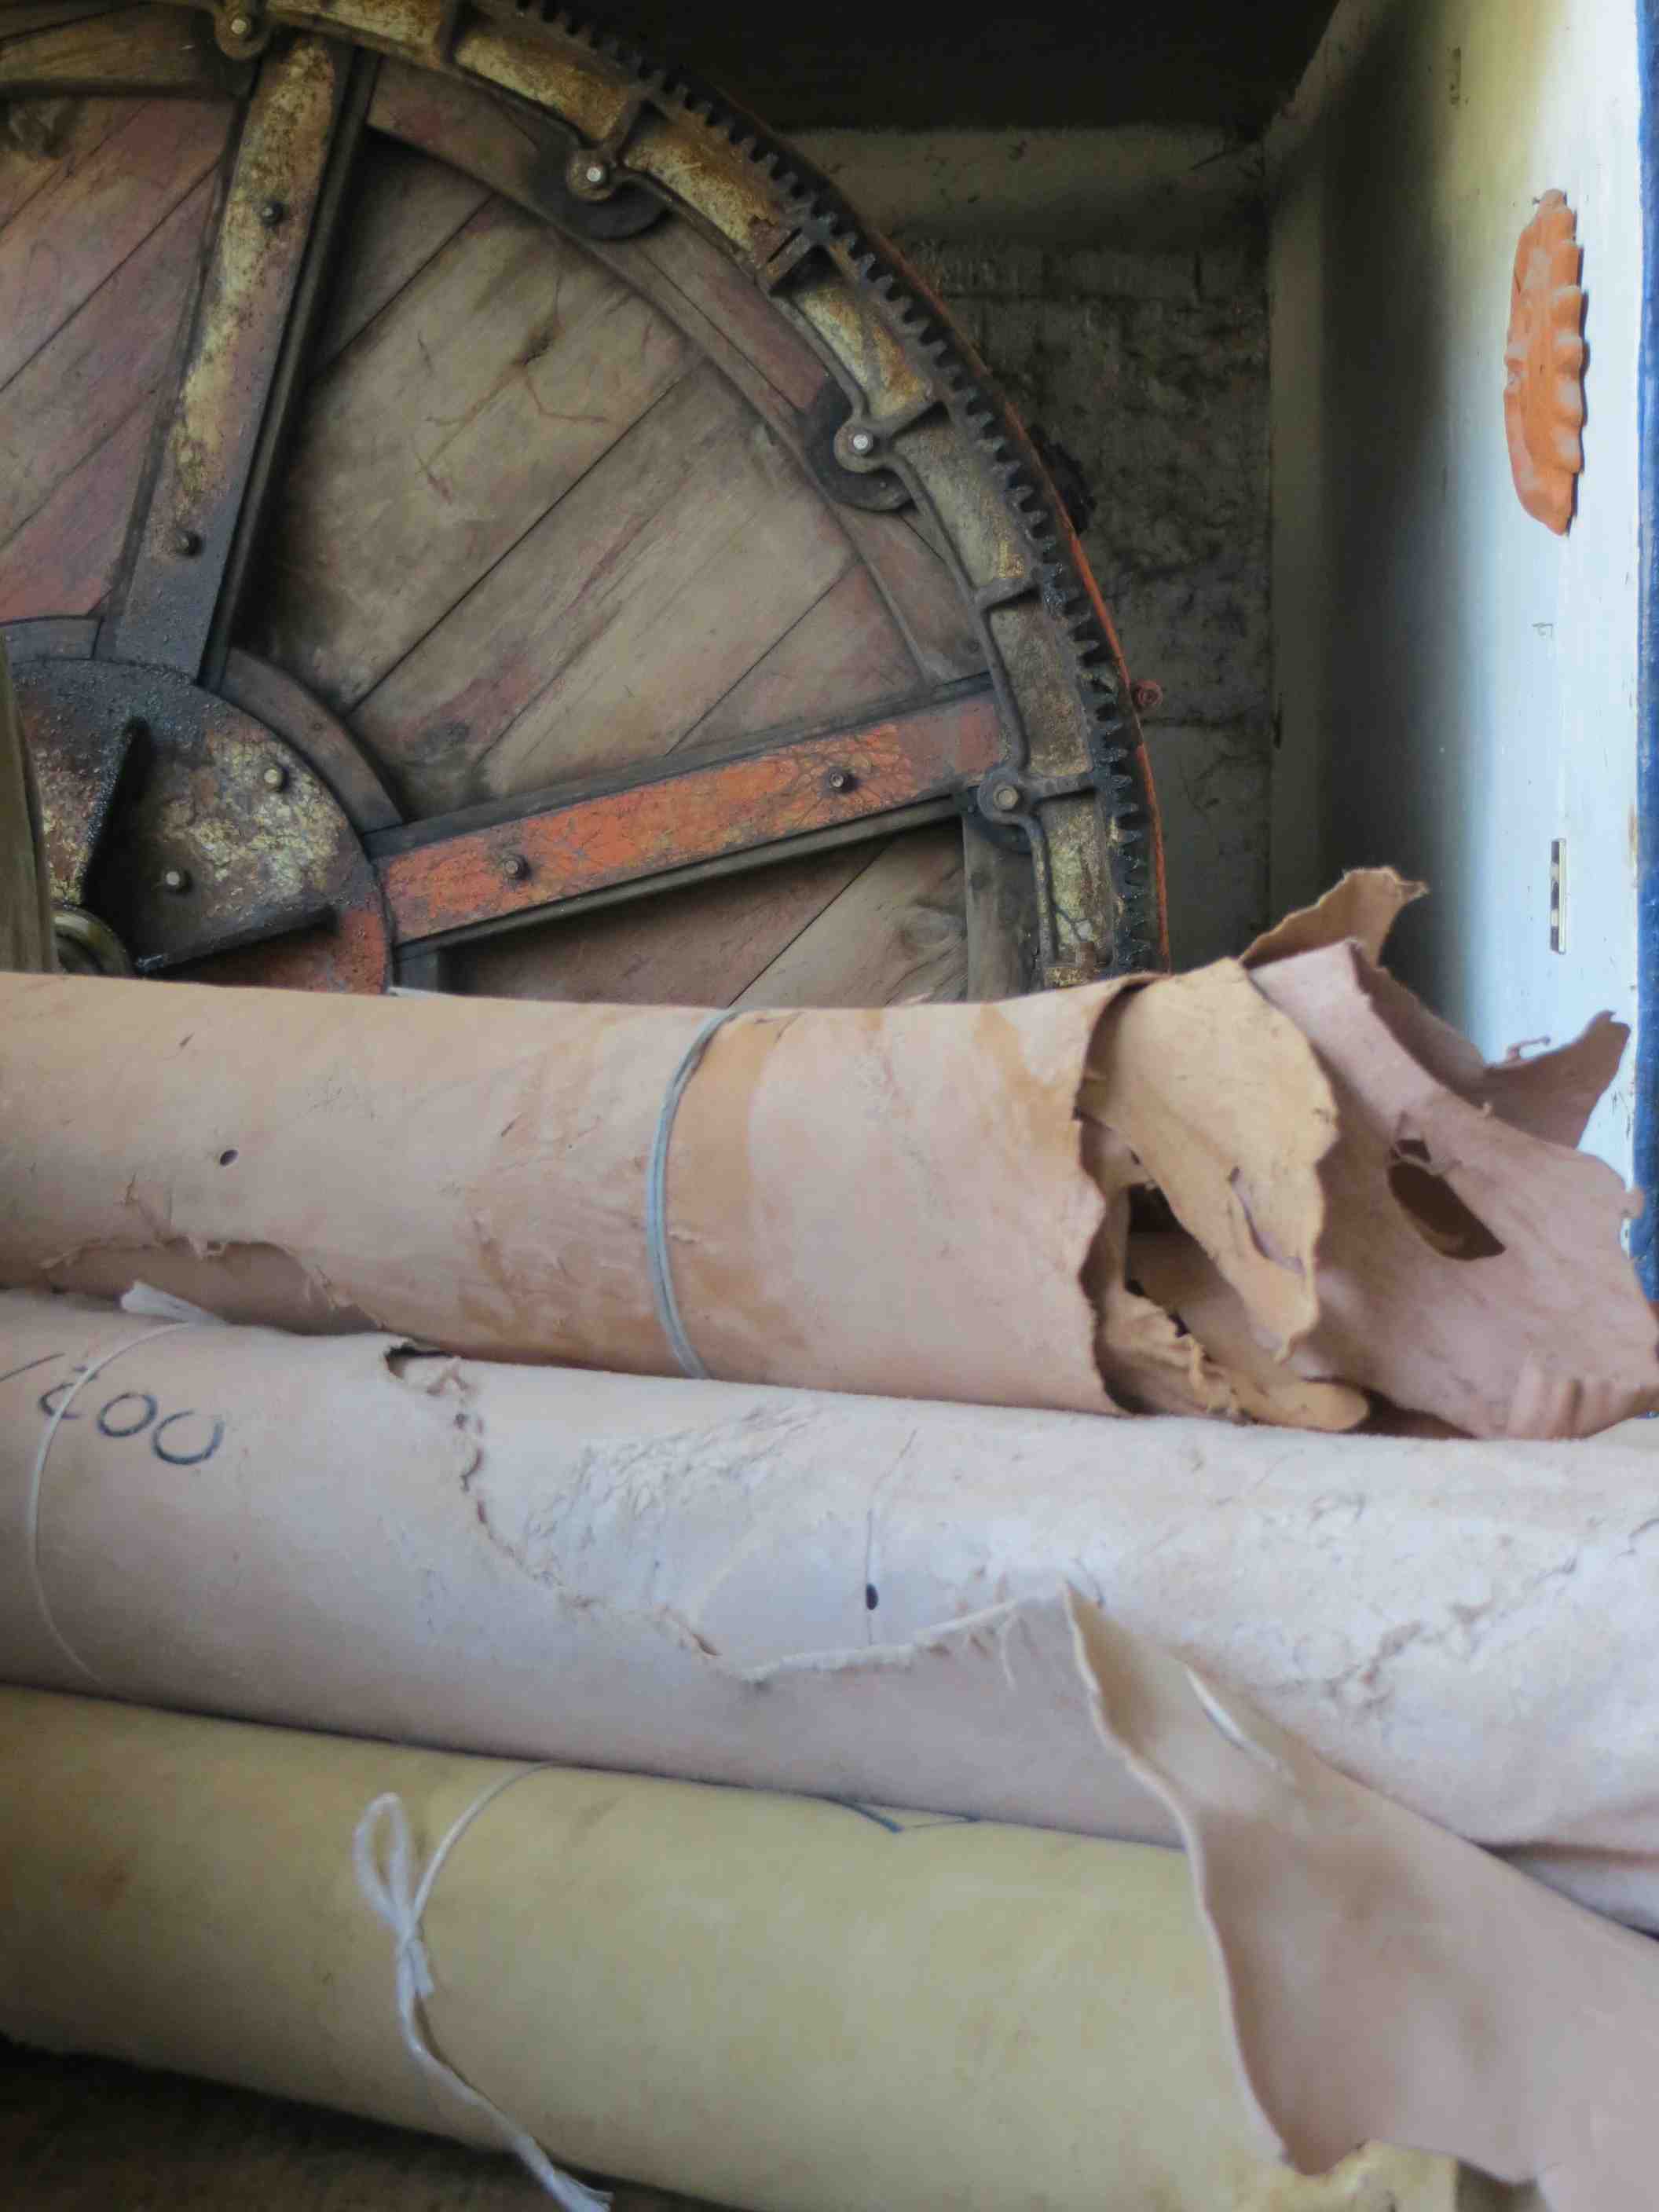
Unlike most mainstream footwear, Mexican Huarache footwear leather is still vegetable tanned using tree bark. Fewer tanneries in the world still offer vegetable tanned leathers because of the slower tanning process and higher costs of the natural raw materials used.
The natural benefits of vegetable tanned leather are:
1. The organic tanning process is non toxic and has a much lesser impact on the environment and the health of the tanners (chrome tannery workers have a 20%-50% higher chance of cancer risk).
2. The leather maintains some of its natural qualities to stretch and adapt to your foot shape.

 Here’s a new minimalist traveler’s wallet. I’m still working through the design and construction process but like it so far.
  Simple three-pocket design; a vertical a horizontal card pocket as well as a large one for bills.
 A bucket purse made from an oil-tanned leather. Welted and bound with thin harness-grade bark tanned leather with a heavier leather shoulder strap.
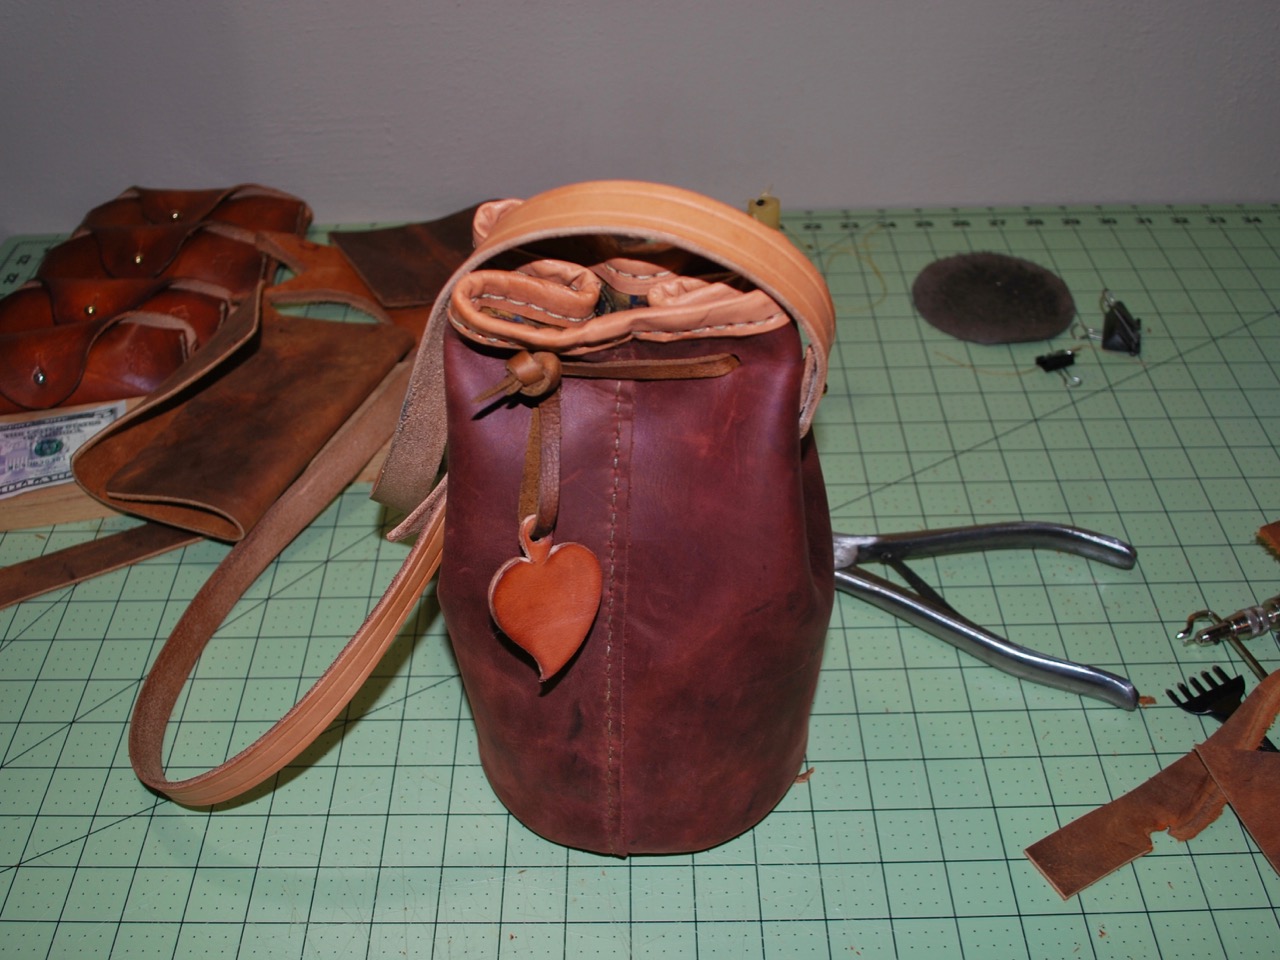 I try to put some sort of bling into projects. This is a historic heart design was cut freehand and balances the antler toggle on the other side.
 Fully lined with a batik print my daughter bought for a skirt.
 Welted bottom.