This is part of an ongoing theme to document travel and camping gear that has served me over the years. These will be mirrored on the Traveler’s Gear page as I get them up.
As a traveler, primitive technologist, peaceful survivalist, affected provincial, long-time Idler, and sometime field scientist I find the necessity for a shoulder bag to carry essentials. I have two size shoulder bags as well as various backpacks, brief cases, and messenger bags that have served me well over the years walking thousands of miles on survey and in my travels.
I made this bag a few years ago based on an 18th century gentleman’s shooting bag. If you are interested to see it’s construction, it is documented HERE. Carried by naturalists, sportsmen, and explorers, this small compartmentalized bag keeps the essentials handy. Sturdy 10-12 oz vegetable tanned leather from Hermann Oak means that this bag will serve many decades without fear of damage from wear.
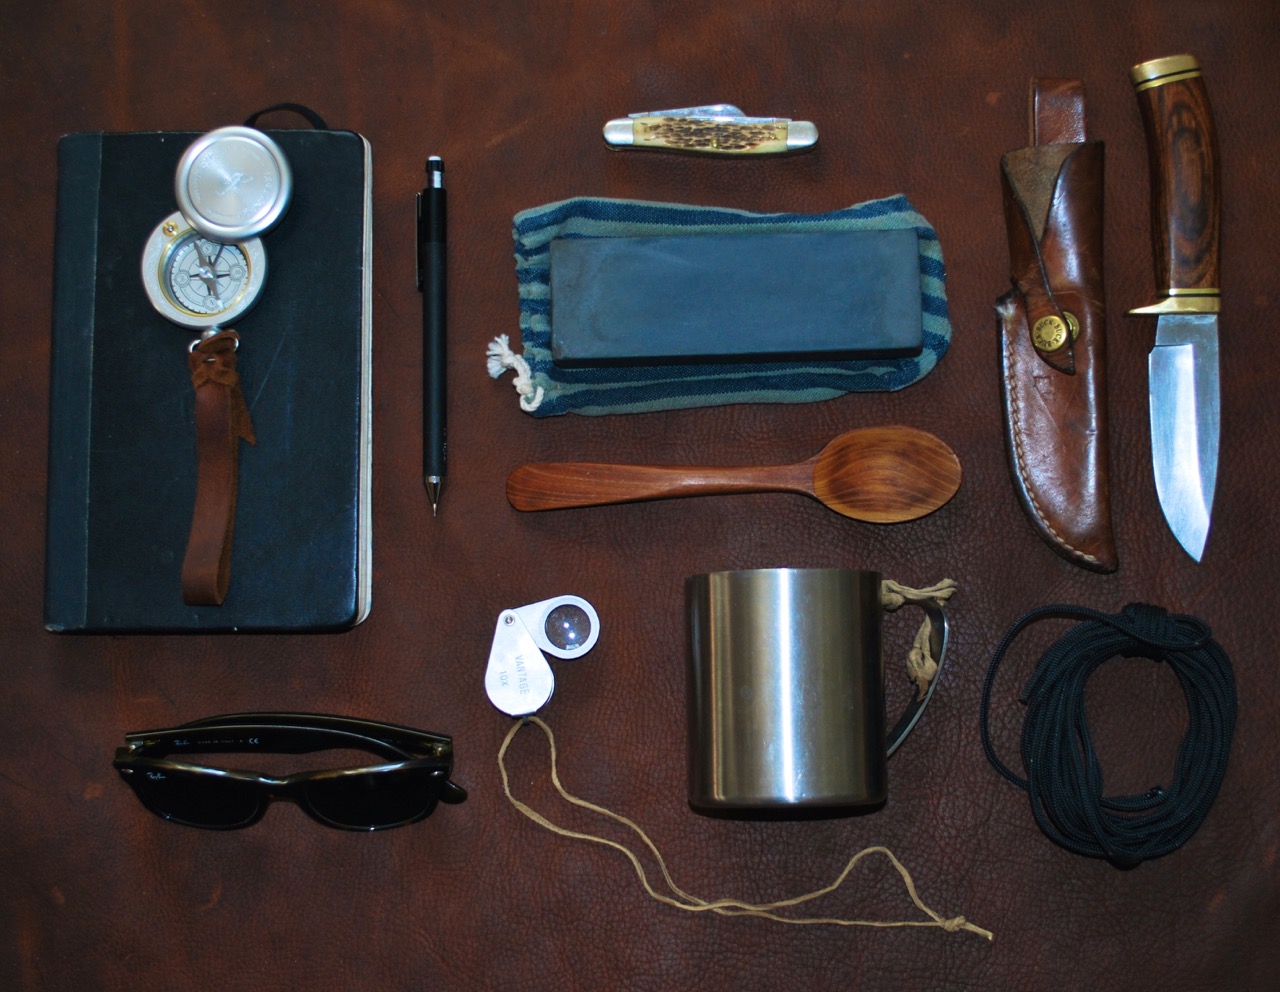
This is most of the contents from the above bag; mostly things I don’t like to be without. Clockwise (more-or-less) from the upper left: Brunton pocket compass with signal mirror, Moleskine notebook, pencil, folding knife, whetstone with bag, belt knife, wooden spoon, 550 paracord, insulated mug, hand lens, sunglasses.
Since I was eleven, I have been infatuated with mountain man style wilderness survival. It was, by far, my favorite merit badge as a Boy Scout. The merit badge book taught about the old idea of a “possibles” bag carried by early explorers that we now think of as a survival kit. Although the above is far from a complete survival kit, this little bundle, with the addition of a water bottle, gets me through many long days of travel and field work. Additional items include: lighter, flashlight, bandanas, and some first-aid essentials. However, traversing the wilderness, or even through civilization, means more than having the right stuff handy, being dressed properly is probably even more important. After years of walking in the wilderness I have learned the same lessons that our forefathers did; the importance of being well shod and covered with a proper hat.
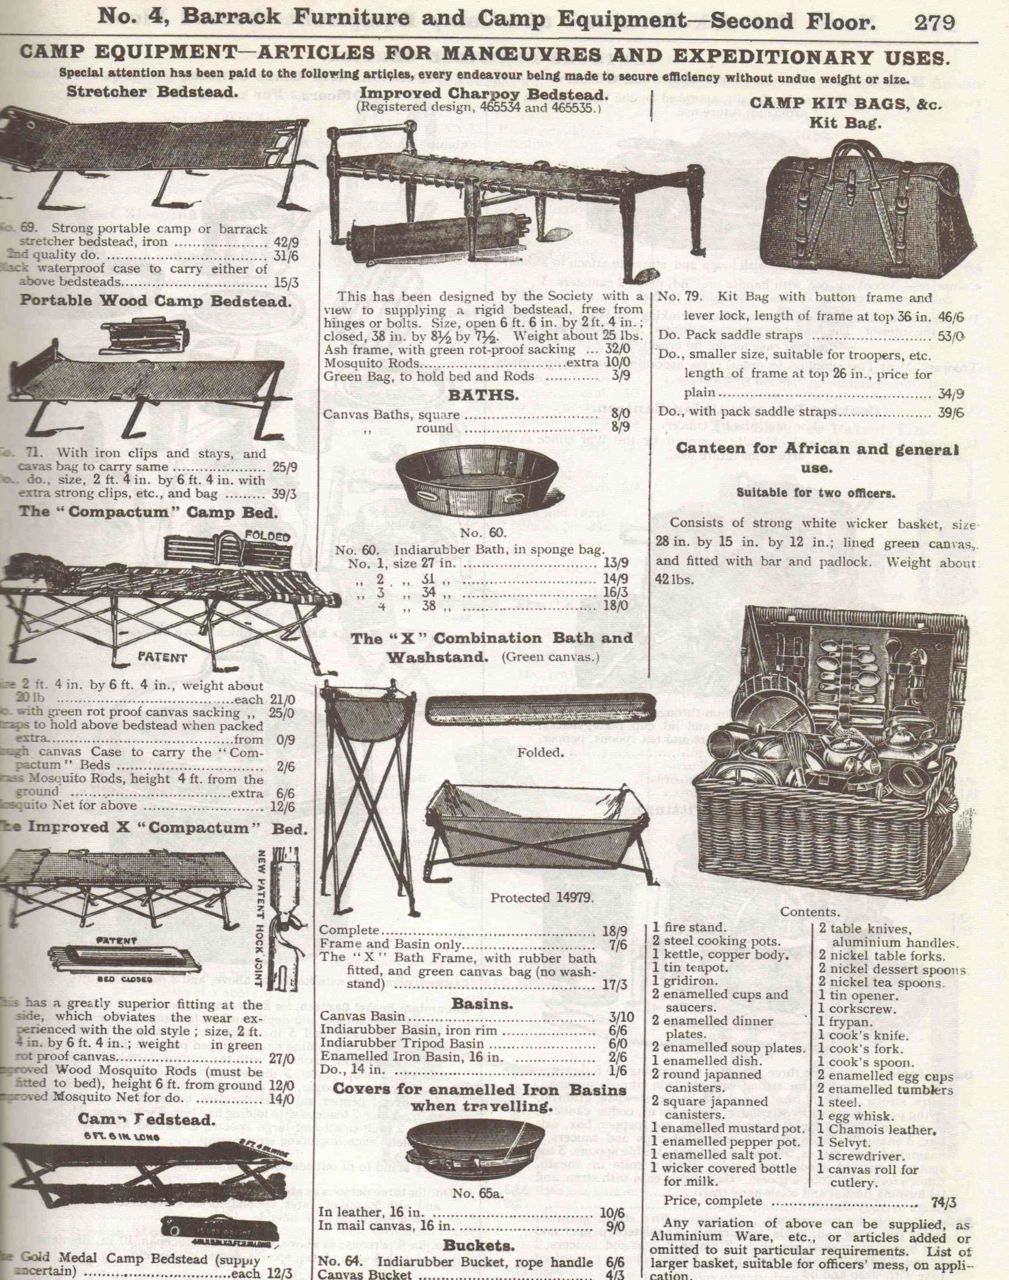
This is a re-post from an earlier entry. Say what you will about British imperial policy of the 19th and 20th centuries. They certainly worked out minimalist travel with a fair amount of style and comfort on a very personal level. These old catalogs give some great ideas for camp living.
From The Army and Navy Co-operative Society Store, London 1907
There are some excellent items here that should give some inspiration for fabricating some classic and classy gear. From an era before the activity of “camping” was fully segregated from “regular living”.
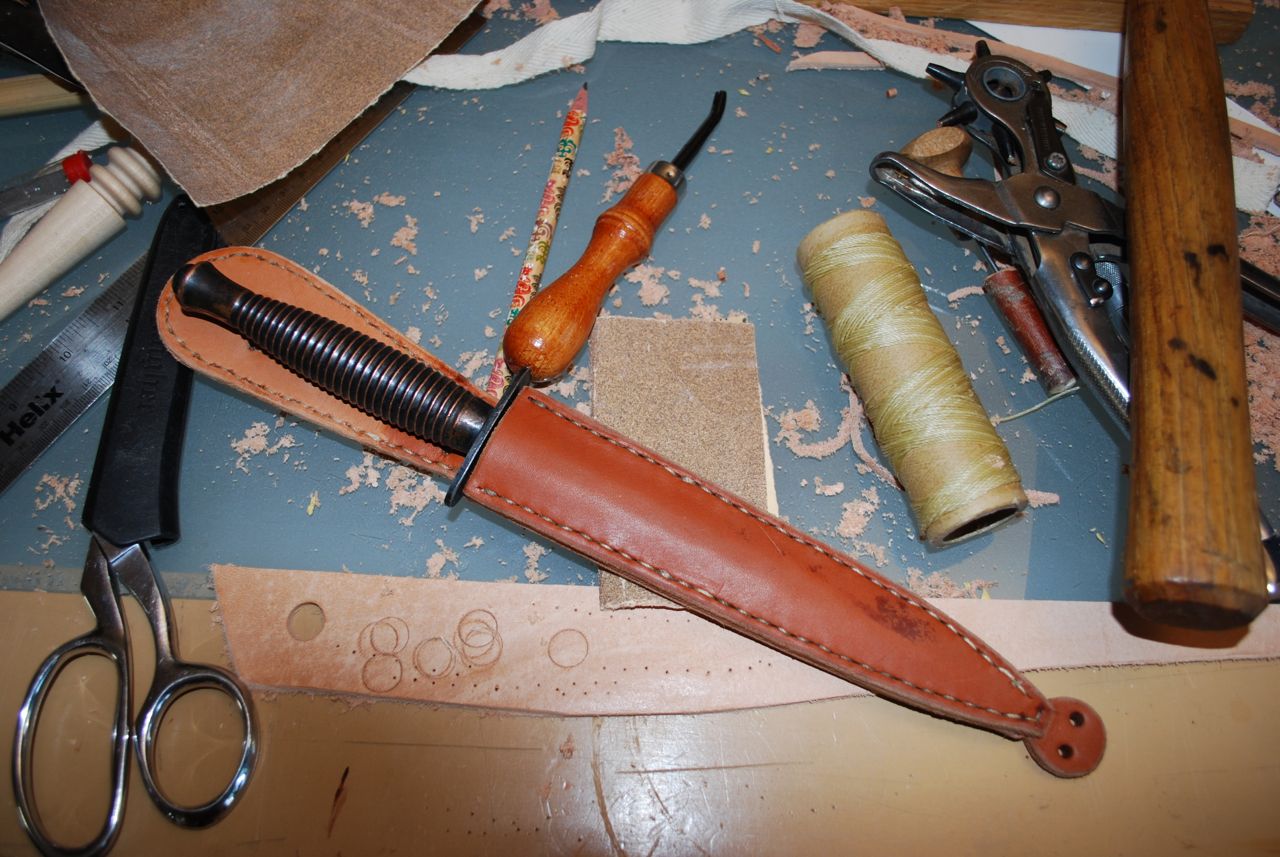
Maybe not the most exciting project to document but a vital one. My F-S knife needed a sheath and I’ve been too busy lazy to make one. Well, I finally got down to business and got it done.
Part of the reason to procrastinate this was that I wasn’t sure what style sheath to make. This is a historical knife that was made with a very specific sheath but wanted one that reflected me and my “style”.
After sketching out the blade and handle onto Bristol board, I decided to meld the basic outline of the original sheath (ca. A.D. 1942) with that of a traditional western sheath knife. That is to say, flat seamed with a welt. Knife sheaths do not require much leather so a quick trip to the scrap bin provided plenty of choices. I decided to go with a very heavy oak-tanned leather I have normally used for shoe soles for the body of the sheath, and a lighter 8 oz. for the collar and strap. The only hardware would be the button for the retaining strap.
After cutting the pieces, the edges were smoothed and beveled where necessary. The heavy welt is shown above being glued down prior to sewing.
I didn’t photograph it, but the outer piece of the sheath was skived down very thin along the stitch lines to give a more rounded appearance to the finished product. Double needle saddle stitching was run up the sides and around the top to provide some support against stretching and to give a more finished look. The sheath was then wetted and the knife left inside for a couple hours to help form the shape of the diamond cross-section blade.
Note: This knife is high carbon steel and therefore prone to rust like any other so the blade was heavily waxed prior to being shoved into the wet sheath.
After burnishing the edges, the leather collar was added with the retaining strap and button and the whole thing was then waxed.
I’ll give it about 50 years before it needs to be replaced and I suspect that it won’t be my problem by then!
Author’s Note: The Fairbairn-Sykes knife is about the coolest mass-produced military knife I know. These were churned out by the 100s of thousands during the Second World War in Sheffield, England and have been in use, with very little variation through the present day. Although these were designed specifically for fighting, these make excellent bushcraft knives. They have an appealing aesthetic and are very similar to daggers carried throughout medieval and early historic Europe.
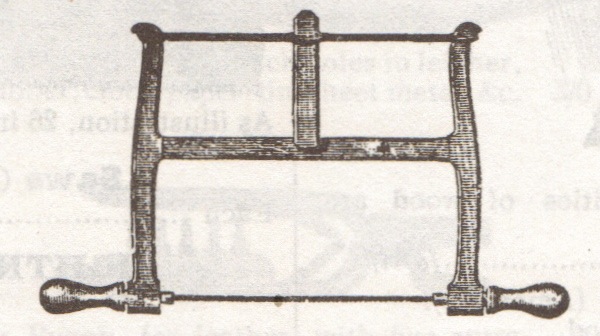
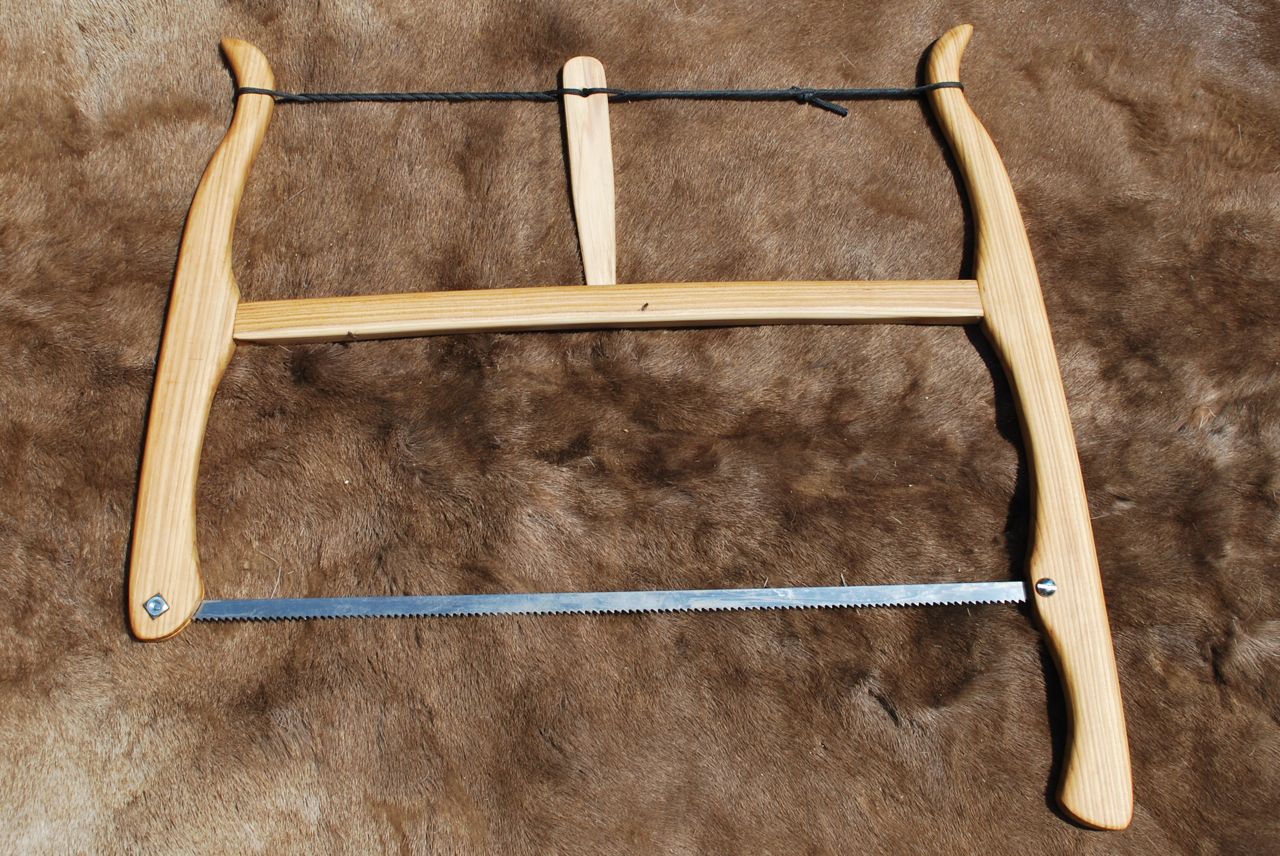
Bucksaws, bowsaws, and other frame saws are often lumped together into a single category in modern American or British English (unless you happen to be a traditional hand woodworker of course). And why should anyone care anyway? Bucksaws are replaced by chainsaws, bowsaws have become cheap, pot-metal, throw away abominations, and turning saws are replaced by band saws, scroll saws, saber saws, or even cheap coping saws.
The firewood bucksaw is the biggest of this family and one I’m glad to have in my toolkit. Yes, I still own a chainsaw but find I use it less and less in favor of the quiet bucksaw that takes no petroleum and spews out no noxious fumes. I have read that most homes kept a big bucksaw handy as the easiest means of creating firewood and I can certainly understand why this would rank above the axe for cutting logs to length.
Firewood bucksaw, the grandfather of the family.
Skipping even the practicality of being able to make your own excellent tools for a few dollars (or less if you are energetic), there is a great beauty and practicality in this ancient design that our ancestors hit upon a couple thousand years ago. The basic premise of this design is to create a structure that will put a very thin strip of serrated metal under immense tension to simulate the stiffness of a much thicker material.
I regret that we’ve come to a point in our history where making a tool is odd, yet making something with our tools is not (yet). Where working for hours at some other thing, we get tokens of cash to purchase something we could have made ourselves in far less time and probably less energy spent. I believe Thoreau was on to this sort of thinking.
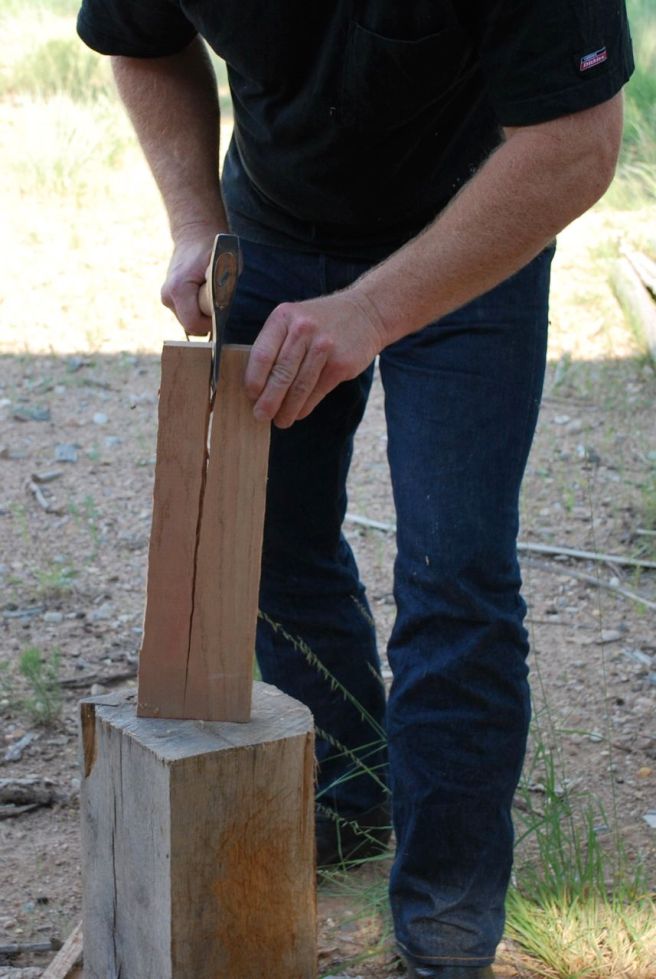
Splitting out the pieces.Halving and halving again to make straight-grained boards.
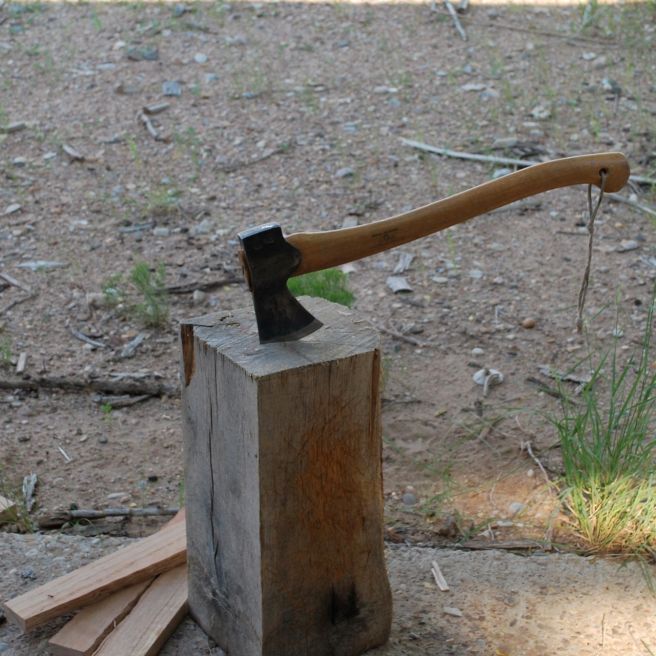
Choosing a length of straight-grained oak in this case, an axe is, by far, the fastest method of reducing it into the constituent pieces for the saw parts. This is far faster and better than sawing, creates no noise or dust, and ensures that each part is exactly in alignment with the grain.
Finished in seconds.
For a quick and dirty saw, these could be worked almost instantly into the mortice and tenon. However, as we always intend to make a tool we will cherish and pass on, some shaping is in order with an eye for form and comfort.
Template on card stock.
I have a file of templates I keep from past projects so I don’t have to continually reinvent these things and I highly recommend this. I find it helpful to write the details on the card stock, as well as label and date them (the notes on the one above are on the underside). Now comes the somewhat tedious task of shaping the arms for which I didn’t take a photo (maybe I’ll remember next time). I saved a few minutes by using the belt sander to taper the upper portions of the arms to save on shaping later.
Cutting a mortice.
After marking up the arms, I cut the mortices with a bench chisel. These are easier than many people think but do take a very sharp chisel and a little practice.
Drilling for the blade and handle connection.
I used a 5/16″ doweling bit for this as it leaves a very clean, precise hole for the 1/4″ brass rod to run through and turn freely.
Finally, the tenons are cut with a thin backed saw.
Cutting the tenon is very easy if the lumber is split precisely with the grain as opposed to sawn out on a table saw (ignoring the natural grain). After the cheeks are cut, its a quick matter to pop off the waste with a sharp chisel.
Auguring the handle for the brass rod.
I used a spare file handle for the primary handle. A 1/4″ hole is augured about 1 1/2″ deep for the 1/4” brass rod that will become the connection for the blade.
The rod is driven into the handle and will be cross-pinned for security.
For this project I moved my little operation into the living room of the house. Creating sawdust and wood chips for the dogs to track around in their boredom is a real bonus. But, on to the show…
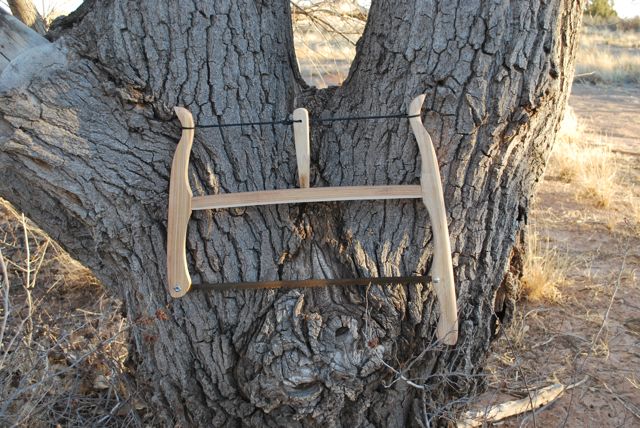
Making a Bucksaw for carpentry, bushcraft, or just because they’re cool.
The little bucksaw I built last winter had never been “finished” even though I’ve been using it for a while now. Having a few hours to spare I pulled out the knives, rasps, and scraper and decided to finish this once and for all before getting down to the next project.
The curves are merely aesthetic and can be ignored completely for a serviceable saw (if you can live with it).
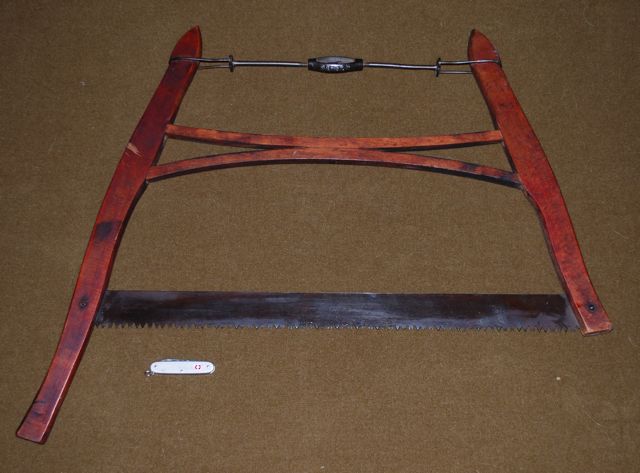
I hope to put this together soon as a sort of “Instructable” for making frame saws, buck saws, and turning saws but for now, this will have to do. Although common enough for the last couple millennia, frame saws have lost their place in the tool kits of carpenters and craftsmen, having been replaced by sabre saws, band saws, and the like. There is a lot of beauty in the old design and a serviceable saw can be built in a short time with very few tools. In fact, the one pictured here cost about $4 for the partial band saw blade, maybe a dollar for the screws and a few bucks for the long-toothed firewood blade. The lumber was created from a less-than-perfect bow stave; a well-seasoned shagbark hickory bodged down to about 7/8″ thick. The genius of this design is that it allows for an extremely thin blade to be stretched very tight for ease of work and a very clean cut.
A file for cutting (top), a store-bought 20″ bow saw blade (middle), and a band saw blade ready to be cut (bottom).
A new, high quality band saw blade can be purchased for under $14 from a decent hardware store. The above is a Delta brand 1/2″ blade with 6 teeth-per-inch (TPI) and is only 2/100ths of an inch thick. That makes for very little waste which can be especially valuable when working harder to acquire materials like antler or bone.
Band saw blades are made in a continuous loop and are great for what they do but the first thing we need is to break the loop. The metal is extremely hard, and fairly brittle which works to our advantage. The edge of a sharp bastard file, like that pictured above can be used to score cross the blade. You don’t need to cut all the way through, but just make a solid scratch across the surface. Then the blade can be snapped by hand, making sure to not put any unnecessary bends in the blade. Drilling the holes in the ends is the tough part. As I said, the metal is very hard so, either you can use a punch to make a starter spot and drill through as is (but this will severely dull most drill bits), or the ends can be gently annealed in a forge or with a torch and drilled soft.
Here are all the components of the new buck saw with the new linseed oiled surface glaring in the sun. The tensioner can be made from any strong cord (in this case 550 paracord), but any strong line can be built up or bailing wire will work (but is a little low-class and ugly and difficult to remove quickly). The spreader bar (the horizontal piece) is morticed into the legs but is not fastened by anything other than the tension on the whole system. Thus, the whole saw can be taken down in a few seconds and stuck into a toolbox or backpack for easy travel.
Above is the assembled saw under tension and ready to cut. A good question was already asked as to “why the spreader is curved in this case?” Because this was made from real wood, split with and axe, following the grain. I could have worked to straighten it for looks but I like the fair curve it created and, as it has no bearing on the function, left it as is.
Hope this helps anyone wanting to make a saw like this. Maybe I can offer this as a short, one day class at Rabbitstick or Winter Count soon.
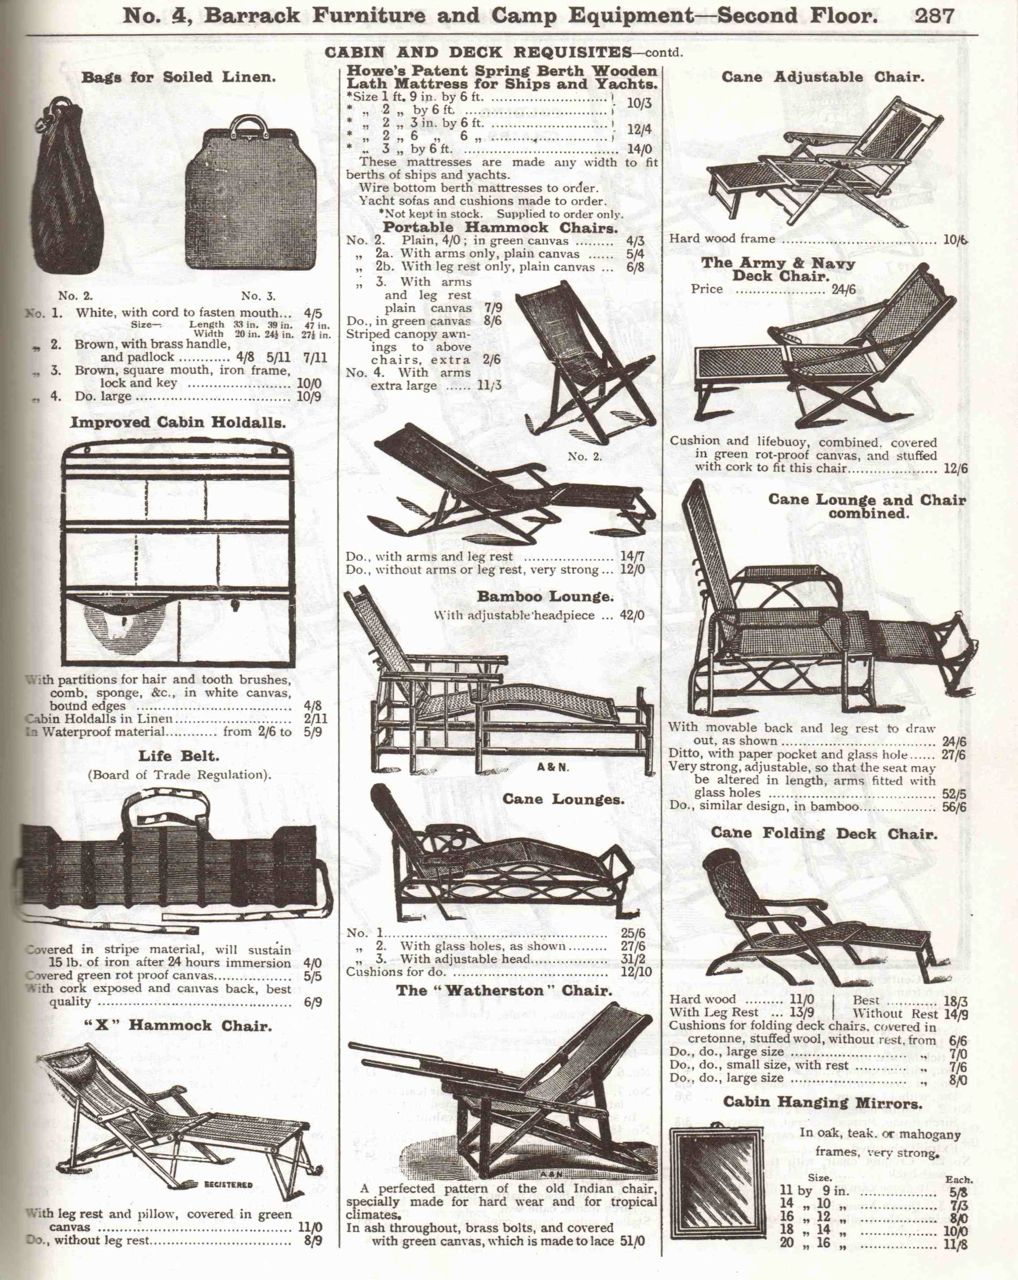
From The Army and Navy Co-operative Society Store, London 1907
Waiting for the plumbers gave me a few minutes to put up this post. This is a lot more than a bunch of nifty images (but it is that as well). There are some excellent items here that should give some inspiration for fabricating some classic and classy gear. From an era before the activity of “camping” was fulling segregated from “regular living”.
Its fair to say that my personal interest in woven Mexican Huarache footwear extends to everything woven. As far as I know despite all the technological advances in history, woven Huaraches just like woven baskets cannot be made by machine and have to be made by hand. In someways this makes basketry and Huarache weaving one of the highest forms of craft.
For more information on the craft of Mexican Huarache footwear please visit Huarache Blog.
Although basketry is one of the earliest forms of craft in the world, its unclear how long woven Basket Packs have existed for, but many old designs are still used in many countries around the world.
Some old paintings and prints help trace Basket Packs to 1400-1500’s.
Images via Wood Trekker: A Brief History of the Modern Backpack (Comments Section)
The Adirondack Pack Basket as it is known today is traditionally made…
I don’t buy a lot of tools but this past week added one old, one new, and created one to add to my pile.
I found this old shoe anvil at out local pawn shop/junk store last weekend and couldn’t pass it up. It will help with my ever increasing level of shoemaking and might just serve as a rivet set for other leather projects.
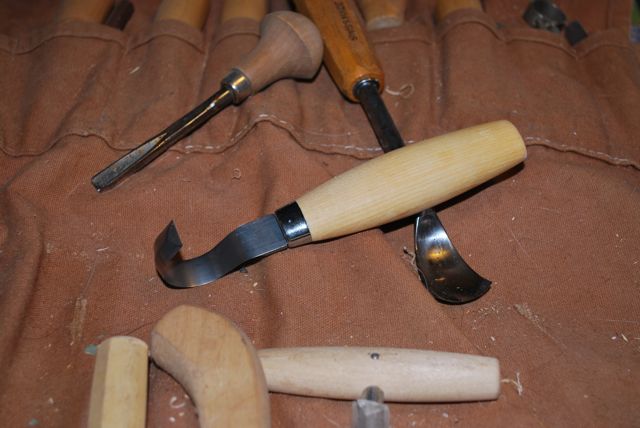
I used an Amazon gift card I received for christmas to purchase a Mora curved knife I’ve had on my wish list for some time. I can’t wait to start making spoons again.
And finally, I have nearly finished a buck-saw that’s been lingering in my mind for some time now. This is it assembled, having sawed a log just to be sure it worked, but lots of finishing touches will need to be added to be a suitable tool. I’ll round the edges and spruce it up with some carving I think, but for now, it makes a nice take-down saw. Total spent: about $20 US.
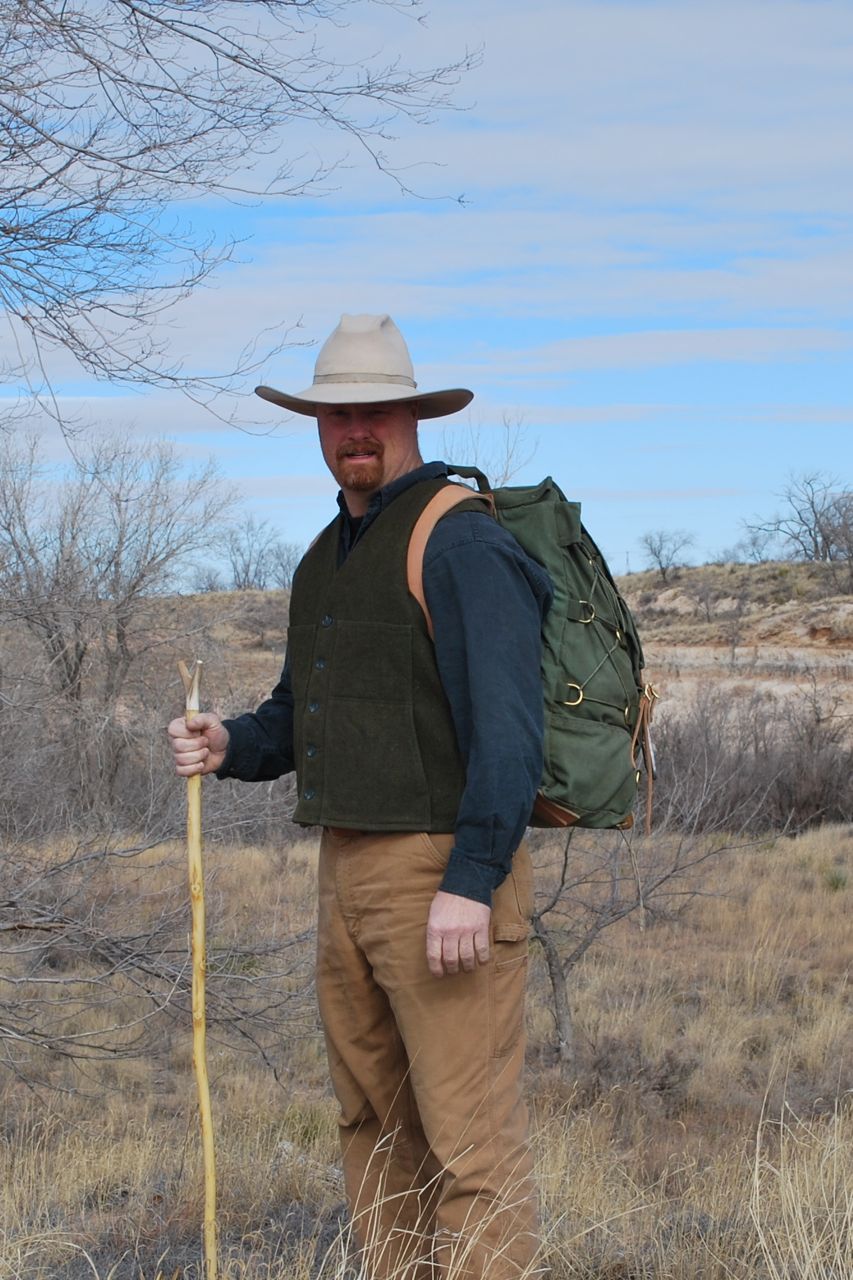
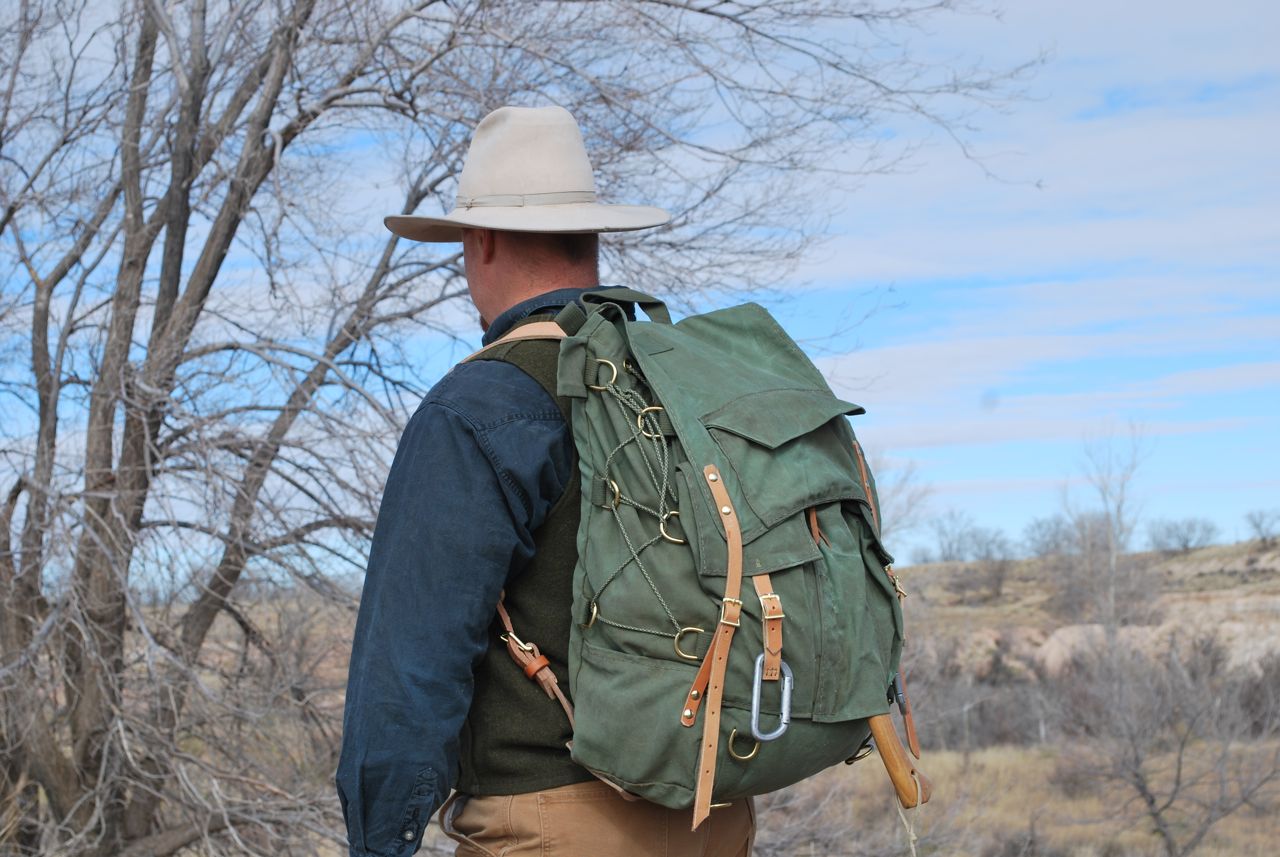
Field testing the nearly finished rucksack. It still needs a few closures and bits but is essentially as finished as anything I make. It’s poorly packed for a quick hike and not very full. More pictures to follow when I get some time off to tramp around with it.
Features: Heavy, waxed canvas truck tarp with 10-12 oz leather straps and all brass hardware. It has an axe sleeve, two long, exterior pockets, small flap pocket, two narrow pen-type sleeves, interior valuables pocket, compression D-rings on sides, D rings for shelter roll, and loops for carabiners.
All hand saddle-stitched and riveted at stress points. I’ll put up a sketch of the pattern for anyone interested.
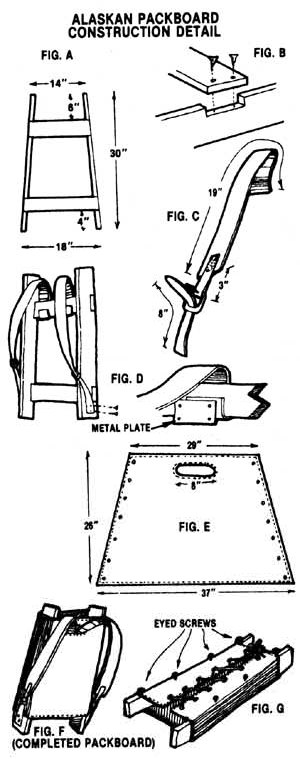
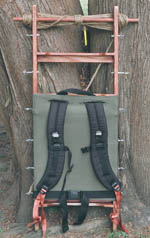
One of many projects happening around here this yule-tide season. A new classic-style rucksack is being sewn, much leatherwork is occurring, and this pack frame is being finished. The wood is shagbark hickory (Carya ovata) made from a bowstave section and some other scrap from the pile. All was split before finishing so the grain is perfectly aligned with the lumber. This made for easy steam bending. As I was working from many examples but no actual plan, there was a lot of mock-up and tweaking of the design to fit my size and intended needs. There’s no metal in the construction. The freight bar and cross members are half-lapped and lashed with rawhide. The bar is also pegged to prevent slipping under load. More to come as it gets finished and field tested.
Here’s a few older frames I could find around the ‘net:

 I made this bag a few years ago based on an 18th century gentleman’s shooting bag. If you are interested to see it’s construction, it is documented HERE. Carried by naturalists, sportsmen, and explorers, this small compartmentalized bag keeps the essentials handy. Sturdy 10-12 oz vegetable tanned leather from Hermann Oak means that this bag will serve many decades without fear of damage from wear.