The Shoemakers’ Shop of Colonial Williamsburg, Virginia has posted an excellent photo-essay of making a pair of 18th Century Jack Boots. Their leather work is phenomenal and shows real craftsmanship. Any leather worker can appreciate this even if they never intend to make a pair of shoes. This pair is particularly interesting with the fire-tempering and waxing that occurs. Their research is in-depth and is well documented.
Stages of heating and finishing the boot.
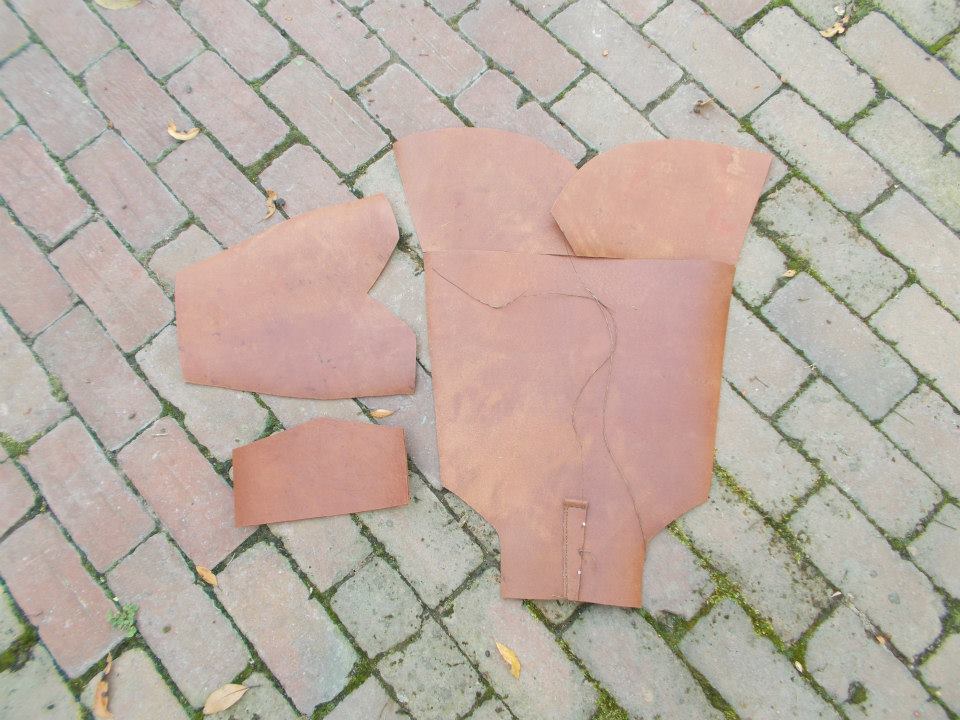
Perfectly stitched in the traditional manner.
The upper coming together.
Ready for waxing.
A judicious use of heat. The grass keep the temperature relatively low.
A finished specimen. Ready for riding.Have a look at their Jack Boot page. There is commentary with each photo. While not full of detail, the images go a long way to understanding the process.
For this project I moved my little operation into the living room of the house. Creating sawdust and wood chips for the dogs to track around in their boredom is a real bonus. But, on to the show…
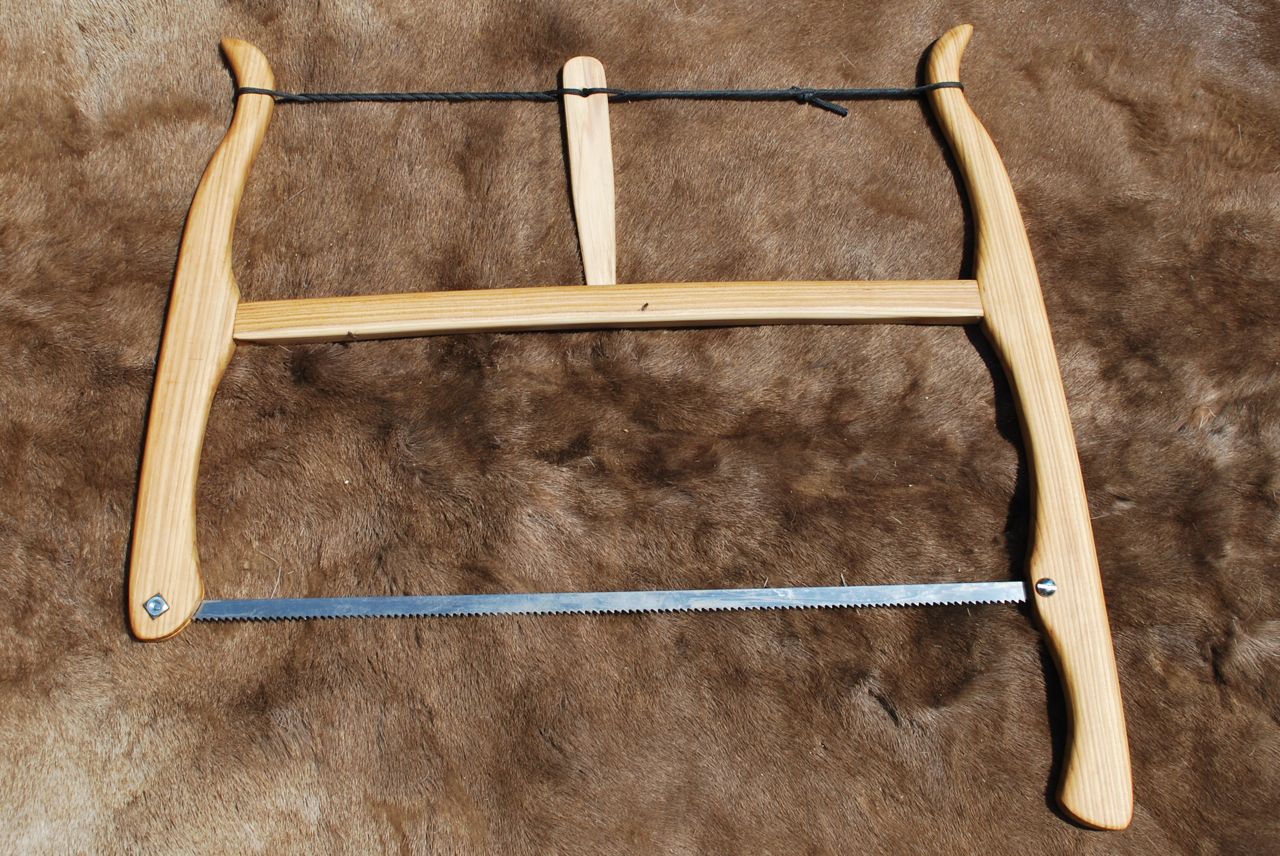
Making a Bucksaw for carpentry, bushcraft, or just because they’re cool.
The little bucksaw I built last winter had never been “finished” even though I’ve been using it for a while now. Having a few hours to spare I pulled out the knives, rasps, and scraper and decided to finish this once and for all before getting down to the next project.
The curves are merely aesthetic and can be ignored completely for a serviceable saw (if you can live with it).
I hope to put this together soon as a sort of “Instructable” for making frame saws, buck saws, and turning saws but for now, this will have to do. Although common enough for the last couple millennia, frame saws have lost their place in the tool kits of carpenters and craftsmen, having been replaced by sabre saws, band saws, and the like. There is a lot of beauty in the old design and a serviceable saw can be built in a short time with very few tools. In fact, the one pictured here cost about $4 for the partial band saw blade, maybe a dollar for the screws and a few bucks for the long-toothed firewood blade. The lumber was created from a less-than-perfect bow stave; a well-seasoned shagbark hickory bodged down to about 7/8″ thick. The genius of this design is that it allows for an extremely thin blade to be stretched very tight for ease of work and a very clean cut.
A file for cutting (top), a store-bought 20″ bow saw blade (middle), and a band saw blade ready to be cut (bottom).
A new, high quality band saw blade can be purchased for under $14 from a decent hardware store. The above is a Delta brand 1/2″ blade with 6 teeth-per-inch (TPI) and is only 2/100ths of an inch thick. That makes for very little waste which can be especially valuable when working harder to acquire materials like antler or bone.
Band saw blades are made in a continuous loop and are great for what they do but the first thing we need is to break the loop. The metal is extremely hard, and fairly brittle which works to our advantage. The edge of a sharp bastard file, like that pictured above can be used to score cross the blade. You don’t need to cut all the way through, but just make a solid scratch across the surface. Then the blade can be snapped by hand, making sure to not put any unnecessary bends in the blade. Drilling the holes in the ends is the tough part. As I said, the metal is very hard so, either you can use a punch to make a starter spot and drill through as is (but this will severely dull most drill bits), or the ends can be gently annealed in a forge or with a torch and drilled soft.
Here are all the components of the new buck saw with the new linseed oiled surface glaring in the sun. The tensioner can be made from any strong cord (in this case 550 paracord), but any strong line can be built up or bailing wire will work (but is a little low-class and ugly and difficult to remove quickly). The spreader bar (the horizontal piece) is morticed into the legs but is not fastened by anything other than the tension on the whole system. Thus, the whole saw can be taken down in a few seconds and stuck into a toolbox or backpack for easy travel.
Above is the assembled saw under tension and ready to cut. A good question was already asked as to “why the spreader is curved in this case?” Because this was made from real wood, split with and axe, following the grain. I could have worked to straighten it for looks but I like the fair curve it created and, as it has no bearing on the function, left it as is.
Hope this helps anyone wanting to make a saw like this. Maybe I can offer this as a short, one day class at Rabbitstick or Winter Count soon.
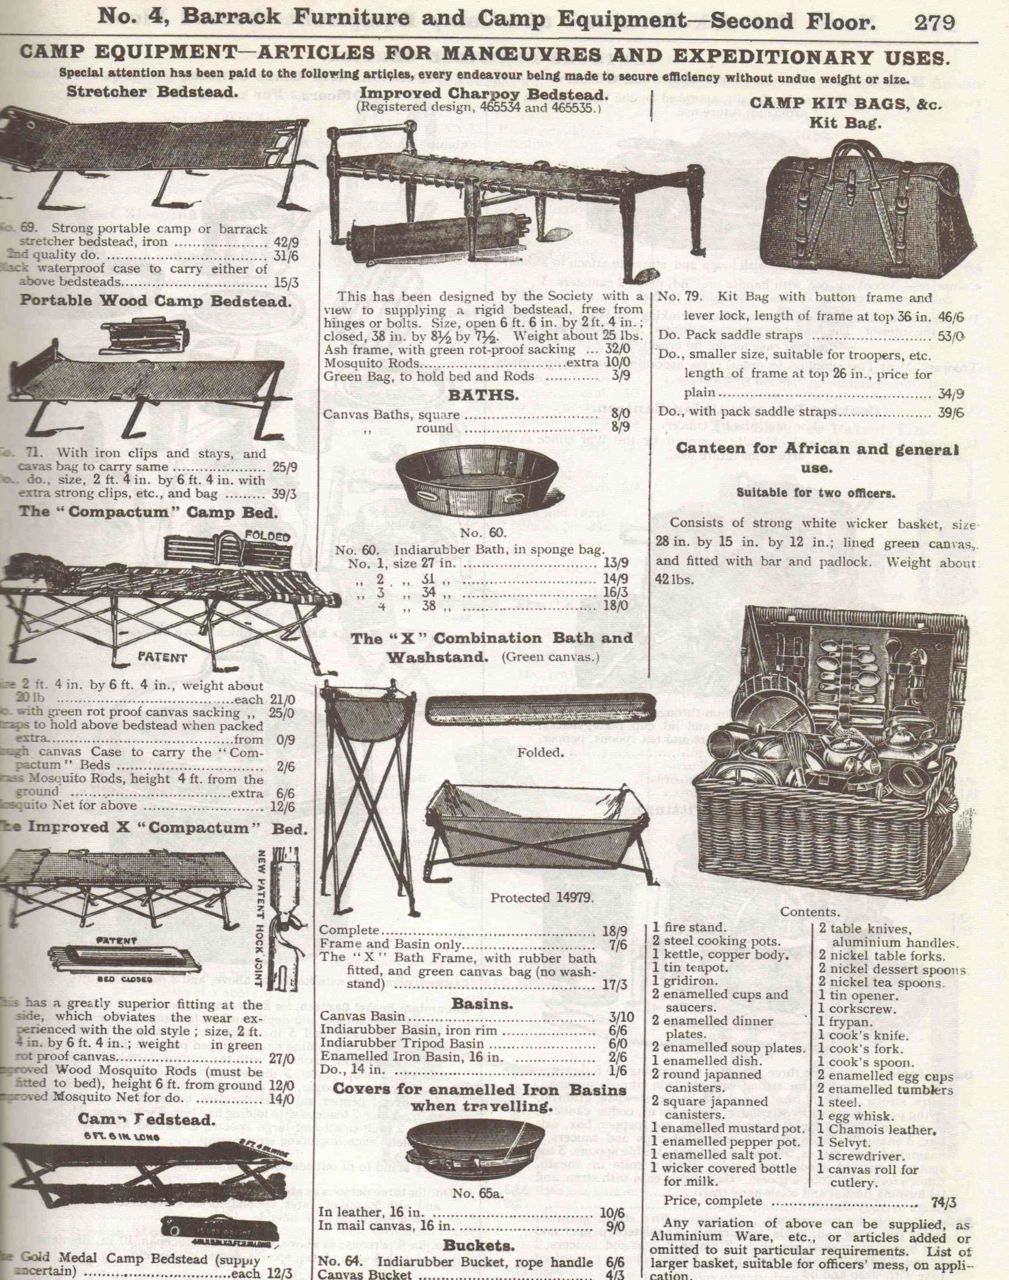
I know I’ve been on a big kick of old gear and tools from the late nineteenth and early twentieth century lately but its good to see the range and availability of these essential items. I find it interesting though, how poor the descriptions are and the arrangement of the catalog. It’s like they just invented this whole idea…
Above you can get an anvil, axe, and workbench on the same page as an Alpine climbing rope, Alpine belt, and a wrist sling (in case the Alpine rope breaks I presume). I would really like the upper “foreign” work bench.
Fretsaws, forges, and blacksmiths’ tools oh my.
I know people who would give almost any left appendage for this nice selection of planes.
The woodcutters’ frame saw isn’t even pictured (too common most likely) but I would be happy with a few others from this page. In all the tools I’ve ever used or seen, I have never come across a “walking stick pruning saw.” German invention, of course.
I think I own that very same “saw set” as pictured above. When I was given by my grandfather I was warned I’d probably do more harm than good if I didn’t know how to use it. Of course, I was probably ten years old at the time.
And in the middle of the page, voila! The very frame saw I plan to make this weekend, and hopefully make a good instruction set to give out or post. Known as a turning saw, frame saw, or nowadays, a coping saw, this design goes back a couple thousand years. Maybe this will be a nice class project for Rabbitstick this year.
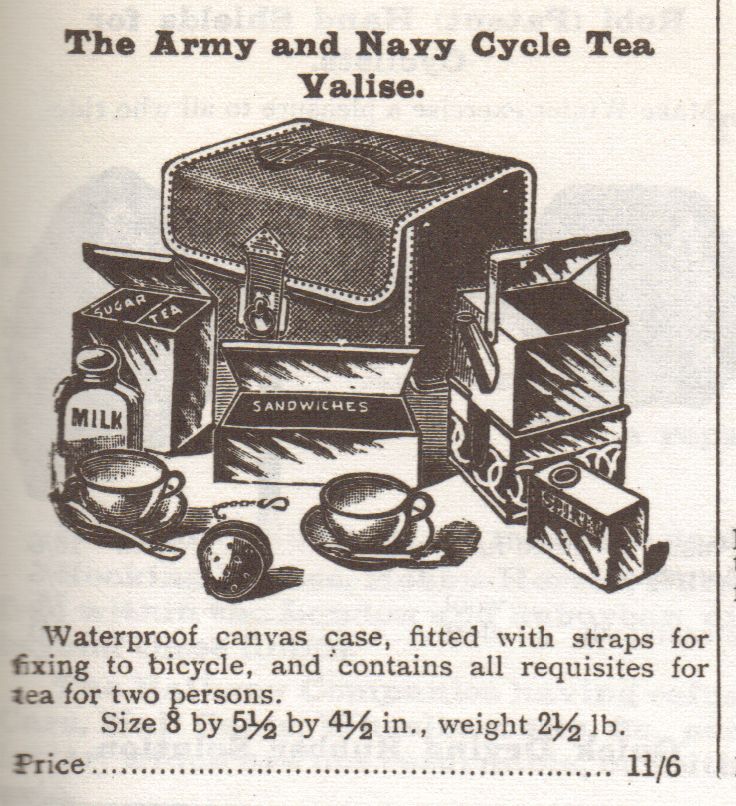
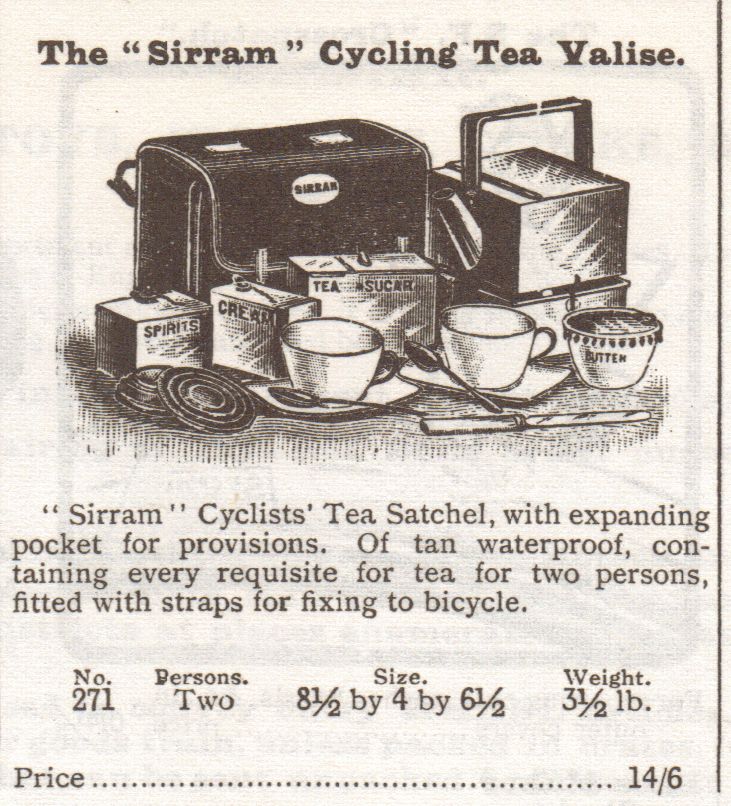
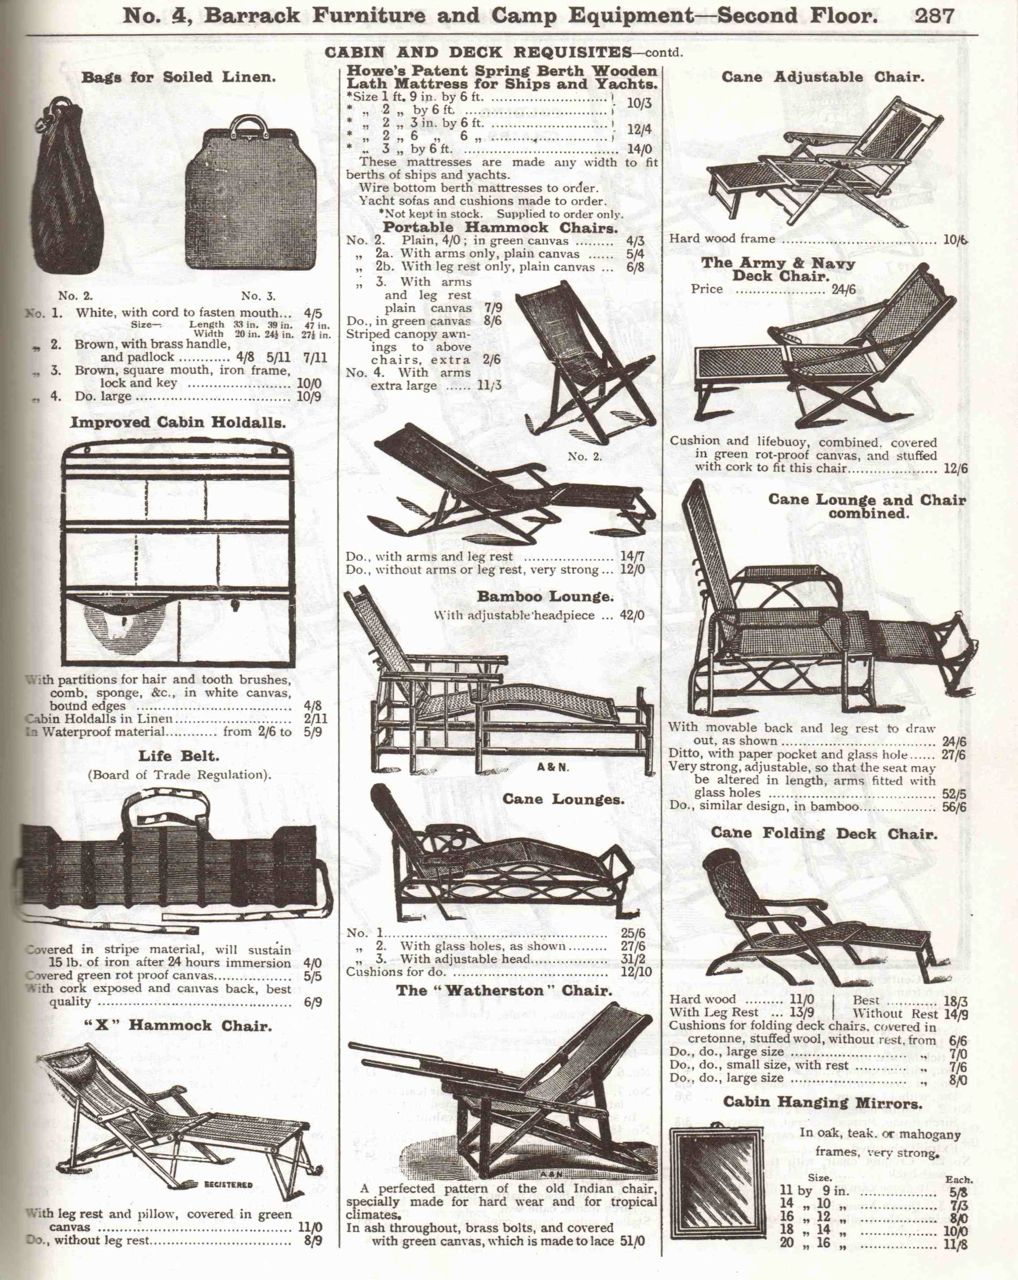
Selections from the 1907 Catalog of the Army and Navy Co-operative Society Store, London.
Mónus József here is a multiple record-holder in Hungarian traditional long-distance archery. In an archery contest in inner Mongolia, he made a successful 653m shot (nearly half a mile) with his home-made bow.
Click the link to see the original page or HERE for more information about Hungary.
From The Army and Navy Co-operative Society Store, London 1907
Waiting for the plumbers gave me a few minutes to put up this post. This is a lot more than a bunch of nifty images (but it is that as well). There are some excellent items here that should give some inspiration for fabricating some classic and classy gear. From an era before the activity of “camping” was fulling segregated from “regular living”.
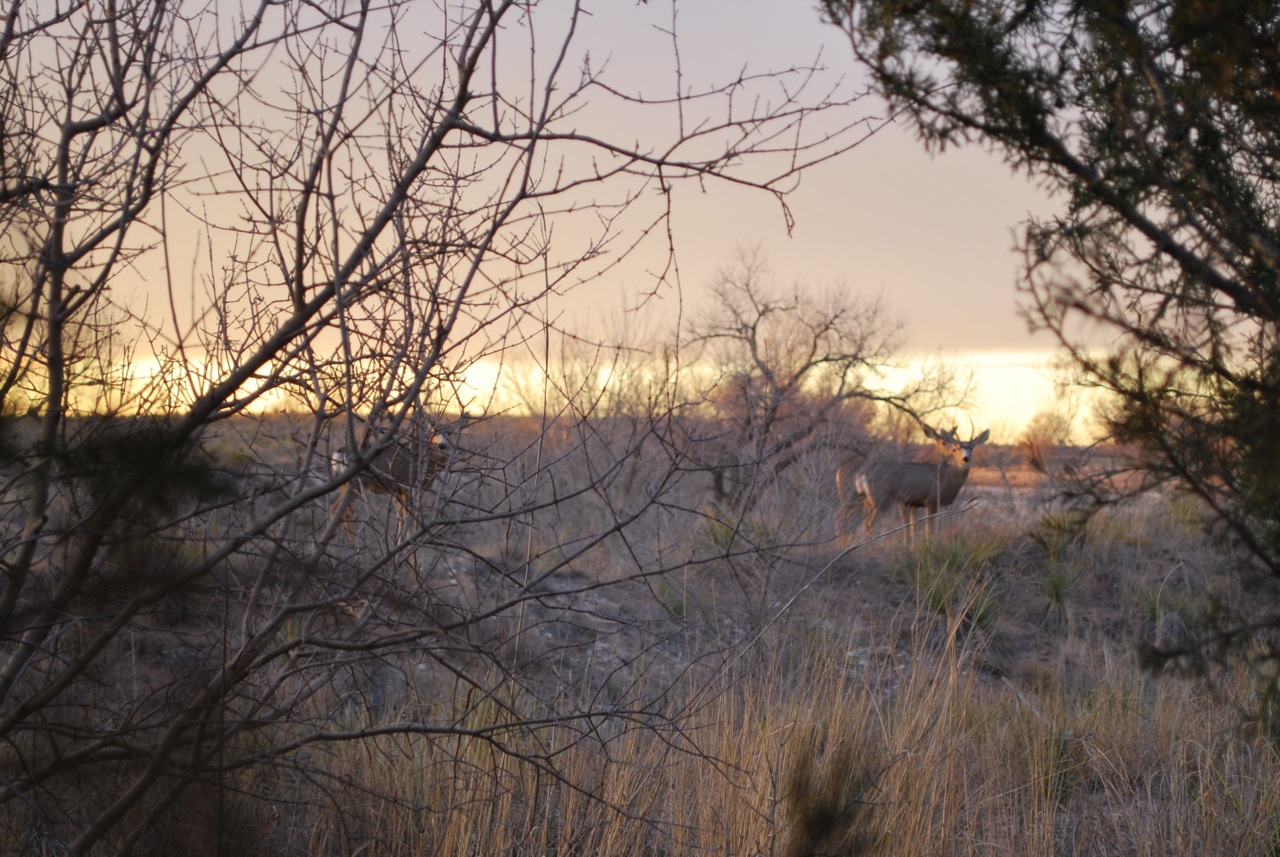
Some thoughts occurred recently while looking through some of my wildlife photos. Especially how so many creatures really “fit” in their surroundings.
Horned lizard in the driveway gravel.
I realize it is mostly for defense (or sometime offense) but it just makes more apparent how poorly most of us humans seems to fit our surroundings. We want to distance ourselves from dirt and sand and smells of nature and cover our scents with industrial chemicals and our flesh with cheap, poorly made clothes.
No point to this ramble really, other than to note the feeling of discord with our surroundings while displacing those who may fit in better.
I currently live in a fairly harsh place; a marginal land overrun with industrial agriculture. A land of extremes where creatures are in constant struggle for water or food. Yet we survive, and hopefully learn to harmonize and not run counter to the way of the earth.

 The Shoemakers’ Shop of Colonial Williamsburg, Virginia has posted an excellent photo-essay of making a pair of 18th Century Jack Boots. Their leather work is phenomenal and shows real craftsmanship. Any leather worker can appreciate this even if they never intend to make a pair of shoes. This pair is particularly interesting with the fire-tempering and waxing that occurs. Their research is in-depth and is well documented.
 Stages of heating and finishing the boot.
 Perfectly stitched in the traditional manner.
 The upper coming together.
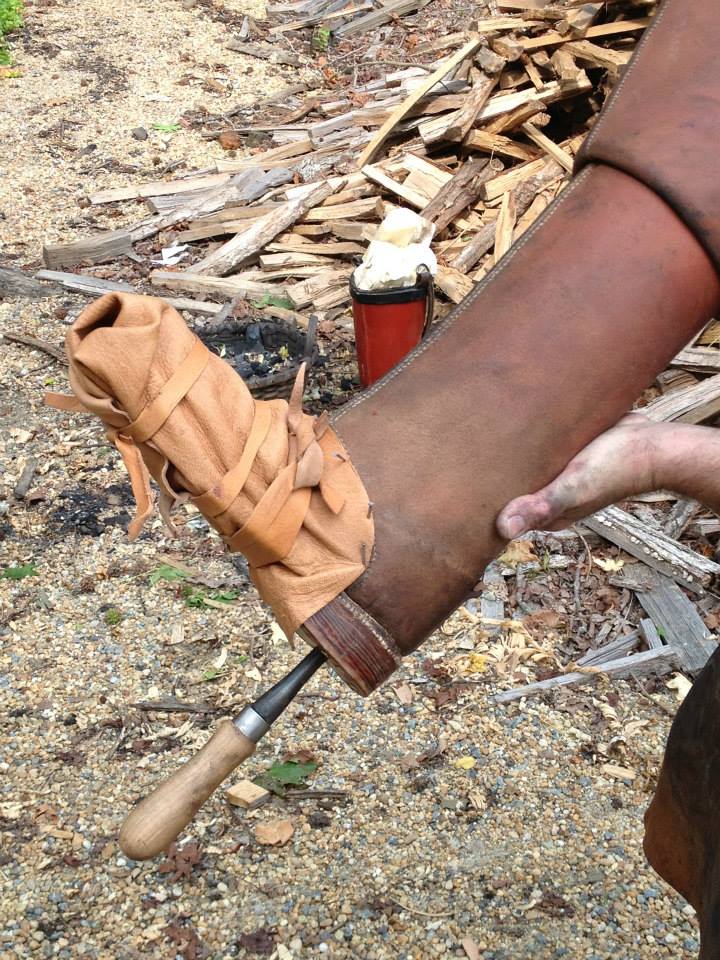 Ready for waxing.
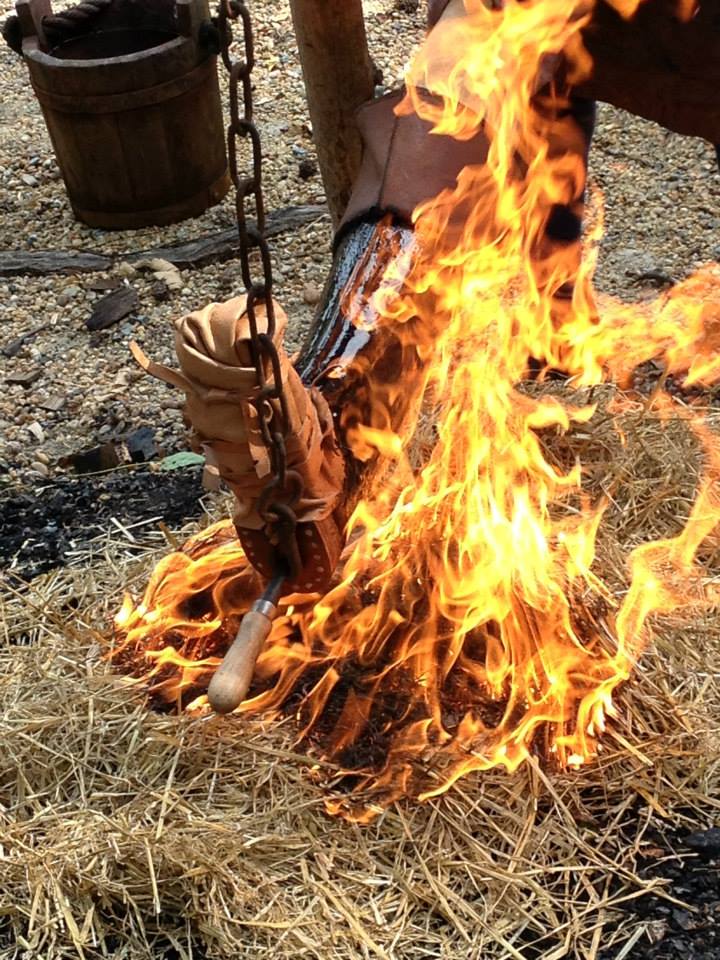 A judicious use of heat. The grass keep the temperature relatively low.
 A finished specimen. Ready for riding.Have a look at their Jack Boot page. There is commentary with each photo. While not full of detail, the images go a long way to understanding the process.