For this project I moved my little operation into the living room of the house. Creating sawdust and wood chips for the dogs to track around in their boredom is a real bonus. But, on to the show…
Making a Bucksaw for carpentry, bushcraft, or just because they’re cool.
 The little bucksaw I built last winter had never been “finished” even though I’ve been using it for a while now. Having a few hours to spare I pulled out the knives, rasps, and scraper and decided to finish this once and for all before getting down to the next project.

I hope to put this together soon as a sort of “Instructable” for making frame saws, buck saws, and turning saws but for now, this will have to do. Although common enough for the last couple millennia, frame saws have lost their place in the tool kits of carpenters and craftsmen, having been replaced by sabre saws, band saws, and the like. There is a lot of beauty in the old design and a serviceable saw can be built in a short time with very few tools. In fact, the one pictured here cost about $4 for the partial band saw blade, maybe a dollar for the screws and a few bucks for the long-toothed firewood blade. The lumber was created from a less-than-perfect bow stave; a well-seasoned shagbark hickory bodged down to about 7/8″ thick. The genius of this design is that it allows for an extremely thin blade to be stretched very tight for ease of work and a very clean cut.

A new, high quality band saw blade can be purchased for under $14 from a decent hardware store. The above is a Delta brand 1/2″ blade with 6 teeth-per-inch (TPI) and is only 2/100ths of an inch thick. That makes for very little waste which can be especially valuable when working harder to acquire materials like antler or bone.
 Band saw blades are made in a continuous loop and are great for what they do but the first thing we need is to break the loop. The metal is extremely hard, and fairly brittle which works to our advantage. The edge of a sharp bastard file, like that pictured above can be used to score cross the blade. You don’t need to cut all the way through, but just make a solid scratch across the surface. Then the blade can be snapped by hand, making sure to not put any unnecessary bends in the blade. Drilling the holes in the ends is the tough part. As I said, the metal is very hard so, either you can use a punch to make a starter spot and drill through as is (but this will severely dull most drill bits), or the ends can be gently annealed in a forge or with a torch and drilled soft.
 Here are all the components of the new buck saw with the new linseed oiled surface glaring in the sun. The tensioner can be made from any strong cord (in this case 550 paracord), but any strong line can be built up or bailing wire will work (but is a little low-class and ugly and difficult to remove quickly). The spreader bar (the horizontal piece) is morticed into the legs but is not fastened by anything other than the tension on the whole system. Thus, the whole saw can be taken down in a few seconds and stuck into a toolbox or backpack for easy travel.
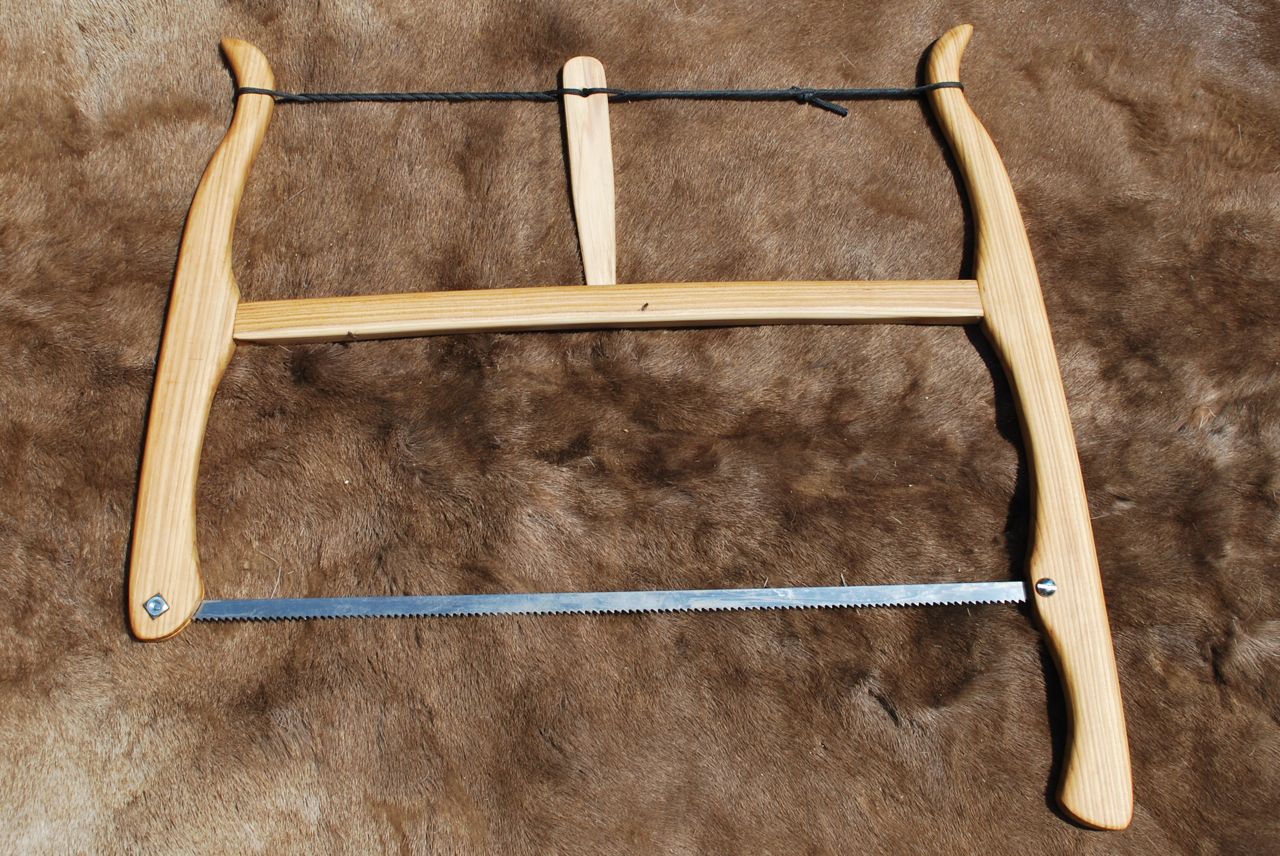 Above is the assembled saw under tension and ready to cut. A good question was already asked as to “why the spreader is curved in this case?” Because this was made from real wood, split with and axe, following the grain. I could have worked to straighten it for looks but I like the fair curve it created and, as it has no bearing on the function, left it as is.
Hope this helps anyone wanting to make a saw like this. Maybe I can offer this as a short, one day class at Rabbitstick or Winter Count soon.
Up soon: a turning saw.