Taking the Biggest Step of All; Transferring the old vardo to the new trailer.
Now that I was confident that the box was going to hold up under the stress of the transfer I was ready to slip the trailer under the body. It was a whole lot less dramatic than I was afraid it would be, and that was a good thing.
And here we are again; naked, and a little afraid.
With the vardo teetering on it’s blocks we prepared to slide the trailer under it. For safety sake, we did this by hand to decrease the chance of bumping the structure or blocks. Because of the layout of the tail light assembly and fenders we couldn’t just suspend the entire body and make the transfer in one run.
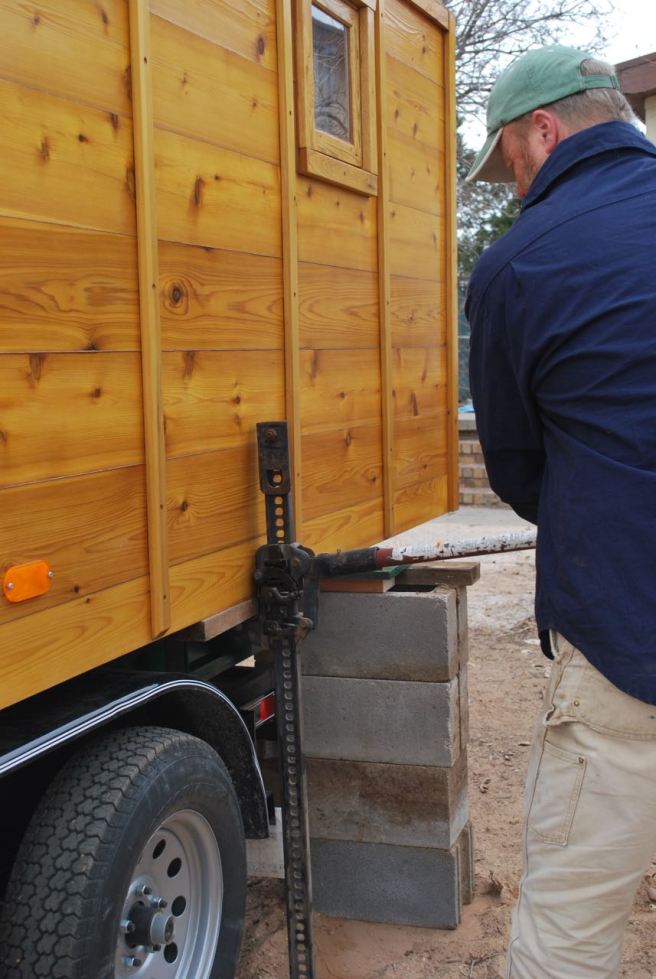
Taking the strain with the Hi-Lift jack in order to move the blocks around the frame.
I used the Hi-Lift jack to easily support the body while we shifted the blocks around. I wanted to get the trailer as far under as possible to ease the final move.
Step three, after moving the blocks around the light assembly.
I was feeling pretty accomplished at this point and we were nearly ready for the final push.
As far as it goes.
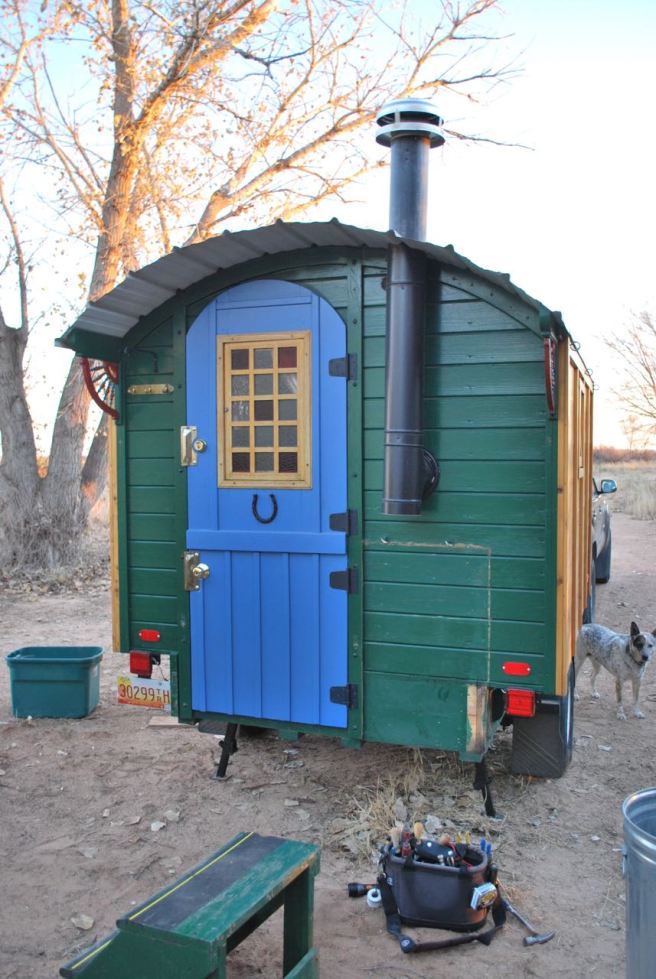
Since there were only two of us, we greased the rails under the vardo body to limit the friction while pushing. This made a huge difference and allowed us to slide it into place with relative ease.
Looking on in slight amazement that it actually worked.
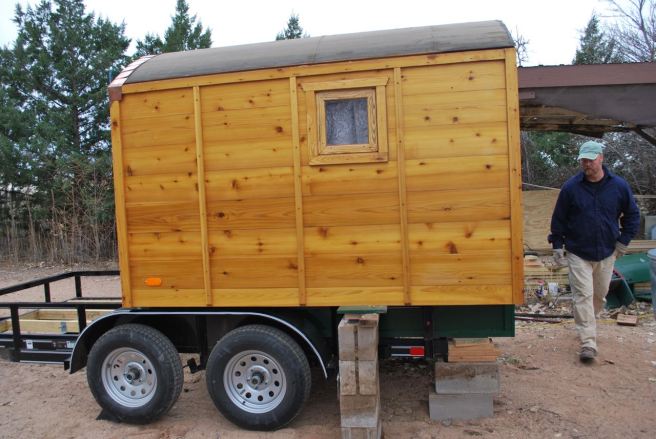
You can see that everything possible was stripped off the body to lighten the weight including the metal roof, stove-pipe, and door. Bolts were used to secure the body to the frame but I’ll likely add a couple more steel straps as we near completion.
Ready to move on.
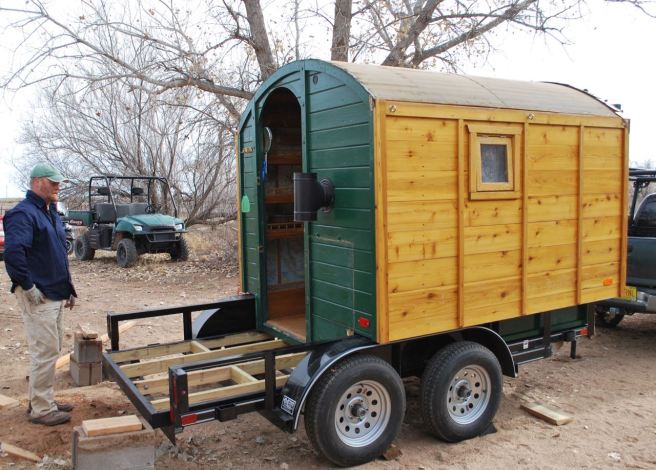
I intend to make the addition look as seamless as possible and to keep the same aesthetic in the addition. For me, it’s a modern living accommodation informed and inspired by the late Nineteenth Century caravans and Sheepherder wagons. They were ultra-modern in their time but had a certain warmth, comfort, and hand-made quality that most modern day RVs lack. Even on a small budget, a solid, warm, and safe home can be built by nearly anyone.
If you are looking for Part 1 of the rebuild/addition then CLICK HERE.
Caution – suggested nudity, implied whiskey, and some old-fashioned Scottish engineering to liven up the day.
K.O. Munson – “Just a case of Excellent Scotch” – November 1946 Artist Sketch Pad Calendar
Now that I have your attention:
Last day in the “before” stage. Lucky for all of you, I’m not naked, just afraid of the BIG move.
Saturday morning came and it was time to start stripping down to the bare essentials (hence the first part of the title, suggested by SB).
After an evening of pulling everything out of the wagon (the first time it has been absolutely bare in over five years) it was time to commence preparations for the move onto the new trailer. This afforded me an opportunity to really look over the entire structure for movement, wear, water damage, etc. and to make changes if necessary. Happily, the structure has held up quite well considering the many thousands of miles and the extensive off-roading I have put it through. Examining the roof, walls, and under sides, the only water marks discovered were those from some seepage through the tongue-and-groove on the front wall from several years back. High-speed driving through torrential downpours really test the tightness of any wooden vessel. As I already knew about this, there were no surprises.
Disassembling parts of the structure that were not meant to be removed become complicated puzzles.
The exterior ledge bracing, storage boxes, and some trim pieces had to be removed to facilitate the fit on the new trailer bed. Stacey hunkered down and puzzled out how they were all connected and spent several hours turning nuts, removing bolts, and unscrewing screws, forming a mighty pile of wood, filling buckets with hardware, and pitching out old fasteners.
After removing the boxes and tie-downs, a fresh coat of paint was in order.
After a thorough examination for wear and damage (we found none), screw holes were filled and a fresh coat of oil paint was applied to the nether regions as some parts will become difficult to access once on the new trailer.
The beginnings of attachment.
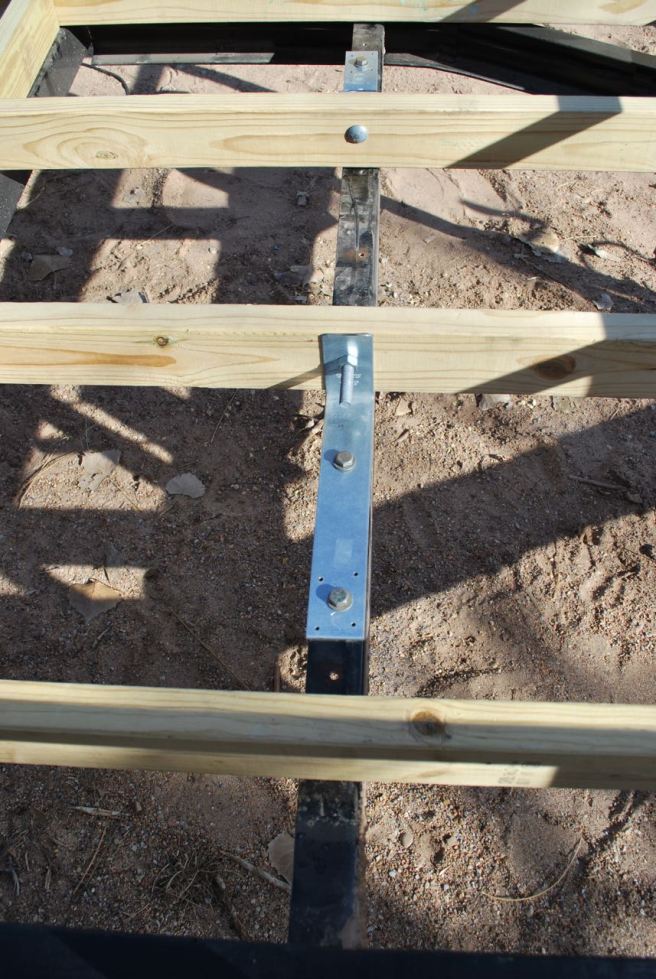
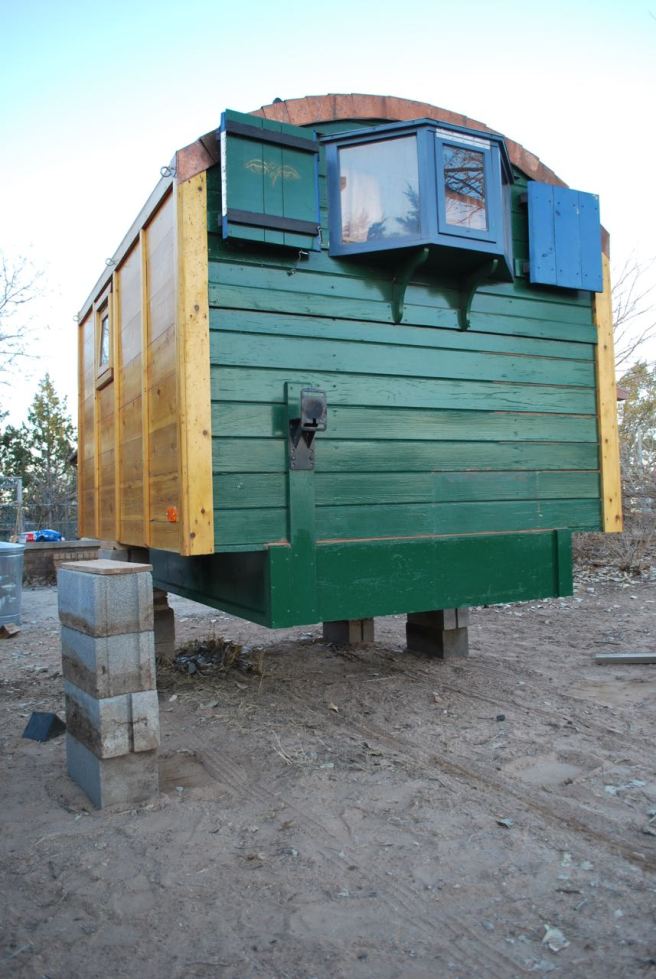
I sprinkled a half dozen Simpson Strong Ties around the frame for strength and safety; all recycled from the original wagon and an old barn project. The vardo will be fastened directly to the steel frame as well but when it comes to this sort of safety “too much is never enough.”
It was an opportune time to deal with many little scars, dings, and damaged bits.
Although no major injuries were discovered in the 20,000 mile check-up, a lot of little issues were dealt with while we had the opportunity. It really drove home to me how much of the original build was done with salvaged lumber and recycled hardware. I have been slowly replacing standard fasteners with stainless, especially below the water-line; this gave me the opportunity to continue this practice (expensive but far-sighted).
While Stacey continued her exterior work, I crawled around underneath disconnecting bolts and steel straps to dismount from the frame. A handful of these could no longer be accessed from inside and had to be persuaded with a Sawzall.
Separating the rear portion of the frame.
How did I remove the frame? Not owning a forklift or other heavy machinery I used the simplest method I could think of. By using the tongue jack and some concrete blocks I was able to first lower the front, thus raising the rear-end. While the rear was up high, I stuffed the blocks and wood under the body to hold it at an appropriate height. Raising the front then disconnected the frame from the rear and allowed blocks to be placed under the front. My only fears revolved around the overall strength and stiffness of the body; would it take the stress in places the appropriate places? As I lowered the unit down, freeing the trailer, I was relieved to hear no creaks or see any flex anywhere.
Using the leveling jack to separate the front portion of the frame.
Over the past couple weeks I have racked my waking brain for an easy and safe way to move the box from one frame to the other. It was at 3:30 in the morning a few days before the move when it came to me. Knowing my wagon fairly intimately, I knew that it was very close to neutrally balanced (i.e., the balance point was very near the center of the body) and this might be used to my advantage. If I could load the back end with enough weight to counterbalance the structure, the body could be cantilevered by 50% or more, like a big kid on a see-saw. The only concern I had then was the overall strength of the vardo body after the steel frame was removed. The fulcrum point would bear a lot of strain.
Envisioning weight distribution.
To sum up this rambling explanation, YES, it dis indeed work!
My floating vardo body, waiting for it’s new trailer.
Voila! I felt like a stage magician levitating his beautiful assistant for an audience full of suckers; in this case, a dog, cat, and a slew of poultry. The old trailer was pulled away to be sold on Craigslist.
And here we are; naked, and a little afraid.
I secured about 400 pounds of weight near the door allowing the front end to float while we prepared to maneuver the new gear into place.
With the early winter sunset I decided the next step would have to wait for morning. Don’t worry, I re-jacked the front end overnight for safety sake. I didn’t want a crushed dog should the worst occur.
If you are looking for Part 1 of the rebuild/addition then CLICK HERE.
Preparing the trailer and laying the foundation for the Vardo.
A couple of issues had to be addressed before any real construction could begin. Unfortunately, a day job and early sunsets dictate my work hours so I only have a short time each night to get something done throughout the week. Here’s the summary:
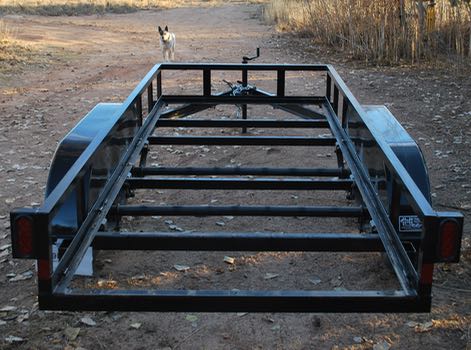
The fresh slate, as delivered from the factory.
The trailer arrived at about 990 pounds. I liked the floor but the extra weight was not desirable. I was going to need to lift the old ledge body about 1 1/2″ anyway (to get the current ledges over the welded rails) so I decided to replace the original floor with a wooden frame to provide the proper height. Does anybody want to buy some 2 x 8s for cheap?
Unnecessary floorboards removed.
A half hour of work, after locating the proper T40 screw driver head for the drill, and the boards were free. Removing the floor boards from the flatbed relieved us of 209 unnecessary pounds, bringing the trailer down to about 780 pounds. That weight-savings can be better used elsewhere and we already have a plan for it.
Test fitting the treated lumber under-framing to build upon.
I’m not a fan of the chemicals in treated lumber but I bow to it’s remarkable ability to survive some pretty harsh treatment. My desired dimensions overhang this trailer by a couple of inches and this was a pretty good way to support that plan without compromising any length. Every inch counts, right? Before you ask, the asymmetrical layout is due to old habits of building on standard centers (16″ in this case). It will only really benefit the laying down of the sub-floor but it saved me some arithmetic. It’s comforting to slip back into zen construction mind.
The coming weekend will hopefully yield some real progress as we are now coming into the difficult bit… moving the old vardo onto the new frame.
If you are looking for Part 1 of the rebuild/addition then CLICK HERE.
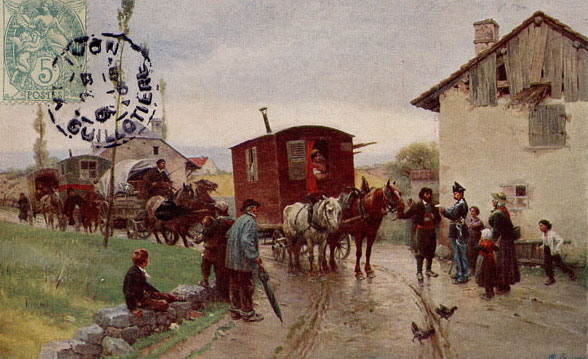
Here’s another look at an image I posted quite a while ago. I really like this photo. These Scottish Travellers give a glimpse of some less-than-stereotypical living waggons (sic). Very few wanderers could afford the classic Dunton Reading wagon but made do with more affordable accommodations; possibly even owner-built.
Tyne & Wear Archives & Museums. Click HERE for the source.
All three of the caravans pictured have mollycrofts for light and air but are of a pretty simple variety. I am struck by the one on the right mostly by how plain it is (plank siding without exposed ribs) and it’s very small proportions. I suspect there were many more of this variety than the elite, custom-built wagons on the roads in Britain in the heyday.
In under ten minutes! Well, watch it being done anyway. Here’s a well-edited and excellent overview building a vardo from the ground up. I don’t know this guy at all but I love the video. I think it’s Canadian (for you Jim).
A Tumblr follower spotted my interest in sheep wagons and other classic mobile lifestyles. They sent me this excellent link to a short (20 minute) documentary from faircompanies.com. It’s a nice overview of sheep wagon design old and new by a couple making and selling old-fashioned Sheep Camps.
And here are a few older posts I’ve made about the American sheep wagons. They’re all you need out here in the west. Click the photos to learn more.
A Sheep Wagon in a Modern SettingGrowing Up in a Sheep WagonA Sheepherder Wagon CommunitySheep Camps are Alive and Well in the West
Have a look at a little bit of nearly lost American history.
Classic sheep wagon; Dutch door, wash pan hanging out of the way but handy, and an offset door.
I love these old sheep camps. There are many on ranches from New Mexico to Idaho and beyond in old sheep and cattle country. They aren’t highway capable but it seems they could provide a real housing alternative for low-income minimalists. For many of us, living this way would be far better than a housing complex or apartment.
Cook stove and kitchen box.
I took a fair amount of design inspiration from these wagons but added a bit of class along the way. I wouldn’t mind having a cook stove like this one though.
A nice stove cap. I need to make something classy like this some time.
Off-the-shelf or build it yourself? I love these details in hand-built structures. This stove pipe cap has a classy look.
A double bed, cooking area, and a place to relax out of the weather. The essentials are covered.
A short piece about Lorna’s wagon can be found here on the Tiny House Blog.
Here are a few classic Sheep Camps from the Wyoming Tales and Trails webpage. There are some great photos and some good information on their web page. I personally took a lot of inspiration from these resourceful and low-cost housing solutions.
Fiddling on the prairie. I could spend much of my life like this!Out on the range. Looking at my Vardo, you can see my inspiration for the offset door and stove.Again, the offset door. I get asked about this a lot. It gives a large amount of room on one side.
There’s a lot of other information and photos of western history here too. Have a look around.