Improving on a Design

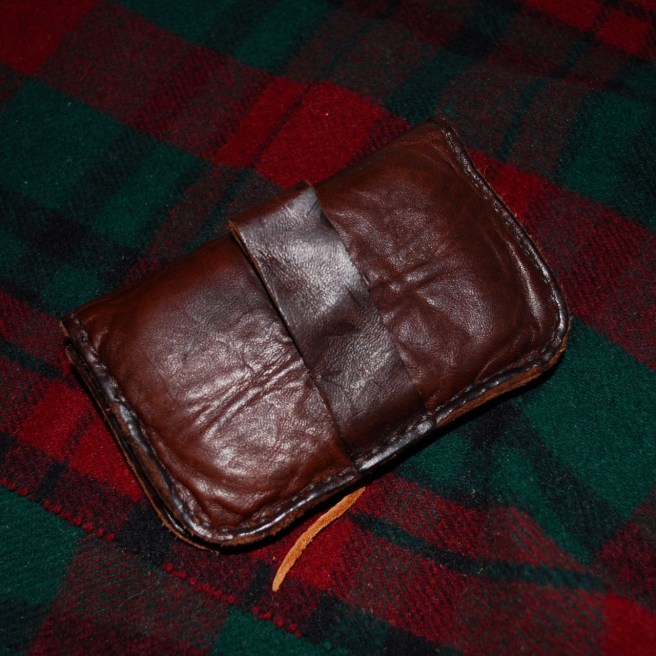
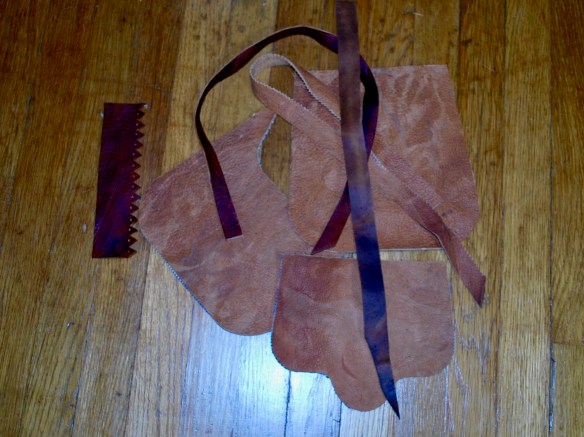
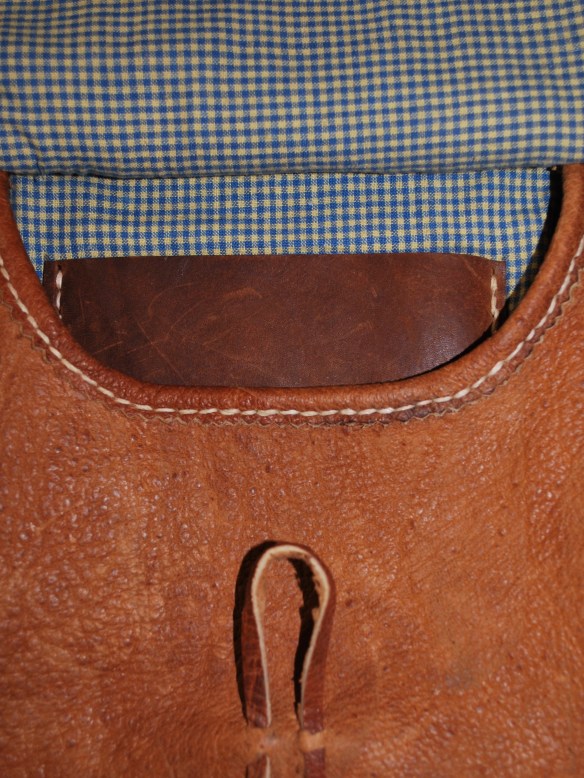
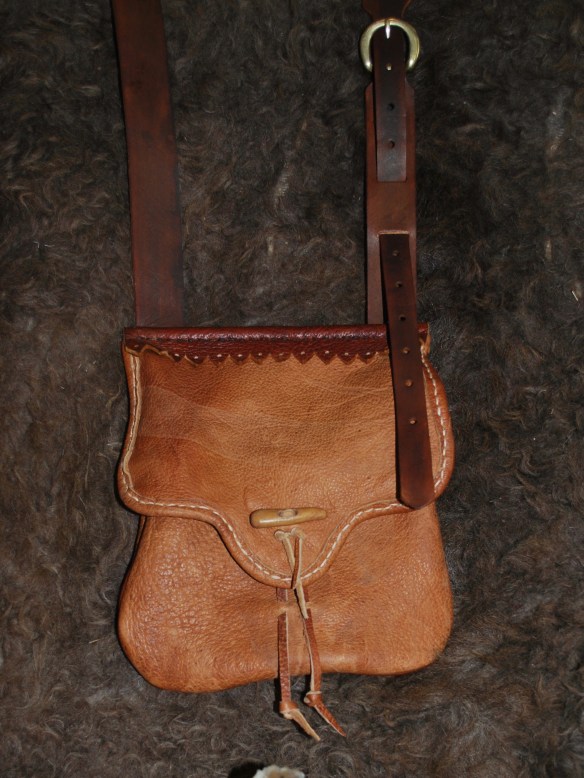
I decided that my kit bags, although nearly perfect for their function, could use a little more room. Outdoorsmen and women can never have too many nooks and crannies about themselves to store little necessities. With this in mind, I have made the bellows sides bigger to accommodate about an inch in thickness. It might not sound like much but it does add up as survival gear can be a very fluid thing.

Fire Kit Complete

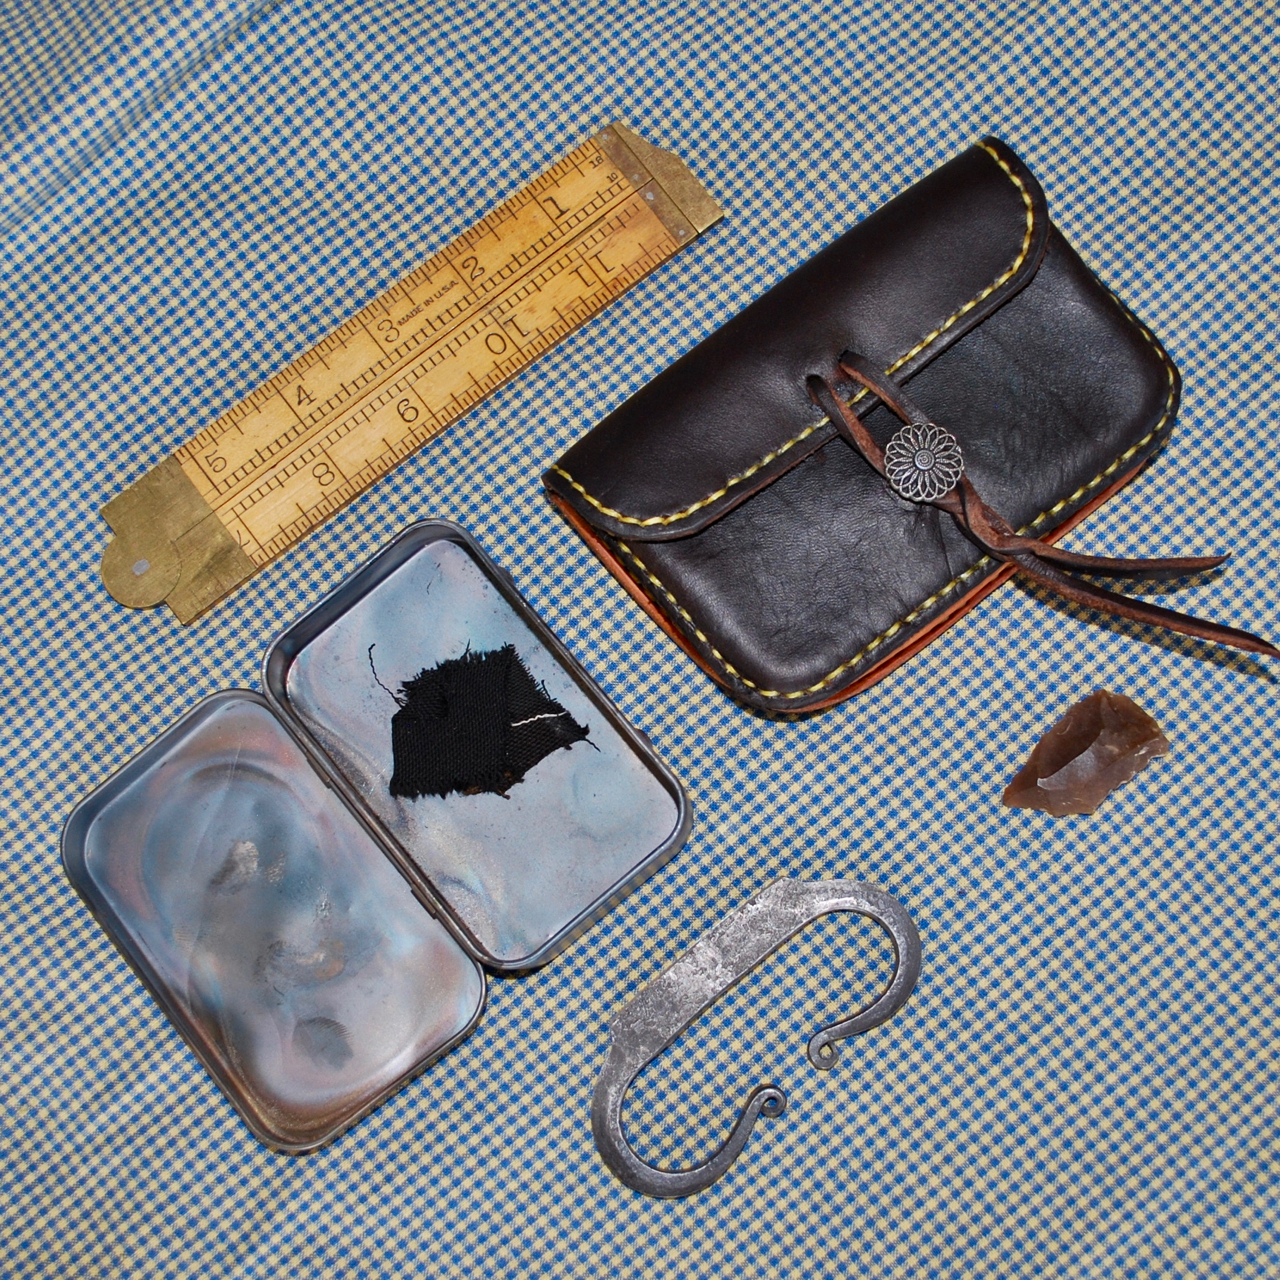
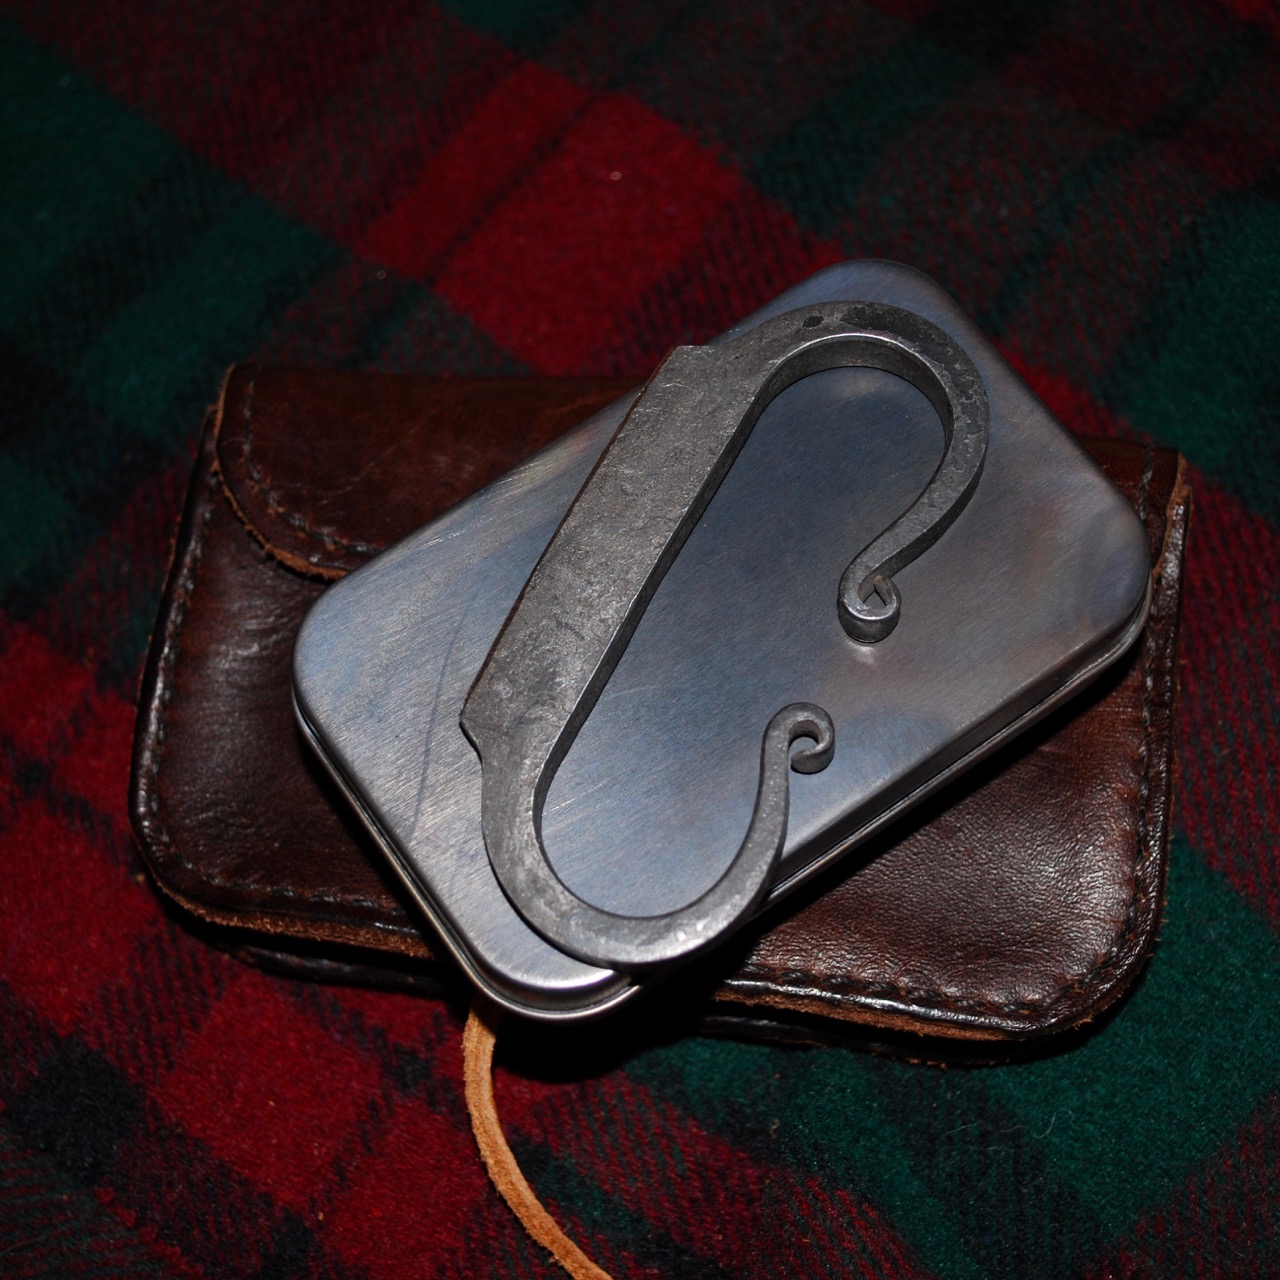
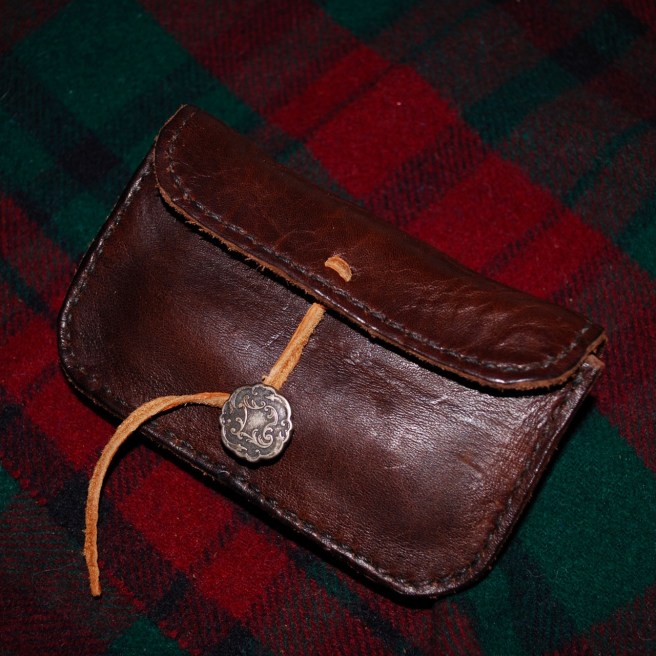
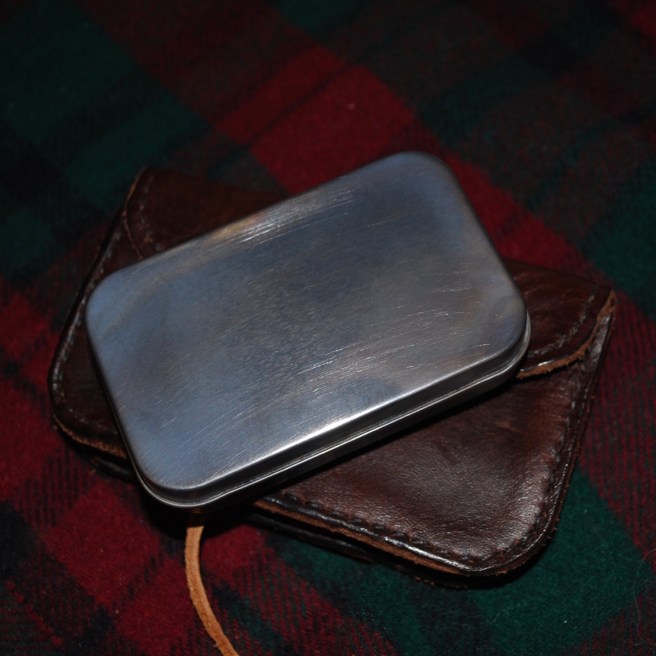
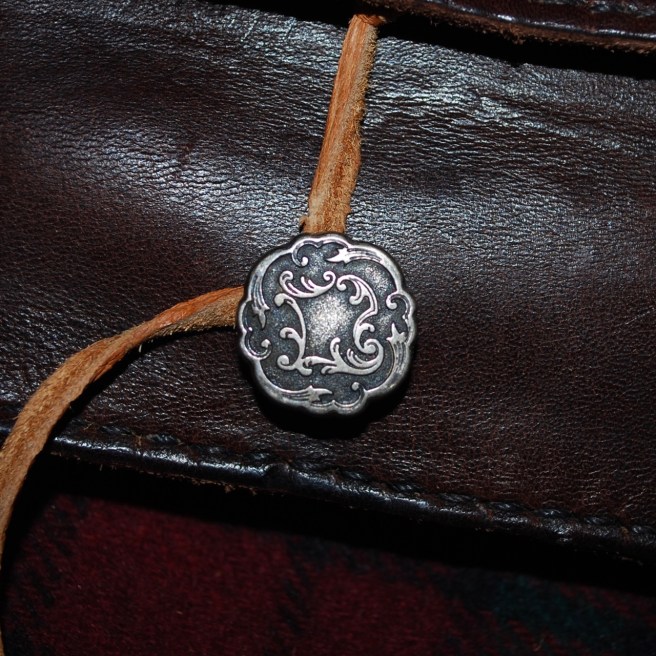
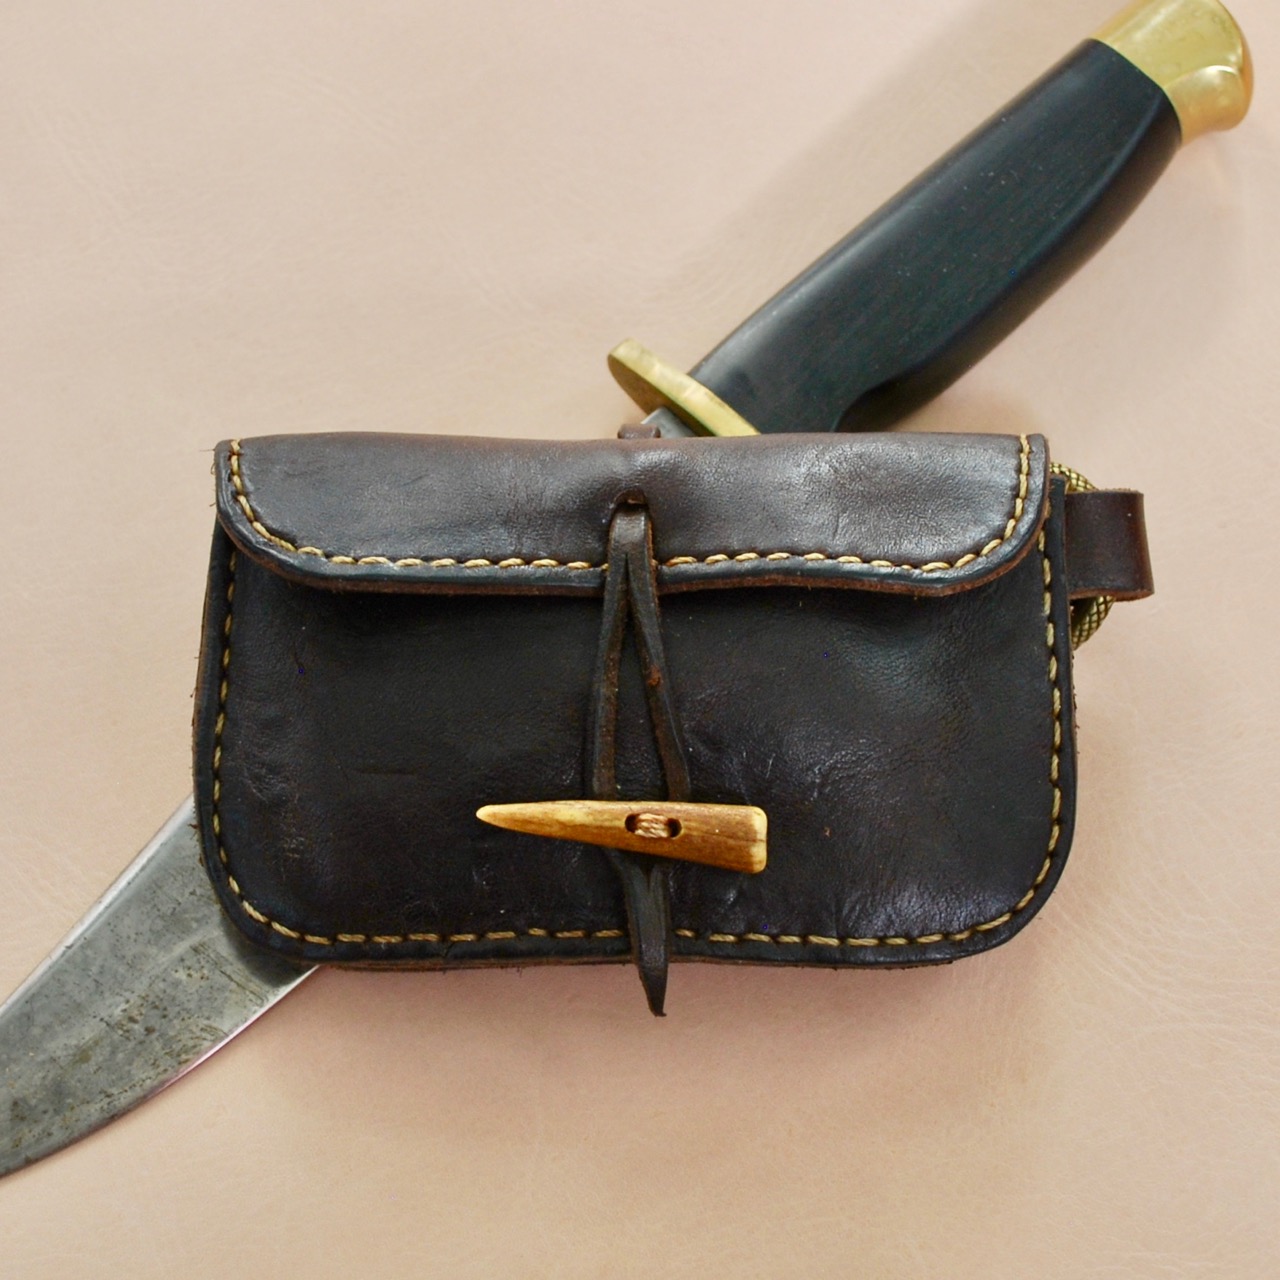
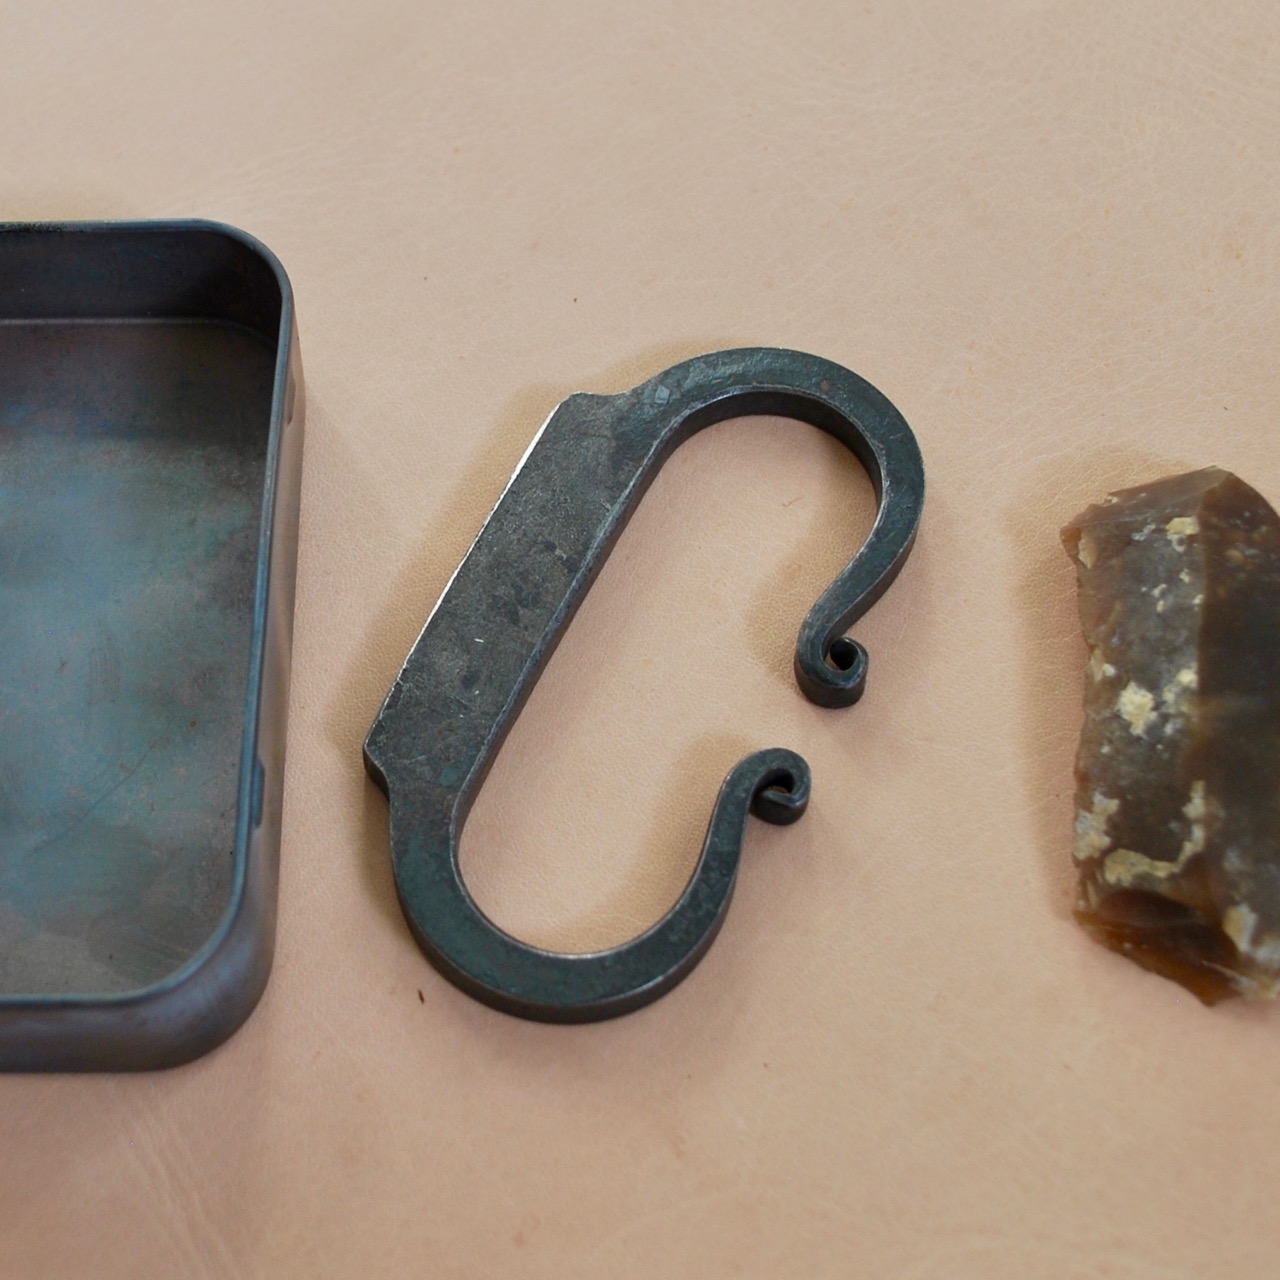
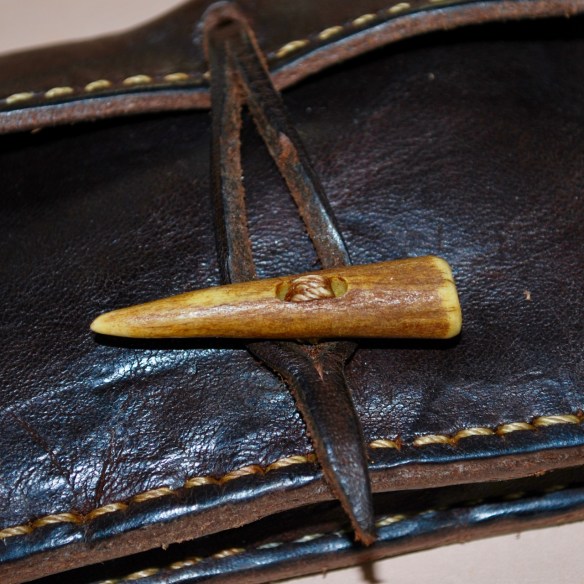
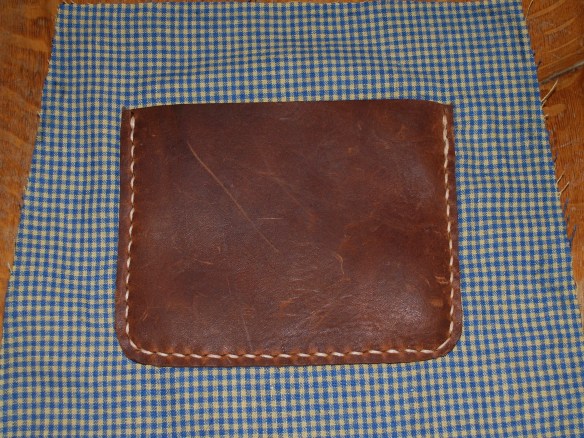
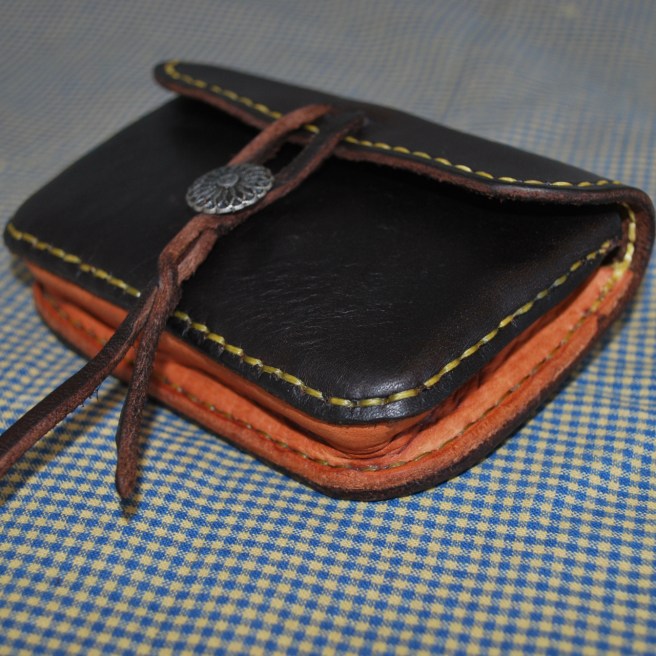
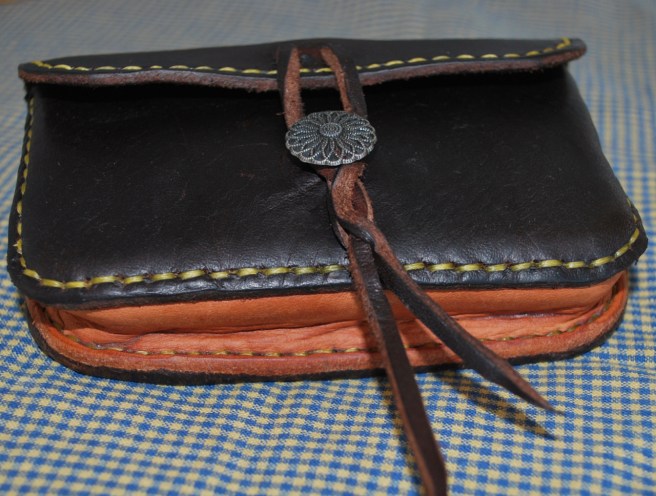
This is a traditional fire kit with TINDERBOX, FLINT, and FIRE STRIKER. This handmade leather belt pouch is constructed from 7 oz veg tanned cowhide and closes with a vintage pewter button. The pouch measures approximately 5 x 3 inches and bellows out approximately 1 inch (interior). The pouch is hung from a belt loop that will accommodate a 2 1/2″ belt.

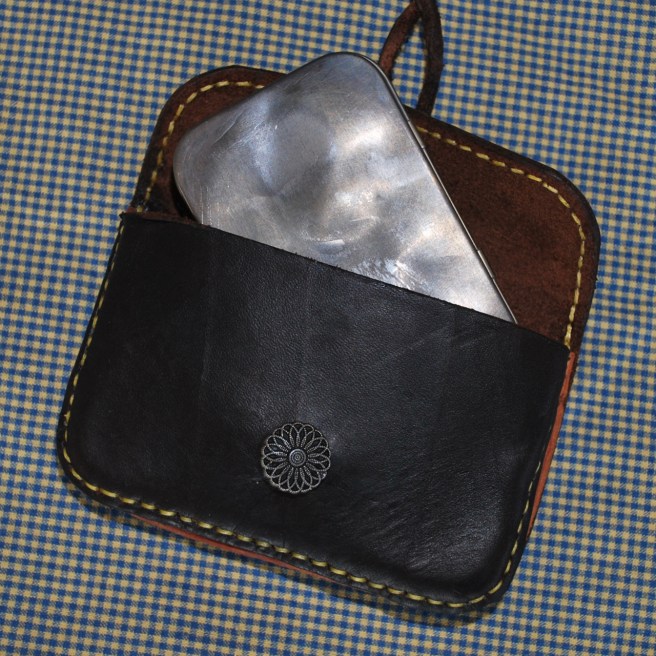
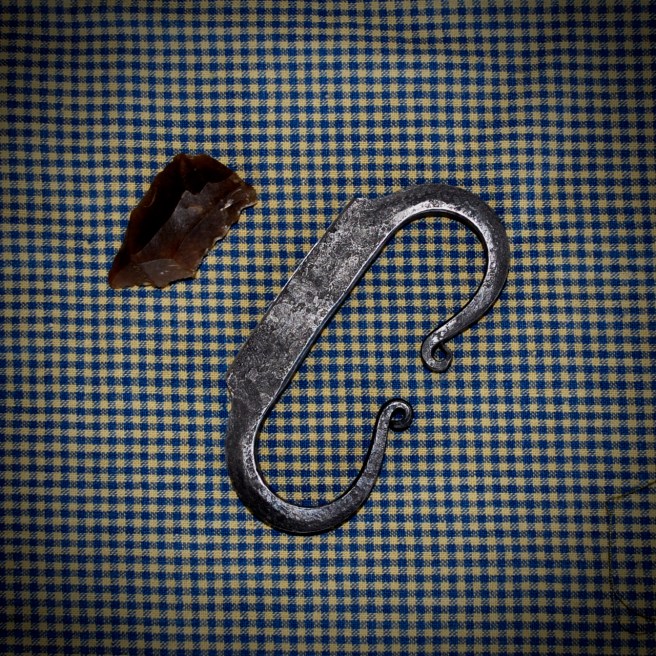
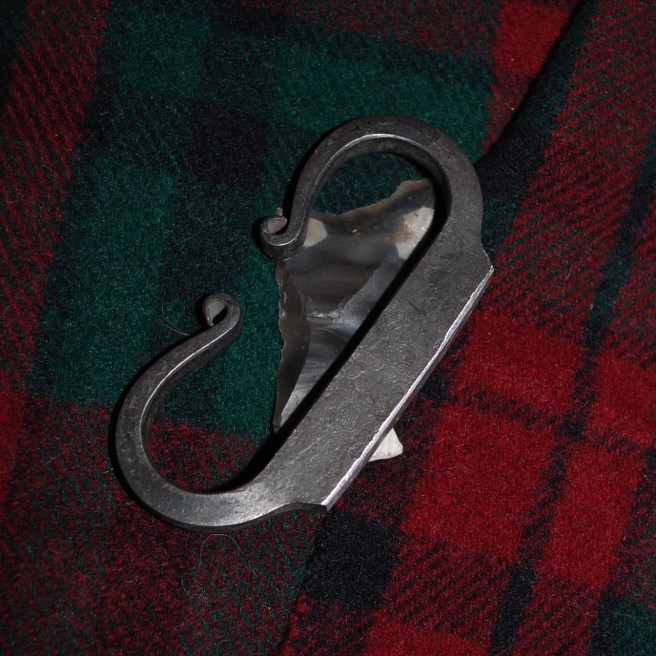
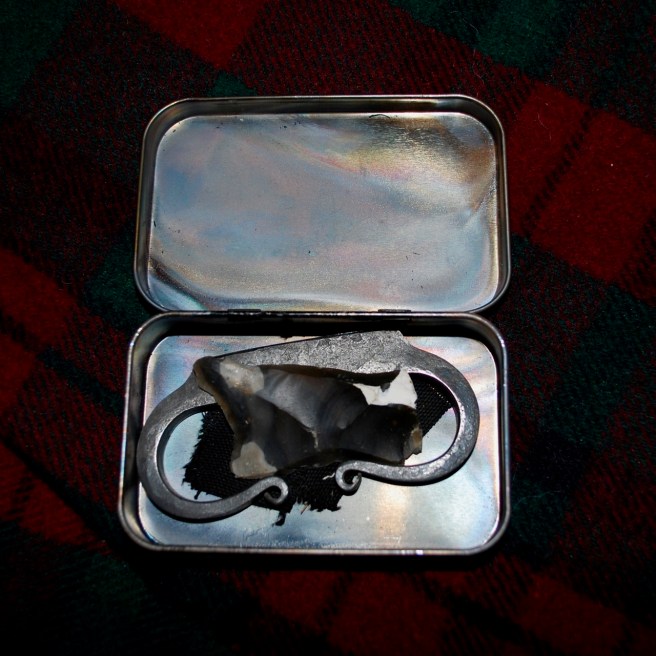
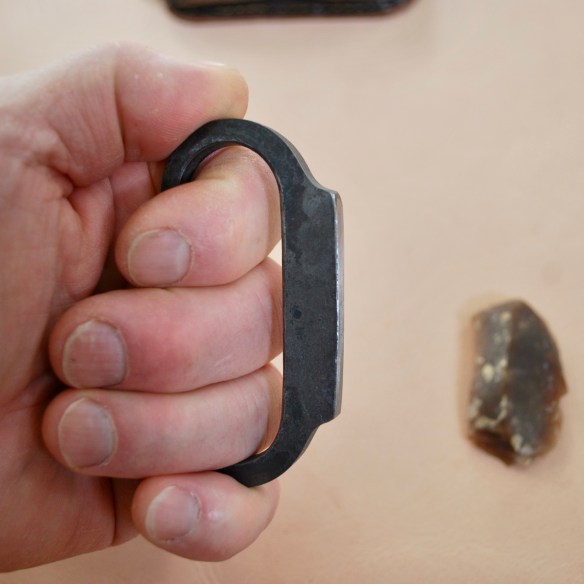
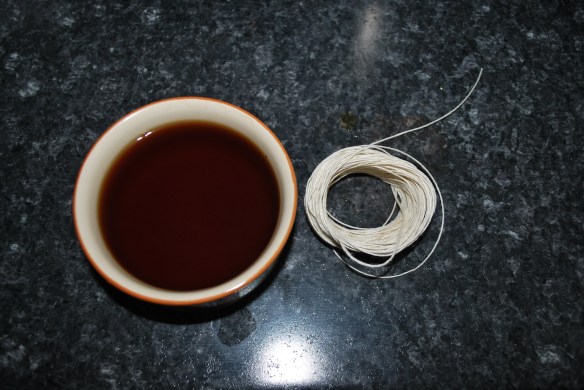
The FIRE STEEL is a collaboration with my good friend Eric at Colonial Iron. It is hand forged high-carbon steel and sparks beautifully. I am including a flint blade made from Knife River Flint (North Dakota). The sheet metal TINDER BOX is a mint tin that is perfectly sized for the job of making and storing charred cloth or punkwood.

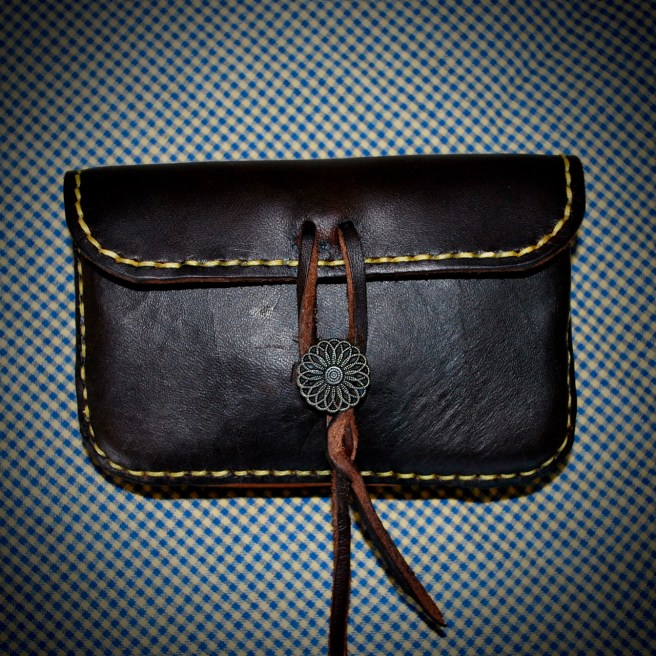
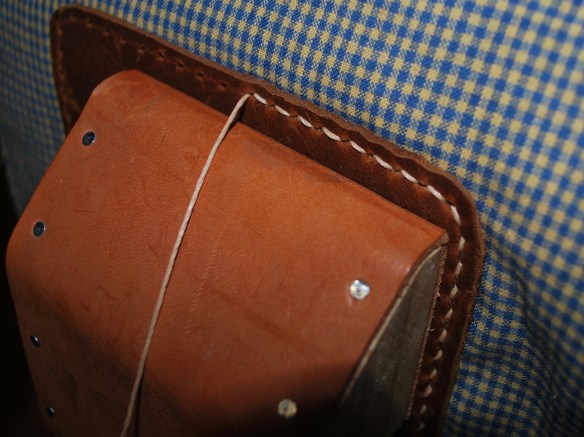
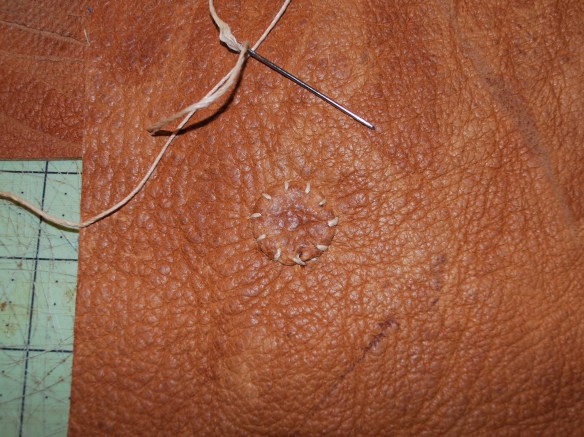
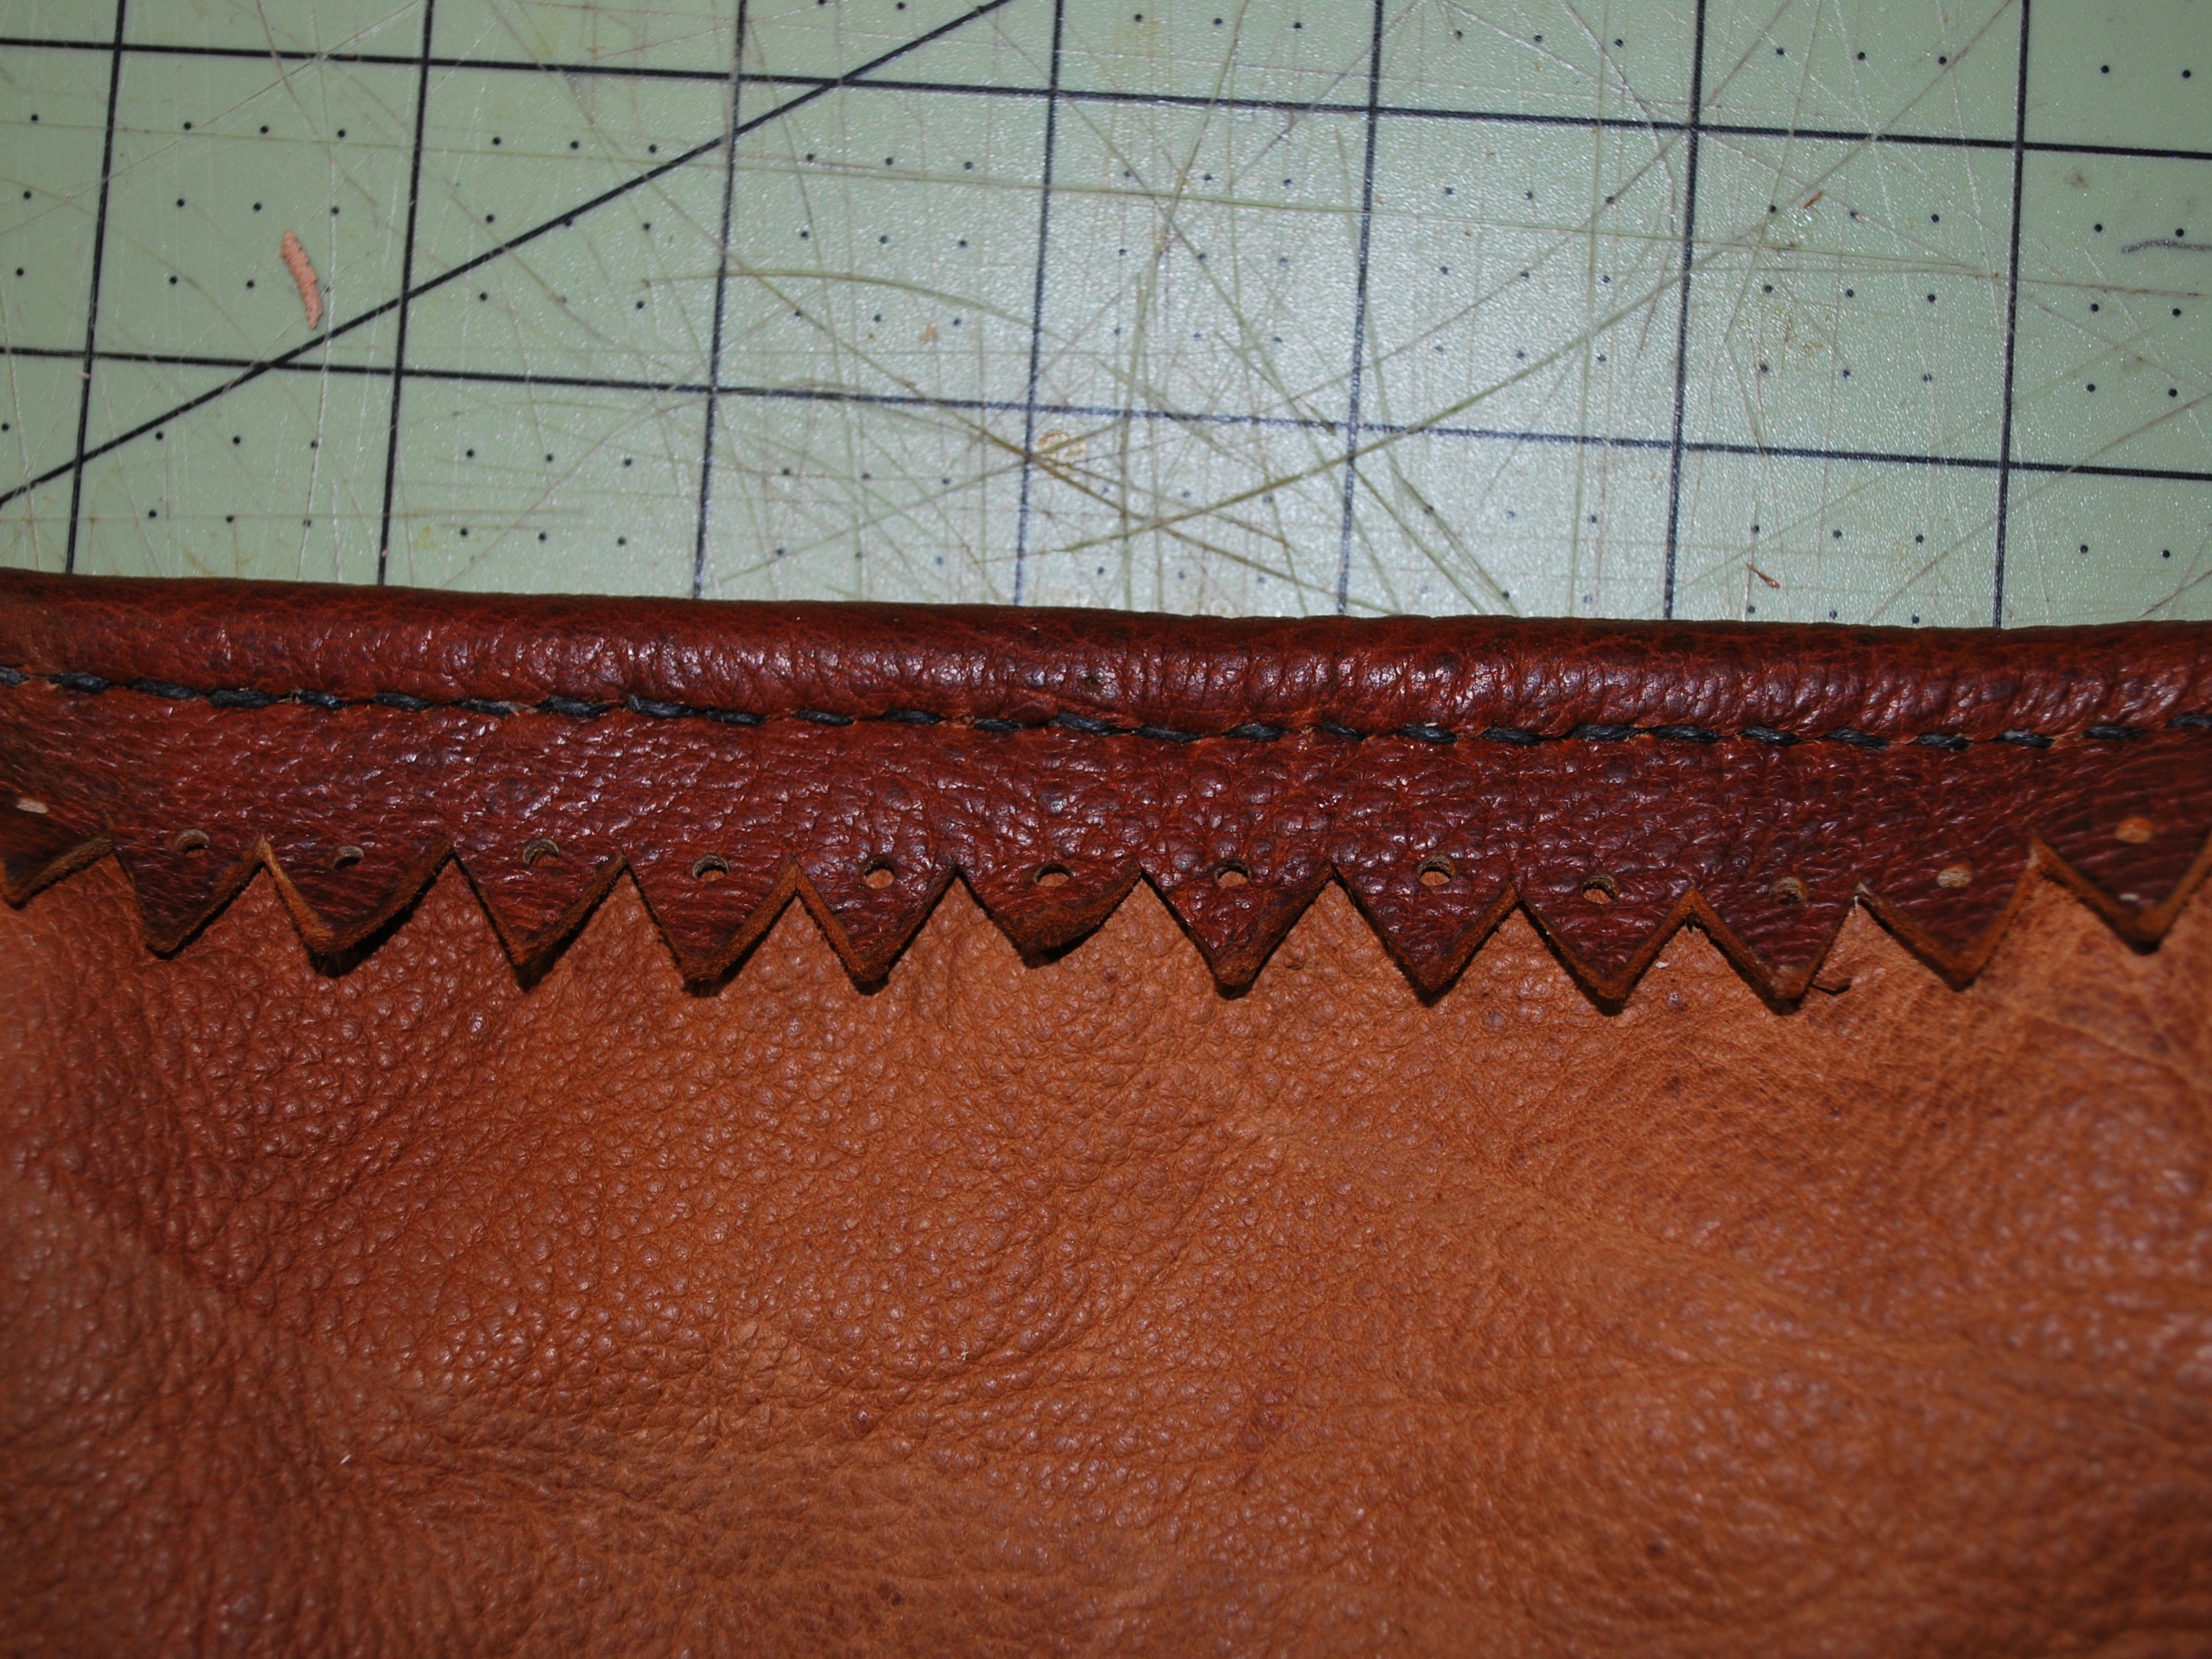
The body of the bag is double needle saddle stitched sewn freehand using yellow saddle thread. The bag has been treated with dubbin (beeswax – neatsfoot oil formula made here in the shop). The pouch works well independent of the kit if you carry the fire kit in your pack.

This is a handmade item so please look carefully at the photos for details of the construction and appearance.

This kit is currently available in my Etsy Shop: https://www.etsy.com/shop/LostWorldCrafts

Fire Kits Again

These Flint and Steel Fire Kits are hard to keep in stock. Since I don’t mass-produce things, I’m pretty slow at filling the shop. We did well enough last year that I still haven’t caught up but hope to in the coming weeks and months. Please check out the shop and consider making it a Favorite to keep up on the new listings.

https://www.etsy.com/shop/LostWorldCrafts

With the addition of a little tinder, the first few fires are on me.

Building Your Own Vardo

I began version one of my Vardo Caravan eleven years ago this month.  As I published updates and details along the way people have for a detailed “how to” for building a vardo.  Since everyone’s needs, skills, and resources are different, I will leave the task to others.  My suggestions are this.  Decide on your basic design wants.  Traditional or modern construction?  Consider size and weight (I went for the minimum of both).  Consider materials.  This will determine construction technique.  As for traditional or modern?  Go look at some used RVs for sale and see how flimsy they are built; not to mention probable issues from toxins in the plywood, pressboard, adhesives, plastic veneers, etc.

Drink in as many details as possible about other wagons.  Are they for show or can they take the hammering of bad roads?  How do you think they will hold together in a wreck?  What kind of long-term maintenance are you prepared to perform?  This is why modern RVs are covered in sheet metal or plastic.  If you convince yourself that you want to use materials others don’t, then ask yourself why.  Are you building an RV that looks “old fashioned” or are you deciding to build with traditional techniques?  (Neither is bad, but it may not be practical to mix and match).

Final sketch that built the Vardo.

Above is the written plan I used to create the Vardo.  This is obviously not exactly how it turned out as changes were made based upon availability of materials and constant reconsidering of different options.  The essentials didn’t change.  This is how the arc of the roof was calculated and overall dimensions worked out.  I chose to use traditional techniques and plywood only in the ceiling (for ease of building and stiffening the structure).  Although glue is used in some areas, the structure depends upon screws and bolts in all critical areas.  I decided I was willing to maintain my wagon so the exterior finish is simple oil paint over wood.

Sketch, sheet 2.

The second sheet of the plan was mostly used as a way to gauge sizes, raw materials, and habitable space.  I didn’t really build from the sheet.

Figuring it all out.

This is just one of many sketches used to figure out space and arrangements.  I looked at Irish Open Lots, Vardos, Bow Tops, and Sheepherder wagons.  With so much experience out there, the best arrangements have been worked out many times over.  Here’s the link to the rest of the photos from the build: https://paleotool.wordpress.com/plans-projects-and-patterns/the-vardo/

Study and read as much as you can about what you want to build.  Make many sketches and plans.  Cut out little scale paper dolls to measure out spaces if it helps. 

Make a model.

Take a deep breath. 

Dive in.

Fire Kits on the Production Bench

The shop has been a little slow with outside projects and day work taking over my hours. However, I do get a few things done along the way and some projects are coming to a completion. I have a load of FLINT & STEEL fire kits on the way for late winter purchase and have put the first up in the shop today (https://www.etsy.com/shop/LostWorldCrafts). There are a surprising number of steps to getting even a simple composite toolkit like these together from the metalwork, leather cutting, dying, sewing, adding the findings and closures, and finally photographing to get them posted in the shop.

Fire Steels from Eric Bartch of Colonial Iron.

I had already designed the pouch style early in the summer and a few sold quickly so my next step was to get some high quality fire steels from within my Maker Family. I put in the order with my old friend Eric and he produced these extremely beautiful strikers for the project.

Simple pouch design that I feel is perfect for my fire kit.

I decided to sew up this round without measuring or marking the stitch line to give them a rustic look. I have mixed feelings about this so I may go back to the more uniform looking stitch marker for the upcoming bags. Each bag will be a little different, with variations on the closures and any added features as whimsy strikes me along the way.

Recycled tinderboxes are an affordable and sturdy option.

If you aren’t familiar with flint & steel fire-making the tinderbox serves a two-fold purpose; to provide a chamber to make charred tinder and to hold and protect the tinder from moisture over time.

The striker doesn’t have to be this beautiful to be functional but to have both form and function makes for a loved tool.

To up the ante, so to speak, on this kit I included a flint from Knife River North Dakota. Some real primo stuff. Needless to say, the high carbon steel strikes very well and produces great sparks. A kit like this will become an heirloom and will only improve with age.

Form and function.

As always, my designs are informed by 18th Century style and are designed for hard use in the wild. If you are interested, wander over to the shop or follow the blog to find out when the next round will be in the market.

All the best to you and thanks for stopping by!

Handmade Sandals

Sandals in progress…

If you have ever taken a class with me you might know that all the intimidating sewing isn’t as bad as it looks.  The sole is three layers thick but the use of a good, sharp awl makes the double needle sewing go quickly.  A lot more work goes into these than I would have initially thought but I really think they come out great in the end.  It took several pairs to get the pattern just right but research into design and construction led me to this final design.  The sole is three layers thick (or more historically) and have been made this way in Europe and North Africa for more than 2,000 years.

The thickness of additional layers isn’t just to provide safety for the feet but the central layer provides a path for the straps to travel through without lumping under the feet.  The parts consist of an insole (medium weight oak tan leather), mid-sole to allow tunneling the straps through, and an outer sole, in this case, leather.  The straps are 48″ per foot plus the heel yoke.

This is how they looked when I thought I was finished. Shortly after, I added buckles and have since been through a few more soles. Currently they are shod with rubber.

Nine years on and still going strong. The patina that good leather takes on cannot be simulated. They get a coat of dubbin every six months or so but otherwise, need little care. I hope to get back to a time when I can wear them daily again.

Everyone Should Cultivate Manual Training

Does this mean we should neglect our intellect? Absolutely not.

In fact, the opposite. We should strive to cultivate both mind and body to become the most perfect specimen we can become, daily.

I came across this passage while reading a bit this morning from Amateur Joinery in the Home (1916) by George and Berthold Audsley and thought it would be worthwhile to share.

There is a lot of good advice here but the above sentences stuck with me while taking the morning walk. “One never knows when life or limb may depend on the expert use of the hand and ordinary tools.” This could be applied to so many facets of an interesting life and is the basis of human survival that has put us where we are for a million years.

I have been using the down time afforded us by the events of 2020 to catch up on an ever-growing list of books and articles I have been amassing for decades. When I was working in archaeology full-time, the hundreds of pages of reading most weeks necessary just to keep current pushed many other interests into side avenues. I hope you all are using your time in a way that works well for you. In the mean time, this book is available for anyone with an interest in tools and working with their hands. It may even inspire new projects.

Click here to download a pdf file of the book. Amateur Joinery in the Home.

Hunter’s Pouch

Kentucky Hunter’s Pouch –

Few words are needed to show this project.  It is a Kentucky Hunter style pouch of a style popular throughout the 17th and 18th centuries in America.  Its antecedents come from Britain and mainland Europe but changed with the times as North America was colonized.

Most of the components cut out and ready for sewing.

In the days before the common man had trouser pockets he still had a fair few things to carry, especially while out foraging in the forest. Men and women have carried some sort of bag to hold their essentials for as long as we have supplemented our inadequate selves with tools. Things such as food, fire making supplies, sewing kit, or ammunition.

After lining with a medium-weight cotton fabric, the interior pocket is sewn in.

The poor man’s hunting pouch is essentially a single pocket bag with one or more internal pockets to separate out the smaller items.

Closing a bullet hole in the hide.

I chose some bark tanned elk from Joe Brandl as it is sturdy but with a very soft feel.

When using real linen, I often soak it overnight in a hot cup of tea before drying and waxing. This gives a nice reddish-brown color.

Pocket complete.

The body is sewn with a welt to create a tight seam and edging is added to stiffen the pocket and flap.

Edge-binding and the reveal of the interior pocket.

The inside pocket makes small items accessible that might otherwise be lost in the bottom of the bag. When shooting black powder, this pocket is a must.

Hand-pinked and pierced binding at the top of the bag.

People have been adding fringe, ruffles, and other decorations to seams and edges for as long as there have been makers.

This type of bag is designed to stay closed without any fastener but it is good to have a way to really secure the flap when traveling. This simple closure is a type that I like for a rustic bag. The toggle is carved from antler and is secured by a simple loop.

Completed bag with strap and buckle.

Finally, a shoulder strap is added. This one is 7 oz. veg tanned cowhide and adjusts by more than 12 inches. This will accommodate most people but more importantly will adjust with the seasons as heavier or lighter clothes are worn. The buckle is solid brass and will never rust.

Typical attire of the early frontiersman. Nearly always armed for hunting and protection, our gentleman here sports three essential items; gun, powder horn, and hunter’s pouch. “Western Hunter.” Illustration credit: Lewis Collins, History of Kentucky, 1850.

This bag and others are available in my Etsy shop linked here:

Sandals

This post came from looking through a few class photos from Rabbitstick several years ago based on an inquiry. This is one of the years I taught my favorite sandal design, an ancient one though still cleverly marketed as a modern style.

I call them saint sandals as they look like something you would see on a medieval depiction of some holy wanderer from Europe or the Middle East.  To me, these are the greatest sandals I have ever owned.

This design is a good introduction to leather working and specifically, making footwear, which can be a bit more complex than most people know.  Shoes really need to fit well in order to not cause pain or damage to the feet so an open design is a good way to start on this craft.

As I make them, the sewing is fairly minimal and can be eliminated entirely with the use Barge Cement.  The sewing makes them a stronger design and I think adds a sense if beauty and craftsmanship to the final product.  It is also a good introduction to double needle saddle stitching.

With a little dedication, these can be made in a long half day and are ready for use immediately.

Thank you to all the patient students who have learned this and taken home to teach others.  I look forward to this class each time I offer it.

Boy Scout Gear from 1925

This is a pretty good setup for any outdoorsman (our outdoors woman for that matter). By 1925, the scouts had worked out a pretty good uniform and gear setup based on many old experts not the least of which was the US Army.

If there’s a bit of a paramilitary look to the scouts it certainly owes much to its military background in Britain and further as a result of the Great War. Still, there’s a lot of good info to take away from this. These are truly the essentials.


The new internet Bushcraft world has very little on the old-timers knowledge.

Winter Count is Coming

I’m happy to say that I will be heading to the annual primitive skills gathering known as Winter Count down in the Sonoran Desert. Thankfully, it has moved to a more remote location further into the desert and far away from the Phoenix sprawl.


I will be teaching a course that I have been doing for some time now; Constructing the Ancient Frame Saw. I say “ancient” because this style saw goes back to the very beginning of metal working. It is a way to create an extreme amount of tension, and thereby stiffness, on a very small piece of metal; saving on a very precious resource.

Even though this, in essence, can be thought of as a one-off craft project. I hope that people will take time to learn the skills and take away more knowledge than a simple material good.


I think it might be easy, at first glance, to think of a project like this as a cheap way to get something that you might not be able to afford otherwise; and that is fine. However, learning basic skills like layout, simple joinery, and the use of hand tools are transferable skills that can be used for a myriad of other projects; from constructing a spear-thrower to timber frame building.

There is even plenty of opportunity to add one’s own style and artistic flare to the project.

Learning to operate even a few simple hand tools, edges and wedges in this case, connect your brain to your body in a way that pushing buttons and looking at screens could never do.


Maybe I’ll see you there someday.