
“When idle, be not solitary. When solitary, be not idle,” Samuel Johnson (1709 – 1784)
Adventures of an Imperfect Man In Search of a Handmade Life

“When idle, be not solitary. When solitary, be not idle,” Samuel Johnson (1709 – 1784)
At least in my limited experience with the wide world.
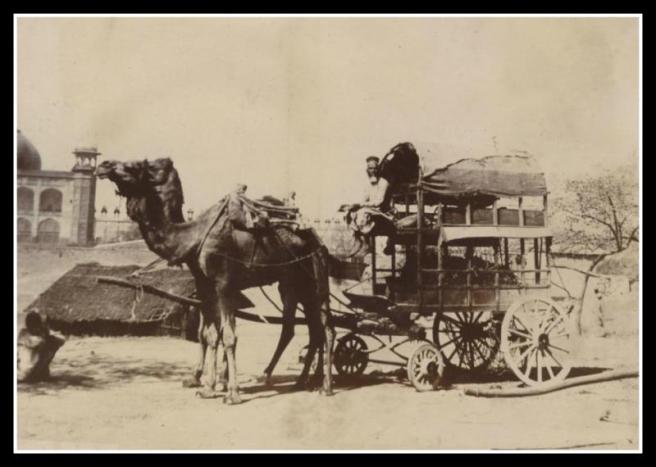
If you know me at all you know that I am interested in pack baskets. Because of this, they catch my eye when I’m browsing historic images.
I could find no information whatsoever about this one. I suspect maybe Tibet in the early 20th century? Pack baskets have been underrated in the west. I’m glad to see more and more of them used in the primitive technology, bushcraft, and survival communities. I love the one I made but I know there are even better ones out there.
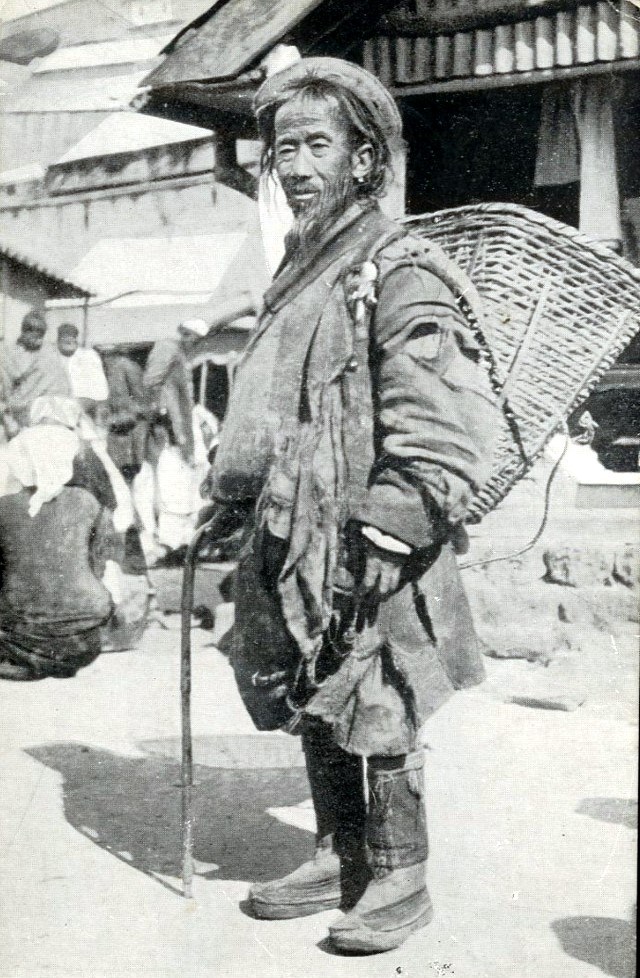
I was interested in the harness system here. It seems to sling around the entire basket for support. It took me some time and effort to come up with one I liked for mine but based on some historic examples, I was able to come up with one that worked.
Enjoy a little preindustrial technology today.

“Here is the test of wisdom,
Wisdom is not finally tested in schools,
Wisdom cannot be pass’d from one having it to another not having it,
Wisdom is of the soul, is not susceptible of proof, is its own proof,
Applies to all stages and objects and qualities and is content,
Is the certainty of the reality and immortality of things, and the excellence of things;
Something there is in the float of the sight of things that provokes it out of the soul.Now I re-examine philosophies and religions,
They may prove well in lecture-rooms, yet not prove at all under the spacious clouds and along the landscape and flowing currents.”
I recently got around to repairing my partner’s atlatl for an upcoming throw at the Landmark. It’s been in use for seven years now and suffered some dings as well as losing it’s wooden hook. The handle is oak and the original cocobolo hook has been replaced with antler which will hopefully last a lifetime.
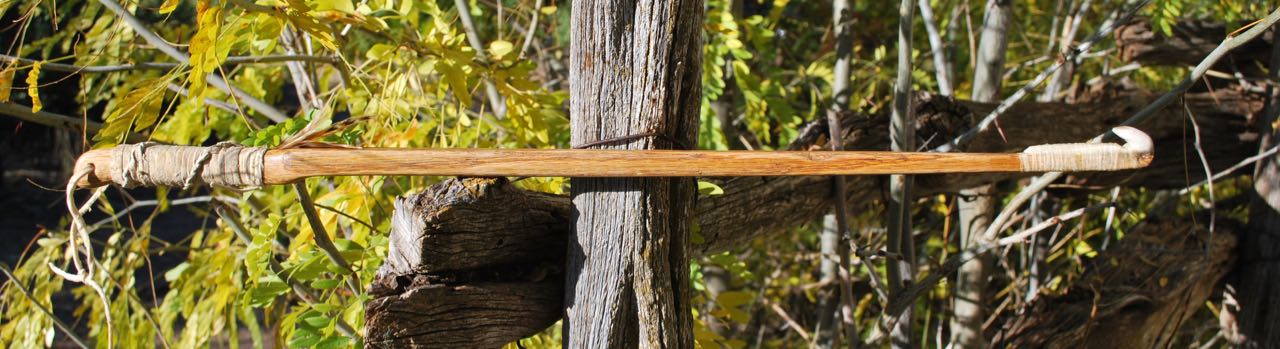 The hook itself can come under a lot of stress, especially if it lodges in a too-deep socket on the spear or dart. I started keeping them fatter and flatter, more like Upper Paleolithic specimens from Europe, making them stronger with a smoother release. This design works well for me.

The hook above is held by elk sinew and hide glue. It may need another round to smooth it out.

Sinew is an amazing material to work with. I learned about it when I was a teenager by reading Larry Dean Olsen’s classic book Outdoor Survival Skills and have been a proponent ever since. Real sinew has many advantages over modern materials including the so-called “artificial sinew” in that it adheres to many surfaces, bonds perfectly with hide glue (sharing much of the same chemistry), and shrinks as it dries making for a tighter bond. Another advantage to sinew as a survival tool is that every animal has it, so watch out.

Finally, a lot of folks prefer a leather gripped handle for a better hold when wet or sweaty. This thrower has won quite a few competitions in the past and I hope that tradition continues in it’s newest reincarnation.


They work!


To my beautiful daughter.


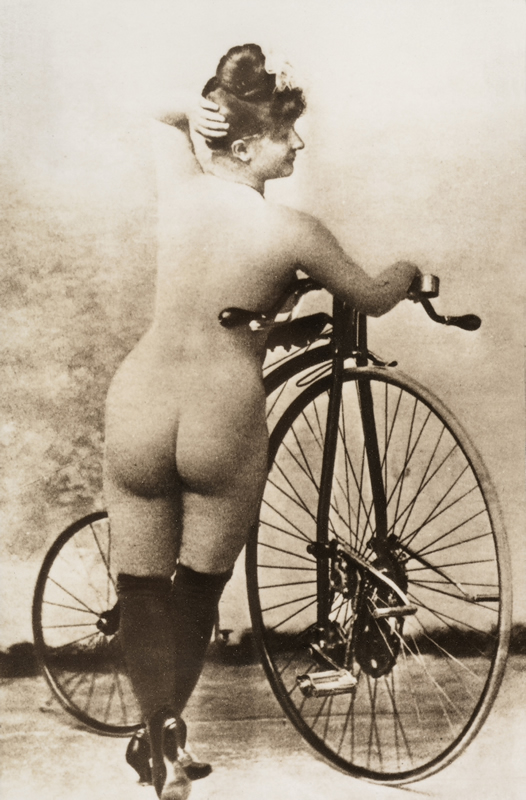
Bicycling was the final straw, so to speak, giving women the excuse to wear (godforbid) trousers, freedom to travel, shop, and generally sever the ties that kept them at home in a modern world. I am digressing and that will require and entirely separate post, but to the wonderful Waverley Belle…
The following immensely popular sales announcement (to judge by the frequency with which it is displayed) is from a different era of madmen advertisers. I suspect this titillating placard was intended for a gentleman’s magazine; to be perused at the club or in the office, out of sight from young, impressionable eyes. I mean, who wants their kid lusting after a seductive beauty at this price? This ad is clearly appealing to those who are looking get a well-built machine under them with the intent to while away a glorious afternoon.
Go away kids, get your own toys.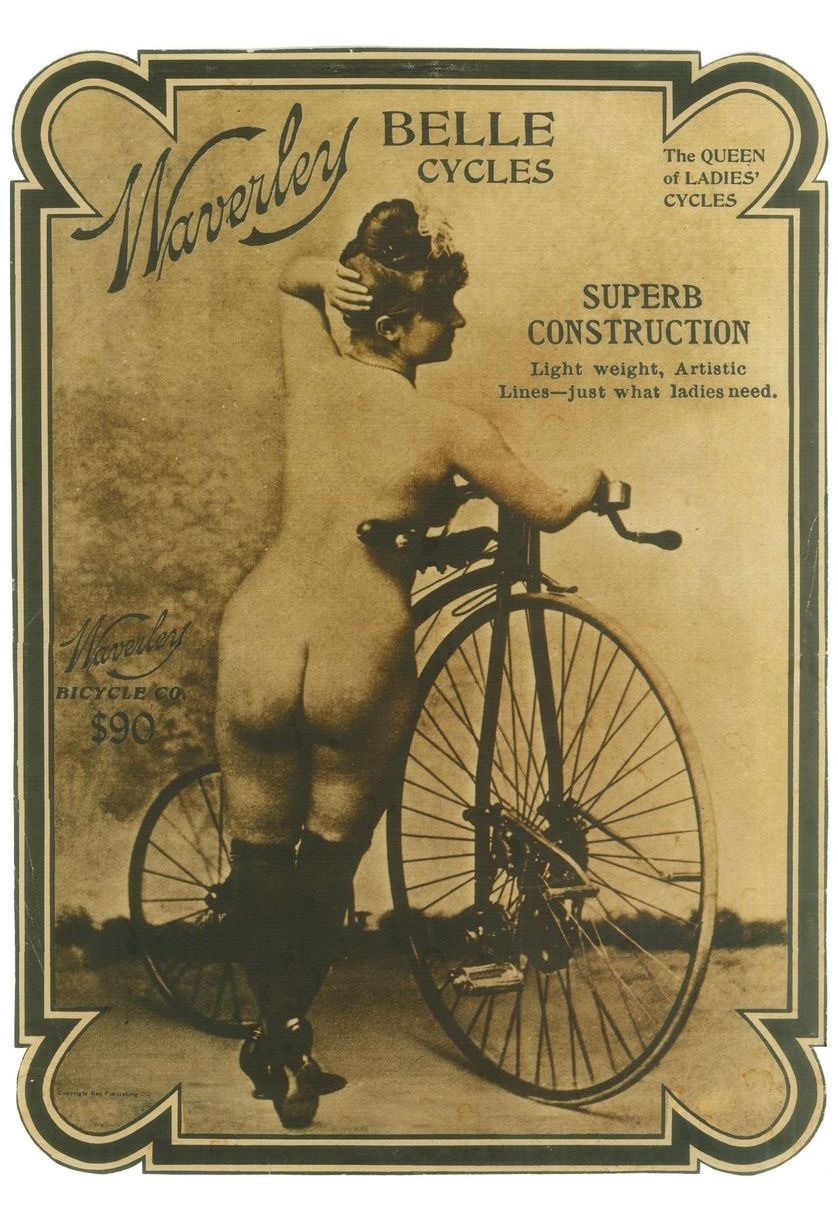 She is certainly a superbly constructed beauty comprised of artistic lines and I suspect, is a wonderful ride indeed. The Victorians clearly appreciated a larger, sturdy frame. Of course, this one is mostly obscured by the lovely lady acting as a prop (these high-wheelers often had no kickstand you see).
 Waverly (of the Indiana Bicycle Company) seems to have been a high-end and innovative company venturing into automobiles in the heady days of innovation before the Great War in Europe.
 These Indiana boys were not just catering to the men. In fact, it seems they seem to be early schemers in the arena of target marketing; catering to the tastes of ladies and gentlemen alike from Indianapolis, Indiana to Medford, Oregon and beyond (e.g., France). These high-end beauties are a bit on the light-heavyweight side compared to our current tastes but are remarkably robust machines offering sturdiness and a joyful ride for a new and modern age.

Innovation was the by-word in Industrialized America and Waverley was in the game. Here’s a couple other, family oriented offerings they produced; not bicycles though.


Anyway, I needed to get some of this curated artwork out into the world and my love of cycling has grown inversely to the amount that my current living situation allows it to actually happen without misery, pain, or more likely death.
Below are some gratuitous images of the state of the world once women gain their mobility, trousers, and the right to vote. Bicycles have been associate with modern thinking, fun, liberation, and even sexual freedom for a long time now. Enjoy these immodest pictures.


And finally, while doing a bit of late-night image research to establish a firm date for the ad above, I came across the original image used for the Waverley Poster:
 It doesn’t appear to be a particularly practical outfit for cycling. Must be French. I hope to get a load of other images from the era posted in the near future.
Interesting submissions are always welcome
I am pining for the day soon ahead when the freedom of cycling will be back in my life.

I decided to make (and learn) a new instrument this summer; a three-string cigar box guitar. It took a few weekends to get it right; figure out the design, apply a finish, and re-work a few details in the setup before I was pleased with the action, feel, and sound. It’s fretless so I am also learning a lot about the slide as well. It’s got a great, bluesy sound and maybe I’ll post a few riffs when I’m feeling up to snuff.

There are plenty of web and print resources for making a Cigar Box Guitar (CBG) so I leave the detailed instructional stuff to the pros. However, Cigar Box Nation is a great starting place if you are interested in homemade musical instruments and I’d suggest starting there if you have no other experience. You can even buy an inexpensive kit if you don’t know where to start but, in the spirit of the cigar box instrument movement, I decided to wing it for the first one. I did however, have to find a cigar box so I picked up one from C.B. Gitty for a very reasonable price. While there, I bought some parts for some other instruments in the planning stages and some very affordable strings to boot.
![]()
What follows is my brief overview of making a CBG from mostly found materials. As a side note, you are certainly not limited to cigar boxes for a resonator. A quick look around the internet will reveal some fairly ingenious sound boxes from oil cans, wine boxes, and gourds. I was tempted to save the few dollars and just knock up a box myself but decided that for my first specimen I would stick to the traditional model.
There are essentially only three parts to this ancient style instrument; the neck, the resonator, and the strings. Yes, it’s a little more complicated than that but looking at the essentials helps simplify the construction.

The neck is any straight piece of hardwood about 35 inches (100 cm) long, about 1.5 inches (3.8 cm) wide, and approximately 3/4 inch (2 cm) thick. Mine was made from a less-than-perfect recycled oak scrap out of my wood pile. While strings can actually be harvested from the steel radials in tires, these make for some pretty limited and primitive sounds. I just used a set of guitar strings I had around for the setup and strung it properly when complete with a set of open G tuning strings from C.B. Gitty.

The resonator in this case is a wooden cigar box. Depending on how you decide to put it all together, the cigar boxes may need to be reinforced and modified to hold the neck. They are only intended to hold cigars so the pieces may need glued tight to avoid rattles.

The string assembly needs a few things to keep them under tension and control their length (for tuning). Starting from the bottom of the instrument you will need something to firmly attach the strings to; tacks, screws, or some sort of tail piece. I had a very cool hinge without anything to do so I used it. The screw holes are just small enough to hold the ball ends of standard guitar strings. Next, you will need a bridge. This is simply a bar with grooves to hold the strings in place at an even spacing. This should be something dense like bone, very hard wood, or even a screw laid on it’s side. At the far end of the neck the strings will need to pass over a nut which is essentially another bridge at the other end. Finally, the strings attached to some sort of tuning peg or geared machine to change tension (and tone).
Here is the construction in a nutshell. Cut out the neck and peg head shape. If the neck passes through the body of the box (as opposed to laying over the top) it should be dished out where it would touch the top. The notches are where is will join with the box.

 A groove was cut with a rasp to hole the 1/4″ bolt that serves as nut.
 Cut this notch deeper than 1/8″ so the action won’t be too high.
 The peg head can either be set back as above or angled back like a traditional guitar. This allows the strings to be pulled down over the nut. As this left the peg head a bit thin for my taste I laminated a piece of hickory on the back for strength.
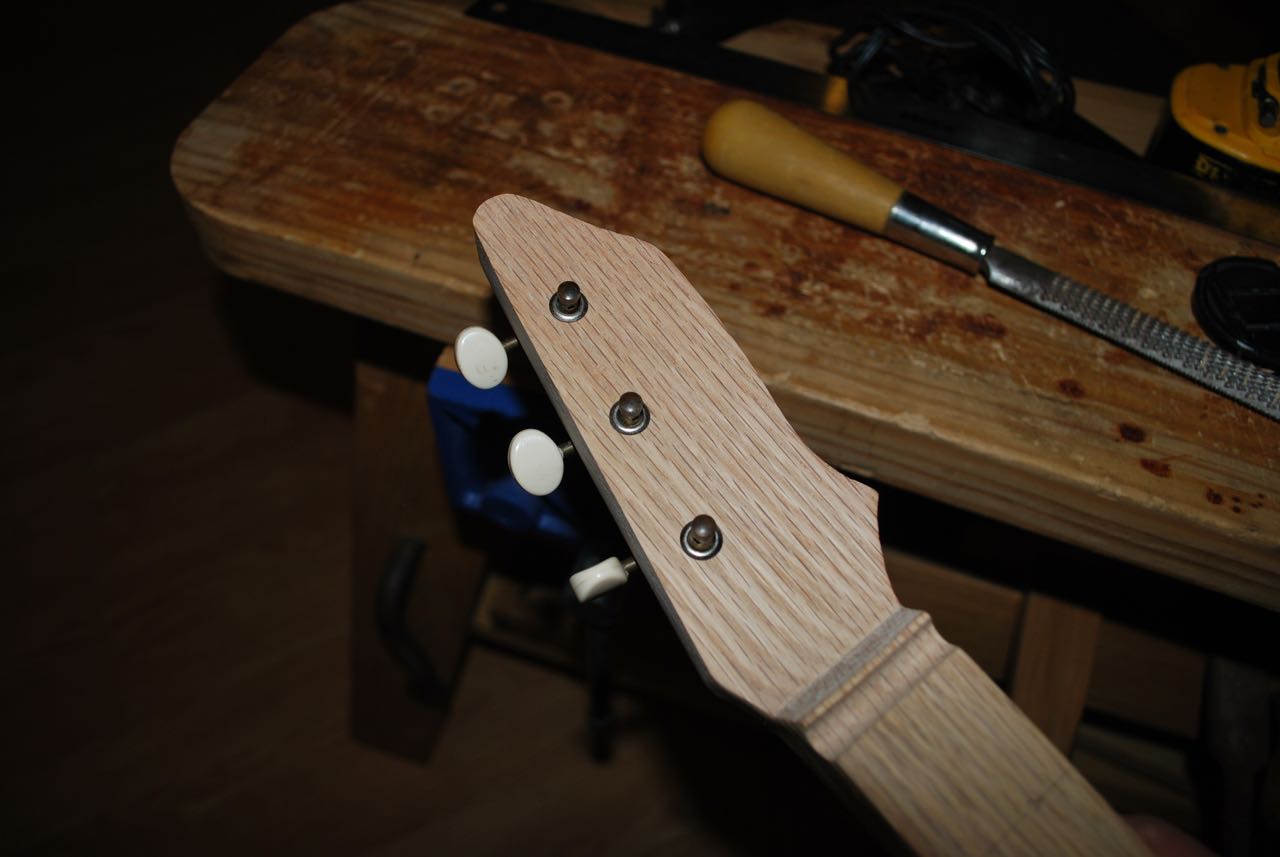 Drill holes for the machine tuners. Mine were recycled from an old Harmony guitar (a garage sale gimme) and served perfectly.
 Here you can begin to see the carving of the neck. I rounded mine fairly traditionally but this is up to the maker/player. The rest of the shaping will wait until the neck is fit to the resonator.
 Once the neck location was determined, an appropriate corresponding notch was created in the box.
 Test fitting the neck. You can see the wasted area that was removed to make sure there was no interference with the sound board (the box top).
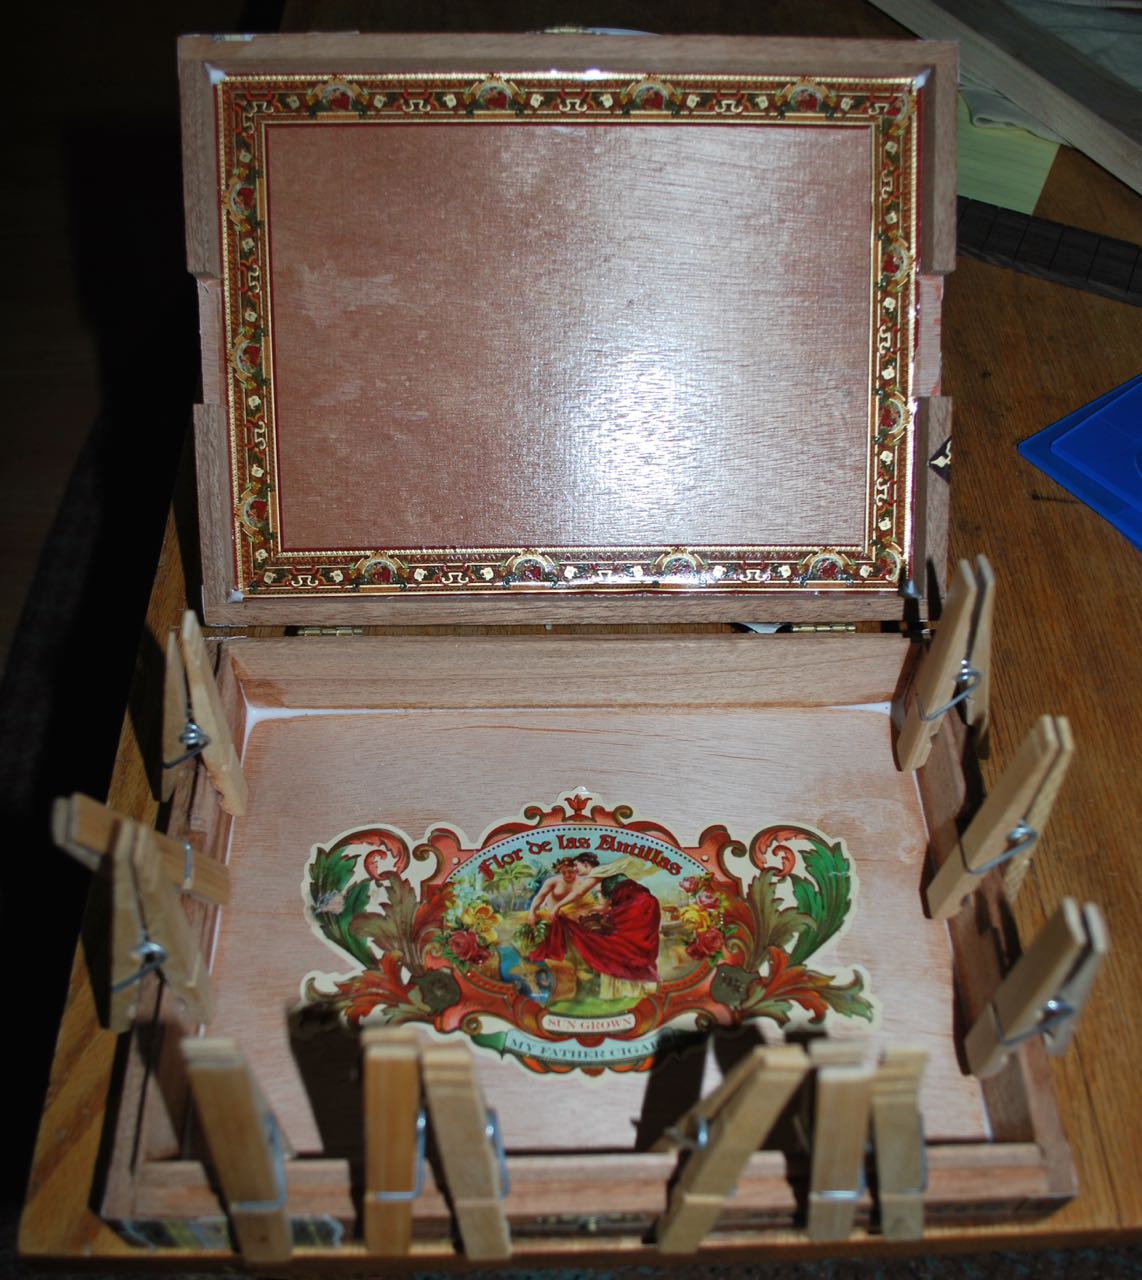 The box wasn’t too sturdy and had a bit of a rattle upon “tap testing.” All joints were glued up for strength. Note I moved the interior lid sticker to the inside back where it can be seen through the sound holes.
 The resonator is dry fitted into place. After this, it was just a matter of removing the leftover bit of neck, glue the box in place, glue the lid shut, and attach the hinge that serves as tail piece.

 This nifty hinge served perfectly and suited my mental need for brass or bronze fittings where possible. I didn’t like my first experiments with a bolt for a bridge so I whittled a simple one from a scrap of ebony. I played it “in the white” and made the few adjustments necessary before finishing up.
 Fret positions were measured out and marked with a wood burner.
 With a parallel-sided neck this is a simple process.
 Piloting for screws with a gimlet.
 Attaching the tuning machines permanently.


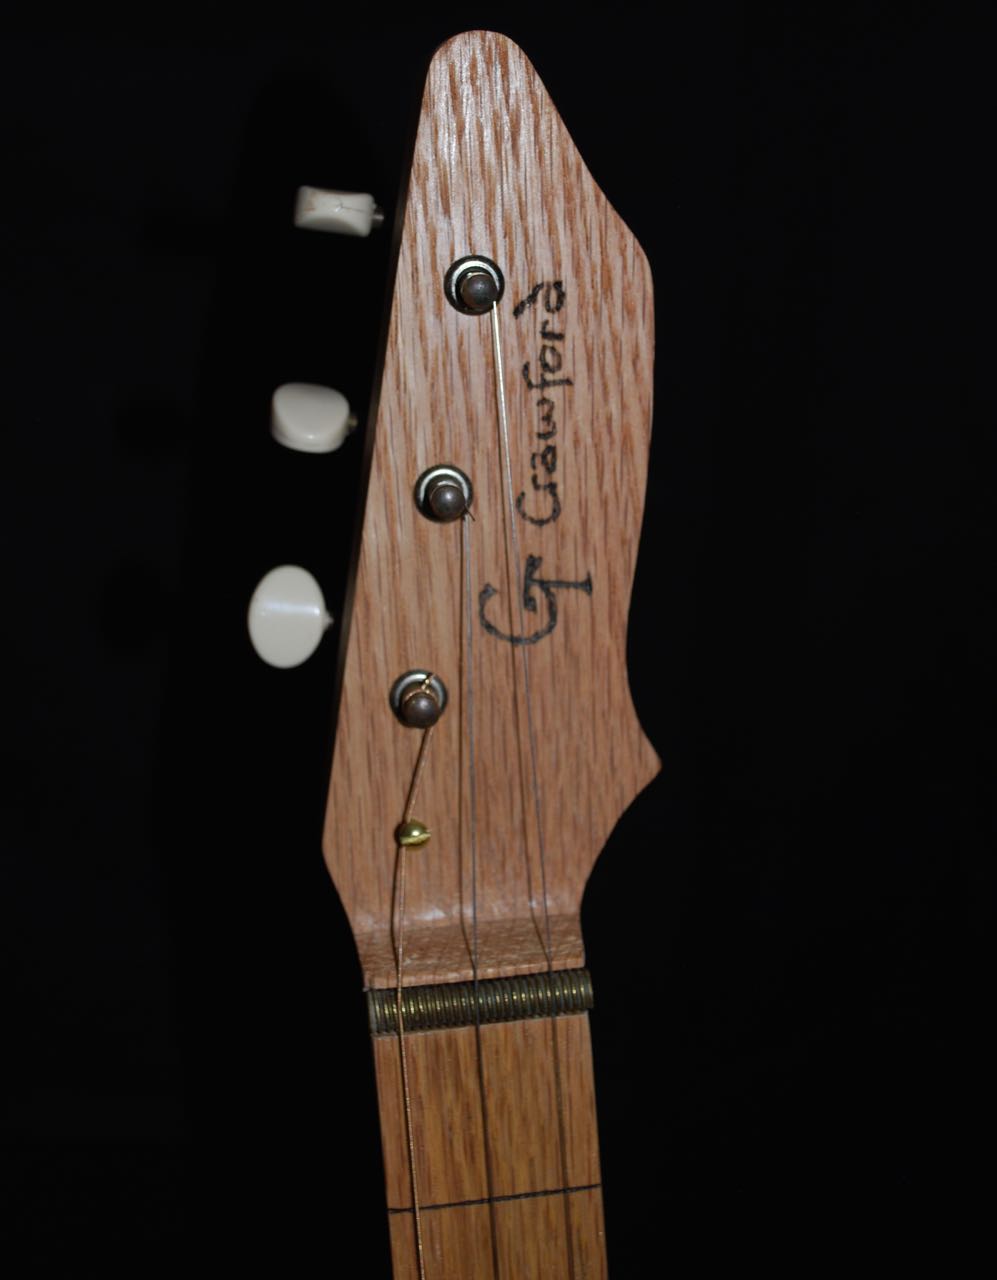
A few coats of tung oil later, and she’s up and playing. I’ll update this as I get familiar with my new toy. YouTube is full of instructional videos about playing a three and four string guitar. Mine works well in an open G tuning. Very bluesy and surprisingly bright and clear.
Looking at my junk craft piles around the house I believe I easily have the makings for three or four more. My next one is already rattling around my head and I think it will be fretted for added versatility.
Come back soon…
George
As an undaunted woodworker I have made most of my musical instruments over the years. I could never justify purchasing a high-end, high-quality instrument but I could make a reasonable proxy. My interest has been rekindled in the last couple years, making my third banjo for myself and reviving one of the mountain dulcimers as my partner has decided to take an interest in it.

")
")
")


")
")
I find that there is never enough time to play an instrument properly with a regular day job, a relationship, and other interests. It seems that it’s time for a change in the schedule to put music back into the center of life.

