
Definitely watch this if you believe in a real handcrafted lifestyle. He has obviously been given the right encouragement and access to knowledge. Many parents would scoff at these things or actively discourage some of these activities. I’m glad to know there are other parents out there with an open mind and encouraging this thirst for knowledge. It’s a fire waiting to be fanned.
Tag: leather work

Nicolás Lizares Huarachero in Tapalpa, Jalisco
What a beautifully shot movie about 80 year old Huarachero Nicolás Lizares.
For more detailed photographs check out a previous post titled Nicolás Lizares – Maker of Fine Huaraches from Tapalpa, Jalisco


Knife Sheath
Maybe not the most exciting project to document but a vital one. My F-S knife needed a sheath and I’ve been too busy lazy to make one. Well, I finally got down to business and got it done.
 Part of the reason to procrastinate this was that I wasn’t sure what style sheath to make. This is a historical knife that was made with a very specific sheath but wanted one that reflected me and my “style”.
 After sketching out the blade and handle onto Bristol board, I decided to meld the basic outline of the original sheath (ca. A.D. 1942) with that of a traditional western sheath knife. That is to say, flat seamed with a welt. Knife sheaths do not require much leather so a quick trip to the scrap bin provided plenty of choices. I decided to go with a very heavy oak-tanned leather I have normally used for shoe soles for the body of the sheath, and a lighter 8 oz. for the collar and strap. The only hardware would be the button for the retaining strap.
 After cutting the pieces, the edges were smoothed and beveled where necessary. The heavy welt is shown above being glued down prior to sewing.
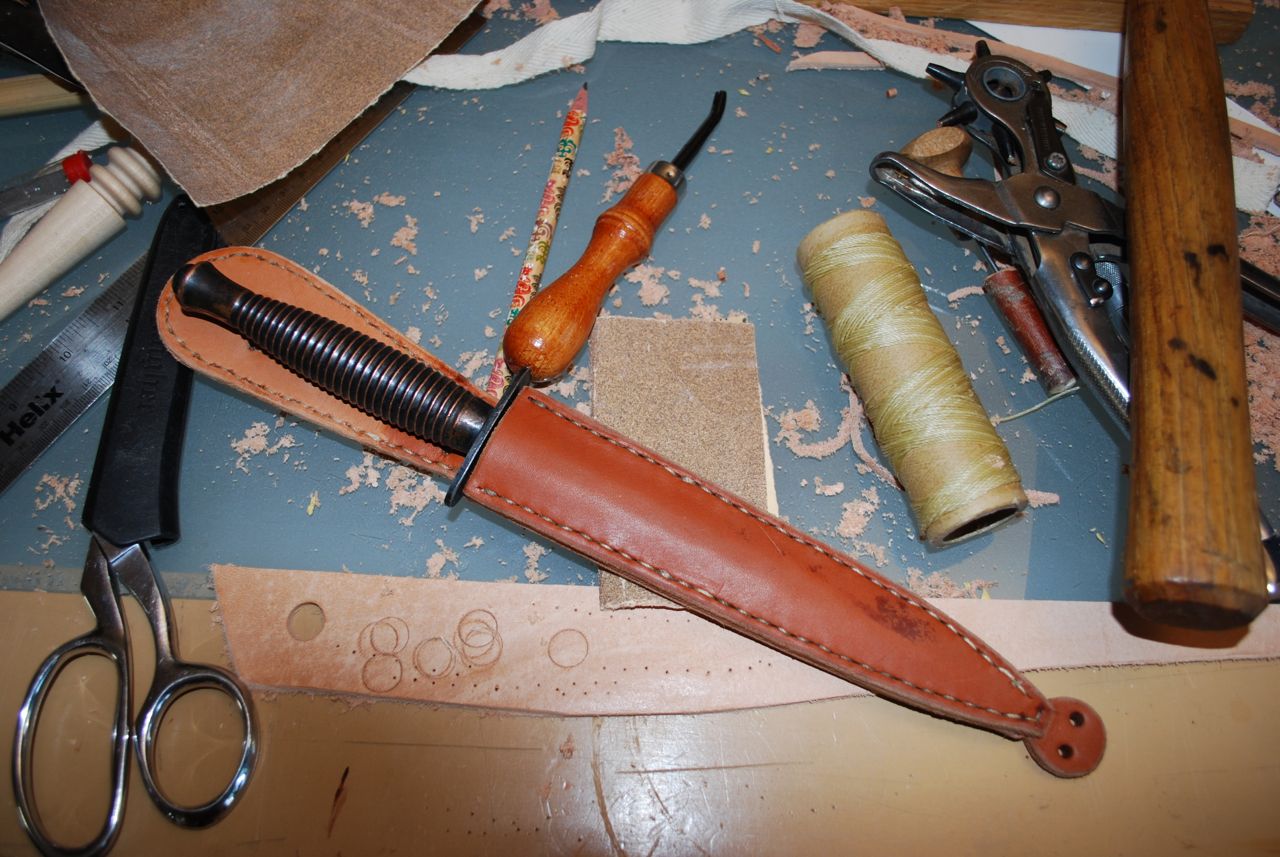 I didn’t photograph it, but the outer piece of the sheath was skived down very thin along the stitch lines to give a more rounded appearance to the finished product. Double needle saddle stitching was run up the sides and around the top to provide some support against stretching and to give a more finished look. The sheath was then wetted and the knife left inside for a couple hours to help form the shape of the diamond cross-section blade.
Note: This knife is high carbon steel and therefore prone to rust like any other so the blade was heavily waxed prior to being shoved into the wet sheath.
 After burnishing the edges, the leather collar was added with the retaining strap and button and the whole thing was then waxed.
 I’ll give it about 50 years before it needs to be replaced and I suspect that it won’t be my problem by then!
Author’s Note: The Fairbairn-Sykes knife is about the coolest mass-produced military knife I know. These were churned out by the 100s of thousands during the Second World War in Sheffield, England and have been in use, with very little variation through the present day. Although these were designed specifically for fighting, these make excellent bushcraft knives. They have an appealing aesthetic and are very similar to daggers carried throughout medieval and early historic Europe.
NakedLeatherBCN
Father daughter leatherwork studio in Spain.
It’s a video I want to rewatch again and again just to see the details of the shop. Kudos to those who Make!
Leather Carry-All
Here’s a recently finished commissioned work. It’s an open-top carry-all in 8 oz. oak-tanned leather with nickel furniture. The bag as a snap closure on the top and a snap closing security pocket for wallet, phone, keys, etc. Overall dimensions are 16 x 12 x 5″ (41 x 30 x 12.5 cm) for about 15 litres of volume.
 The new owner wanted simplicity in a general purpose shoulder bag that would stand up on it’s own. After some mock ups we arrived at the desired dimensions and specific features for the bag which include a removable shoulder strap for travel and a secure external pocket.
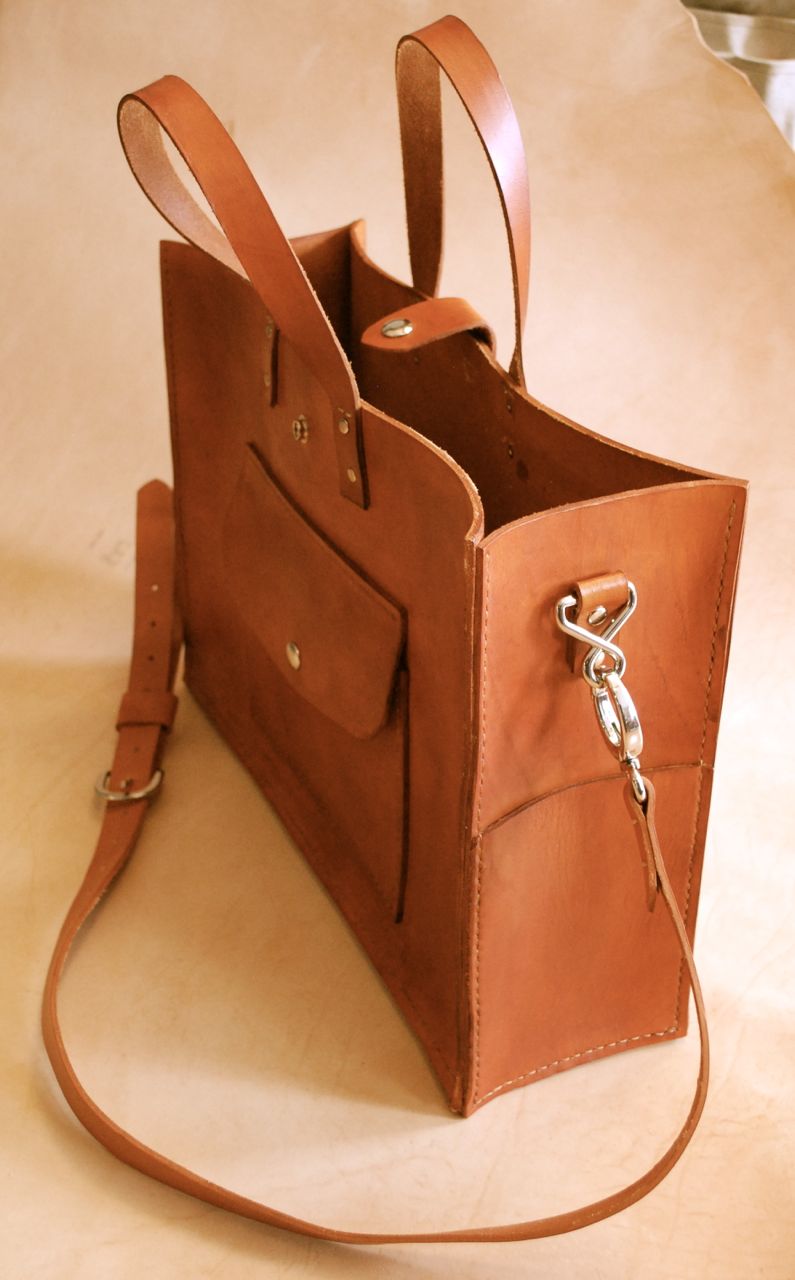 There is an open top pocket on one end for pens, small notebook, or power cable. In all, the bag will work great for shopping, craft supplies, picnic, or for carrying to the office.
 I used some snazzy, heavy-duty hardware for the strap. All seams are hand sewn and stress points riveted.
 The new owner insisted on a bottle strap inside which I sized to fit a 750 ml canteen or a standard wine bottle. Great idea to add versatility.
Off to it’s new home. A bag like this will last for a lifetime of hard use and will only get better with age.
On a similar theme, here’s the post about the haversack I made for myself a little while back:

Irish Brogues and Other Simple Shoes
It’s time for new shoes. After a soon-to-be-finished commission for a leather satchel, I intend to dive into a brogue-making project in the style of 19th century Ireland. This basic design certainly dates back much further than this as shown by archaeological finds in bogs throughout Europe. Don’t confuse these brogues with the more modern usage such as:
 This is a brogue in the Scottish/Northern English semi-formal fashion with decorative holes reminiscent of the drains left in old field shoes. Nor is this to confused with the type of shoe that some modern-primitives call “ghillie-brogues” or more properly, just “ghillie”:

These earned their proper name from Scottish Ghillies; a term used to denote game wardens, hunting and fishing guides, and sometimes, even poachers. A simple shoe style that probably goes back several millenia in Europe.
What I decided to shoot for was a shoe that is relatively simple to produce, is closed for winter use, and can be regularly worn in public without arousing too much comment.

To me, something like the “bird shoe” above is very cool but not really acceptable in an unforgiving office environment. I would gladly hunt elk in these but for some reason, modern work culture has a fairly standardized and limited uniform. This style tends to be cut from a single piece and sewn around three-quarters of the sole. This one is punch decorated, probably to show off the stockings inside, a sign of wealth. This is a form of “turn-shoe” or soft-sole sewn inside-out then “turned”. A sturdy high top 12th century Dutch example with a center-seamed upper is seen below. In my opinion, these would make a fine winter shoe.

I can’t help but see the similarity between these and North American center-seam moccasins.
 The style above is a well-documented Irish “Type 1” dating anywhere from the 1st centuries A.D. through the Middle Ages. A little more complex in construction, especially to get a perfect fit, it has been argued that these may be the result of craft specialization in the early Christian period of Northern Europe. I plan to make a pair of these and contemplate them as a possible design for teaching simple shoemaking. There is some real sewing involved, but not enough to intimidate most beginners.

For those who know American moccasin styles the pattern above seems very familiar as a one piece, side-seam shoe.
So, this brings us to the “Irish Brogue” or Type 5 shoe. These are known well up into the nineteenth century and I wouldn’t be surprised to find them in even more modern contexts, especially amongst the poorer populations. There are similar shoes depicted in Colonial America, probably made in the home for lack of money or access to a cordwainer.

The above brogues appear to be a “built” shoe, having separate soles, multi-pieced upper, and a heel lift; the only difference between these and others from the period is the lack of ties or buckles. Although difficult to tell from the image, they are likely constructed similar to those below:

Hopefully, updates will soon follow to track the creation of a new pair of shoes.
Ox & Tree Leather Goods
Haversack
Over the weekend, I was able to design and nearly finish a new leather haversack. I’ve wanted to make one for a while but I’m always hesitant to start a big sewing project if I don’t think I’ll finish it in a short time… I hate lingering unfinished projects (not to say I don’t have a few lying around).
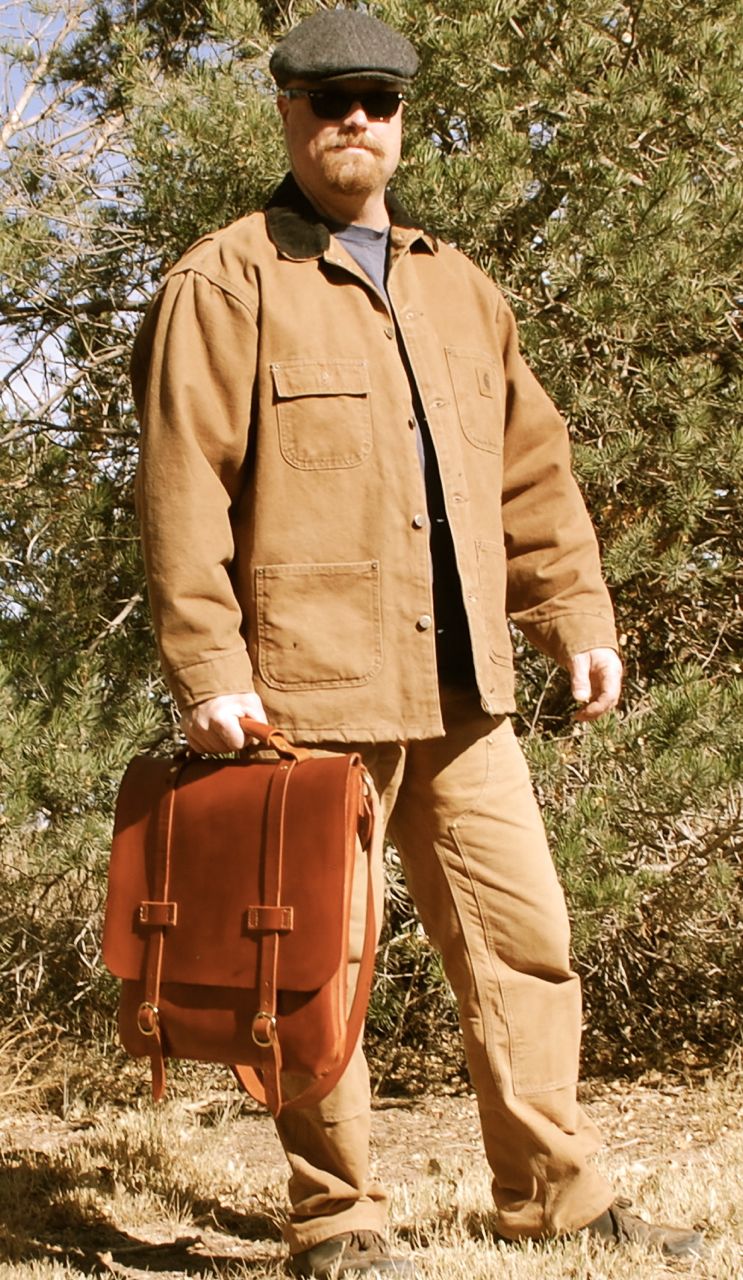 [update: outdoor photo of the finished haversack.]
 So, while this idea has been bouncing around in my skull for some time, I was inspired by running across a beautiful bag from Morocco in a store in Santa Fe a couple weeks ago. It was about 20″ square with a flap that covered the entire body and was supplemented by a small pocket inside and a larger, open pocket outside. So voila! That’s exactly the design I was pondering.
 It didn’t occur to me to document the process right away, and I didn’t do it well, but here’s how to make a haversack in a few pictures and very few words.
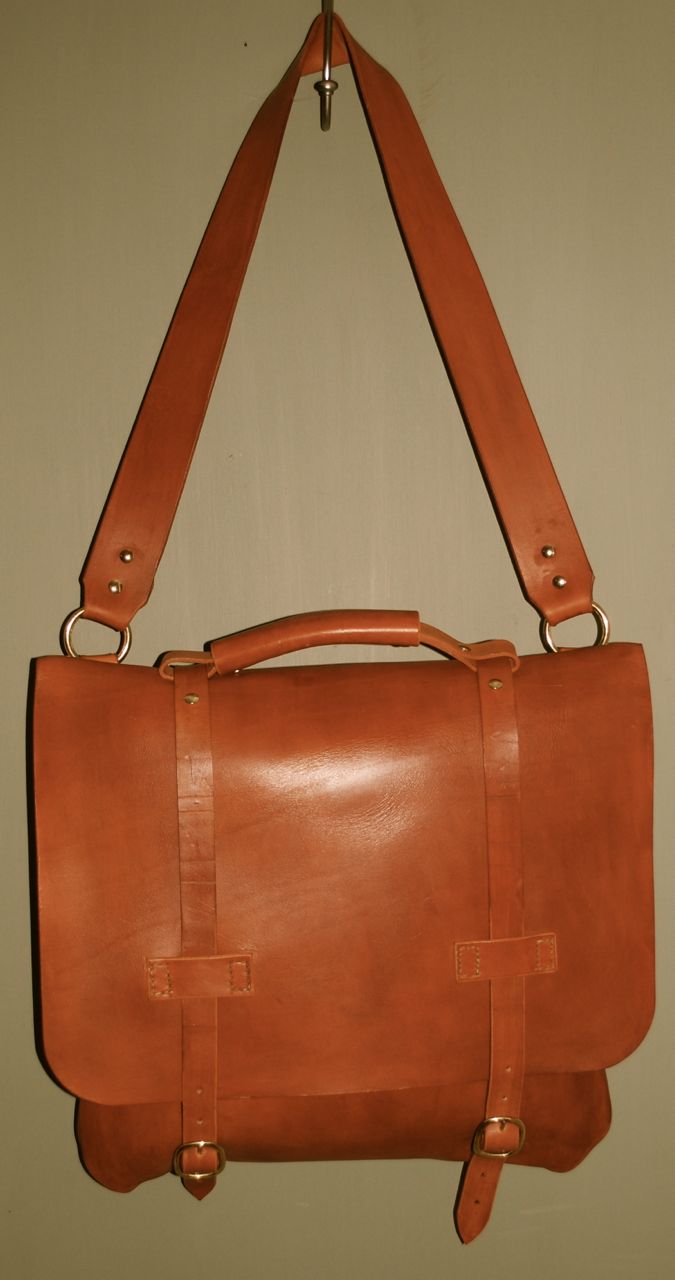
A little historical trivia because I am an archaeological geek; “haversack” means “oats bag” and is associated with soldiering, pilgrims, and other travelers for at least two millennia. Something very like this was carried by Roman Legionnaires and is shown on Trajan’s Column. Here’s a likely reconstruction of their bag:

Okay, back to the business at hand. The layout consists of three connected square sections, in this case 18″ x 54″ (18 x 3). I happened to have a beautiful soft bend of 8 oz. vegetable tanned leather from Spain that just barely fit the size I needed. This used most of the side, so I used some similar weight shoulder for the pockets. I gave the whole thing a dye coat of tan water dye as the pieces were cut.
Below is the basic bag coming to life, outside pockets visible, with a third pocket inside, not shown.
 I like the simplicity of this design, but at this point was forced to decide as to whether the stitching will be outside and visible making a flatter, but bigger bag (see backpack for external stitching).

An observation: folks who don’t MAKE stuff, don’t always appreciate the large number of steps in an apparently simple project like the above. For example: the inside pocket must go on before the outer (so you can get to the stitches), rivets need to be set before they are hidden away, edges skived, beveled, and burnished, stitch holes punched, etc. Above is the bag nearly ready to “close”. Hope I didn’t forget anything.
I sewed it “inside out” to hide the seam and to puff out the body a bit. Turning back out was quite a chore and took some struggling but in the end, I think it looks good. It’s not really quite this red but that’s an issue with my camera and photography skills.


 It shouldn’t be assumed that this is cheap. The body alone is 6.75 square feet of leather meaning you need about 10 square feet of good hide to start with to make the entire bag. With the materials and all the labor involved, it’s easy to see how a leather worker can often charge $500 or more for a similar project. I buy up leather in quantity when the price is low when I can but this project still could cost over $150 in materials alone.
But in the end, it’s really an heirloom of a centuries-old design. It will improve with age and hopefully this is a creation that will outlive me.
