Coming soon to the blog; New plans for a packable frame saw.

In the mean time, check out the link to my older post about making a frame saw from 5 years ago.

Adventures of an Imperfect Man In Search of a Handmade Life

Coming soon to the blog; New plans for a packable frame saw.
In the mean time, check out the link to my older post about making a frame saw from 5 years ago.
In preparation for summer teaching I recently spent some time making a couple new pump drills for demonstrations and hands-on activities. While some modern tools were used in the production, these are entirely hand-made with no purchased parts or plans. As I have only made two of these previously I spent a little time perusing images of old pump drills to find good examples to use as models.

The pump-drill is an ancient technology that was used world-wide for at least the last 5,000 years. As most (sometimes all) of the parts are perishable, archaeologists are often limited to conjecture on the finer points based on a few surviving parts or images available. Despite its immense antiquity, pump drills (and their cousins the bow-drills) maintained their currency in the maker’s tool kit well into the Industrial Revolution and, in some places, into the 21st century.

The components can be easily gathered around the house or the wood pile. The flywheel, in this case, is steatite, a soft soapstone that is easily carved but has a high mass. Wood or other materials can be substituted if they are more readily available. My first drill, many years ago had a flywheel from a mesquite wood log. I chose it for its relatively high mass and availability.

The shaft for this project was split out from some aged oak and worked into a cylinder with a diameter of just over 1/2″ (13 mm). The shaft needs to taper slightly, widest part at the bottom, to keep the flywheel from sliding off. I drill the flywheel hole 1/2″ wide and slowly reduce the shaft size until it finds a snug fit.

I learned long ago that through hard use, the stone will sometimes slip around the wood shaft. Cutting a key slot on the shaft with a corresponding one on the stone will solve this problem with the insertion of a sliver of hard wood or “key.”

Someone could create a nifty GIF animation of this but I think the photos below will assist in understanding how the key works.

A bit of glue would probably help but I don’t think it necessary if the pieces all fit securely together.

Soapstone is easily worked and can be slabbed, by hand with a hacksaw. A rasp or an assortment of sandpapers are all that are needed to shape the stone.

To make a bit from a masonry nail, simply heat it until it is cherry red and let it cool naturally in order to anneal it. This makes the metal soft and easily worked with a file, stone, or grinder. After it is shaped the point can be re-hardened by heating the point to a dark cherry red again then plunging it in water to cool.
What I didn’t document here is the lashing method. After fitting the bit in the shaft, the chuck was secured using heavy cotton thread coated in pine tar. I think that a long-term solution would benefit from using wire but I wanted to keep these simple. We’ll see if they last. If you aren’t concerned with “primitiveness” then a strong and permanent connection could be made with JB Weld or two part epoxy.

The second drill, on the left is rigged in a different fashion. All the connections are made with clove hitches. We’ll see which we like better.


Spade bits like this one tend to bind as they come through the opposite side so the hole will be finished by flipping the stone over. Still, the hole is peeking through and ready to finish.

Pump drills are an awkward shape to pack when assembled but I discovered early on that they easily disassemble to fit into a very small space.
If you are considering a primitive project as part of your summer “to do” list, give a pump drill a try. Lots of fun, can be made in a day, and it will impress your not-so-primitive friends. As a final note, I put an Instructable up based on this post as well. Have a look if you don’t mind and give comments if you see fit: https://www.instructables.com/id/Primitive-Pump-Drill/

While preparing materials for a primitive tools class I decided to test the new drill on a piece of slate. This is a little harder than soapstone and more abrasive. I didn’t have any lubricant handy (e.g., water) but decided to try it out anyway. It cut like a charm! Just a note to those not familiar with these low-tech drills; the hole is generally cut until is just barely pokes through the other side then the object is flipped over and drill from the rear. This keeps the bit from binding as is comes through.
Enjoy…
Here are some good words about responsibility I would like to share from the Northwest Woodworking Studio.
I had this crazy idea about the world and how I’d like to change it today.
Hear me out.
What if folks acted as if they were responsible for their actions? That whatever they did out in the world had a pond and ripple effect? That they are not alone on their computer, on a phone, in their world, entitled to more of everything at the expense of everyone else?
It would be like working at the bench if you will allow me. Where when you screw something up you are the one who did this. You are the one who has to fix it. You can’t turn to your neighbor, the car next to you or the bike rider, big business or the government, or your sad upbringing and history and blame them for it. You have to take responsibility for who you are and where you are in…
View original post 138 more words
I don’t normally share my professional work on this blog but thought it might be of interest. We were out re-recording a rock shelter yesterday known for some rather mysterious pictographs. Mysterious in that they are vague and probably mostly wiped out due to weathering. Only the protected portions of the shelter contain clear images and only one image is a petroglyph (pecked as opposed to painted).

Looking for hidden glyphs.
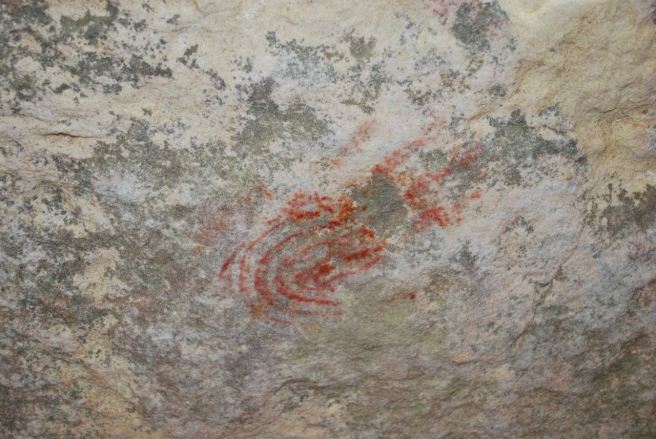


There are no clear cultural symbols that would tie these panels to a single time period or affiliation but there are some hints at an Archaic connection (or at least stories about the Archaic). It is strongly suspected that the site has been known and has been collected on for at least two centuries as Europeans had a presence here since the early 18th century. This may account for the complete lack of diagnostic artifacts on the site. However, diagnostic points have been collected nearby and show a strong association with the Missouri Late Archaic tradition in the form of Langtry points.
Hope you enjoy some vicarious archaeology.
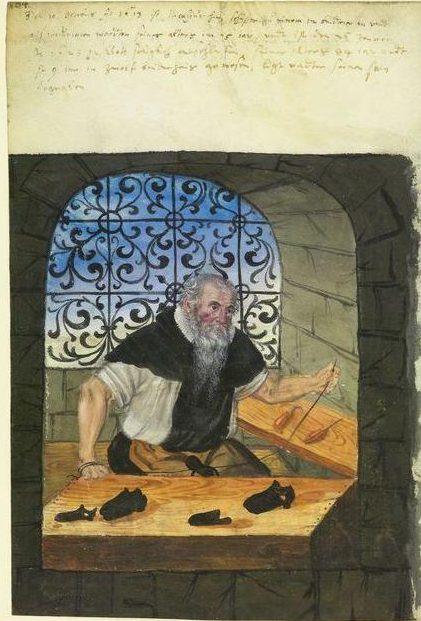
I’ve been researching more ethnographic data for trapping techniques to get beyond the same handful we have all seen since our Scouting days; the Paiute, Figure-4, spring snares, etc. While not looking at all I came across this interesting image from the archives of the Smithsonian from 17th century Italy. The more I research, the more I learn that trapping, in the old days, was a passive-active activity, not just set the trap and go away. Leaving the animal for any significant time allows the prey to escape or be taken by other, craftier, predators.

Text authored by Giovanni Pietro Olina, , about 1622; and illustrated by Antonio Tempesta, 1555-1630 and Francesco Villamena, ca. 1566-1624.
This trap is a great example of the active-passive nature of hunting and trapping. The hunter, disguised as a cow is slowing pressing the flock into a tubular net, guided by the short fences on either side.
There are more tried and true ideas where this came from so hopefully I’ll be able to tease them out of the available archives and share a few more as I find them.
I was looking up a link for someone and rediscovered the video today showing how to make tough and durable sandals from discarded tires. This style is well-known in Southeast Asia, particularly in poorer areas.

If you are interested in sandal-making, you can hardly go wrong with this design if you have access to old tires. I suggest watching the video if only for the remarkably sharp knife this maker is using. Using tire material is a little heavy but will truly last a lifetime. The straps fit purely by friction so they are continuously adjustable while the waterproofness of the material makes them perfect for the wetlands and jungle.
I understand this style was created in the 1940s when old tires became abundant and some creative shoemaker had a Eureka moment. There is also a short write-up on this style on the always interesting Huarache Blog if you are seeking more information about this shoe.
Another step toward self-sufficiency and off-grid knowledge for the Mayhem Shoe Collective.
From one of my new favorite blogs Running With Sheep. Johan and Sanne are a couple of remarkable outdoors – bushcraft – survival enthusiasts with more than a touch of philosophy thrown in.
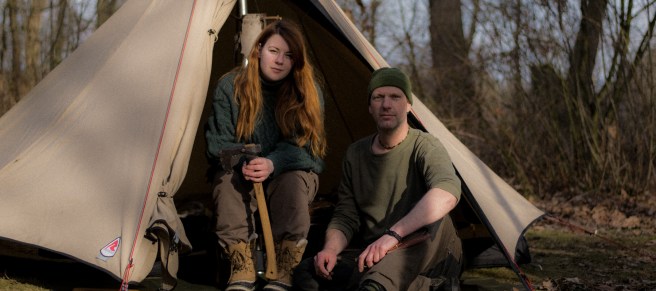
Their most recent project shows how to convert a run-of-the-mill thrift store find into a functional pack basket. From what I can tell, they are adept leather workers so their skill shows in this project. Re-using found objects is an excellent way to economize both money and time, especially if it is something outside your skill set or craft specialty.

Pack baskets are light and strong and a perfect choice for hauling anything from food to dirt. Prehistoric people used them for everything, and the solid structure makes them useful even when not carried on the back (most of the time).

If you can cut a few straight lines, do some minimal sewing, and hammer a rivet, this project is for you. For the complete post, head over to Running With Sheep to learn more. I suspect you’ll want to stay a while and catch up on their other posts as well.
Enjoy!
DIY Pack Basket:
I found this video over at the Scotianostra Tumblr so thought I’d add a bit to it. The Battlefield Band has been part of my life for decades. I particularly appreciated their sentiment of “Home is where the Van is…”
Happy Birthday local Bairn, Brian McNeill born on April 6th 1950 in Falkirk.
Brian was a founder member of the Battlefield Band, one of our finest Folk Groups. He also joined several other top Scottish Folk musicians including Dick Gaughan in Clan Alba.
Enjoy a little music on this spring day and have a great weekend.
In case you want to know the lyrics, here they are as best as I can tell…
Come, bonnie lass, and lie near me
And let the brandy cheer ye
For the road frae Fife to Falkirk’s lang
And cold and wet an’ weary
My trade, it is the weaving
At the bonnie toon o’ Leven;
An’ we’ll drink to the health o’ the fairmer’s dames
Who’ll buy my claith the morn.
CHORUS after each verse:
For ye can see them a’, the lads o’ the fair
Lads frae the Forth an’ the Carron Water,.
Workin’ lads an’ lads wi’ gear
Lads that’ll sell ye the provost’s daughter
Soldiers back frae the German Wars,.
Peddlers up frae the Border;
An’ lassies wi’ an eye for mair than the kye
At the trysting fair o’ Falkirk
Come, Geordie, lead the pony for the path is steep an’ stony
An’ we’re three lang weeks frae the Isle o’ Skye
An’ the beasts are thin an’ bony
We’ll tak the last o’ the siller
An’ we’ll buy ourselves a gill or two;
An’ we’ll drink tae lads who’ll buy oor kye
In Falkirk in the morn.
I’ll stand here an’ I’ll show ye, there’s the toon below ye,.
But ye’d best bide here in the barn the nicht
For the nichtwatch dinna know ye
Ma brither, he’s a plooman an’ I’m for the feein’ noo, man;
Sae we’ll drink tae the price o’ the harvest corn
In Falkirk in the morn.
O, the wark o’ the weaver’s over, likewise the days o’ the drover
An’ a plowboy sits on a tractor noo; too high tae see the clover,
The workin’s no so steady, but the lads are past the ready
For tae drink a health tae the workin’ man in Falkirk in the morn.
There are quite a few images from the Golden Age of the Gypsy Caravan* floating around the web, many without appellation. Still, they have much to offer the potential traveler or yearning nomad today.

I quite like seeing the nearly universal items one needs for living on the move such as the folding tables, water coolers, wash basins, buckets, and lanterns. If I were to guess, I’d say this one was taken in some muddy side-alley in southern England around the beginning of the 20th century.

And let’s not forget that a large market for the high-end and custom wagons was for professional showmen, another group living on the road. I have kept the above image in my stock because I really like the awning over the door.

I think one of the appealing aspects of these wagons is their almost timeless flavor. An image from the 1950s at the Appleby Fair looks much the same as one from 1985 or 1895 with the addition of an occasional automobile. The Open-Lot design above is out of favor with the modern American crowd due to the lack of security but I can see the advantages on a warm summer day.