Here’s a great story I read years ago about being raised in a family of six in a sheep camp measuring about 7 x 8′! (I think that’s the floor space). I recently relocated the article in Mother Earth News.
Nice layout sketch of a sheep camp.
Here’s an excerpt:
“The canvas-covered sheep wagon was roughly about seven feet wide by eight feet long. On the front end a door opened out of the middle and you stepped down onto the wagon tongue and thence to the ground. From the inside looking out, the stove was on the left of the door. On the right was a small wash stand with several wooden drawers for storage of linens, towels and socks. A bucket of water and washbasin were on the oil cloth covered top and a small mirror hung above the basin for shaving. Soap, toothbrush, razor and essentials rested on top of the stand when in location or were stowed in a drawer when moving.”
Sheep camps from Wyoming from the Wyoming Tales and Trails webpage. Great photos and some good information concerning everything “western.”
I could spend much of my life like this!
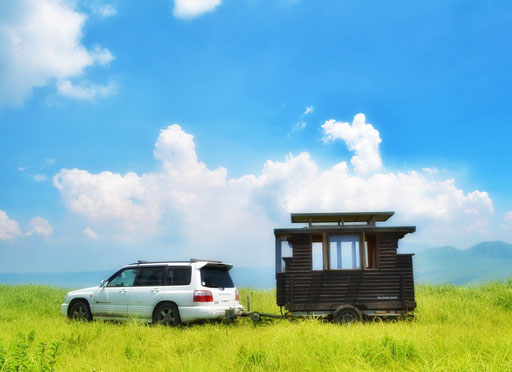
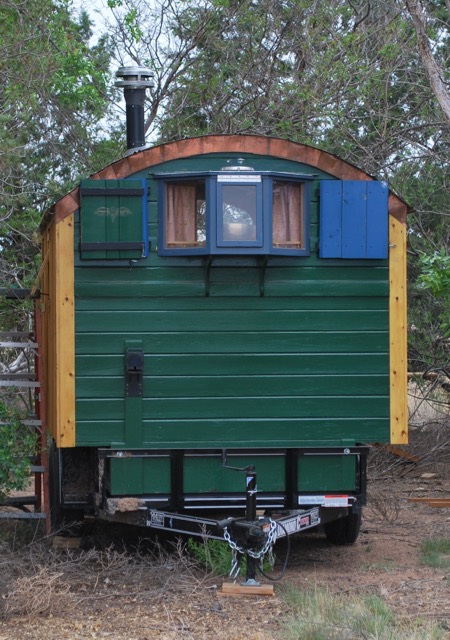
A self-contained base camp in a sheep wagon provides a cozy home on the prairie.
A beautiful culmination of cultures a innovations created this iconic American living arrangement. We can learn a lot from these designs today.
The Wyoming Tails and Trails website contains a lot of other information about western history along with more than 100 photos. Have a look around and get a feel for the old west.
I say Vardo because that’s really what it is. You can sense that the presenter of this show isn’t too familiar with true rolling homes, caravans, vardos, or whatever you want to label them but his enthusiasm is real. I like this home a lot but there is too much gymnastic restructuring for my taste. I’m probably just lazy. I’m not knocking his aesthetic or design though; they are spot-on. Mr. Tagami fit a lot of useful ideas together to create a wonderful living space. Several of these innovations are being integrated into my future plans.
If you haven’t seen this yet, here’s a video detailing one of his creations and the happy owners who inhabit it.
The original link was sent to me by Chris Beneke. Thanks Chris.
TINY HOUSE JAPAN: Some serious innovation at work.
I do not read or speak Japanese so I’m at a loss over many details but the photos and videos exhibit a world of real innovation in design and construction. The builder, Haruhiko Tagami (製作担当 田上晴彦) has a spectacular web page highlighting some of his designs that are already giving me much food for thought for future constructions.
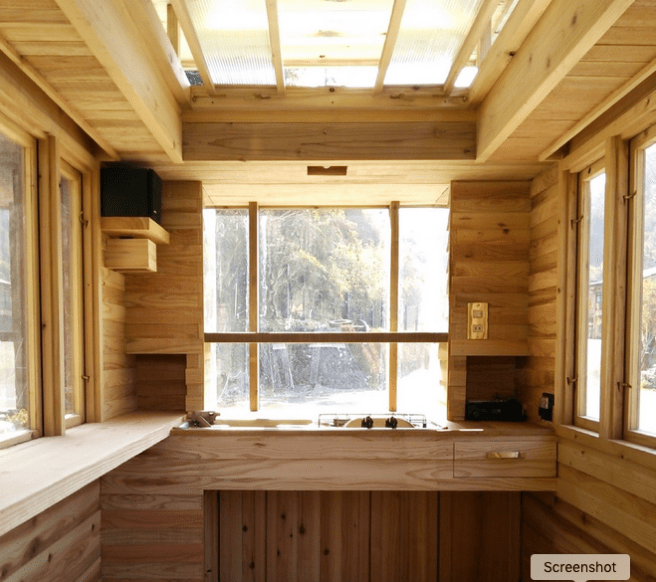
One of the first things that really caught my attention was the pop-up mollycroft which adds and enormous amount of light and circulation but folds flat for travel.
He has designs from the truly tiny (on par with my original design space-wise) to a very substantial house on wheels with pop-out rooms that are incredible works of engineering.
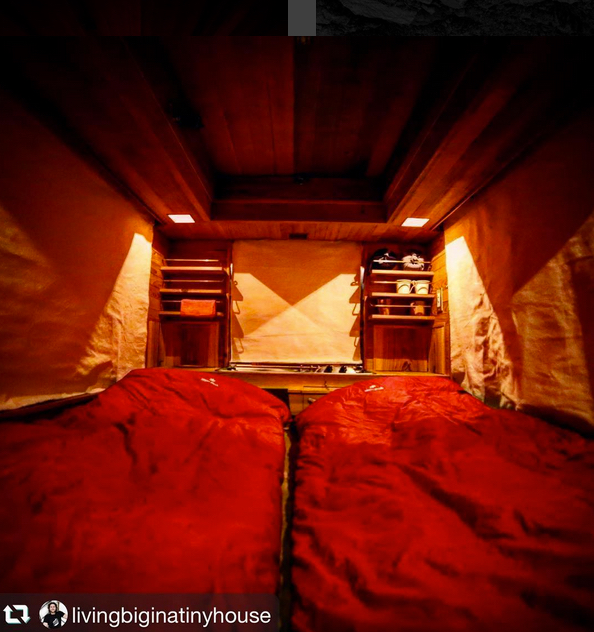
The smallest Baske-T.Roll down canvas curtains block the large windows for the night.
One of the problems with covering the extended space is having roll-up roofs along the lines of an old roll-top desk.
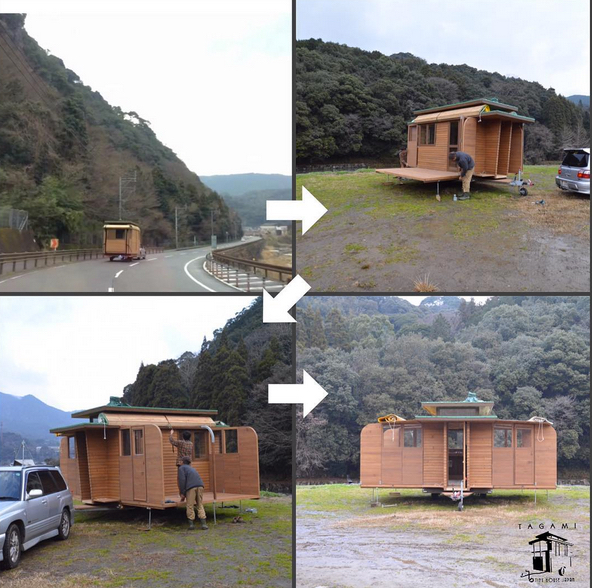
This allows for the modest-sized trailer to become a spacious palace; a big advantage when sharing with others.
This more than triples the available living space and in some of the photos there is even a third room extended as well. This would suit a lot of people as a truly long-term living solution that could be pulled by a relatively small vehicle; not the enormous white aluminum fifth-wheel monsters that haunt the freeways.
Enjoy this small overview of the design and please check out more of his work by clicking the LINKS.
Many more photos of his work are available on his Instagram Page as well. There is much to explore for the budding builder so be prepared to take notes!
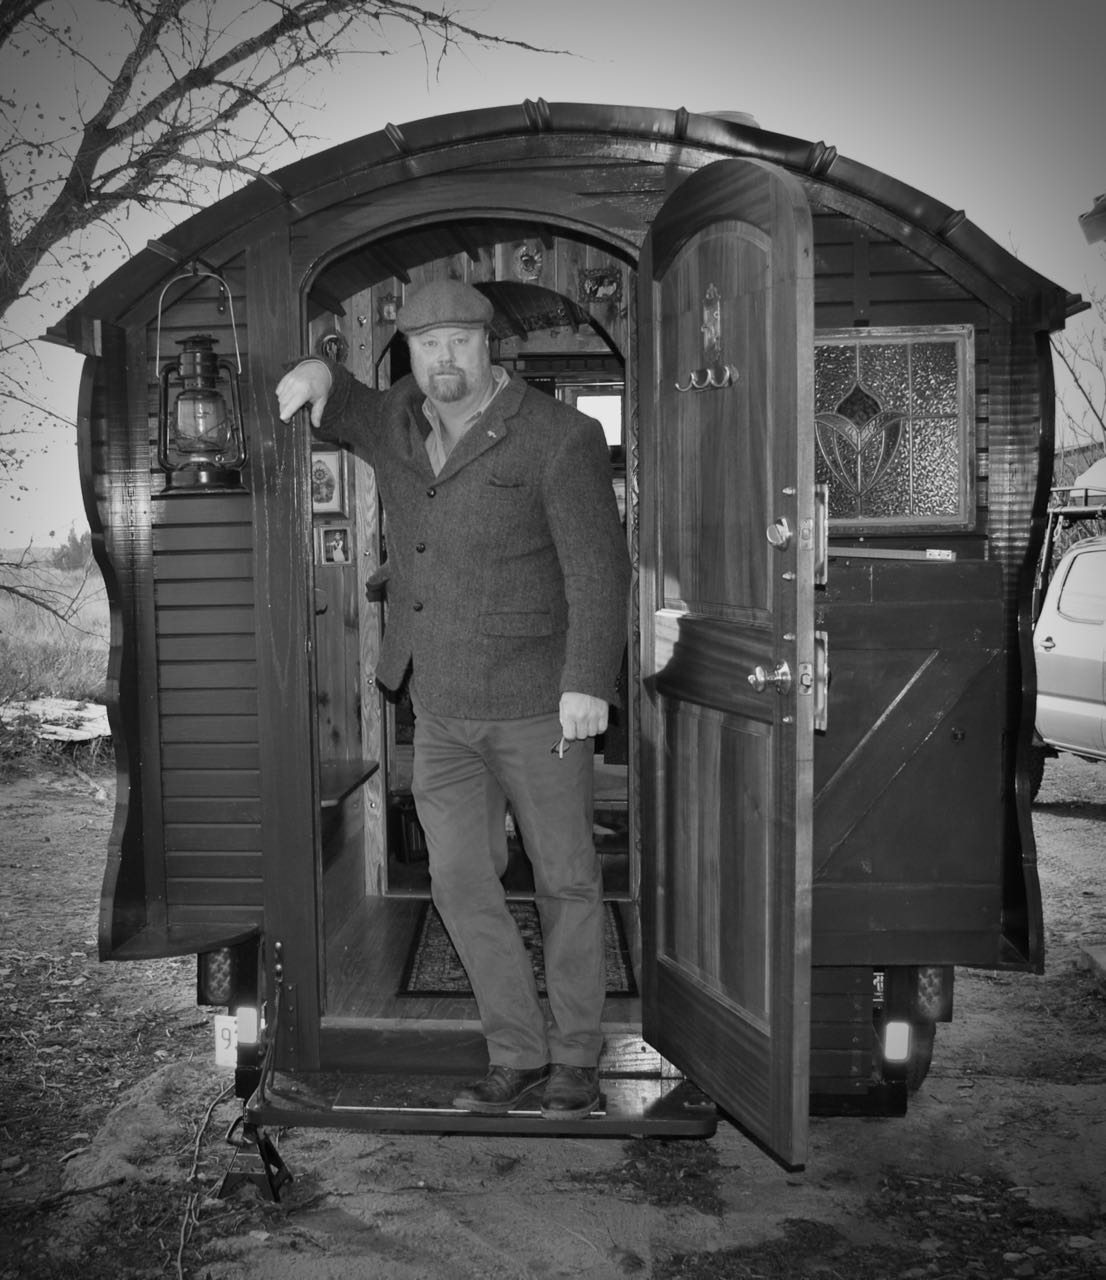
A beautiful, dark, wintery day spent in the Vardo, getting things in shape and spending some quality time reading led me to thinking about shooting a few photos. The place is a bit unkempt but I think it shows how the space is used in real life.
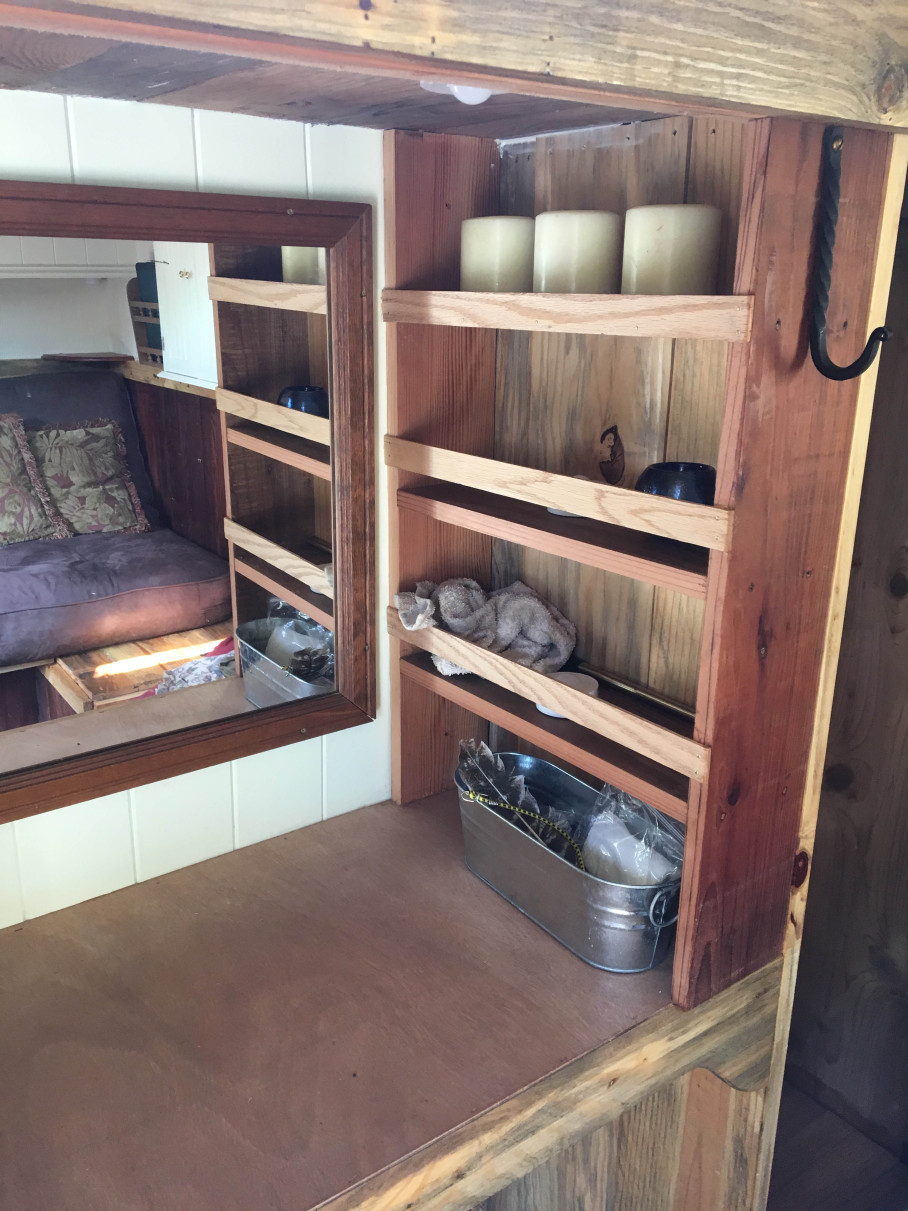
The hearth corner with miscellaneous junk piled on the surfaces. This is the view from where my head lies on the bed.A lot of wood types were used throughout the build as some was recycled and some was purchased based on availability. We are out beyond the end of the realm so supplies are limited. The small photo over the door is my grandparents who played a major role in my upbringing.The samovar corner with sink in place. The wood for this built-in comes mostly from an old (pre-war) desk that had seen better days. They used excellent materials that I really didn’t want to discard so I’ve been hanging onto them for several years now. The mirror is more useful that I would have ever thought and fits the space perfectly. The Samovar is strapped in by a belt connected to the wall and Stacey provided a cute octopus hook for wash cloths and other things. I’m just finishing the windows so they have yet to be varnished.Copper sink made from a french mixing bowl (thanks to Mick for the idea).A view aft from seated on the bed. I won’t lie, cutting all the cedar was not pleasant to conform to the arc but it ultimately turned out fairly successful. Apparently, I was trained well back in my life as a carpenter.My view of the stained glass window from bed with a small candle lantern next to it.Cluttered corner. Things are slowly finding their homes.The dog, trying to figure out what I’m up to but staying close to the heater. She climbs underneath the master bed when it’s time to sleep for the night.
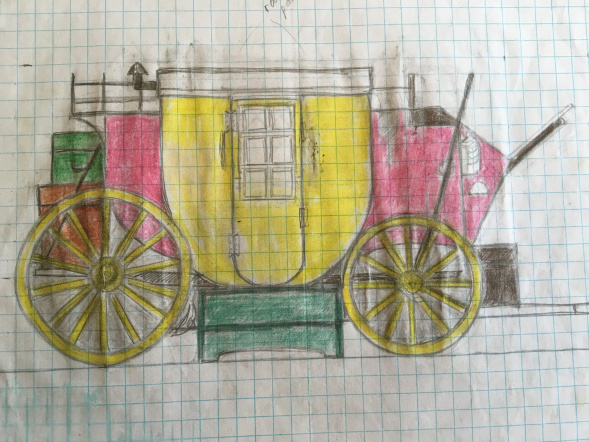
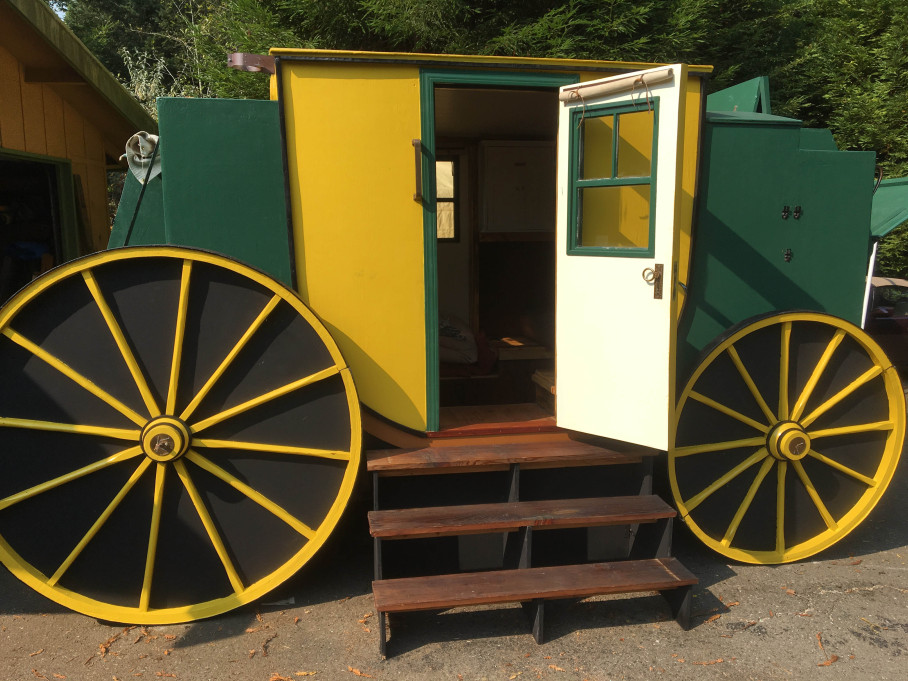
A home-built camper with a old-fashioned Mail Coach theme.
Tony passed on his links to me to share with the vardo community. When I first saw the giant wooden wheels I thought it was a stationary sculpture piece for the back garden. These actually remove for travel and are really just for show.
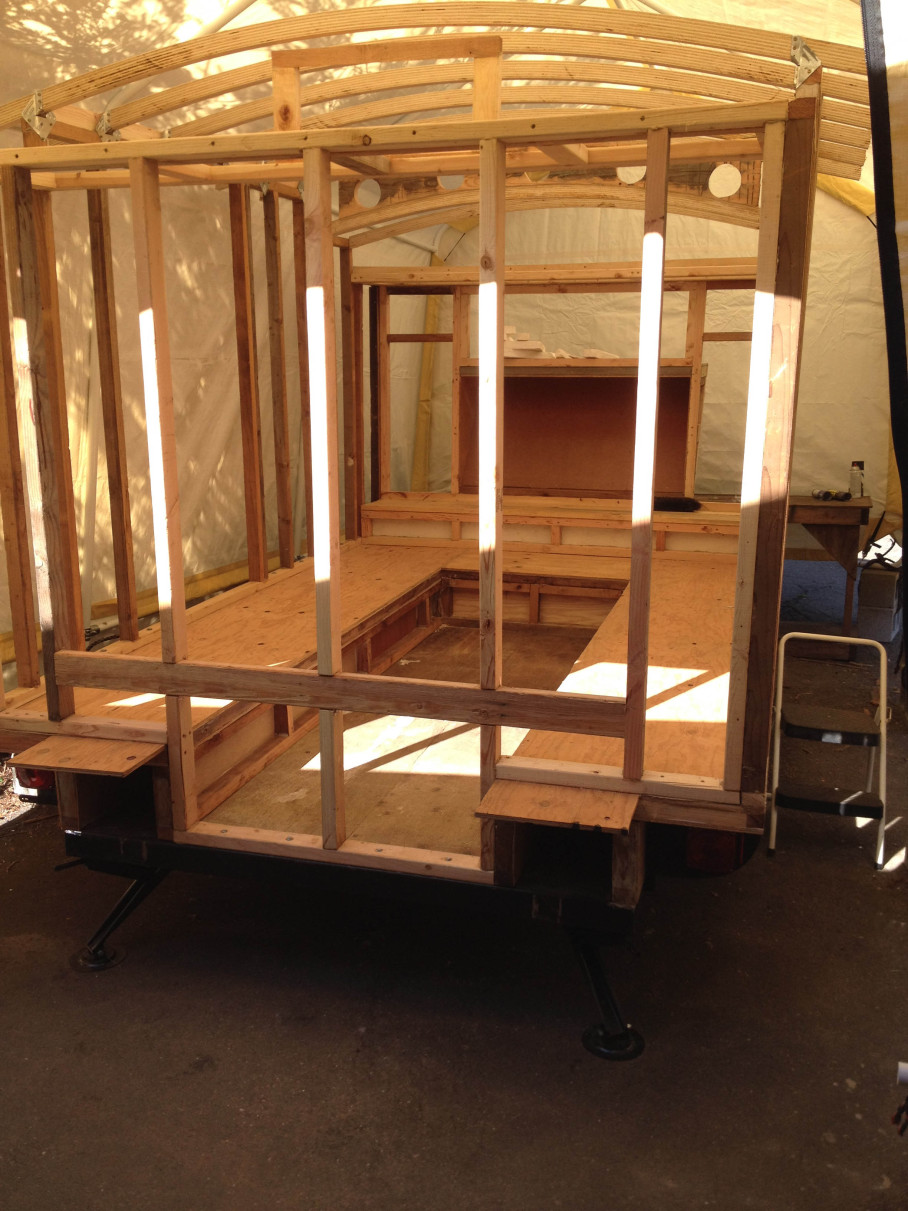
I’m always glad to see someone’s concept sketches as I have filled notebooks with these myself over the years.
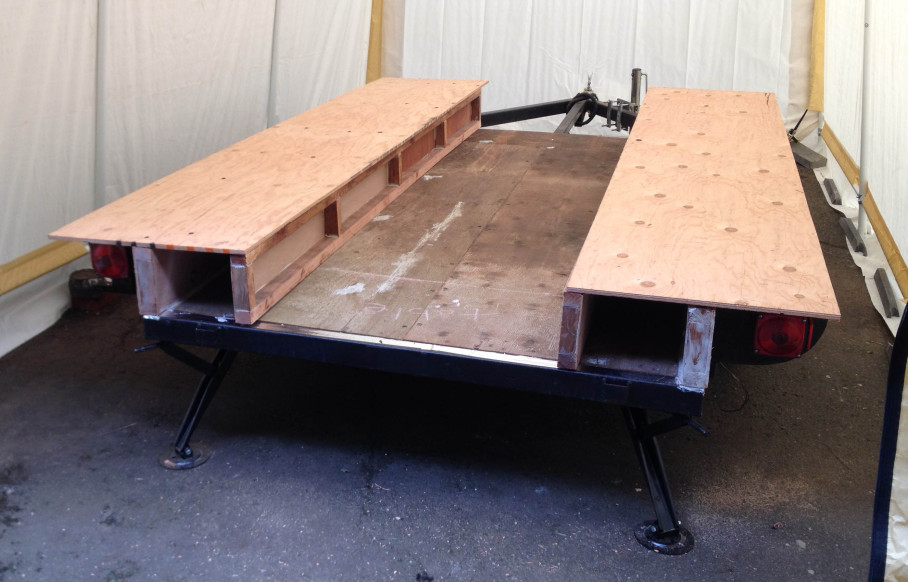
Tony’s web page guides you through the entire process in photos (newest to oldest) so you can learn from his build.
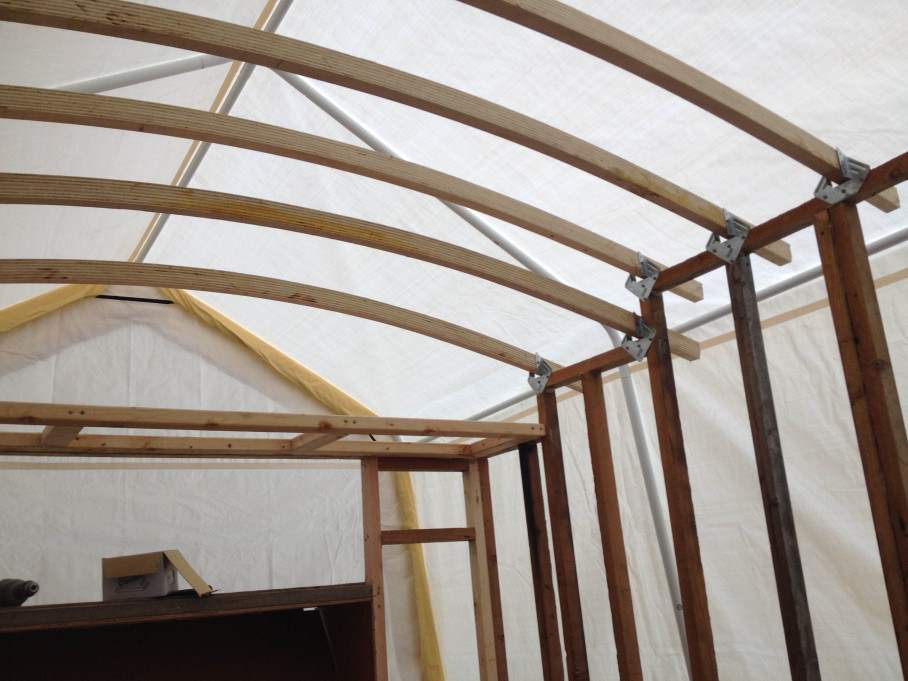
Note the “dead” space in the ledges as it becomes important storage later.
Straight forward off-the-shelf hardware is used throughout including things like Simpson Strong Ties for the rafter connections.
It’s a pretty whimsical design and I think this photo sums that up nicely.
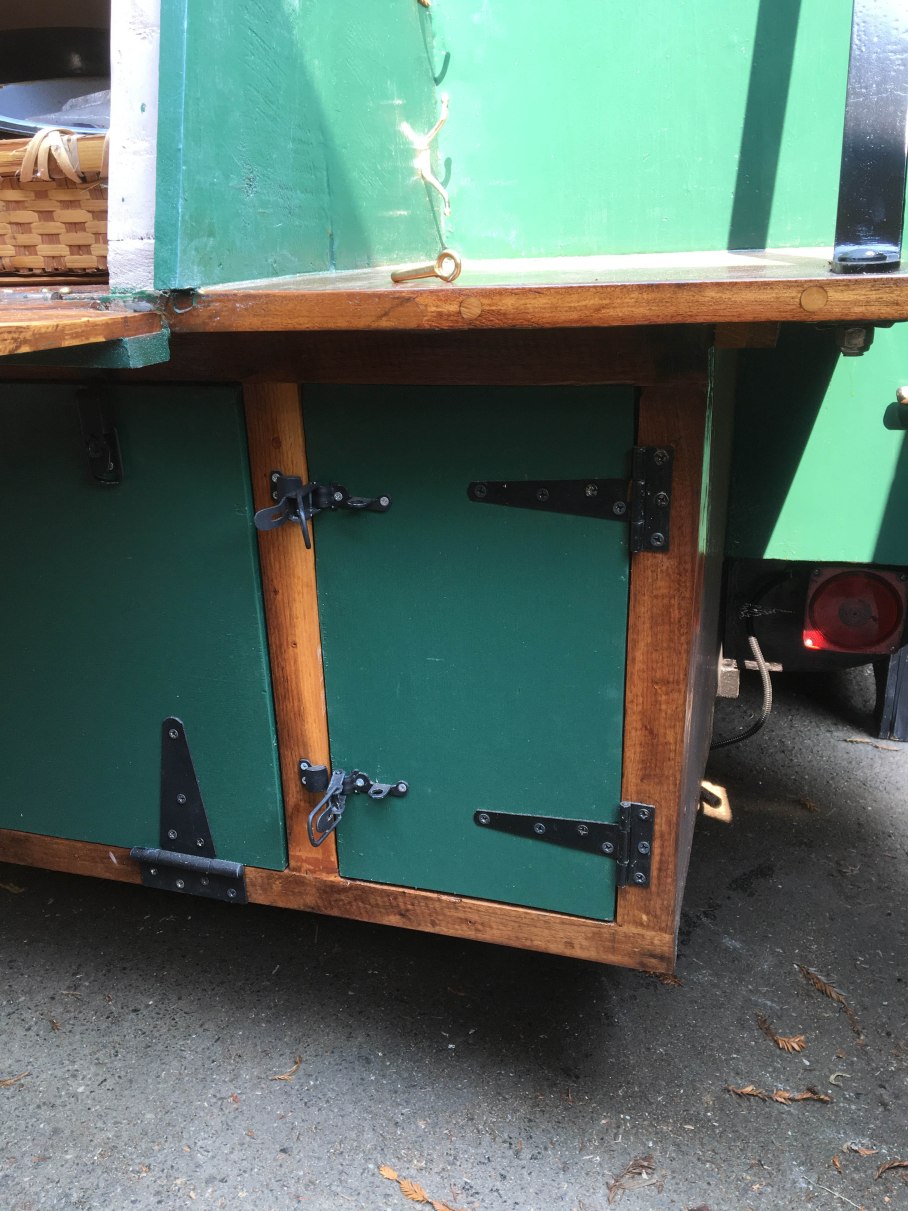
Storage door closed.
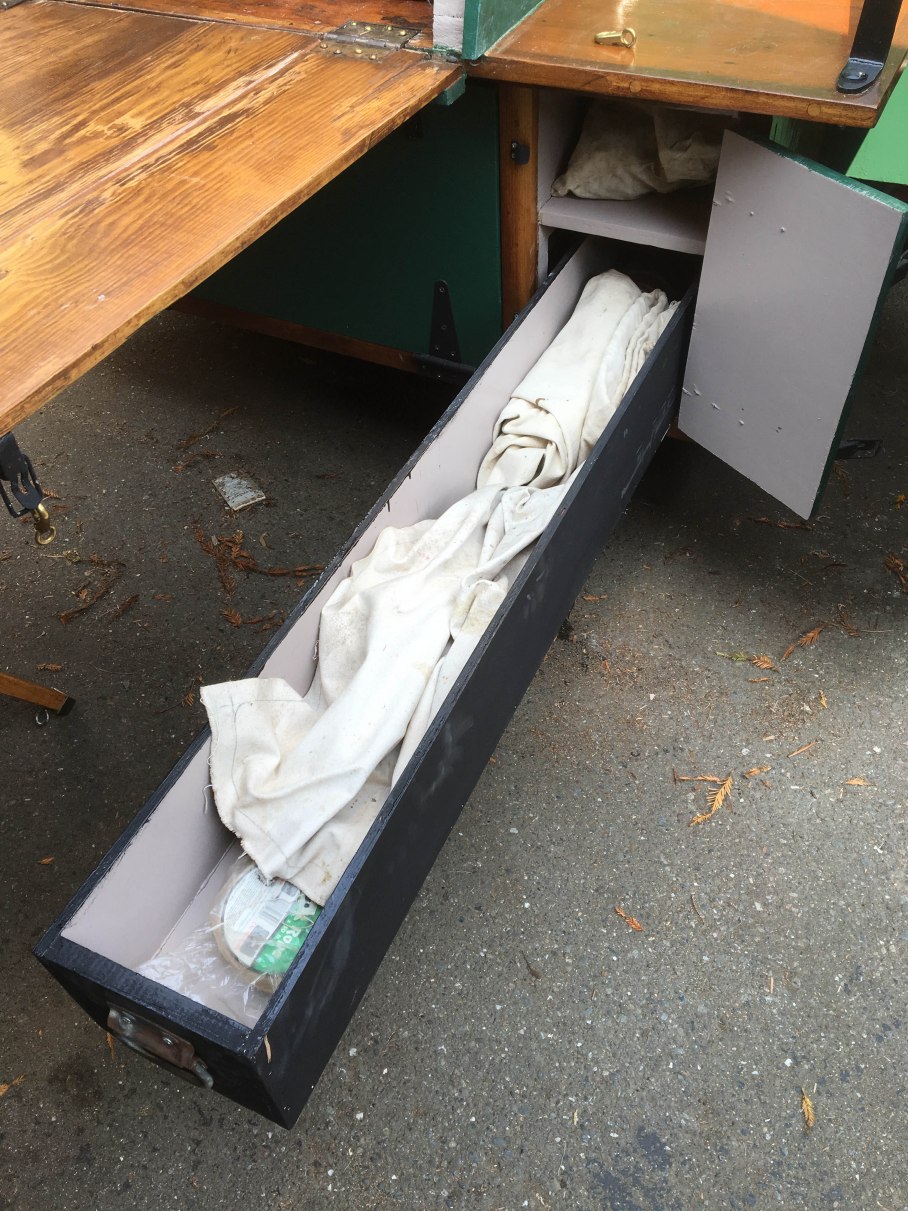
Door open to reveal a very long drawer.
A simple rustic look inside fills the bill and looks quite functional.
The little stove removes and stores in it’s own locker for travel.
If you are looking to build your own camper, vardo, or other living wagon, you can’t have enough great ideas so get over to Tony’s website and have a look:
I have not been entirely idle on the vardo project but have not had time to post here. Work life has been eating up my spare time with travel, and fun though that may be, it means nothing else gets done outside the work day. Cutting a hole in my nice, dry roof haunted me for several months but with the aid of a high-temperature silicone stove-pipe flange, I was ready to dive in. I didn’t want to remove the roofing panels so the cutting was difficult. I did what I could with the circular saw and gnawed the rest out by hand with a chisel. Not pretty, but it worked in the end. Then it was just a matter or cutting a hole through the steel and cleaning it up with a file.
The ugly hole. Fortunately it will be hidden.
I created a cover for the hole from an old, solid copper serving platter (see photo below) that looks nice, and will cover the ugly. The gap between the layers was filled with stove gasket insulation.
Matching up old, very old, and new pieces to make the connection. The offset was used so that the pipe lands between the purlins.
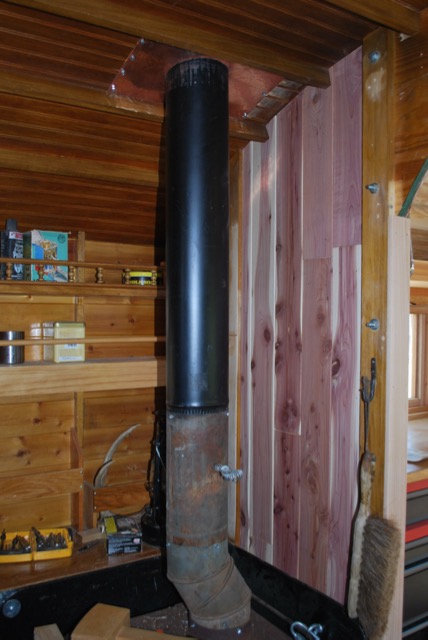
The upper pipe will get a coat of high heat paint while the lower portion will get stove polish along with the stove itself. In the background, the new juniper paneling is visible. Otherwise, the place looks like a wreck. The mallet is handy to solve all measurement problems.
The silicone flashing isn’t as ugly as I feared but still hope to pretty it up with copper sometime.
Learning from experience, I created this new chimney setup so that the outside pipe could be easily removed, if necessary, for off-road travel. I will probably shorten the pipe by a few inches as it sticks up fairly high. Once this was completed, I could get back to the good stuff.
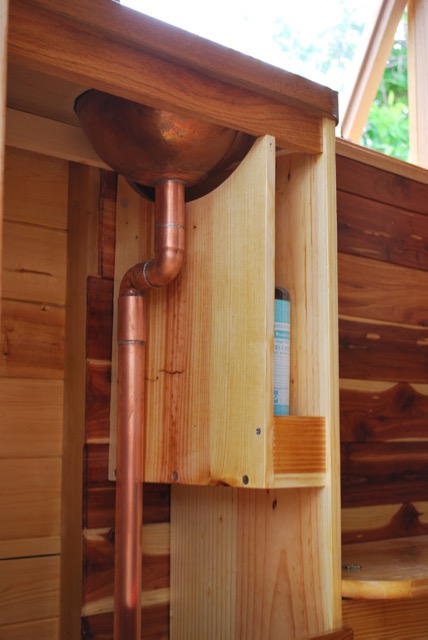
Sink area with a new-purpose-built soap holder.
In order to maximize storage space a small shelf was created to hold soap. The size was determined by a standard Bronner’s soap bottle and it holds two comfortably.
A little carpenter’s geometry.
Some scraps from the wood pile were recovered and planed down to rejuvenate them for use. Nothing fancy here, just utility.
The large under storage area is designed to hold the beautiful copper cistern from the tinker Robins.
Everything in the area has another coat of varnish so as soon as create a method of securing the Samovar, the washing-up area will be complete.
First coats of varnish on the oak.
Finally, I have begun varnishing the floor. The new oak contrasts with the old but will darken soon enough.
Sink, seating, and storage galore – I’m finally moving onto the luxuries that make this addition what it is meant to be; essentially moving some outdoor activities and living indoors with more amenities and easier foul-weather living.
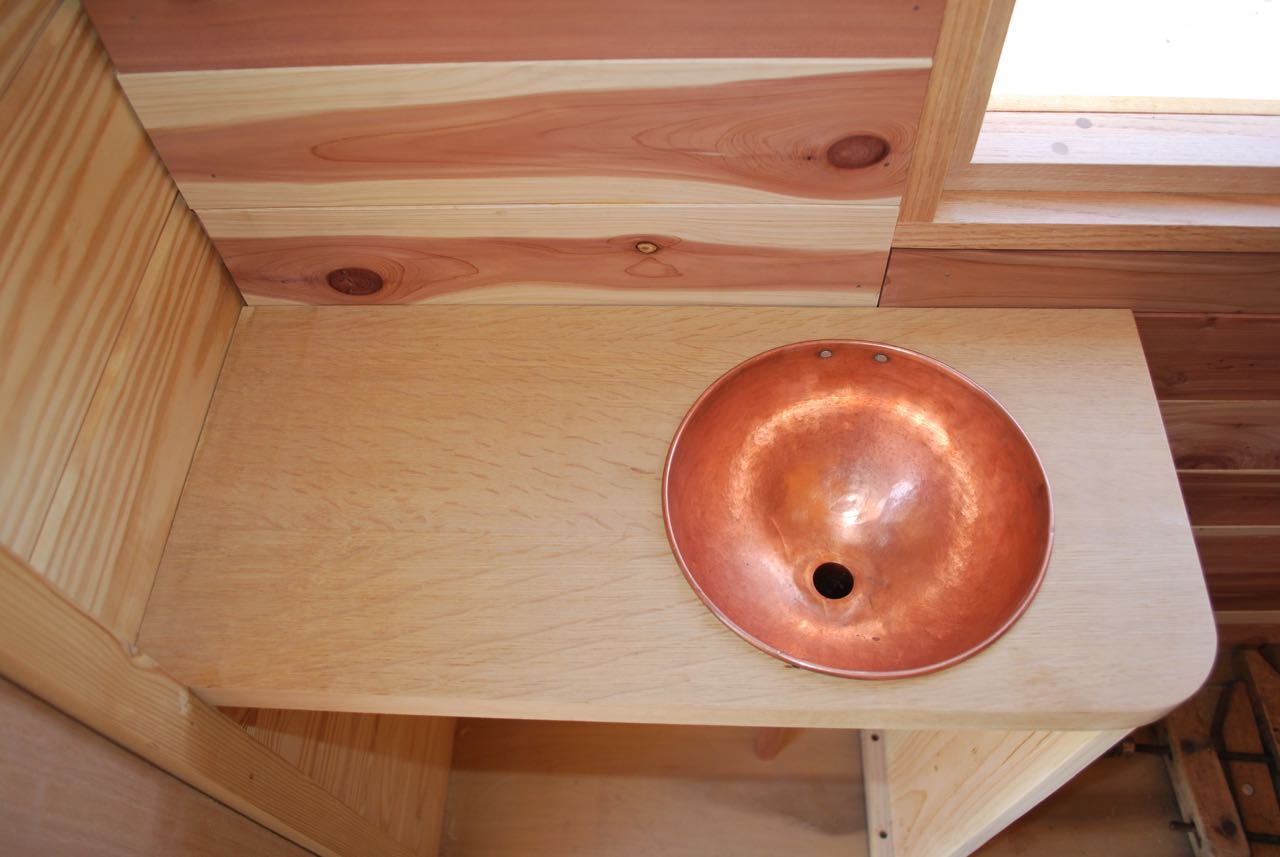
Copper mixing bowl drilled for a drain.
Beginning with a little sink re-purposed from an old copper mixing bowl set – This one was the middle size and fit the area perfectly. I’m certainly not taking credit for the idea as I took this freely from Mick’s vardo. The bowl is a perfect size for some personal hygiene, tooth-brushing, etc. while on the road while the bigger cleaning can still be done outside with the old washtubs and in the future, with an outside shower.
Drilling the hole – I was concerned about this step as there were several things that could go wrong; hole placement, dented bottom, rough fit, and so on. In the end I did my best to find the exact center with a tailor’s tape, from the outside, and marking the location with an awl. I then flipped the bowl over, set it up in a scrap board, and while holding it with my feet used a hand brace with a Forestner bit to slowly cut the hole. This worked surprisingly well and required only a little sanding and smoothing before moving on.
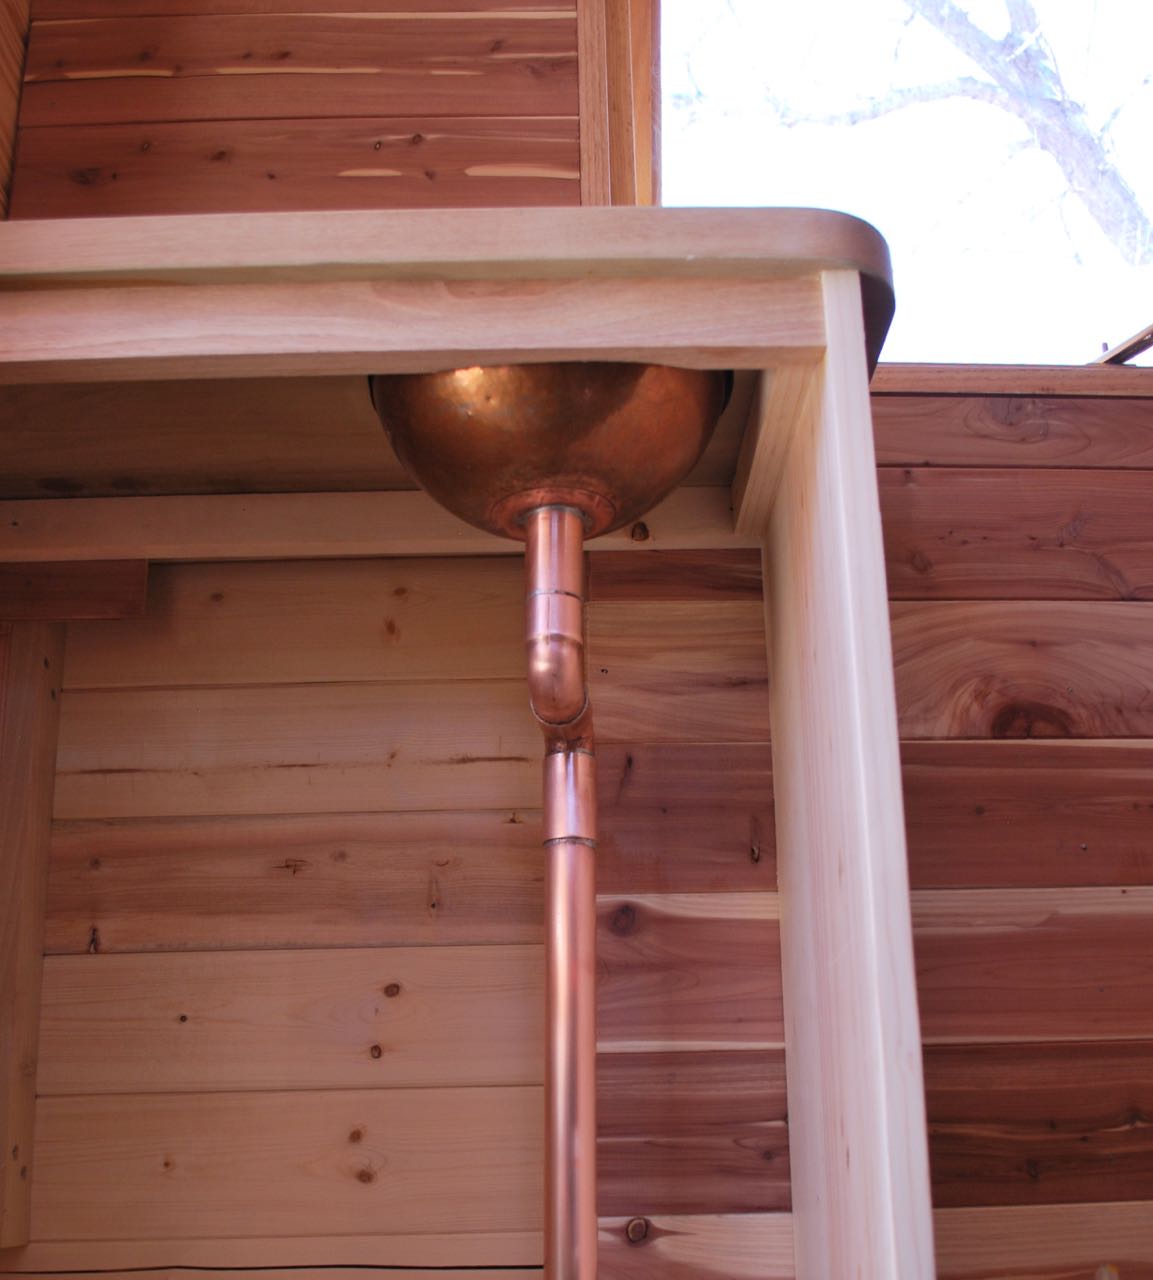
The bowl is not very heavy copper so I was concerned about the solder strength at the joint. There should not be much real strain on it but to ensure a larger surface area to sweat the solder, I sleeved the short pipe with a heavy coupling. I flowed the solder deep into the sleeve before attaching to the so they should be united forever now.
Pipe and coupling soldered in place.
Some serious tugging and testing leads me to believe this is a solid joint.
View of the plumbing from below.
A couple elbows and a short run of pipe completed the plumbing “system” and installation was a breeze. A small shelf to hold a couple Dr. Bronner’s bottles and a towel bar will be added soon to complete the set-up. The storage area to the left was sized to hold the beautiful new copper cistern during travel. The cistern will live outside in the kitchen area when encamped.
A note of caution – Although not really discussed here, the oak-framed windows are visible in some of the images. These were recently added and are glazed with Lexan for its light weight and excellent strength. Keeping the weight low is still a major priority, even in the addition and, if you are building something like this, remember: EVERY SINGLE POUND COUNTS! Fasteners, glass, hardware, accoutrements; they all add up and will be paid for in the final weight. If I could build everything with oak and walnut and hickory for durability, I would. However, the weight will add danger in towing, lower the fuel efficiency and have a cumulative effect on the overall structure.
Looking down the drain.
The sink was fitted into place and a outflow pipe seated in the hole drilled by the same Forestner bit used in the bowl. This counter is a re-purposed old office desk top from the 1930s or 40s that I’ve had for many years. It is a white oak laminate over a red-oak core (when things were built to last). A couple passes through the planer yielded a beautiful and sturdy surface to work with. The rest of the desk top was turned into the large counter on the starboard side that will be included in the next post.
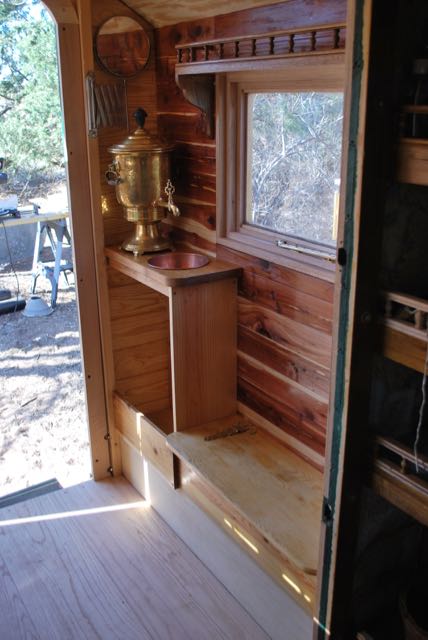
The Samovar in position for washing and the shaving mirror in it’s new place.
This old Samovar was a lucky find for us and fits the location perfectly. It’s high pedestal provides clearance that would otherwise need to be created with some sort of shelf. Otherwise, it’s simply a beautiful and functional piece.
The new bench and a smattering of varnish.
The next step was to create a small bench with the idea that this would give room when two or more people were inside as the floor space is limited in the main cabin. This area will serve as something of a mud room for the rest of wagon. The hinges were an Ebay find of solid brass under a hundred or more years of varnish and tarnish. I think Stacey really enjoyed making these shine again. This wood is some very solid pine reclaimed from an antique child’s desk and again, a planer made short work of cleaning it up for use.
Side bench.
I would have preferred the seat to be a little deeper for comfort but didn’t want to interfere with the traffic-way through the door. Nobody wants a shin-buster in such a small space.
There cannot be enough storage space in such a small accommodation.
The bench provides another small storage compartment for items that may need to be readily accessible; it’s not large but every bit counts.
An overview of the new area.
It’s always difficult to get a clear picture of arrangements in such a small space but this shot from the main cabin gives a general impression of the area and the relative size the new window.
For Part 1 of the rebuild/addition then CLICK HERE.