The Shoemakers’ Shop of Colonial Williamsburg, Virginia has posted an excellent photo-essay of making a pair of 18th Century Jack Boots. Their leather work is phenomenal and shows real craftsmanship. Any leather worker can appreciate this even if they never intend to make a pair of shoes. This pair is particularly interesting with the fire-tempering and waxing that occurs. Their research is in-depth and is well documented.
Stages of heating and finishing the boot.
Perfectly stitched in the traditional manner.
The upper coming together.
Ready for waxing.
A judicious use of heat. The grass keep the temperature relatively low.
A finished specimen. Ready for riding.Have a look at their Jack Boot page. There is commentary with each photo. While not full of detail, the images go a long way to understanding the process.
Mónus József here is a multiple record-holder in Hungarian traditional long-distance archery. In an archery contest in inner Mongolia, he made a successful 653m shot (nearly half a mile) with his home-made bow.
Click the link to see the original page or HERE for more information about Hungary.
Lynx is certainly one of the coolest people I know. An amazing person on so many levels. Here is a 53 minute documentary (mostly in French) about her lifestyle and teaching. Very well done and I’m glad, on the web.
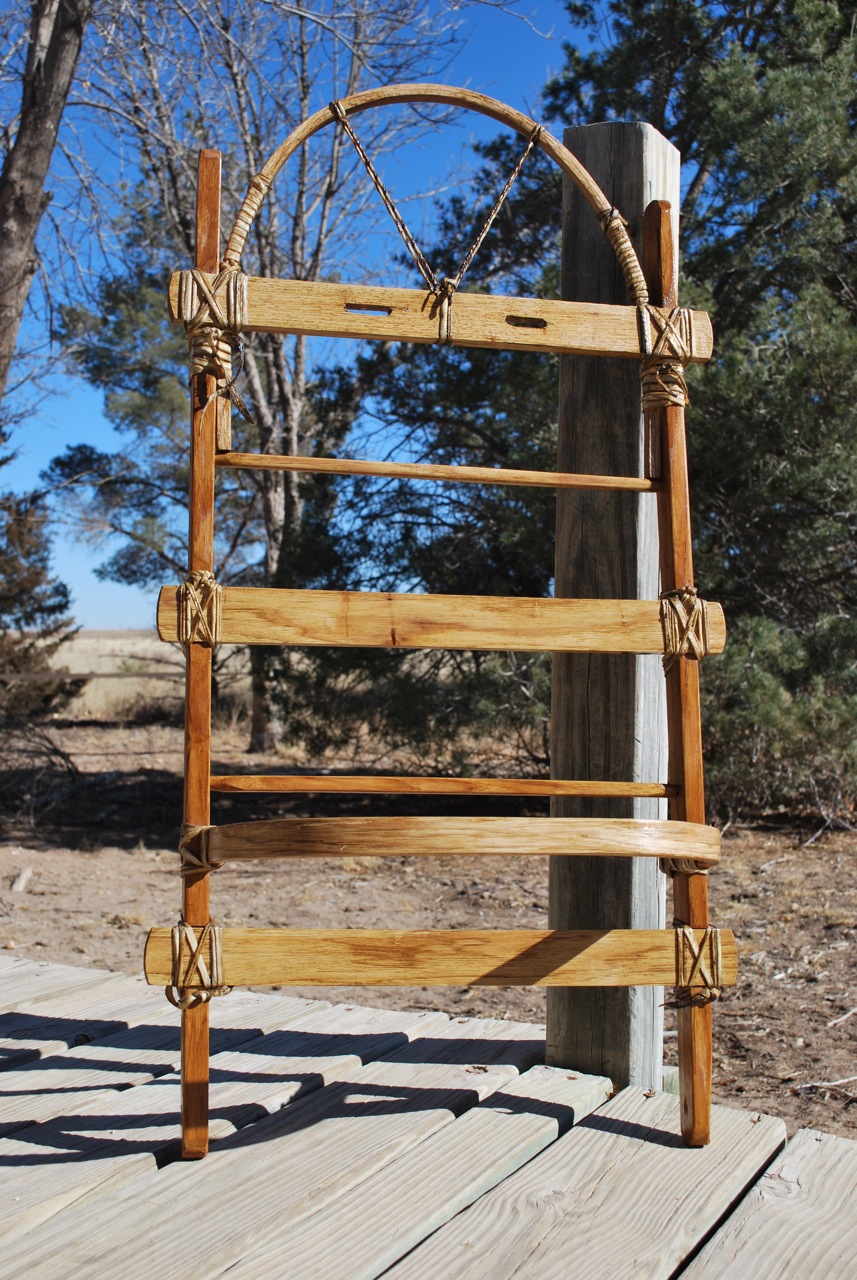
Here’s a detailed photo of the naked frame with an initial coat of oil & pine-tar coating. This will weatherproof the whole thing and make the rawhide less appealing to critters (I caught my dog licking one of the lashings this morning). This mixture is about 60% boiled linseed oil and 40% Stockholm pine-tar, an ancient coating used on just about everything in pre-industrial northern Europe. It should dry in a day or two and be ready for a second thin coat later in the week.
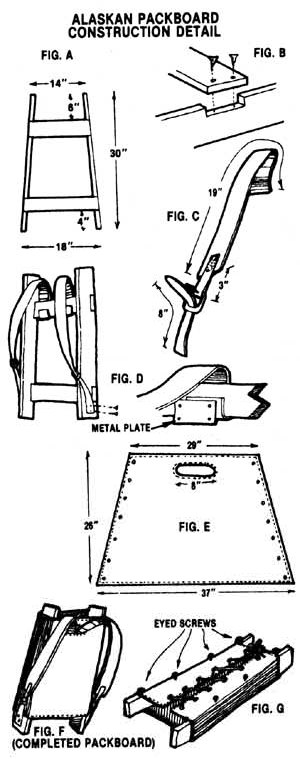
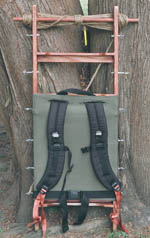
One of many projects happening around here this yule-tide season. A new classic-style rucksack is being sewn, much leatherwork is occurring, and this pack frame is being finished. The wood is shagbark hickory (Carya ovata) made from a bowstave section and some other scrap from the pile. All was split before finishing so the grain is perfectly aligned with the lumber. This made for easy steam bending. As I was working from many examples but no actual plan, there was a lot of mock-up and tweaking of the design to fit my size and intended needs. There’s no metal in the construction. The freight bar and cross members are half-lapped and lashed with rawhide. The bar is also pegged to prevent slipping under load. More to come as it gets finished and field tested.
Here’s a few older frames I could find around the ‘net:
A real treat from the Sifting the Past blog. It is worth checking out if you are interested in researching the past through images of the period just prior to mass industrialization. The Townsend’s have a couple excellent websites including an interesting 18th century cooking blog with videos. There is so much in this painting that describes the time and the craft of the cordwainer. There is a palm awl and lasting pinchers in the lower right, the ever critical strap for holding the shoe while sewing, the sewer’s palm for pulling tight the lock stitch, as well as the hammer, mallet, and knife of the trade. He is holding the sole awl in his left hand. The basket on the work bench contains a great bone tool made from a metapodial bone as so often found prior to the 20th century when craftsmen made their own tools. I want my shop to look this great sometime soon.
As a craftsman of sorts, I understand that making a “one-off” of something does not imply expertise and replication builds a real understanding of the object being produced. However, this is certainly not my first leather working or shoemaking project but a major improvement on a theme. The lasts I purchased earlier in the year on Ebay have finally been used to actually make a shoe so I documented the process as it came along last week; mistakes and changes included in the process. While searching for huarache construction, I have only been able to find the simplest tire sandal designs and many links to “barefoot” running sandals. I recently found the Huarache Blog and scoured it for inspiration and design secrets from real huaracheros in old Mexico.
Sole cut out, punched for strapping and nailed to the last.
The lasts shown here seem to fit me well but are an Oxford dress shoe style, I think, meaning they run a little long in the toe. New lasts are pricey (ca. 50 euros/70 US), but I think it will pay in the long run to invest in a better design for myself and those people I might make shoes for.
Wetting out the first strap.
I didn’t show the strap cutting process as there is little to be learned about that. My fancy new Osbourne strap cutter can be seen in the upper right of this photo
Since this project was experimental, I used scrap leather, meaning I could only get about three foot (one meter) straps. In future, I’ll probably use 6 foot or longer pieces (2+ meters).
Nailing the strap to the last.
Pre-punched holes in the mid-sole and away we go. A little tallow on the straps helps cut the friction of the leather but ended up being not worth the trouble.
Placing the twining thong.
This is a signature of the style I chose. The vamp or tongue-like piece was later removed as I didn’t like the way it looked. I’ll experiment more with that later.
Lacing and twining.
Unlike normal, I completely finished the first shoe and removed it from the last to check size and shape to determine any major changes that would need to be made.
Heel added and lacing up the back. I think this step shows the evolution of the strap sandal to the modern huarache.
The straps running under the mid-sole look like a problem here but are ultimately skived down, wetted, and hammered flat.
Straps ends as added in. Longer straps would lessen the ends here.
I used simple wire nails to attach the soles but sewing would work too.
Ends to be trimmed and skived, and a finished sole.
Pulled from the last, they actually matched. I don’t know why I was surprised but that made me happy.
Preparing to nail the sole.
This method is fast and efficient, and I suspect rather tough. The nails are pressed through the leather and rubber into a thick leather scrap below. Otherwise, you would need to pry it up from the work board.
Nailing the sole.Bending the nails in preparation for clinching.
The nails are bent over (inward) to prepare to “clinch” them. There are no photos of this part of the process but this was done by setting the shoe back upright on a small anvil and hammering the nails down tight with a punch. The pre-bending causes the nail to curl inward and back up into the sole. Voila! The Huaraches below have about five miles of hiking on them now and they’re beginning to have some character.
Huaraches you say? Do tough guys wear such things? In an era of cheap, slave-made garments, its easy to forget how self-reliant our ancestors were for such things as raiment. I include this excellent photo of Capitan Alcantar I found on the Huarache Blog as a great historical image of a man of action wearing his huaraches and ready for war.
Click the image for more historic photos like this.

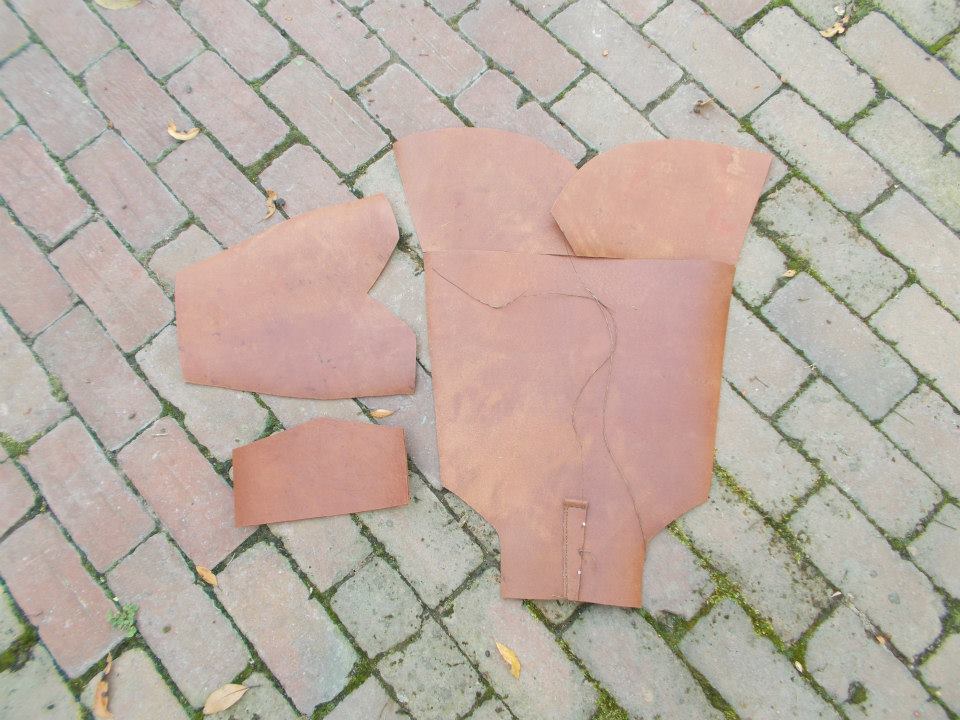 The Shoemakers’ Shop of Colonial Williamsburg, Virginia has posted an excellent photo-essay of making a pair of 18th Century Jack Boots. Their leather work is phenomenal and shows real craftsmanship. Any leather worker can appreciate this even if they never intend to make a pair of shoes. This pair is particularly interesting with the fire-tempering and waxing that occurs. Their research is in-depth and is well documented.
 Stages of heating and finishing the boot.
 Perfectly stitched in the traditional manner.
 The upper coming together.
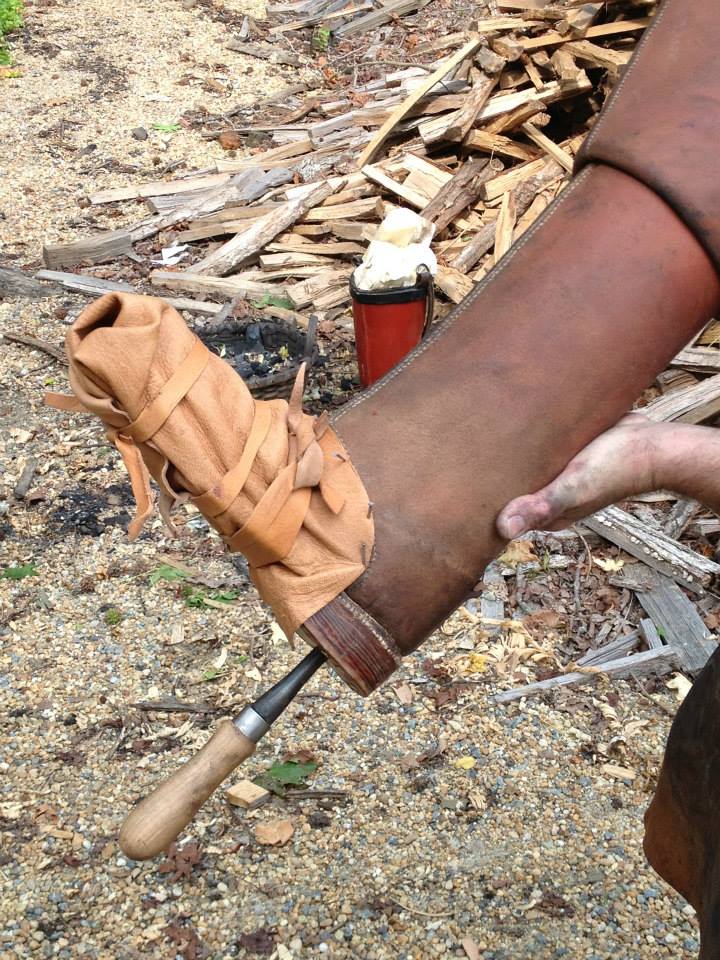 Ready for waxing.
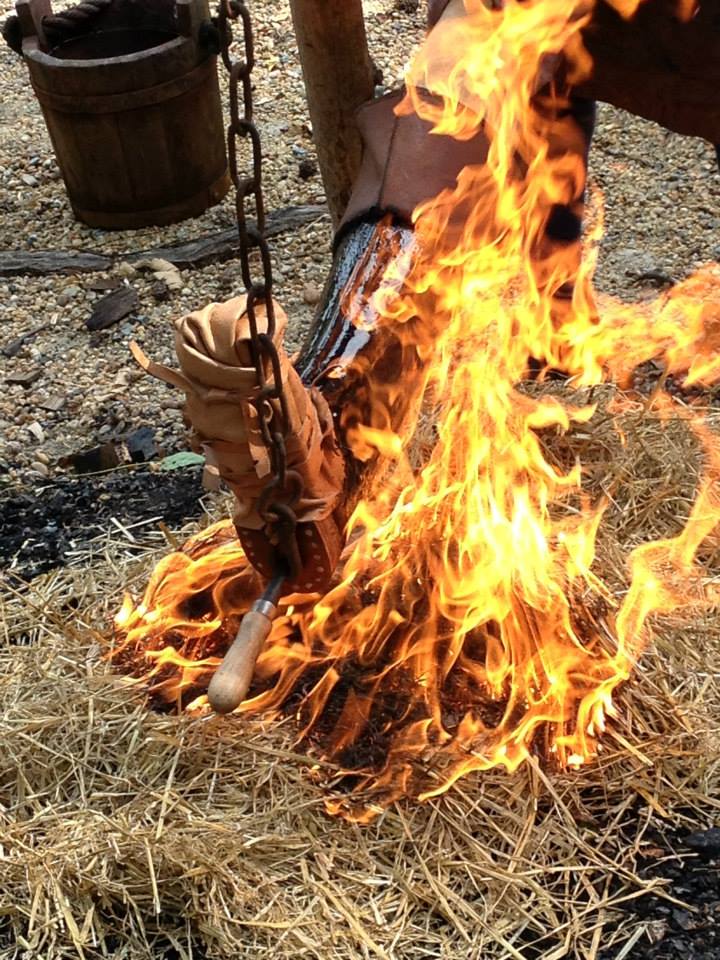 A judicious use of heat. The grass keep the temperature relatively low.
 A finished specimen. Ready for riding.Have a look at their Jack Boot page. There is commentary with each photo. While not full of detail, the images go a long way to understanding the process.