I love these things. I saw quite a few parked on ranches from Colorado to Idaho last week. I know they aren’t highway capable but it seems they could provide a real housing alternative for low-income minimalists. Way better than a housing complex or apartment for sure. The photos link to Ken Griswold’s Tiny House Blog. If you haven’t figured it out yet, I’m a fan of his site.
I took a fair amount of design inspiration from these wagons but added a bit of class along the way. I wouldn’t mind having a cook stove like this one though.
Off-the-shelf or build it yourself? I love these details in hand-built structures. This looks way better to me than the local hardware store option.
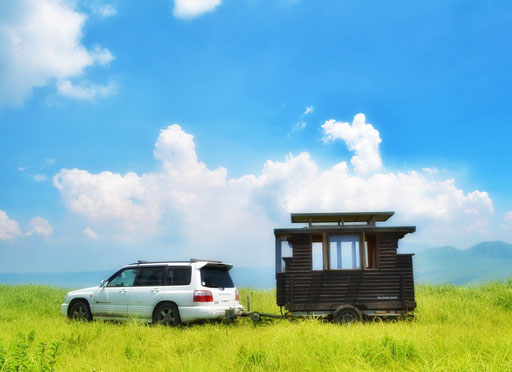
I always appreciate getting mail and comments on the blog; especially when someone is able to take information away and create something of their own. I recently received some fine photos from Kevin with his own Vardo build. I emailed back for more information but haven’t heard anything yet.
The wagon is a lovely and familiar design and it’s great to see it out in public alongside the more normal modern camp setting.Kevin also builds beautiful coolers that I hope to see more of in the near future. One is visible next to the vardo in the image above. Here’s the email I received and I hope to hear (and see) more from Kevin soon:
George:
Hello. I have been following your blog for a few years. I’m writing to you directly as I want to share some photos of the Vardo that I built, using yours (and a few others) for much of the inspiration. I wasn’t sure how to go about posting the photos to your blog, so I figured I would send them directly to you.
I live near Houston and own property in Buffalo Wyoming, home to a historical population of Basque sheepherders, and many currently rolling sheep wagons. Living in two extremes, I have had some issues with changes in humidity affecting the performance of the wagon and would likely do a few things differently, if I were to do it all over again (but wouldn’t we all).
I haven’t seen any updates on your Vardo-make-over in quite a while. Hopefully there’s more coming. I know the work on mine is never done. There are always items hanging around on the list of future improvements.
Let me know if you have any questions about the construction and performance of the wagon. I’m happy to carry on a discussion if your interested, and willing to send more photos if you request. You’ll notice in the photos some glimpses of one of my hand made coolers. They’re marine fiberglass coated wood on the inside, and out; built sort of like a cedar strip canoe. I built the chuck-box in the first photo as well. It travels in the rear of the wagon to be set out for camp cooking. I figured these were both items that might interest you.
Here’s a great story I read years ago about being raised in a family of six in a sheep camp measuring about 7 x 8′! (I think that’s the floor space). I recently relocated the article in Mother Earth News.
Nice layout sketch of a sheep camp.
Here’s an excerpt:
“The canvas-covered sheep wagon was roughly about seven feet wide by eight feet long. On the front end a door opened out of the middle and you stepped down onto the wagon tongue and thence to the ground. From the inside looking out, the stove was on the left of the door. On the right was a small wash stand with several wooden drawers for storage of linens, towels and socks. A bucket of water and washbasin were on the oil cloth covered top and a small mirror hung above the basin for shaving. Soap, toothbrush, razor and essentials rested on top of the stand when in location or were stowed in a drawer when moving.”
Sheep camps from Wyoming from the Wyoming Tales and Trails webpage. Great photos and some good information concerning everything “western.”
I could spend much of my life like this!
A self-contained base camp in a sheep wagon provides a cozy home on the prairie.
A beautiful culmination of cultures a innovations created this iconic American living arrangement. We can learn a lot from these designs today.
The Wyoming Tails and Trails website contains a lot of other information about western history along with more than 100 photos. Have a look around and get a feel for the old west.
I say Vardo because that’s really what it is. You can sense that the presenter of this show isn’t too familiar with true rolling homes, caravans, vardos, or whatever you want to label them but his enthusiasm is real. I like this home a lot but there is too much gymnastic restructuring for my taste. I’m probably just lazy. I’m not knocking his aesthetic or design though; they are spot-on. Mr. Tagami fit a lot of useful ideas together to create a wonderful living space. Several of these innovations are being integrated into my future plans.
If you haven’t seen this yet, here’s a video detailing one of his creations and the happy owners who inhabit it.
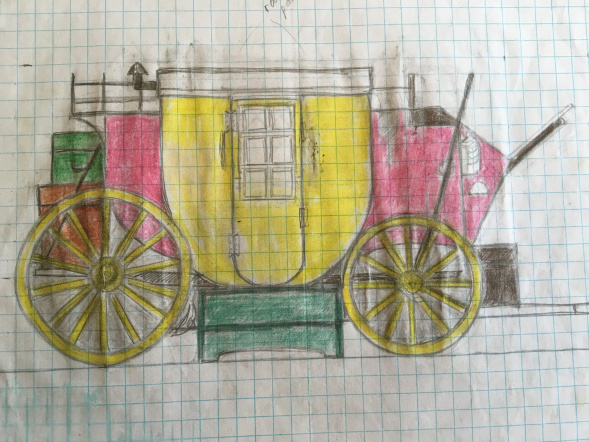
A home-built camper with a old-fashioned Mail Coach theme.
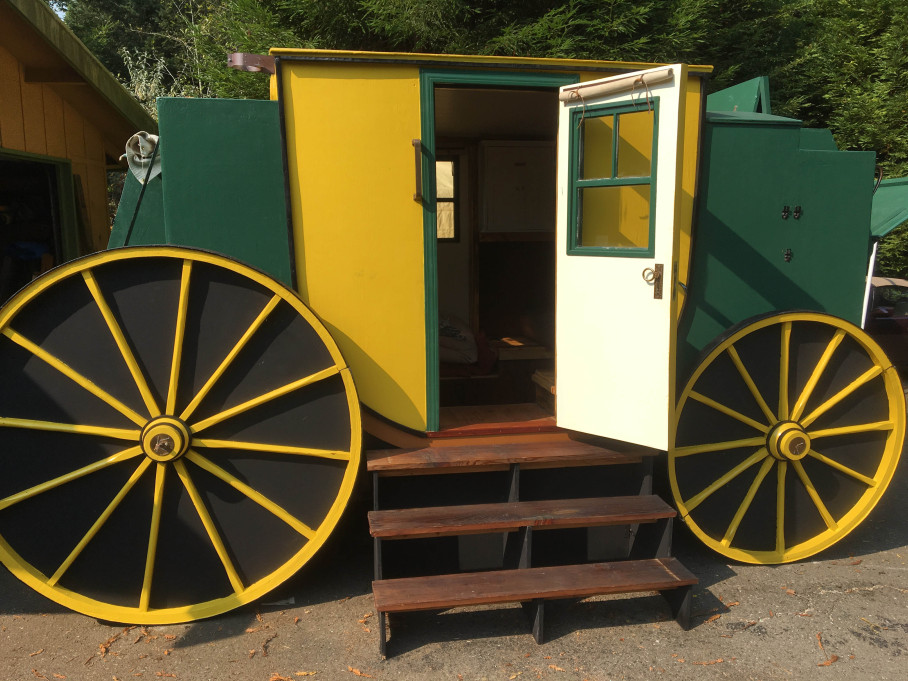
Tony passed on his links to me to share with the vardo community. When I first saw the giant wooden wheels I thought it was a stationary sculpture piece for the back garden. These actually remove for travel and are really just for show.
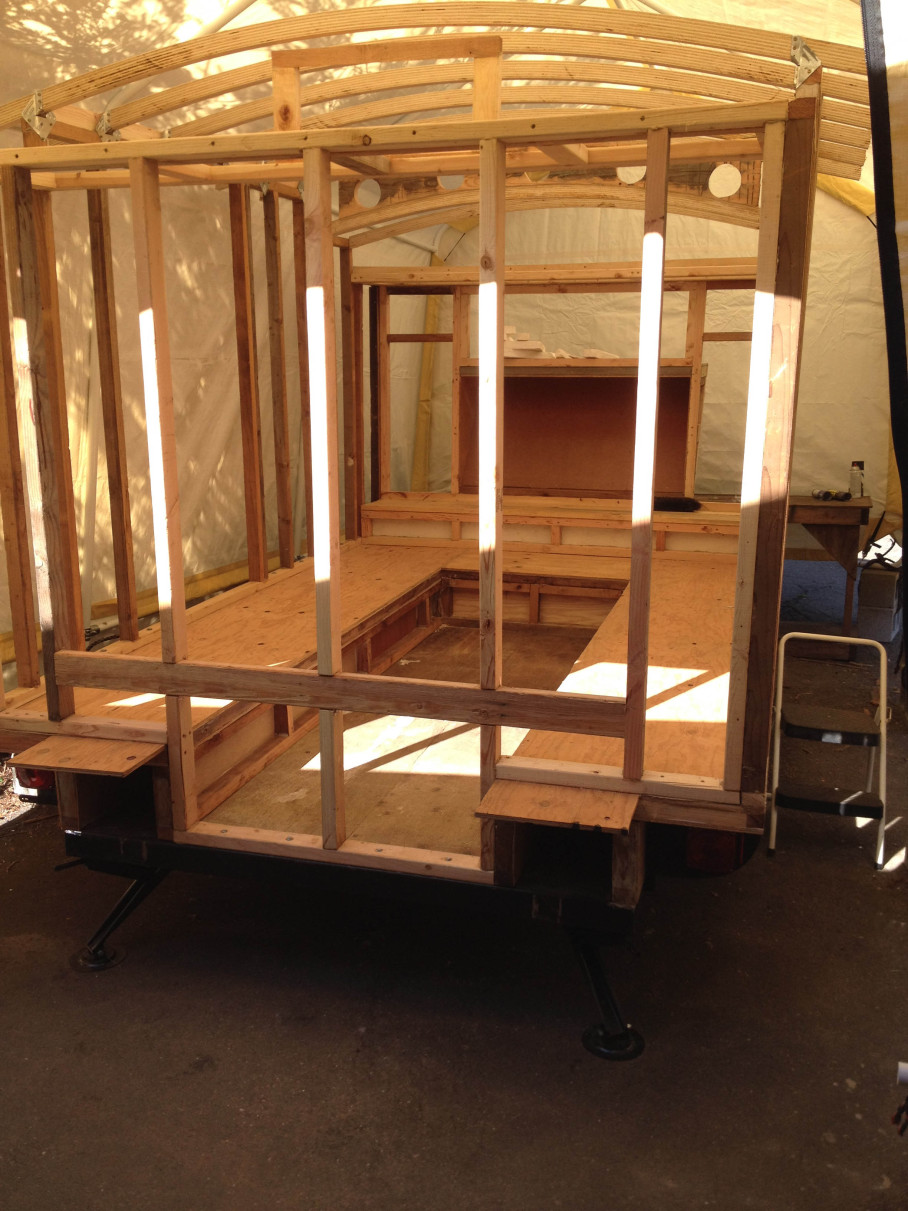
I’m always glad to see someone’s concept sketches as I have filled notebooks with these myself over the years.
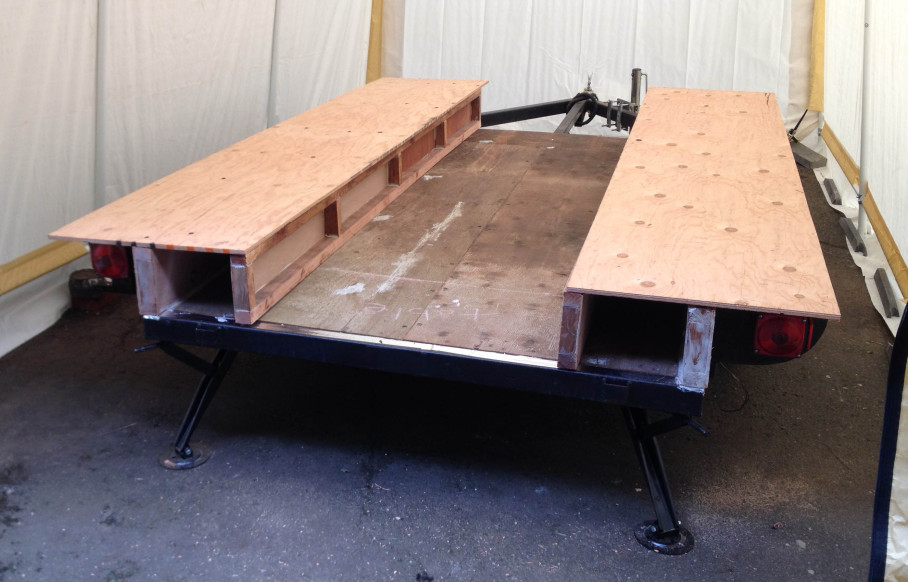
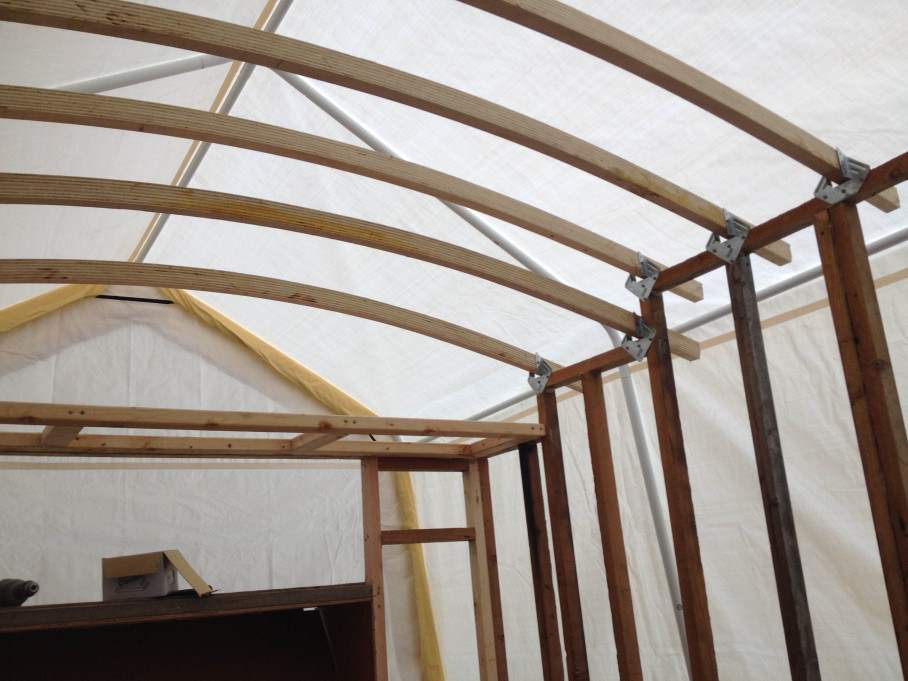
Tony’s web page guides you through the entire process in photos (newest to oldest) so you can learn from his build.
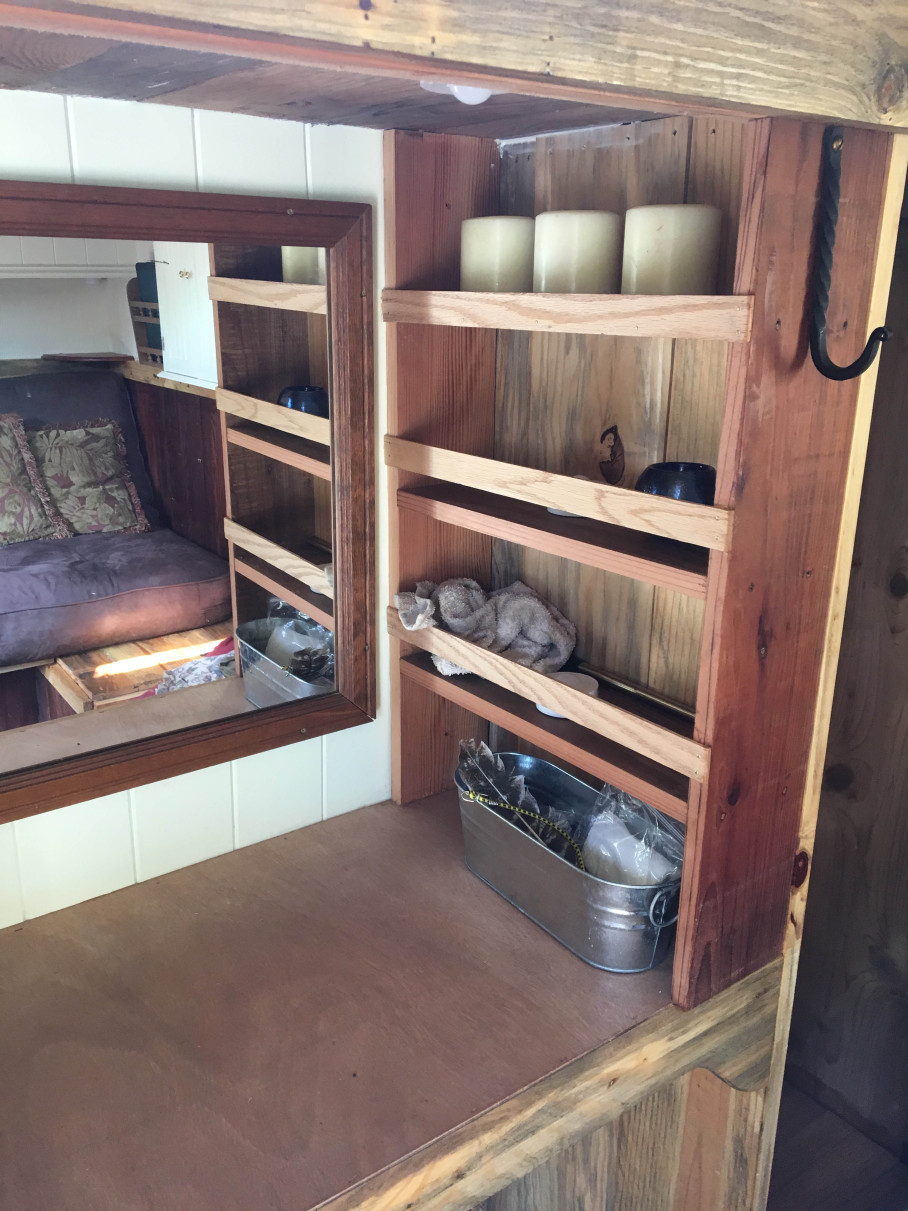
Note the “dead” space in the ledges as it becomes important storage later.
Straight forward off-the-shelf hardware is used throughout including things like Simpson Strong Ties for the rafter connections.
It’s a pretty whimsical design and I think this photo sums that up nicely.
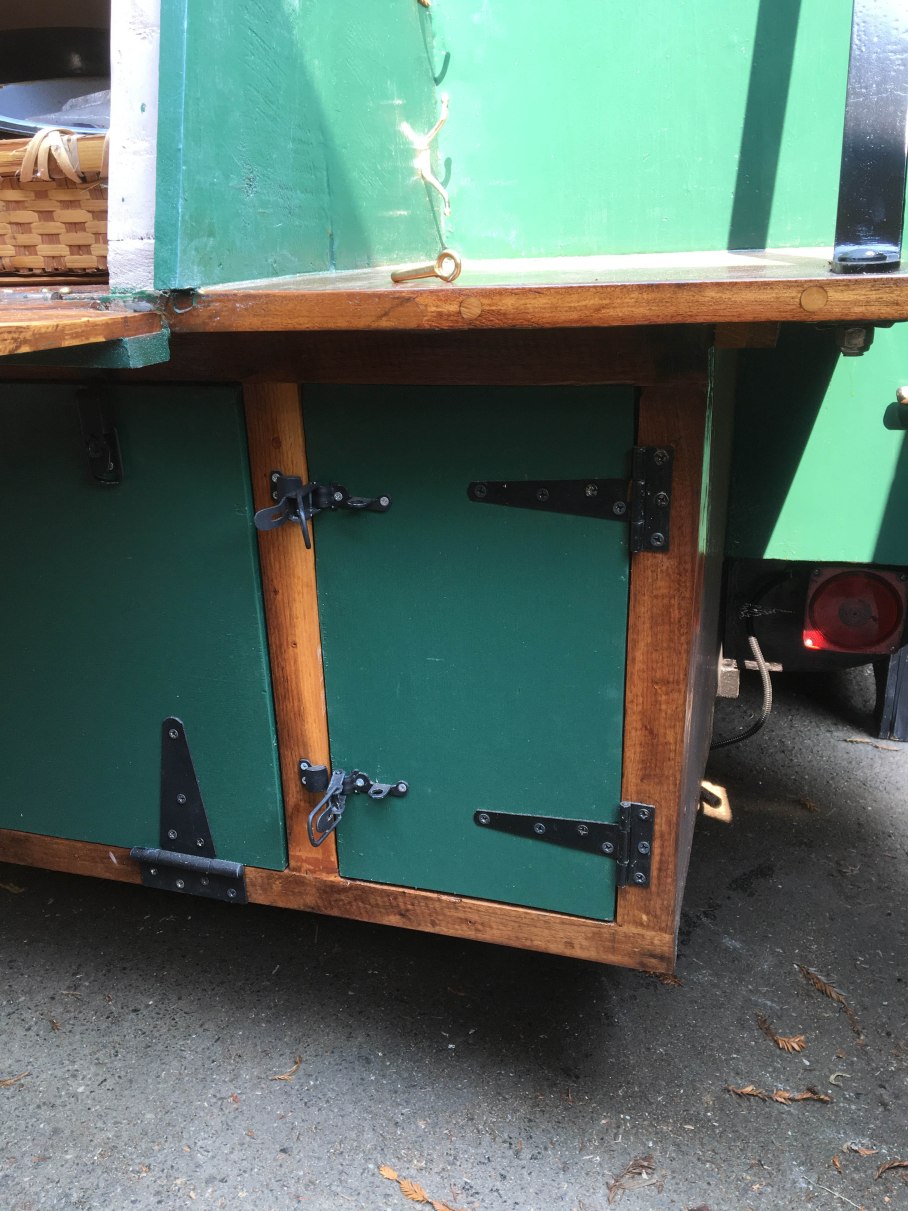
Storage door closed.
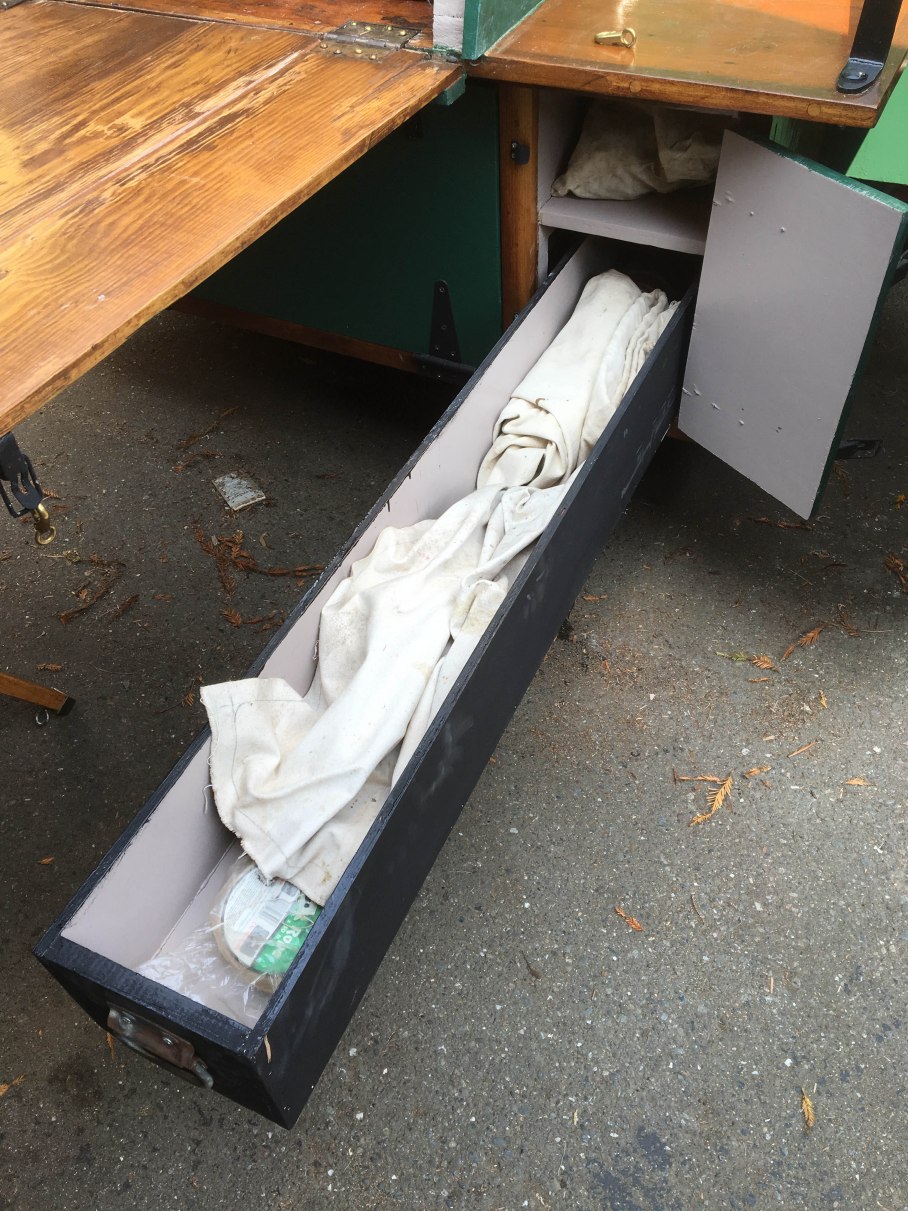
Door open to reveal a very long drawer.
A simple rustic look inside fills the bill and looks quite functional.
The little stove removes and stores in it’s own locker for travel.
If you are looking to build your own camper, vardo, or other living wagon, you can’t have enough great ideas so get over to Tony’s website and have a look:
Sink, seating, and storage galore – I’m finally moving onto the luxuries that make this addition what it is meant to be; essentially moving some outdoor activities and living indoors with more amenities and easier foul-weather living.
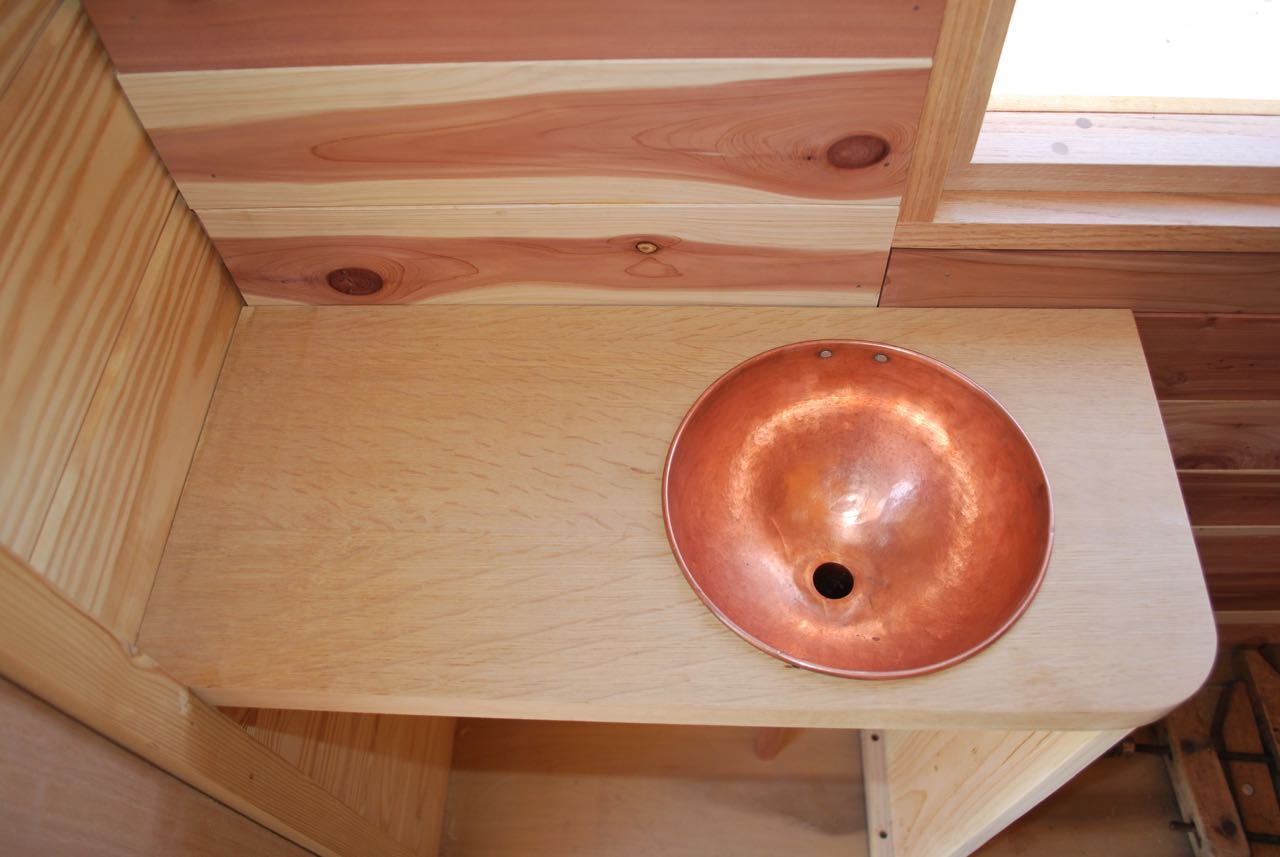
Copper mixing bowl drilled for a drain.
Beginning with a little sink re-purposed from an old copper mixing bowl set – This one was the middle size and fit the area perfectly. I’m certainly not taking credit for the idea as I took this freely from Mick’s vardo. The bowl is a perfect size for some personal hygiene, tooth-brushing, etc. while on the road while the bigger cleaning can still be done outside with the old washtubs and in the future, with an outside shower.
Drilling the hole – I was concerned about this step as there were several things that could go wrong; hole placement, dented bottom, rough fit, and so on. In the end I did my best to find the exact center with a tailor’s tape, from the outside, and marking the location with an awl. I then flipped the bowl over, set it up in a scrap board, and while holding it with my feet used a hand brace with a Forestner bit to slowly cut the hole. This worked surprisingly well and required only a little sanding and smoothing before moving on.
The bowl is not very heavy copper so I was concerned about the solder strength at the joint. There should not be much real strain on it but to ensure a larger surface area to sweat the solder, I sleeved the short pipe with a heavy coupling. I flowed the solder deep into the sleeve before attaching to the so they should be united forever now.
Pipe and coupling soldered in place.
Some serious tugging and testing leads me to believe this is a solid joint.
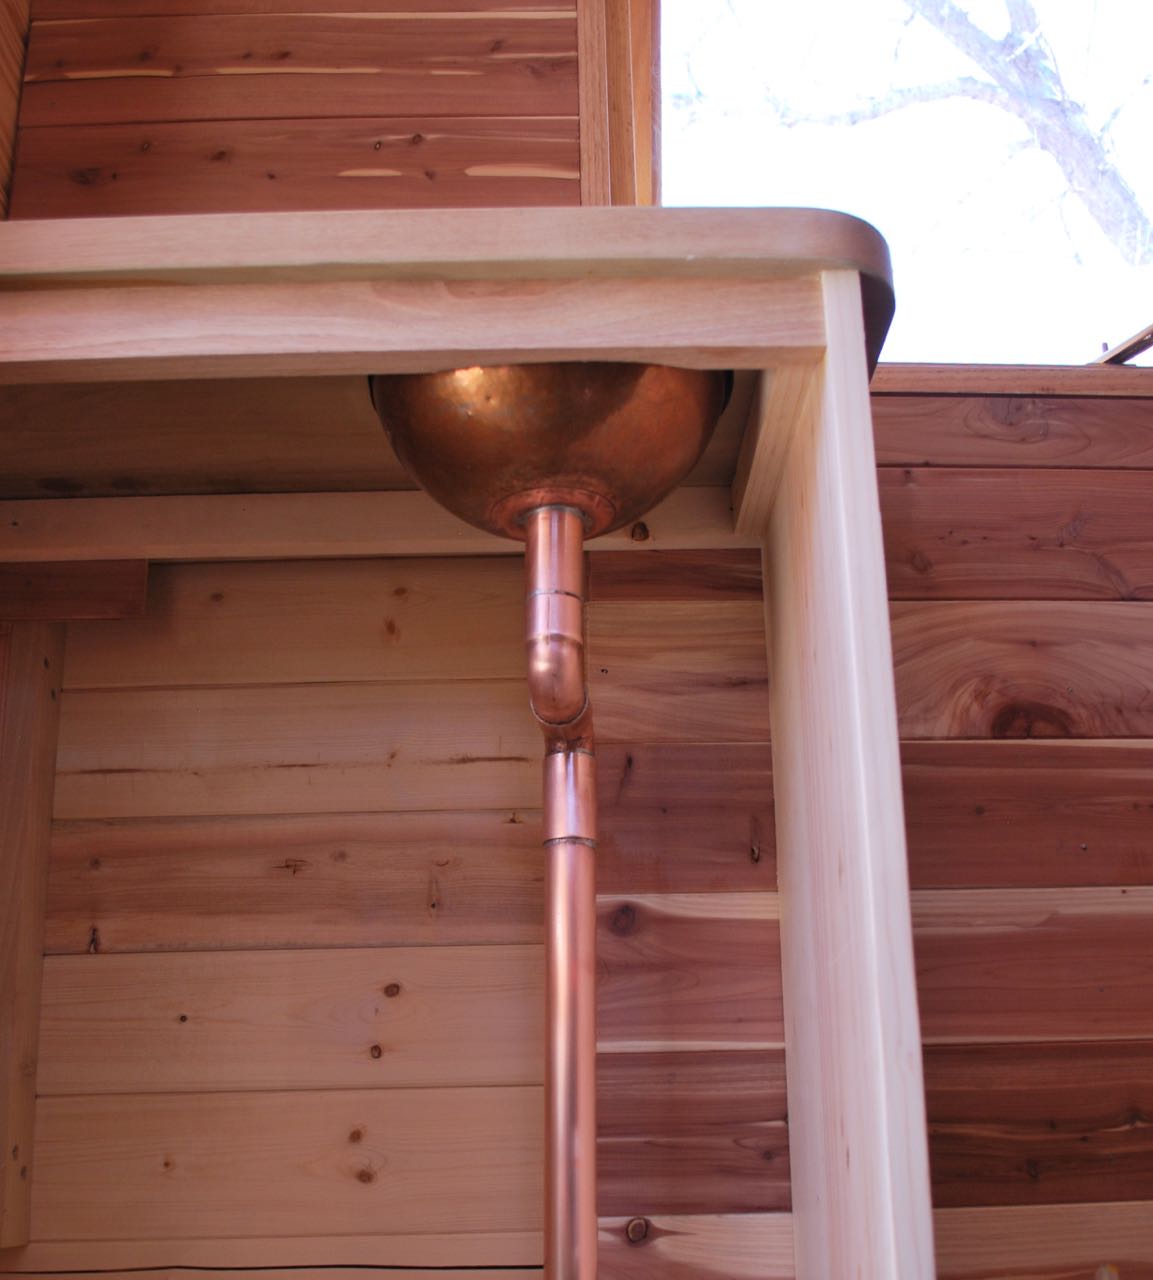
View of the plumbing from below.
A couple elbows and a short run of pipe completed the plumbing “system” and installation was a breeze. A small shelf to hold a couple Dr. Bronner’s bottles and a towel bar will be added soon to complete the set-up. The storage area to the left was sized to hold the beautiful new copper cistern during travel. The cistern will live outside in the kitchen area when encamped.
A note of caution – Although not really discussed here, the oak-framed windows are visible in some of the images. These were recently added and are glazed with Lexan for its light weight and excellent strength. Keeping the weight low is still a major priority, even in the addition and, if you are building something like this, remember: EVERY SINGLE POUND COUNTS! Fasteners, glass, hardware, accoutrements; they all add up and will be paid for in the final weight. If I could build everything with oak and walnut and hickory for durability, I would. However, the weight will add danger in towing, lower the fuel efficiency and have a cumulative effect on the overall structure.
Looking down the drain.
The sink was fitted into place and a outflow pipe seated in the hole drilled by the same Forestner bit used in the bowl. This counter is a re-purposed old office desk top from the 1930s or 40s that I’ve had for many years. It is a white oak laminate over a red-oak core (when things were built to last). A couple passes through the planer yielded a beautiful and sturdy surface to work with. The rest of the desk top was turned into the large counter on the starboard side that will be included in the next post.
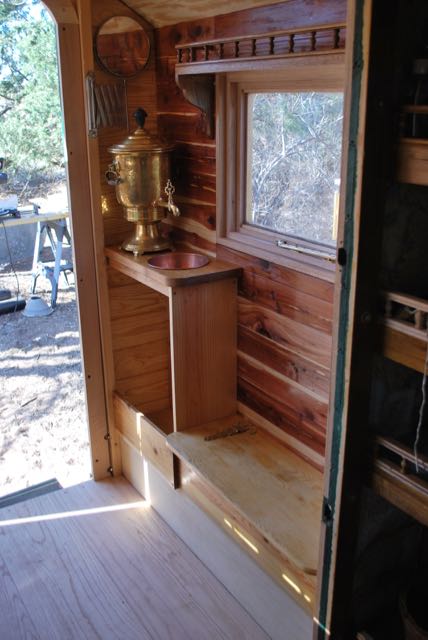
The Samovar in position for washing and the shaving mirror in it’s new place.
This old Samovar was a lucky find for us and fits the location perfectly. It’s high pedestal provides clearance that would otherwise need to be created with some sort of shelf. Otherwise, it’s simply a beautiful and functional piece.
The new bench and a smattering of varnish.
The next step was to create a small bench with the idea that this would give room when two or more people were inside as the floor space is limited in the main cabin. This area will serve as something of a mud room for the rest of wagon. The hinges were an Ebay find of solid brass under a hundred or more years of varnish and tarnish. I think Stacey really enjoyed making these shine again. This wood is some very solid pine reclaimed from an antique child’s desk and again, a planer made short work of cleaning it up for use.
Side bench.
I would have preferred the seat to be a little deeper for comfort but didn’t want to interfere with the traffic-way through the door. Nobody wants a shin-buster in such a small space.
There cannot be enough storage space in such a small accommodation.
The bench provides another small storage compartment for items that may need to be readily accessible; it’s not large but every bit counts.
An overview of the new area.
It’s always difficult to get a clear picture of arrangements in such a small space but this shot from the main cabin gives a general impression of the area and the relative size the new window.
For Part 1 of the rebuild/addition then CLICK HERE.
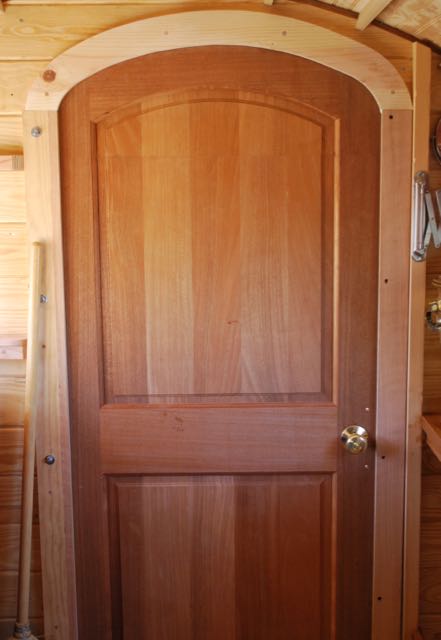
Every home needs a door. It’s a tricky bit that must fit well, open and close easily, provide some security, and hopefully, look good doing it.
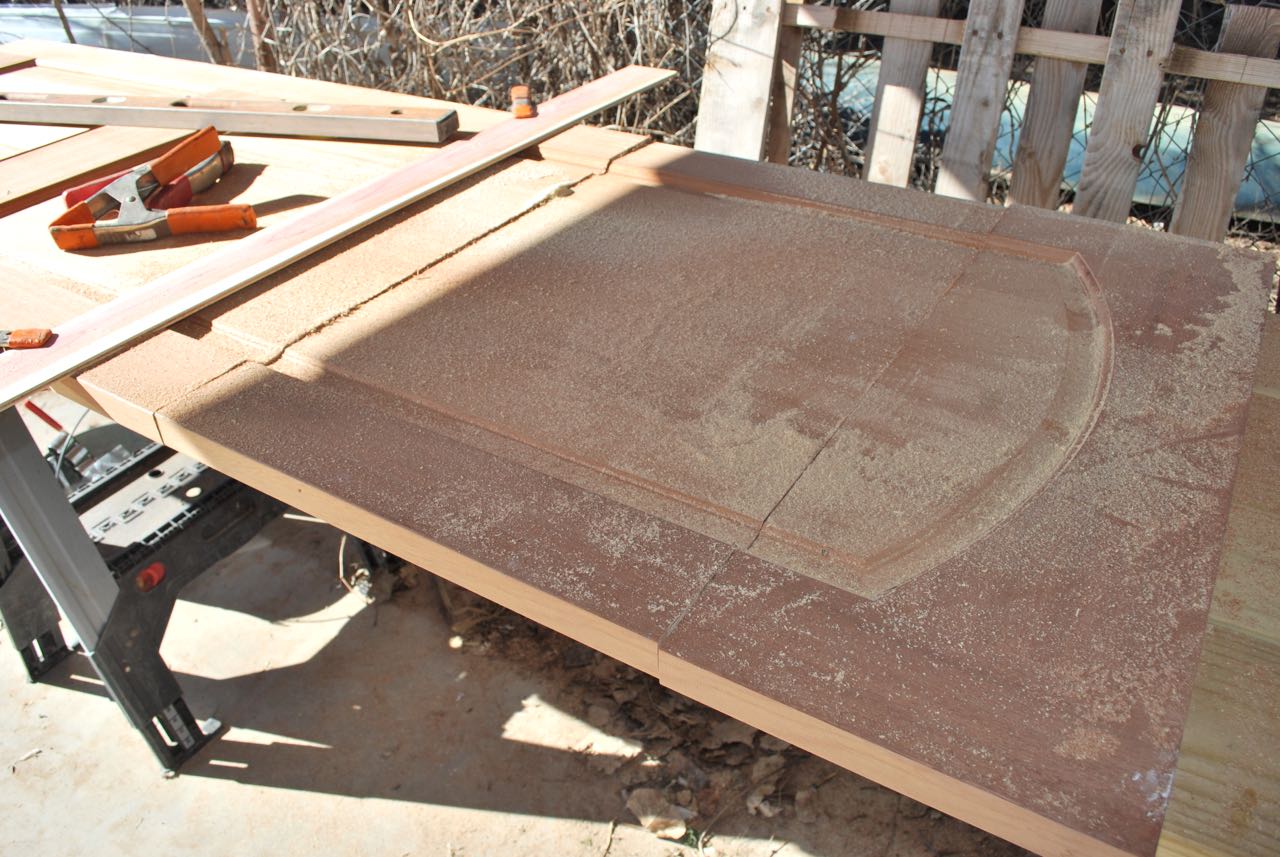
We found a mahogany, two-panel door at the Habitat Re-Store in Lubbock a couple months ago and since the price was right ($10), we bought it. It was clearly well-made and I suspect it ended up at Habitat due to a largish scratch near the bottom on one of the rails. The only down-side for me was it’s height. At 94″ (2.38 m), it was far too tall for a simple, tiny vardo. I knew I had to cut it down and was willing to risk the $10 as it went to a good cause either way. I suspected the panels were solid but, as is usual with this type of door, the rails and styles would be laminate over pine (or similar). I had not initially considered a professionally made door but the final selling point was the nice arch-shape to the top of the upper panel. It was an arc that I could match when came to finishing the door.
Some stressful cutting; 20 inches removed.
The circular saw seemed the obvious choice for a long, straight cut like this so I set up a board as a guide and went at it, taking a full 20 inches out of the middle.
Matching the glue surface.
The top was then folded down for planing to get a precise fit for gluing surface. This part took a lot of fidgeting and tweaking to get it correct over the entire run, but I achieved it in the end with only a little frustration and some muttering.
Clamping it back together.
To hold it all together, I decided to use polyurethane Gorilla Glue. I don’t use this for much but it can make an extremely strong and waterproof bond. A couple very long screw completed the hillbilly engineering and I was confident with the result. With the loss of 20 inches from the middle, the grain no longer lined up perfectly, but at a short distance, it isn’t very noticeable. Hey, it’s a $10 solid mahogany door after all. Talk about some good and frugal recycling.
Top arc is cut and the glue line looks pretty clear here. It’s less noticeable in real life and will be less so as the door darkens with age.
I cut the top of the door to match the arc of the inset panel and I think it’s a great match for the curves of the wagon. But now, it came down to making a door frame, after the fact, to match the new door shape, compound arc and all.
Square hole, rounded door. A scrap of wood was secured to hold the door in position while fitting and marking for the frame.
Obviously, the hole for the frame was the next step; requiring another stressful free-hand cutting job.
Matching the arc in the opening. There is hope for the new door.
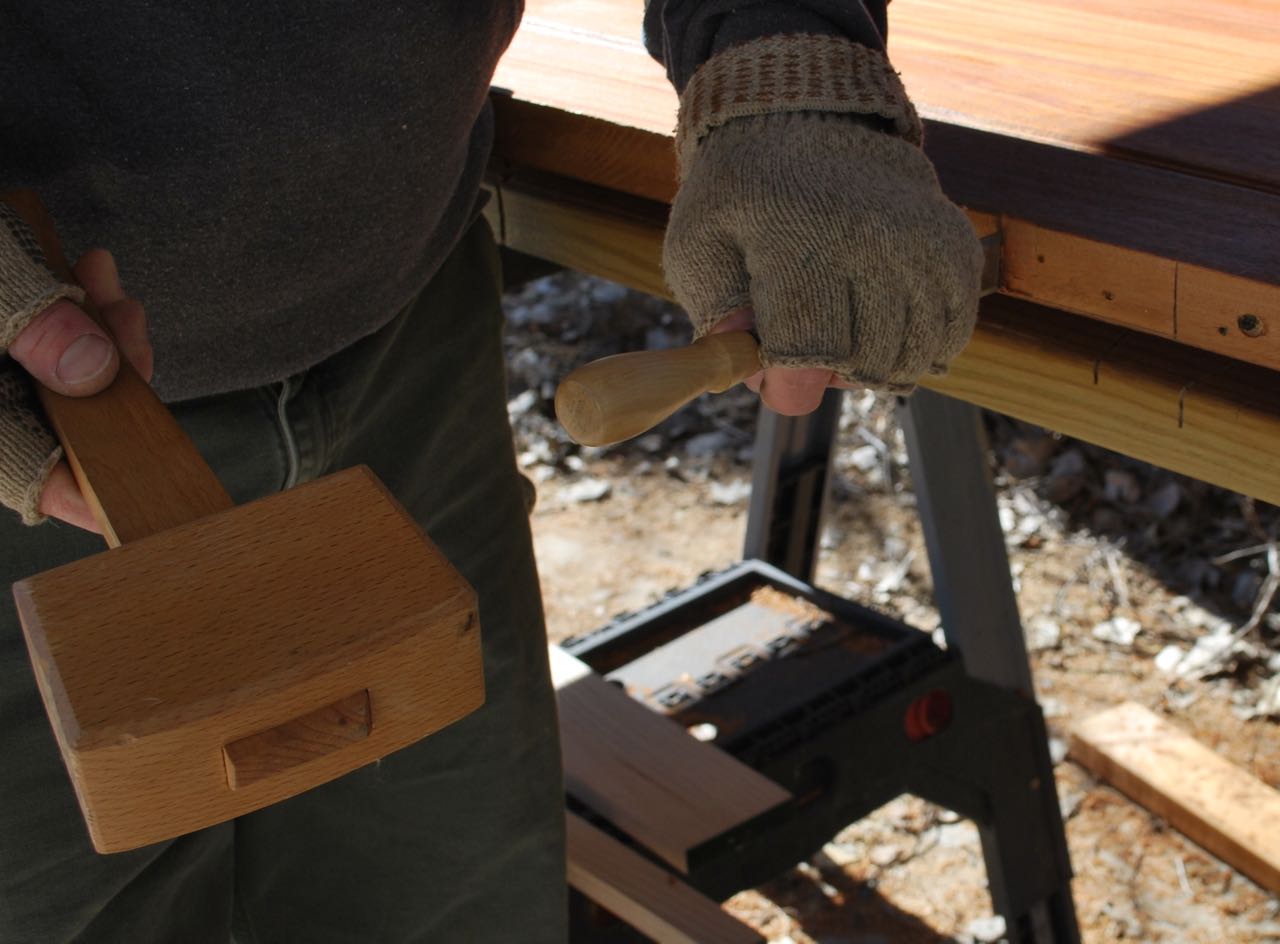
Cutting and sanding complete, it was time to build up the frame from oak to provide stiffness and stops to seal the interior. Fortunately, outside of a couple fierce storms, the weather has been extremely clement this winter, making for good working conditions.
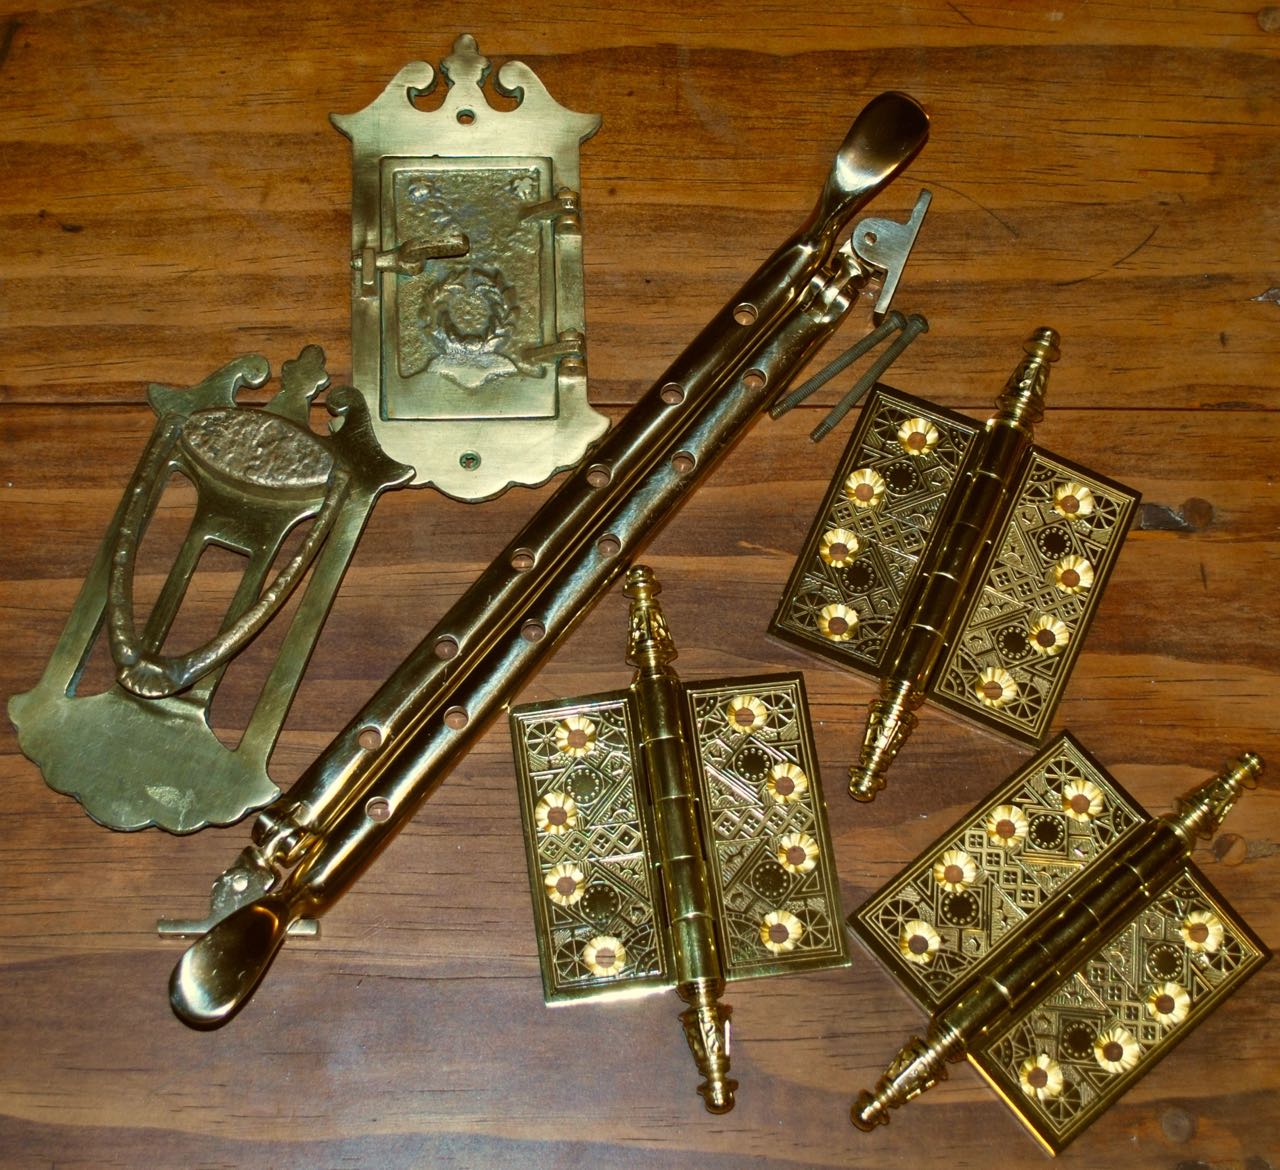
Mortising for the hinge.A smattering of new and old hardware.
I both got lucky and splurged a bit on new hardware. The hinges are real beauties and very sturdily built. There is no perceptible play in them whatsoever and they operate very smoothly. I went with a 19th century Eastlake pattern from House of Antique Hardware in Portland, Oregon. Great stuff, great service, just too much to choose from.
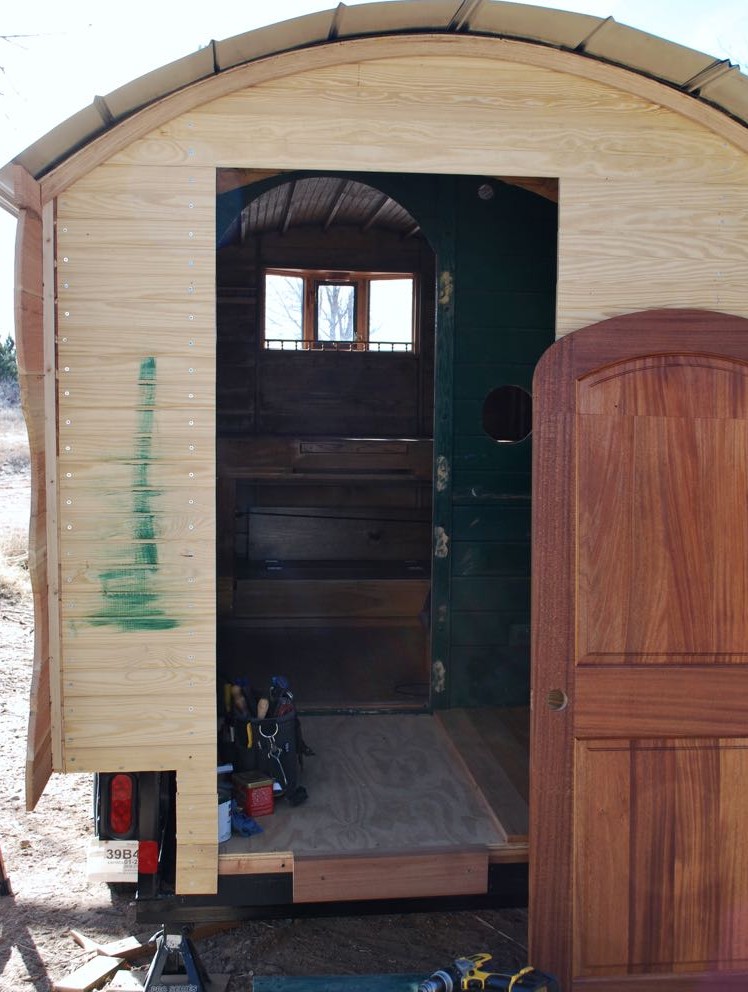
The door is nearly fitted into it’s final position in this photo. High quality hinges not only look nice but function so much better than the cheap, temporary ones they replaced.
I’ll admit that this tricky bit of framing isn’t perfect but is far better than I could have hoped for and suits us fine. A small speakeasy grill will complete the door and even serve as a small vent when necessary.
Eastlake style. Notice the beauty of the natural mahogany next to the oak.Test-fitting the new hinge mortises. I just couldn’t pass these beauties up. Still some finishing work to be done on the door but without an indoor shop, something had to be in place.
There are lots of small steps that still need to happen but at least there a door in the hole.
Piecing together the door jamb and frame.
There is a lot more to report and I’ll get it posted as soon as I can. Great things are afoot and I can even see a distant light at the end of the tunnel.
For Part 1 of the rebuild/addition then CLICK HERE.
Copyright The Munnings Collection at The Sir Alfred Munnings Art Museum.
Here are a couple final Alfred Munnings images of Romani caravans in an English countryside. As a keen observer, he definitely caught the important details of each type of caravan and the essentials of camp life. The watercolor above is somewhat unusual for Munnings as it shows no animals, people, or campfire.
Alfred Munnings.
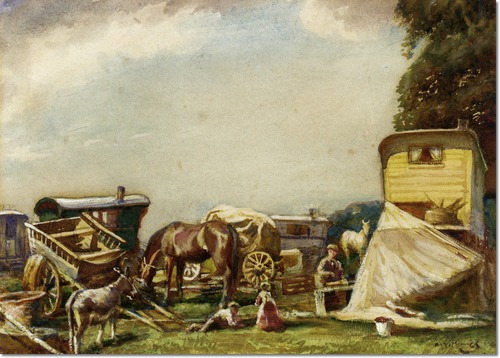
Above is a rarely shown rounded square-top among other carts and caravans with livestock milling about. The variety detailed in these historic images should be helpful for those desiring to design and build a similar living accommodation. The previous post gave a glimpse of Laura Knight’s work on the subject and her subjects are remarkably detailed and informative.
Gypsy Camp, ca 1938, Dame Laura Knight.
This is one of my favorite scenes of a camp in the countryside; two beautiful ledge wagons and a marquis tent in a field. I could picture this in a high parkland of the Rocky Mountains. Many people don’t know that the outlier tent, awnings, and tarps are almost ubiquitous with the old caravans. This allows for a very flexible and expandable living arrangement or a sheltered kitchen area.
Young Gypsies 1937, Dame Laura Knight.
If you look closely at the sketch above, you can see that this is the same encampment from another angle, focusing on the kids at play. It looks like a fine way to grow up.
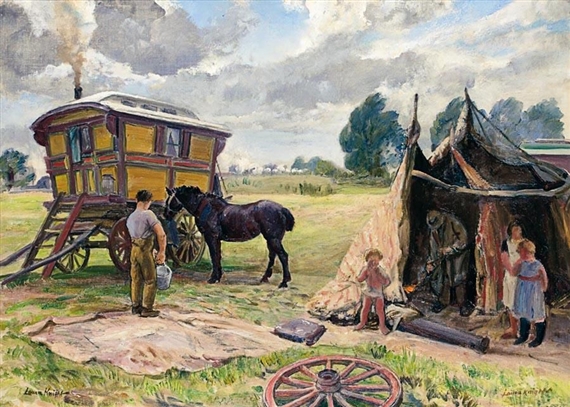
Gypsy Wagon and Tent, Dame Laura Knight, 1962.
And finally, another favorite of mine. I suspect it’s the same little yellow wagon next to the sketchiest bender tent ever. Probably a makeshift shelter for work or cooking. A wagon wheel in the foreground seems to await repair while the kids look on. Note the size of these caravans relative to today’s “needs” and remember that whole families lived and were raised this way.
If you missed the previous post about historic caravans in art go HERE or check out a whole page of images I have curated HERE.
These images might whet the appetite for summer days, picnics, an caravanning off into the great unknown; or it might just be a bunch of pretty pictures if the former isn’t your cup of tea. Anyway, these are generally labelled and classed as Gypsy images although we know that this is often seen as an offensive word to many Romani (Roma, Romany, etc.), I don’t think it was intended this way in many cases. For that matter, when not applied to an actual people, the word gets thrown around in art, aesthetic style, dance, music, and many other ways. I have only known a few “Gypsies” in my lifetime and that was the term used; maybe out of simplicity, maybe just as resignation to the common language. But enough of this digression, enjoy the paintings. There will be more to come.
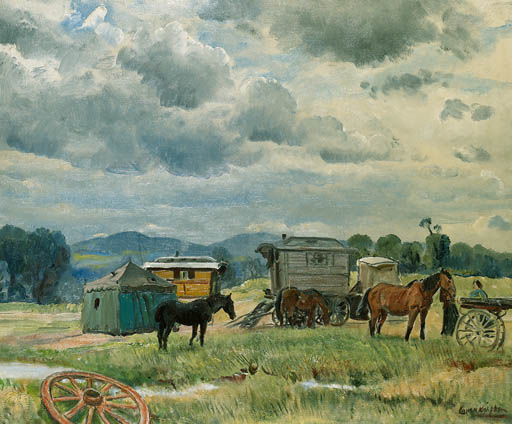
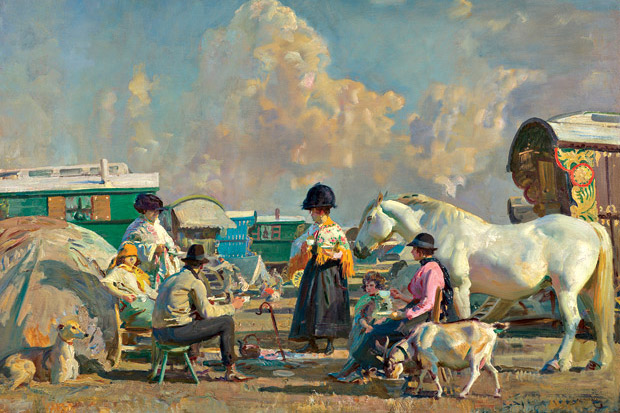
Dame Laura Knight, Gypsy Caravans, 1935. LONDON.- Trinity House.
“Knight … bucked trends through depicting liminal sites, such as circuses and gypsy settlements, from the very beginning of her career. An example of this is her delightful work Gypsy Caravans (1935).”
The caravans depicted above are the Rolls-Royce’s of their day; highly ornamented Reading Wagons with mollycrofts, awnings, windows, and fine paint work. They would catch they eye of any artist. I am particularly fond of the domestic scene around the hearth; laundry being done and hung out to dry in the background.
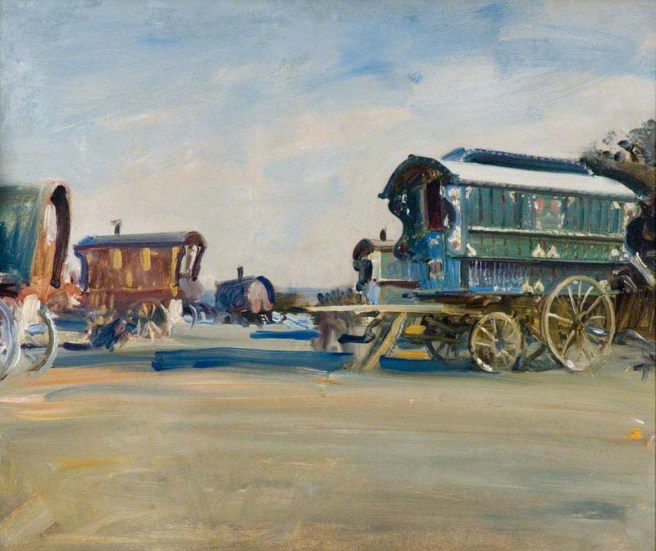
The paintings below are by Sir Alfred Munnings (1878-1959), a British artist who made many beautiful watercolor paintings of horses, encampments, and caravans. What better, more colorful, and dynamic subject matter? “Alfred Munnings’s biography states that he clearly considered himself accepted among the gypsies when he was able to persuade several of the older women to bring out the brilliant shawls, boldly coloured aprons, and flamboyant ostrich feathered hats that were special occasion wear for the women.”
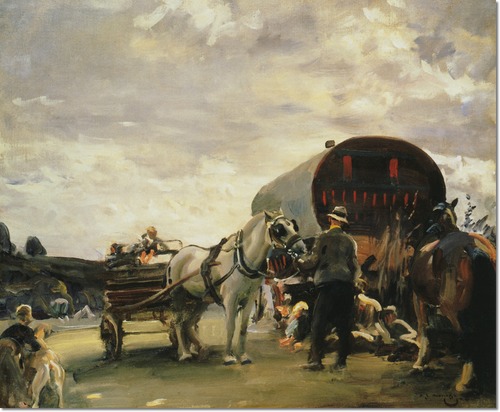
Sir Alfred Munnings.
The ubiquitous fire hook and kettle rest as the true center of this scene. Everyone is done up in the Sunday best at Epsom Downs. We see all kinds of accommodations from a bender tent to various quality of living wagon. And no camp is complete without a lurcher (dog) and the milk goat.
Munnings became president of the Royal Academy and was made a Knight of the Victorian Orderwhile Dame Laura Knight (1877-1970) served on a panel of European judges for an international exhibition at the Carnegie Institute and was appointed as an official artist for the Nuremberg War trials for her technical abilities. In other words, good documentary artists.
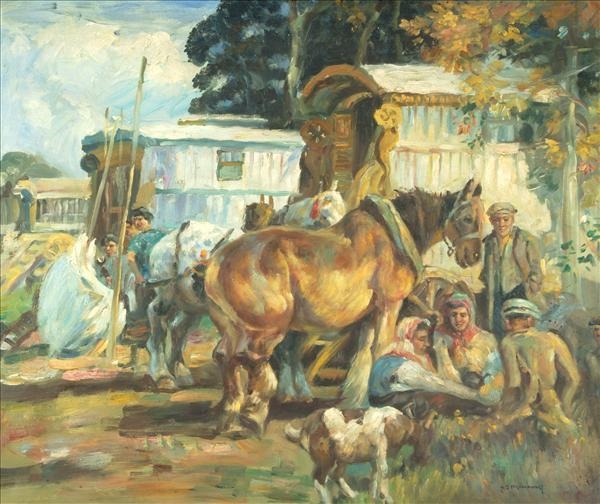
Sir Alfred Munnings.
Travellers and their goat gather ’round the morning tea. I envision Mick’s garden will look like this once Jim and I get our ‘vans parked for the summer.
Gypsy Life, the hops pickers, Sir Alfred Munnings..One of my favorites. So much going on here and a great color scheme.

 I love these things. I saw quite a few parked on ranches from Colorado to Idaho last week. I know they aren’t highway capable but it seems they could provide a real housing alternative for low-income minimalists. Way better than a housing complex or apartment for sure. The photos link to Ken Griswold’s Tiny House Blog. If you haven’t figured it out yet, I’m a fan of his site.
 I took a fair amount of design inspiration from these wagons but added a bit of class along the way. I wouldn’t mind having a cook stove like this one though.
 Off-the-shelf or build it yourself? I love these details in hand-built structures. This looks way better to me than the local hardware store option.