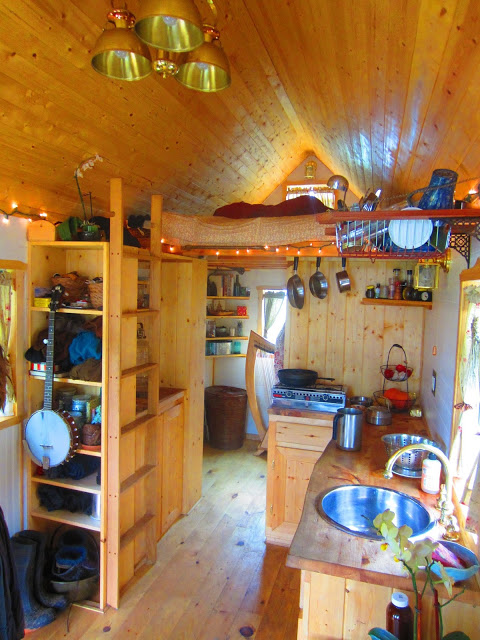
It appears to be made of upcycled parts and wood and is said to be made on a refurbished trailer. Found on Tiny House Swoon. It’s a kindred spirit for sure.


Click on over to see more at the Tiny House Swoon blog.
Adventures of an Imperfect Man In Search of a Handmade Life

It appears to be made of upcycled parts and wood and is said to be made on a refurbished trailer. Found on Tiny House Swoon. It’s a kindred spirit for sure.
Click on over to see more at the Tiny House Swoon blog.
Like all other hand tools, the drawknife is a simple machine designed to provide the user with an advantage that will; give him (or her) more control, increase his (or her) productivity or shorten the workday. (Or all three, if you’re lucky.) Of course, there is the added benefit of being every bit as therapeutic to use as a spokeshave.
Most folks new to working with hand tools may have developed some faulty notions about the drawknife and its use. Let’s explore this simple, but extraordinarily useful tool and how to get the most out of it. First, let me throw out a caveat here. As always, let me state, that is no absolutely right way to use any particular tool. The way that works best for you, is the “right way”. That said, there are a few things that you should understand about the drawknife that are, pretty much…
View original post 852 more words
Deek has featured another fine home with some great photos. I particularly like this set as the house doesn’t appear to be “staged” but is actually lived in.

I can’t wait to see more as promised.
 See the rest of the photos HERE or just cruise the rest of the Relaxshacks site if you have some serious time on your hands.
For this project I moved my little operation into the living room of the house. Creating sawdust and wood chips for the dogs to track around in their boredom is a real bonus. But, on to the show…
Making a Bucksaw for carpentry, bushcraft, or just because they’re cool.
 The little bucksaw I built last winter had never been “finished” even though I’ve been using it for a while now. Having a few hours to spare I pulled out the knives, rasps, and scraper and decided to finish this once and for all before getting down to the next project.

I hope to put this together soon as a sort of “Instructable” for making frame saws, buck saws, and turning saws but for now, this will have to do. Although common enough for the last couple millennia, frame saws have lost their place in the tool kits of carpenters and craftsmen, having been replaced by sabre saws, band saws, and the like. There is a lot of beauty in the old design and a serviceable saw can be built in a short time with very few tools. In fact, the one pictured here cost about $4 for the partial band saw blade, maybe a dollar for the screws and a few bucks for the long-toothed firewood blade. The lumber was created from a less-than-perfect bow stave; a well-seasoned shagbark hickory bodged down to about 7/8″ thick. The genius of this design is that it allows for an extremely thin blade to be stretched very tight for ease of work and a very clean cut.

A new, high quality band saw blade can be purchased for under $14 from a decent hardware store. The above is a Delta brand 1/2″ blade with 6 teeth-per-inch (TPI) and is only 2/100ths of an inch thick. That makes for very little waste which can be especially valuable when working harder to acquire materials like antler or bone.
 Band saw blades are made in a continuous loop and are great for what they do but the first thing we need is to break the loop. The metal is extremely hard, and fairly brittle which works to our advantage. The edge of a sharp bastard file, like that pictured above can be used to score cross the blade. You don’t need to cut all the way through, but just make a solid scratch across the surface. Then the blade can be snapped by hand, making sure to not put any unnecessary bends in the blade. Drilling the holes in the ends is the tough part. As I said, the metal is very hard so, either you can use a punch to make a starter spot and drill through as is (but this will severely dull most drill bits), or the ends can be gently annealed in a forge or with a torch and drilled soft.
 Here are all the components of the new buck saw with the new linseed oiled surface glaring in the sun. The tensioner can be made from any strong cord (in this case 550 paracord), but any strong line can be built up or bailing wire will work (but is a little low-class and ugly and difficult to remove quickly). The spreader bar (the horizontal piece) is morticed into the legs but is not fastened by anything other than the tension on the whole system. Thus, the whole saw can be taken down in a few seconds and stuck into a toolbox or backpack for easy travel.
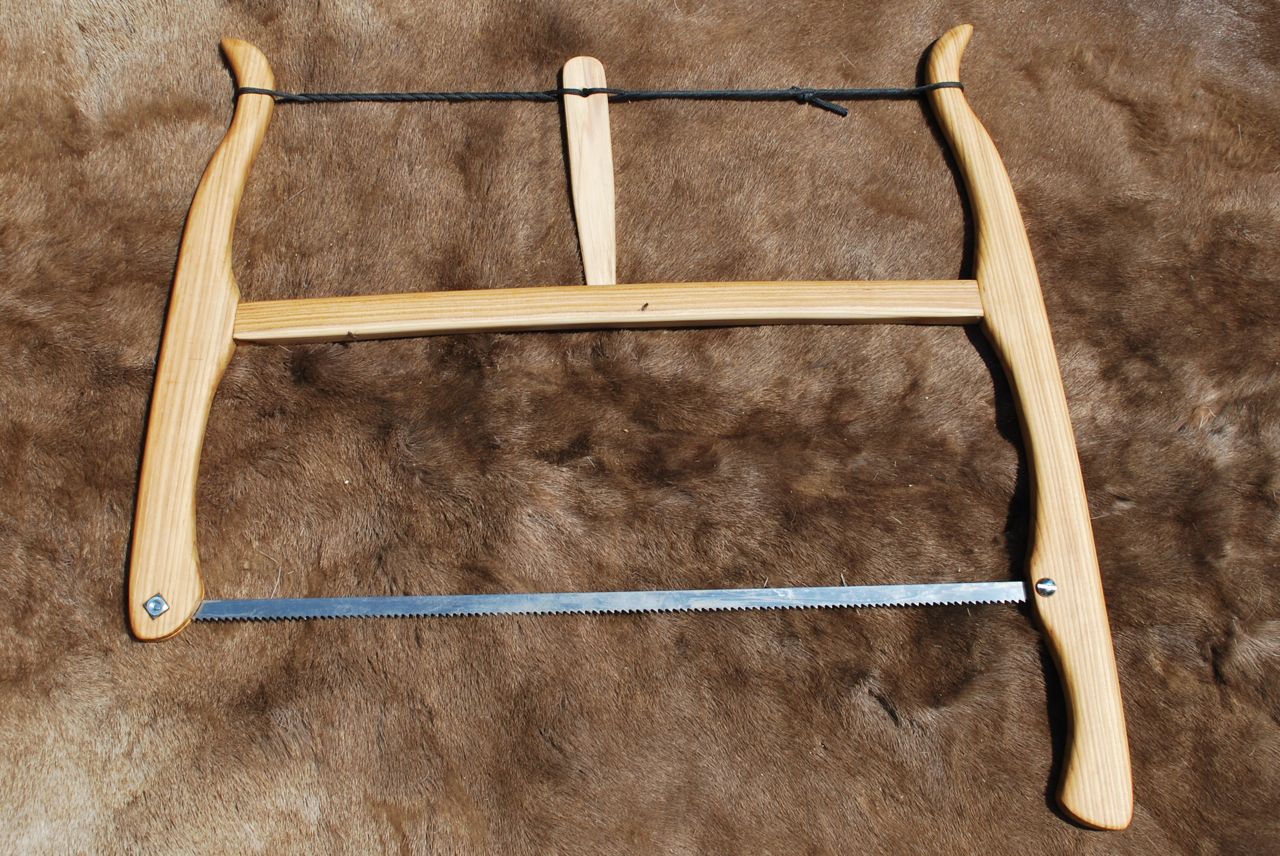 Above is the assembled saw under tension and ready to cut. A good question was already asked as to “why the spreader is curved in this case?” Because this was made from real wood, split with and axe, following the grain. I could have worked to straighten it for looks but I like the fair curve it created and, as it has no bearing on the function, left it as is.
Hope this helps anyone wanting to make a saw like this. Maybe I can offer this as a short, one day class at Rabbitstick or Winter Count soon.
Up soon: a turning saw.
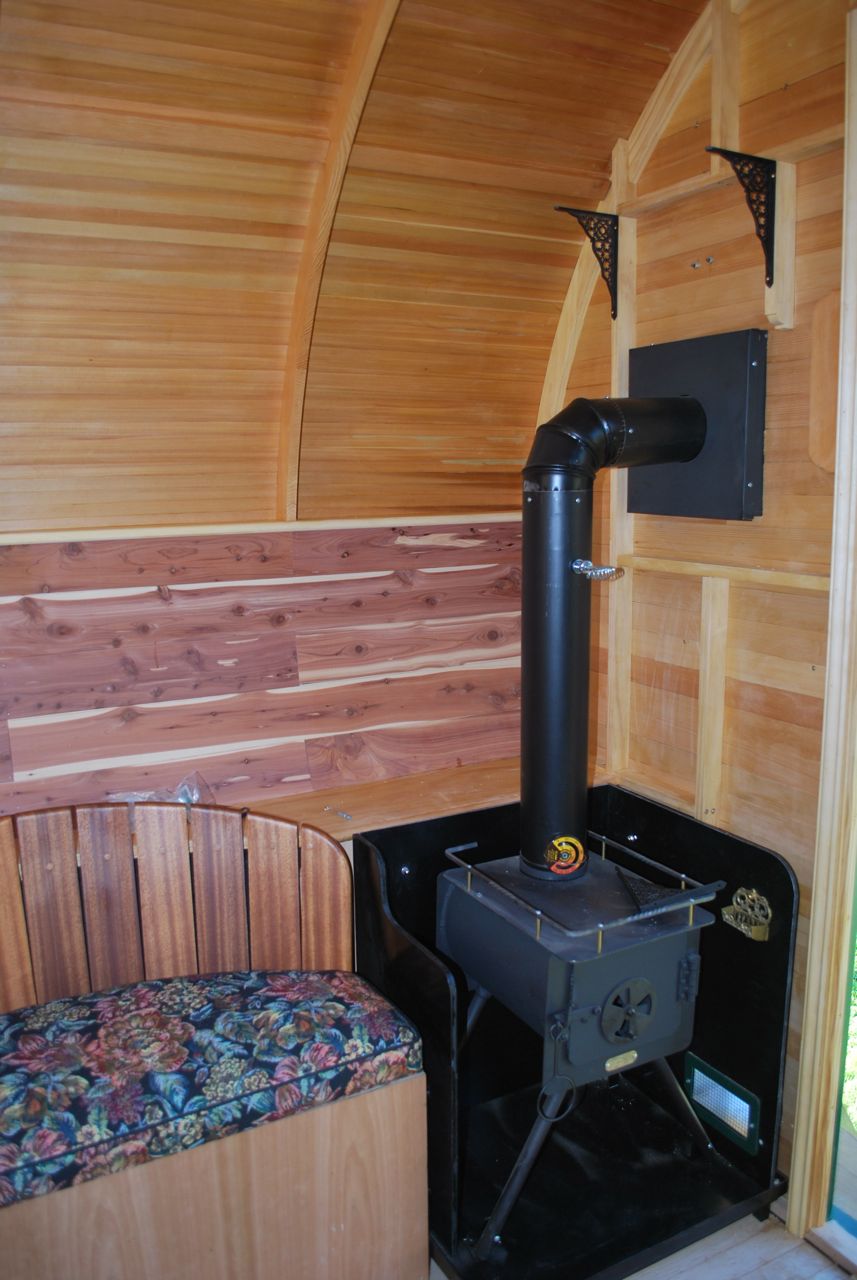
Mick’s bowtop is coming along nicely, and has even hit the road for an extended camping trip. The canvas cover is attached but, unlike it’s historical cousins, there is wood all the way around the roof for strength and security.
 Mick’s cabinet-making skills are paying off in the details including the hand-built bay window, dutch door, and drawers.
 The photos hardly do it justice as there is great detail in every part of the construction.
 From the arched moulding to the compound angles in the stairs, great thought has gone into each step of the construction.
 A combination of woods gives a great look and feel to the interior.

 Curved seat backs counter the arch of the roof for a unique look and feel in the interior.
 The home stretch is in the details of shelving and other storage; a problem not made easier by the curved walls but will create a wagon that is a work of art as much as a home on the road.

Visit the build here to see more: http://vrdomayneac-trailerbuild.blogspot.com/
 What a great wagon. I wish my creativity could approach this level of beauty.
 If you are looking for a topper or small camper with some class, check out Casual Turtle Campers.
 From the website:
The idea for Casual Turtle Campers was conceived by Peter Pavlowich in the summer of 2010. On a road trip to Colorado, he noticed an abundance of truck campers but a profound lack of variety or style. As a Wood Construction and Design graduate from the University of Idaho, he believed he could design and build a simple and attractive alternative to the big, heavy, white boxes that he seemed to see everywhere. Over the next few years, Peter slowly and methodically brought together ideas and drew up plans for what would eventually become the design for Casual Turtle Campers.
He very happily lives in Fort Collins, Colorado with his wife, Lindsey, and their dog/shop foreman, Moxie. We love when people stop by – just get in touch!
A great short film about a bowl being turned on a treadle lathe.
Info from the Vimeo Page:
Shot in a couple of hours on 2 separate afternoons, this is Leo who lives in a yurt with his partner and a variety of animals on the edge of Exmoor in the UK.
He is a craftsman of many talents, and this film shows him turning a piece of wood into a beautiful bowl using a traditional foot powered lathe (which he also built himself).
We started shooting on the first afternoon, but one of his sheep escaped, so we had to shoot the rest the following afternoon. Unfortunately, the weather was far from perfect and was actually raining lightly.
It doesn’t take him long to turn one of these bowls, and watching him work was a real pleasure.
Music –
Conversations with Angels – Luke Richards
Inner Dream – Barrie Gledden.
All shot using Canon 7D with EF 24 -105, f4 lens.
In searching for home-built campers, there were very few images on the web just a few years ago. Jay Nelson came up a few times over the years due to his ingenious building of structures onto existing vehicles, compact car, scooter, boat, and now a truck.


It’s my kind of work. Low budget, simple, and highly functional alternatives to the mainstream consumption.

But would I do this the the Vespa? Maybe.

Of course, my new truck is in sore need of a cool topper…
See more of Jay’s work on his site http://jaynelsonart.com/ or follow his blog on Tumblr.

