From Cassell’s Carpentry and Joinery by Paul N. Hasluck, ed., 1907 edition, an excellent resource.
A selection of simple construction framing joints for building construction.
These are all really just mortises or forms of notching. These simple techniques can add a lot of value to your repertoire. The internet shows so much excitement when these things are seen in Japanese joinery but let’s not forget that this technology was world-wide common knowledge just a century ago.
I have been re-studying joinery, amongst other things, recently and am currently deep in Moxon’sThe Art of Joinery. I have built many structures in my life and documented quite a few for historic preservation. Last night, I made it through another oldie from the 1920s Woodwork Joints by William Fairham which really set my stagnant mind in motion.
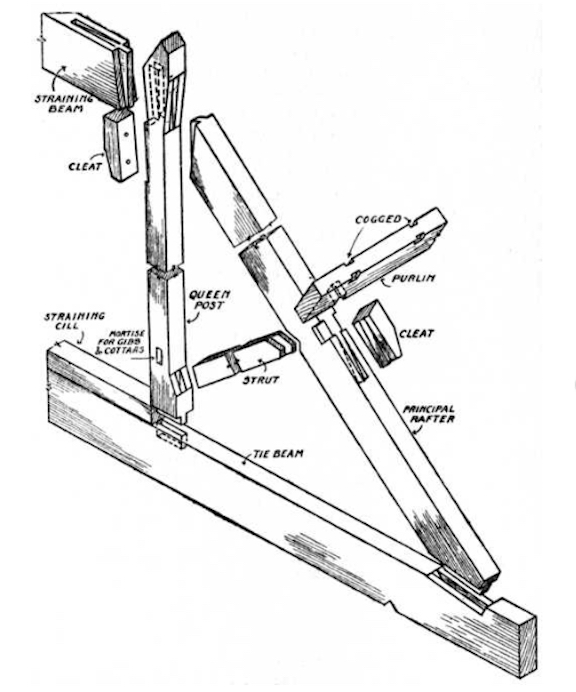
Queen Post Roof Truss schematic from William Fairham’s Woodwork Joints (1921, revised n.d.).
I know the image isn’t the sharpest but this, to me, shows the level of quality and craftsmanship we have lost in our pursuit of speed, simplicity, and the dumbing down of our trades. Nothing in this truss is complex in-and-of-itself but requires some layout skills with straight-edge and dividers, not to mention hand skills with saw and chisel. Few fasteners are required in this type of construction as it depends on the joinery locking the system together.
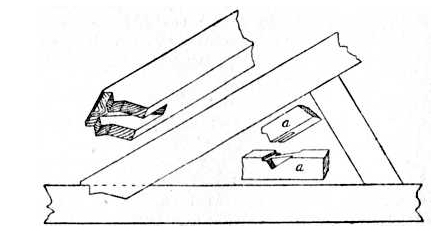
A compound-cut, stopped bridle joint used in roof truss construction. A common alternative to the above mortise joint. Not as complicated as it sounds but very solid indeed.
I have read several misguided web sites on woodworking recently lauding Japanese and other Asian-style building techniques for their use of joinery and lack of metal fasteners. Yes, they are remarkable, just not unique to Asia. This type of construction is the reason many centuries-old buildings still stand today.
“Japanese” tenon joint.
Very little under the sun is new technology. The above joint is a locking corner known as a Japanese corner tenon. I have no idea if this really filtered into western construction from Japan but it is a pretty neat looking joint.
Struts mortised to king post.
Rafters mortised to king post.
All the complicated joints are a lot of fun and interest, but in reality, learning the basic mortise and tenon (with the myriad variations) will allow for the creation of most building structures.
Half lapped top rails “through-pinned”.
Even simple half-lap joints are structurally sound with some thought towards design. The above pinned and half-lapped joint can be found in historic structures tying the top rails of simple buildings together and is also seen in a straight wall run, not just on corners. This simple timber joint is perfect for small outbuildings, sheds, and chicken coups.
Notching, used to tie purlins tight to rafters.
Cogging, an old-fashioned way of setting joists.
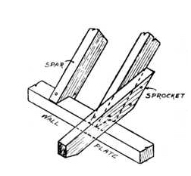
Finally, a few simple joints you may still see used are simple notching, cogging, and bird-mouth joints.
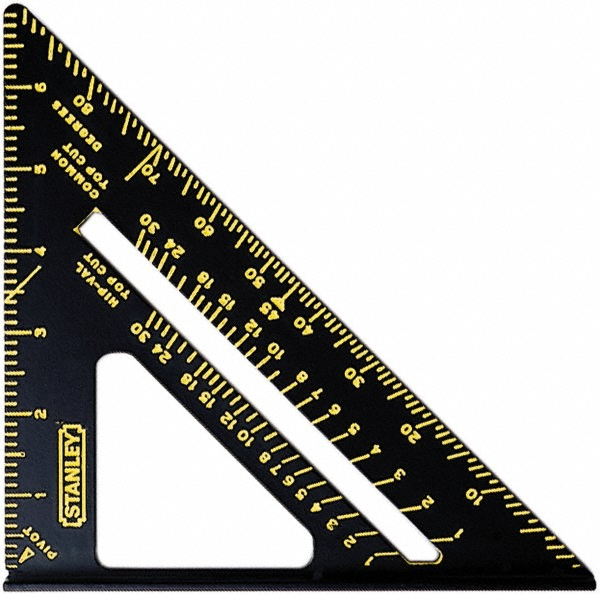
When I was a young laborer in high school and beyond, laying out and cutting accurate bird-mouths and rafter angles were the tests that separated “the men from the boys” as it were. Some people could never really get their heads around the angles, even with the ingenious, and simple layout square; many a builder’s best friend.
This post took a bit of a rambling turn but more on this subject will certainly follow for good or bad. I’m always learning, so bear with me as I work through the process on my keyboard and in my head.
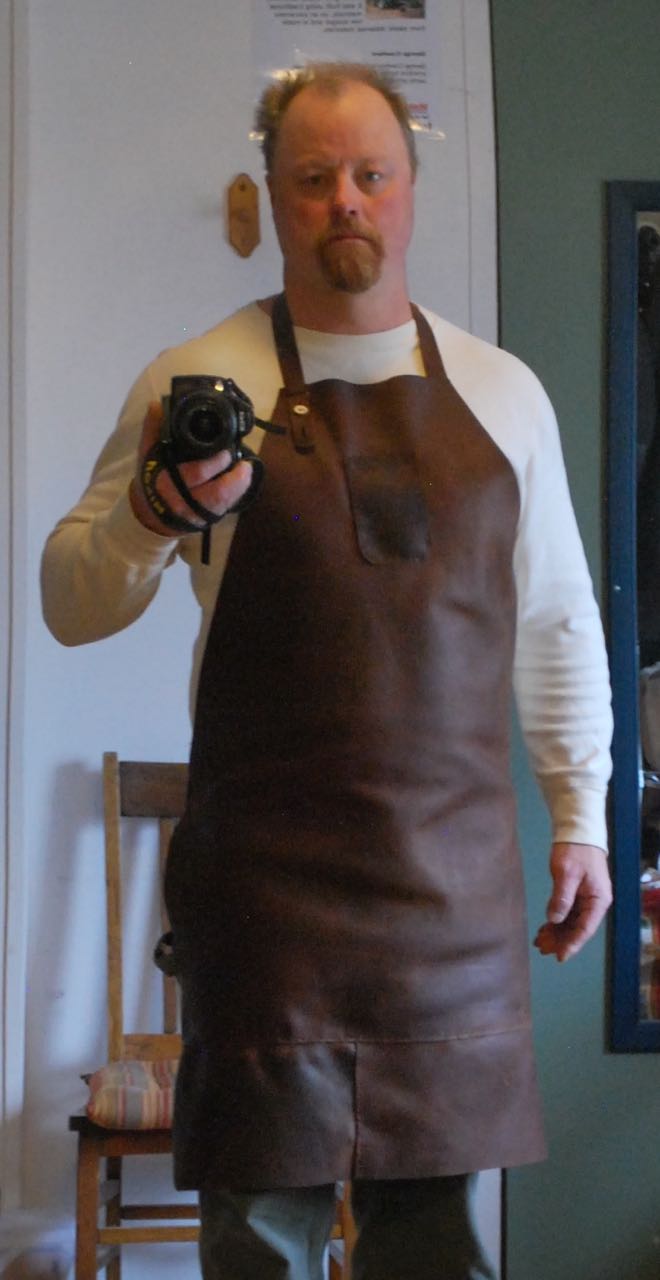
I finally got around to replacing my very old shop apron. It was the standard issue split-leather welder style and over many hard years had amassed large quantities of wood glue, grease, metal grime, blood and membrane (from brain tanning), and other unidentifiable smudges over most of it’s surface. It went into the trash a while back when an unexpected leak in my barn allowed it to saturate and subsequently get some very ugly mold patches in a funky tie-dye pattern. I expect it was fairly nutrient-rich and I wasn’t interested in trying to salvage it after all these years.
I had some fine oiled leather from a recent project (aprons take a lot of footage) so was able to cobble together a decent shop apron without too much difficulty. I expect this to last another 20 years or more; maybe the rest of my life.
The image is not great. Just a poorly lighted mirror shot “selfie.” Par for the internet I guess. And no, I’m not glaring. That’s just how I look. I guess I didn’t learn to smile well as a kid or it’s just not in the genes.
One of my favorite tools and one I have seen misused by too may people over the years. Often these are snatched up at auctions by antiquey people who want a wall hanging but quality ones can be found on places like Ebay. I have several styles and they each have their virtues.
My carriage maker model gets all the heavy work where the carpenter’s razor gets the other 80%. And let’s not forget the humble but beautiful cabinet scraper.
The common spokeshave has not changed much in over a century. The main types can be subdivided several ways but they are essentially, high or low angle with various shapes to the foot plate. I find this tool a great help when making bows, handles, or other spindle-shaped things. A flat shave will take you a long way but I get great use out of a rockered-style (convex front-to-back) for creating the complex shape of a bow handle.
These examples are from the very early 20th century and are all probably still in use from that era. I still have a boxwood low angle shave from my great-grandfather. The steel is remarkable.
The frame saw. Virtually every house in North America contained one of these prior to oil and gas heat.
Advertisement from 1913.
These saws are an excellent and handy way to cross-cut large logs quickly. the design is over 2,500 years old solving the problem of keeping a stiff blade with a minimum amount of metal. This style come in at about 4 1/2 pounds giving enough heft to aid in cutting. Teeth cut both ways and the blades tend to be made from excellent steel. Perfect for re-use if you can find one mouldering in the corner of a flea market. I picked on up several years ago in “like new” condition and it has given great service ever since. Limbs can be simply replaced if they become rotted or otherwise damaged. These are the chainsaws of our forebears.
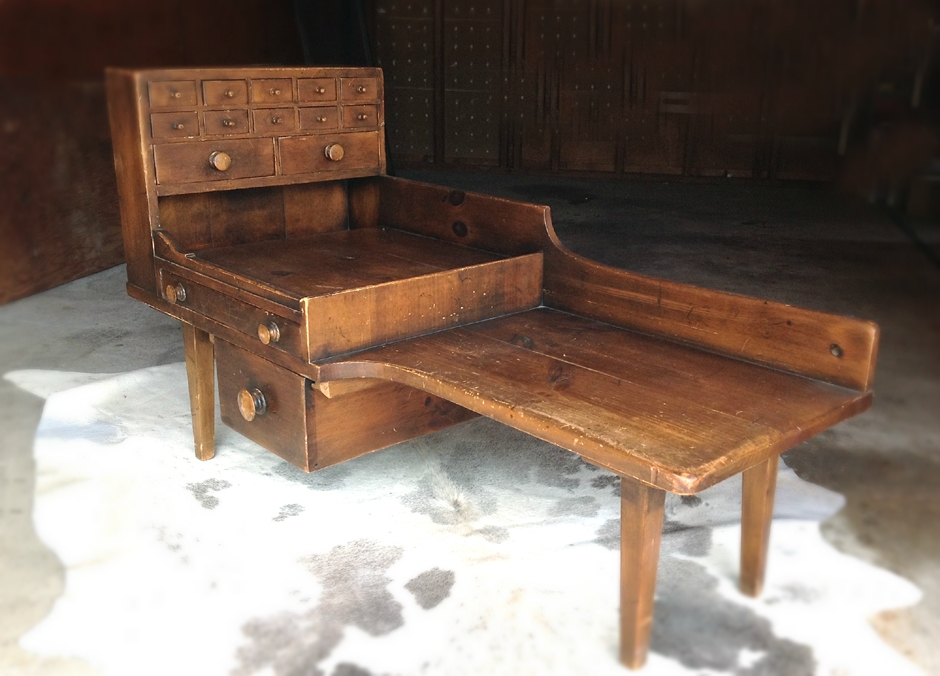
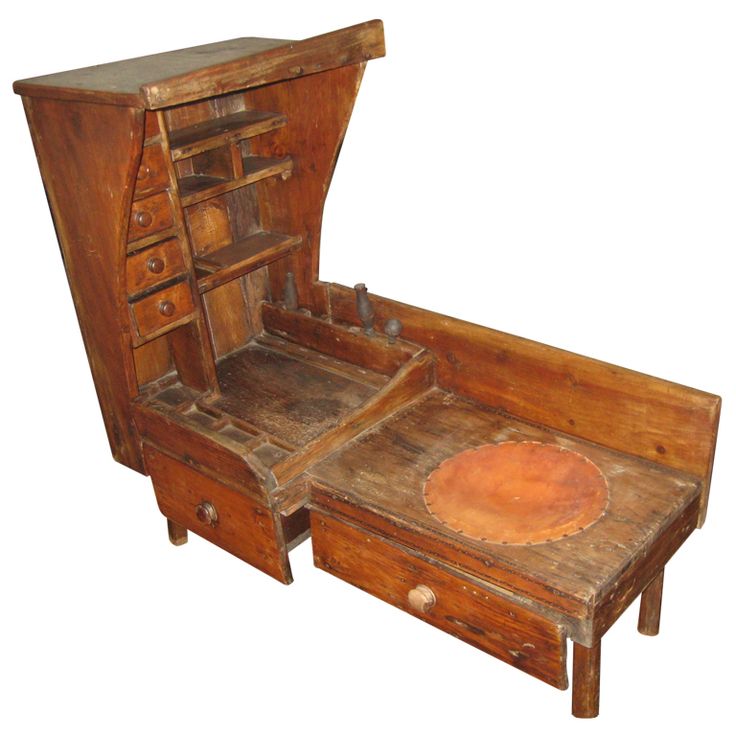
I have come across these little benches for quite some time and I find them fascinating. I even started a folder in my image library for them. A quick search around the web finds many of these in auction houses, on Ebay, Craigslist, and elsewhere, generally at exorbitant prices. It appears they generally end their long lives as side-tables in a middle class home, assisting in the creation of nothing; just a curiosity to a collector. They really are remarkable and interesting professional tools; clearly bespoke to the needs and means of the craftsman who used them. You can almost see their ancestry written upon them; a Roman or Medieval bench with simple splayed legs, a cutaway for seat, a little rail to keep tools from rolling away. Later some small tills might be created to segregate nails and needles, and knife slots added so that they might be handy but safe.Really, a simple slab of wood, but as “needs must” it becomes a little workshop, self-contained.
Drawers or cubbyholes became a natural addition to the workspace as the bench replaces tool caddies. Some can be locked up for safe-keeping and fancy builders made more comfortable seats.
The essential layout seems to always be the same. We are, after all, given the same basic human shape and the need is the same. Organization, convenience, and a solid place to work.I can see this type bench being useful for other crafts as well but it would definitely end up modified over time to suit the specifics.Even the above humble specimen has found a home, holding more collected crafts. Slowly dying as a curio for some of us to ponder as a useful holdover from an era when we made for ourselves.The designs seem varied as the places they originate and the ingenuity of the makers. Cordwainers, cobblers, leather bag makers, can all find the beauty in this design.Many a zapatero could still find great assistance with a shop setup like this.I could make great use of this as an itinerant craftsman. And maybe I shall someday. Perhaps, by looking into the past, we are seeing a better, simpler future
Cobbler at work, no citation, no date. Click for “source”.
“Round and ’round the cobbler’s bench, the monkey chased the weasel…”
From the YouTube channel, Chop With Chris where he does “amazing woodworking projects with no power tools.” At last count, he has 19 “how to” videos available and a slew of other good things on his YouTube channel.
From his “About” Page:
“I play in that weird intersection of woodworking and music! A few years ago I randomly picked up this woodworking hobby that started with a few cheap flea market tools and a wooden stump. Driven by inspiration and passion to try bigger and better projects, this “hobby” has turned into an obsession with wood, tools, and video editing. Join me for the excitement, the entertainment, and the eduction on my next woodworking adventure. Come on and Chop With Chris!“
Graham Haydon of the Joiner’s Workbench shows a fun experiment while showing off his new dovetail saw from Skelton Saws. Graham joins a couple 1 x 6’s in three minutes and does a pretty good job of it. This is what I imagine some apprentice doing back in the pre-industrial era when he’s showing off his newly mastered skills to the master or a shop rival. There is no real point for the speed other than to demonstrate how little time and effort is really necessary to form a traditional wood joint. This is definitely upping my interest in perfecting traditional joinery.


 Graham Haydon
