The sporran is complete and ready to go so, of course, I had to model it to show the size and wearability.
Here is the Maker in his workshop sporting the new bag. I didn’t bother to “kilt up” but that is the belt I frequently wear when kilted. Overall, this design is great and I’ll probably start making a few more right away. I like this one better than my own day sporran so I guess I’ll need to make one for myself as well. I should note that a truly traditional sporran would be ornamented with leather or hair tassels. I pondered this addition, but it isn’t really my style. Maybe on the next one.
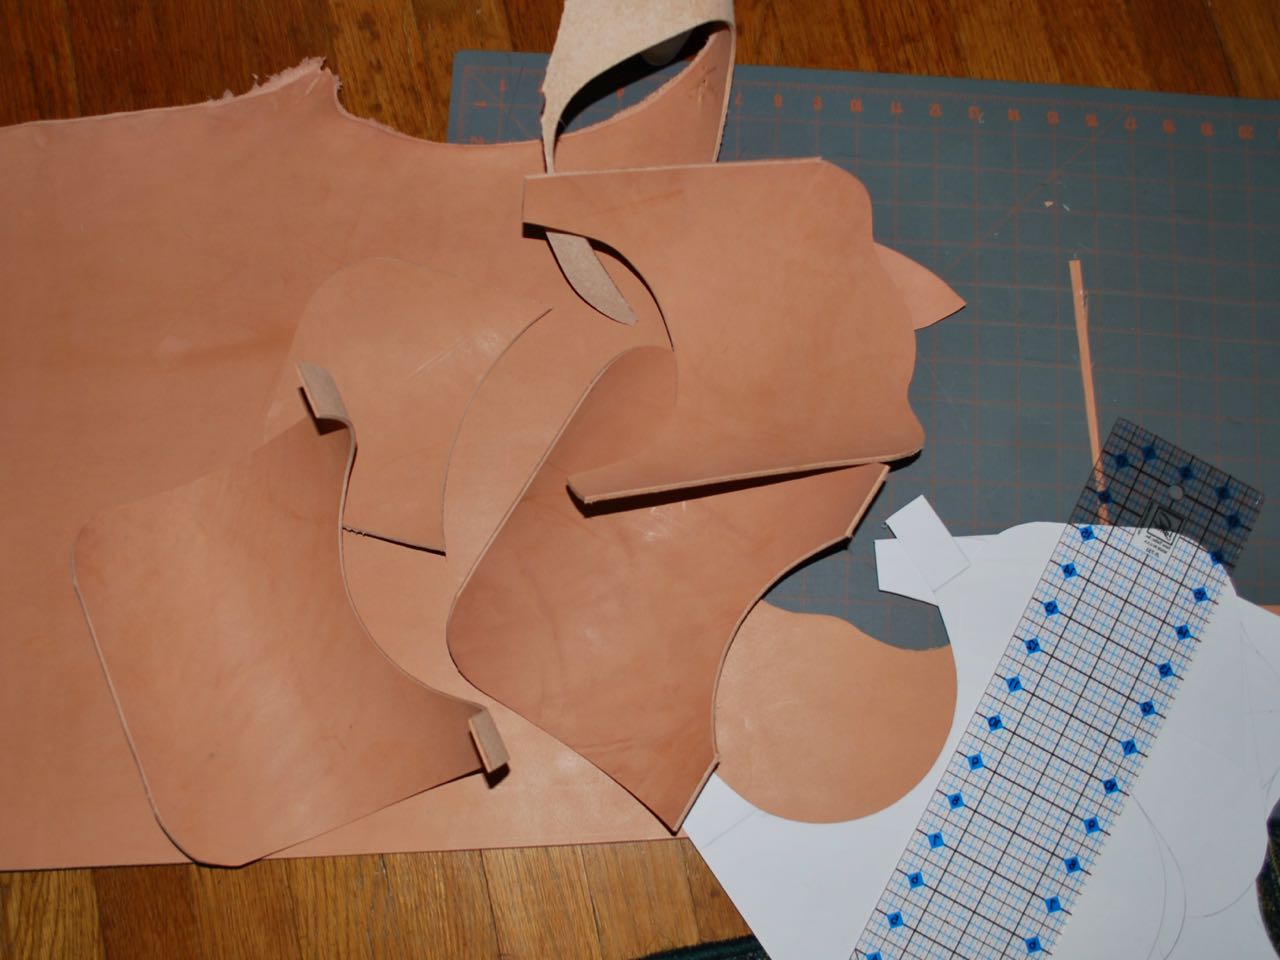
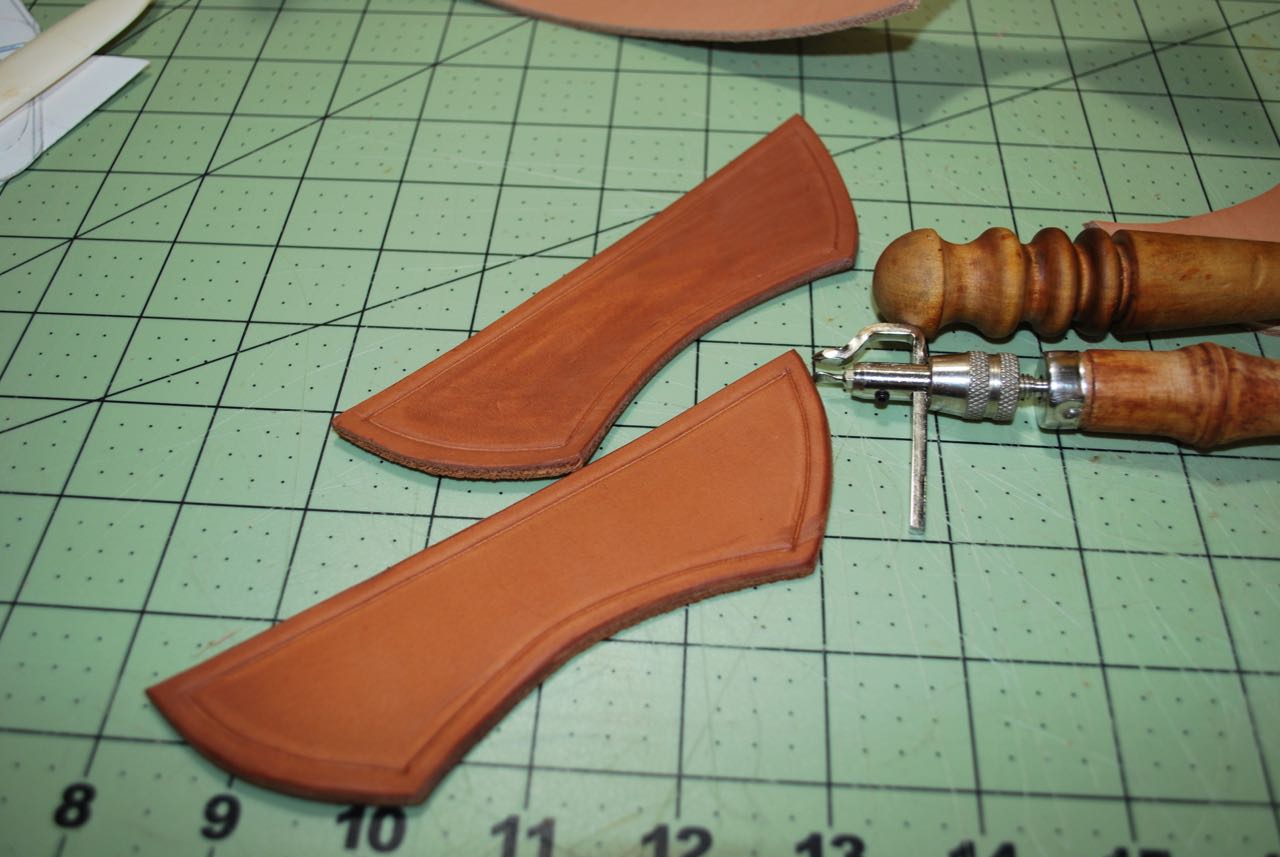
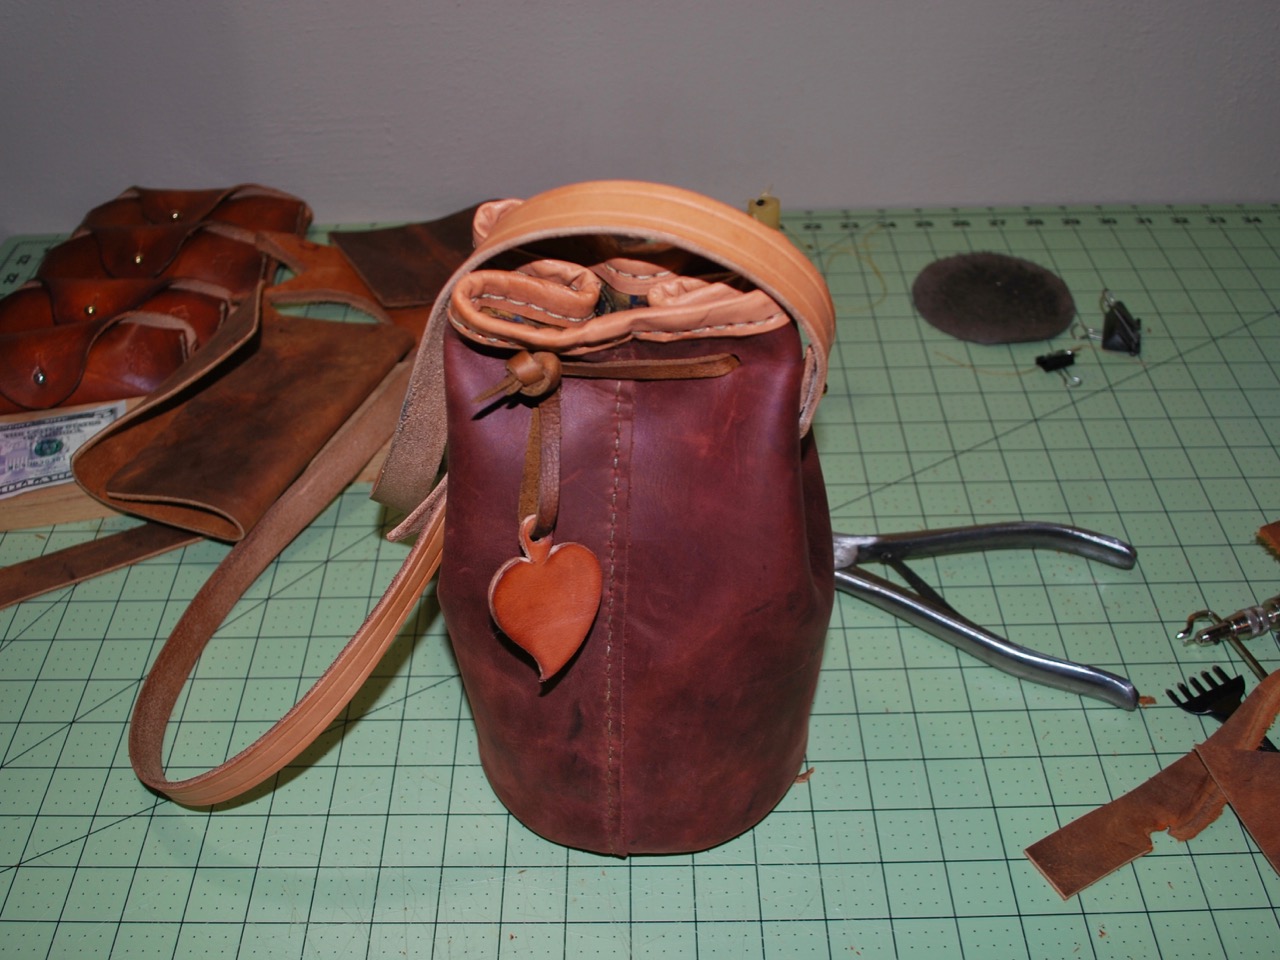
I have been wanting to make a few sporrans based on the classic 18th century style. This type, often referred to as a Rob Roy style, is a fairly simple, single pocket design that can have a number of variations. The one I’m making here is from 6 oz full-grain hide and should outlive it’s owner, even under hard use. A versatile belt pouch like this was originally intended to be worn with kilt or trousers as built-in tailored pockets are a rarity in history.
At 6.5 inches wide by 6 inches tall it can hold a fairly complete fire and survival kit in a handy position on almost any belt.
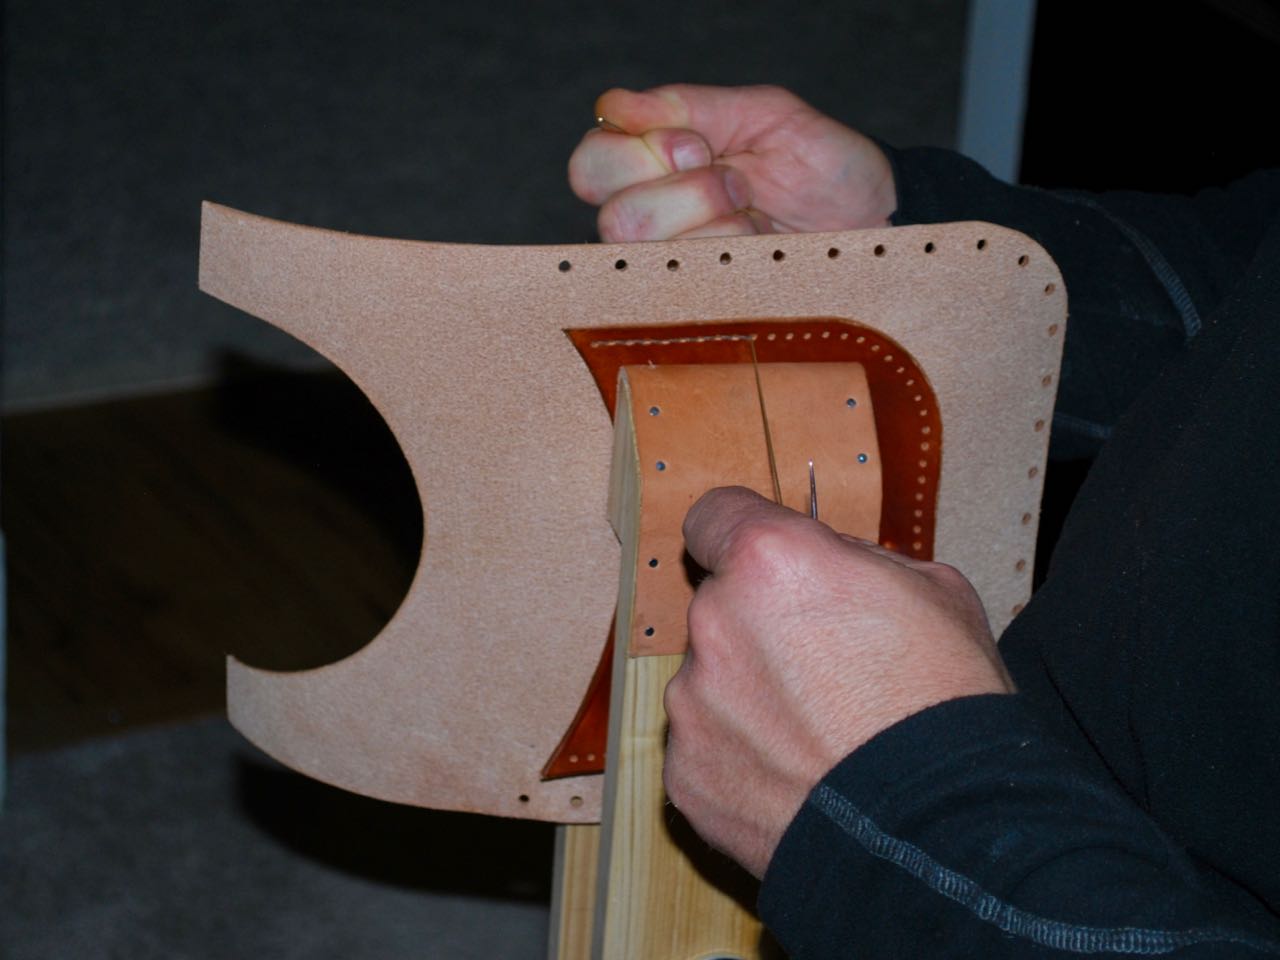
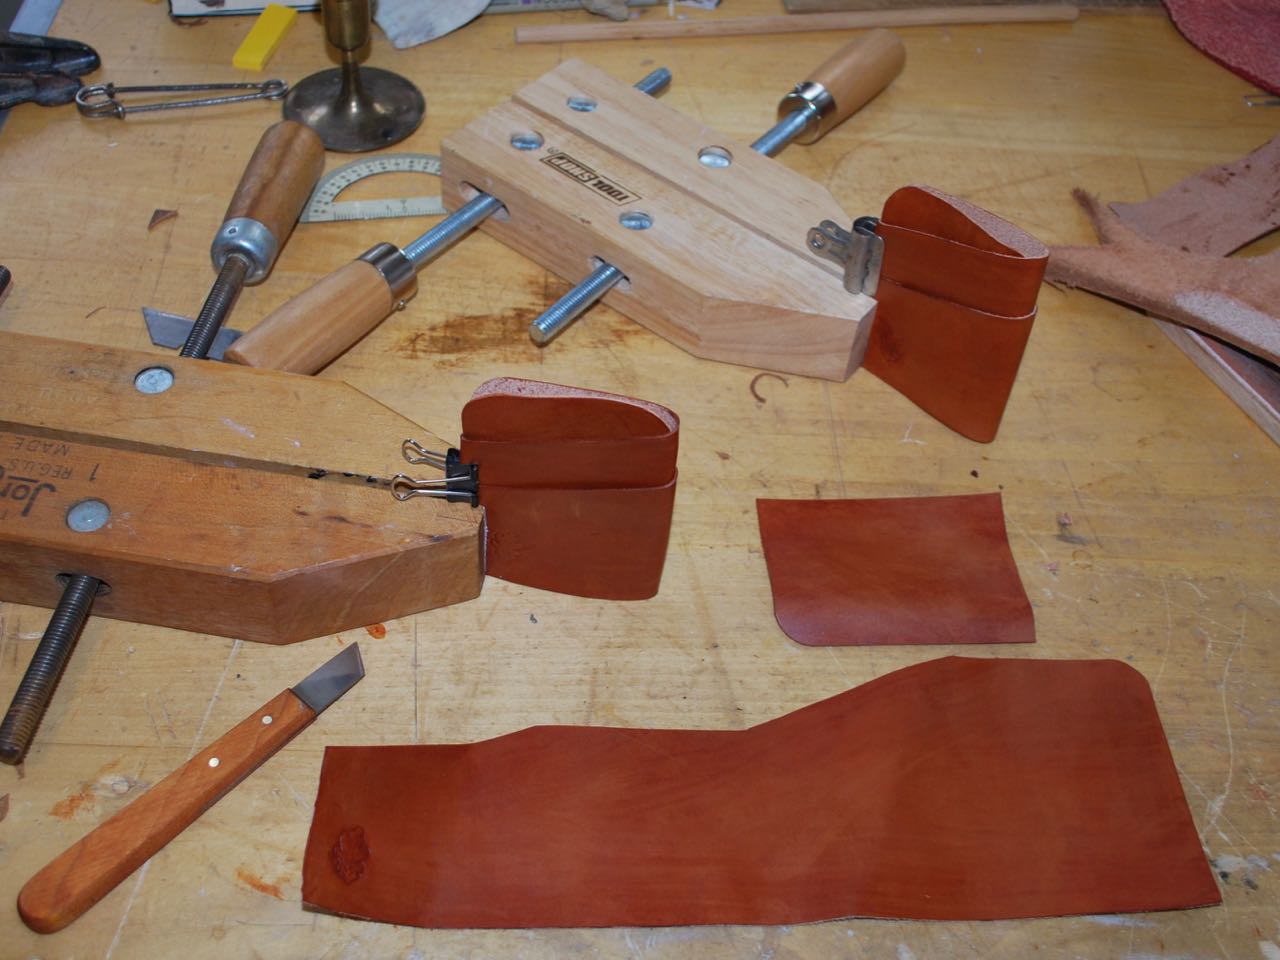
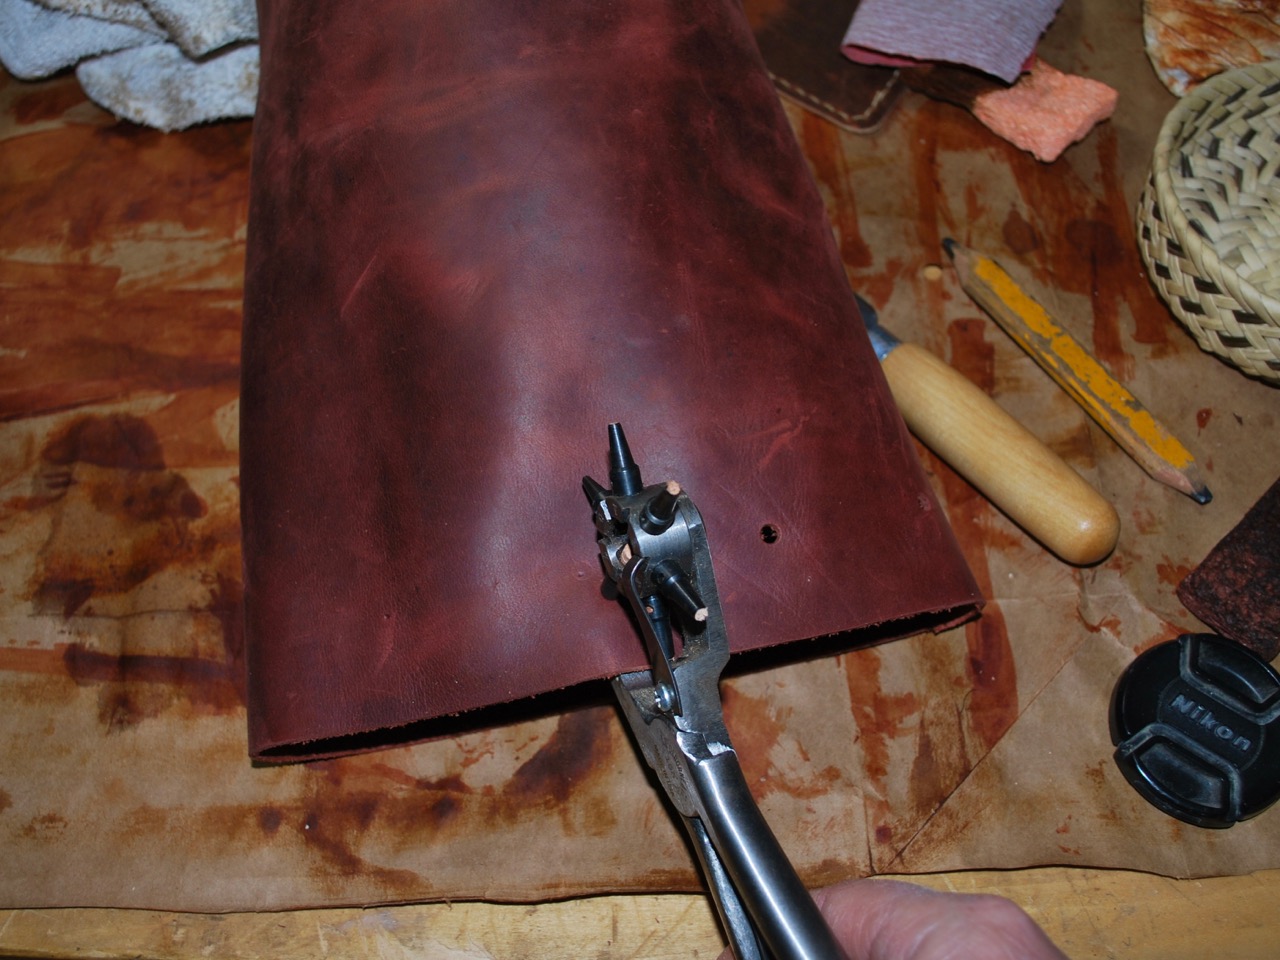
As with most of my leatherwork, this bag is hand sewn using a double-needle saddle stitch for strength and longevity.
The dye is wet in these photos, looking a bit uneven, so I’ll try to shoot a few more in better light when the weather improves.
The bellows design I chose stays flat but will expand to fit more gear as needed. Look for a follow-up soon. It is listed on my Etsy page so it will, hopefully, be finding a new owner in the near future.
In my internet sleuthing I have gathered literally thousands of images, plans, and patterns of things I would like to make or have for reference. Government documents, like the scans below, are invaluable resources for the maker when they are made public. Who would know how to better and more efficiently make a pair of riding gloves than the U.S. Cavalry. This design is the culmination of more than 110 years in the business.
Click the pattern for the full-sized image. Scale to fit the dimensions shown for the standard sizing or scale them to fit your hand, be it a tiny little paw or oversized ham (note the three sizes on the pattern).Part of the fun is learning the names of the parts; I had no idea there was even such a thing as a quirk in a glove.
I hope to get around to making a pair soon myself but please let me know if you have any success when you try these. Thanks for reading and please click “Like” or leave a comment if you have one.
Stitching Pony, Leather Worker’s Clamp, or Saddler’s Clam…
Whatever you call it, it is a handy device to own if you sew any leather. These are simple devices that just about anyone can make with little time or money invested. Although there are many varieties and models, the one shown in this tutorial by Harry Rogers of Bucklehurst Leather is the one I have most commonly seen. Is there no end to this man’s skill and diversity of talents?
The only comments I really have are:
YES, the jaws should be lined with thick, smooth leather and that the gap is necessary to keep the jaws as flat as possible against the work. It is also nice, but not necessary, to have a compression spring over the bolt to push the jaws apart when loosened. And finally (terrible way to open a sentence in writing I know), a recent comment from a friend suggested that the tightening nut could be replaced and a better system be devised from a bicycle quick release axle. Maybe on the next one.
When teaching a leather craft or making an item for someone, I am often asked about the machine used to sew such thick leather or through so many layers in tight areas. People are often astounded when I explain that this is all hand sewn, with an awl and two needles.
Some earlier work. Good, but not great, stitching.
I learned saddle stitching before the internet was a thing and without a book. I was sewing leather bags, moccasins, and clothing in a relatively poor and untutored way. As I became more savvy over the years I was able to analyze older pieces and read an article or two about saddle stitching and cordwaining that began to make my work look more professional.
Saddle stitching is the only way to build a large, complex leather project without some ridiculously expensive machinery.
While I have considered making a video to give an introduction to saddle stitching I know there are many master craftsmen out there far more skilled to do this properly. One of them is Nigel Armitage of Armitage Leather. He is a member of the Guild of Master Craftsmen of Britain which I understand is nothing to sneeze at (I can hardly imagine the level of dedication most of these men and women have for their crafts).
On to the show…
This is probably the best and simplest tutorial I have seen online about learning the basics of saddle stitch. If you are new to this, remember, the pricking iron is not an absolute necessity for starting out but it will make you seams straight and beautiful. If you don’t own one, you can still mark and follow a line or even mark the stitches with a ruler and awl (I did this for a very long time).
I hope this answers some question for those getting interested in leather work and saves you some of the headaches I experienced without proper instruction.
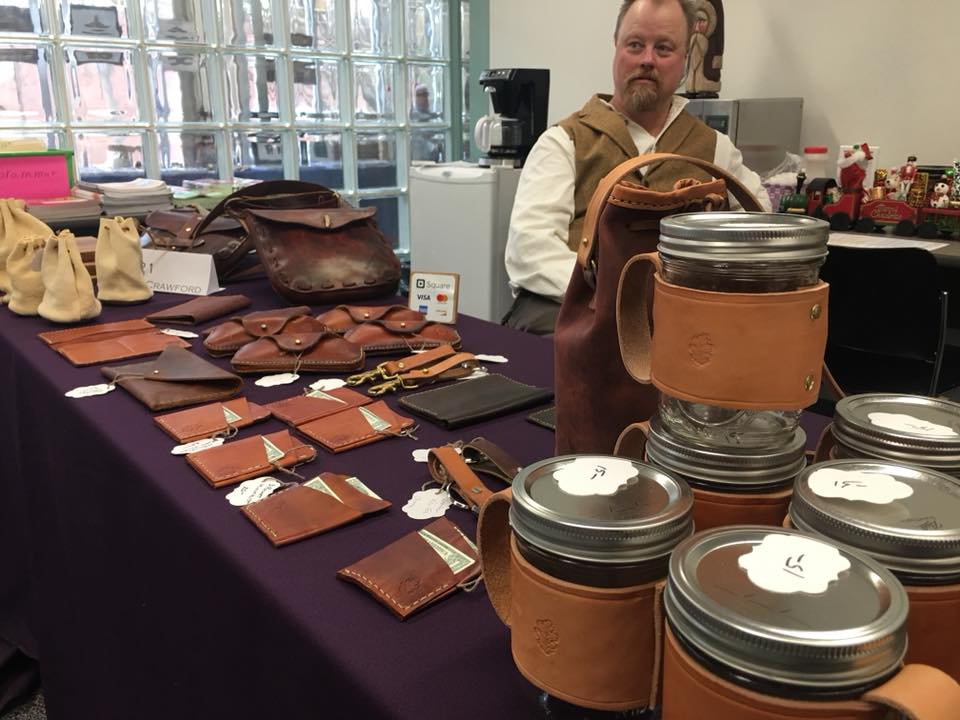
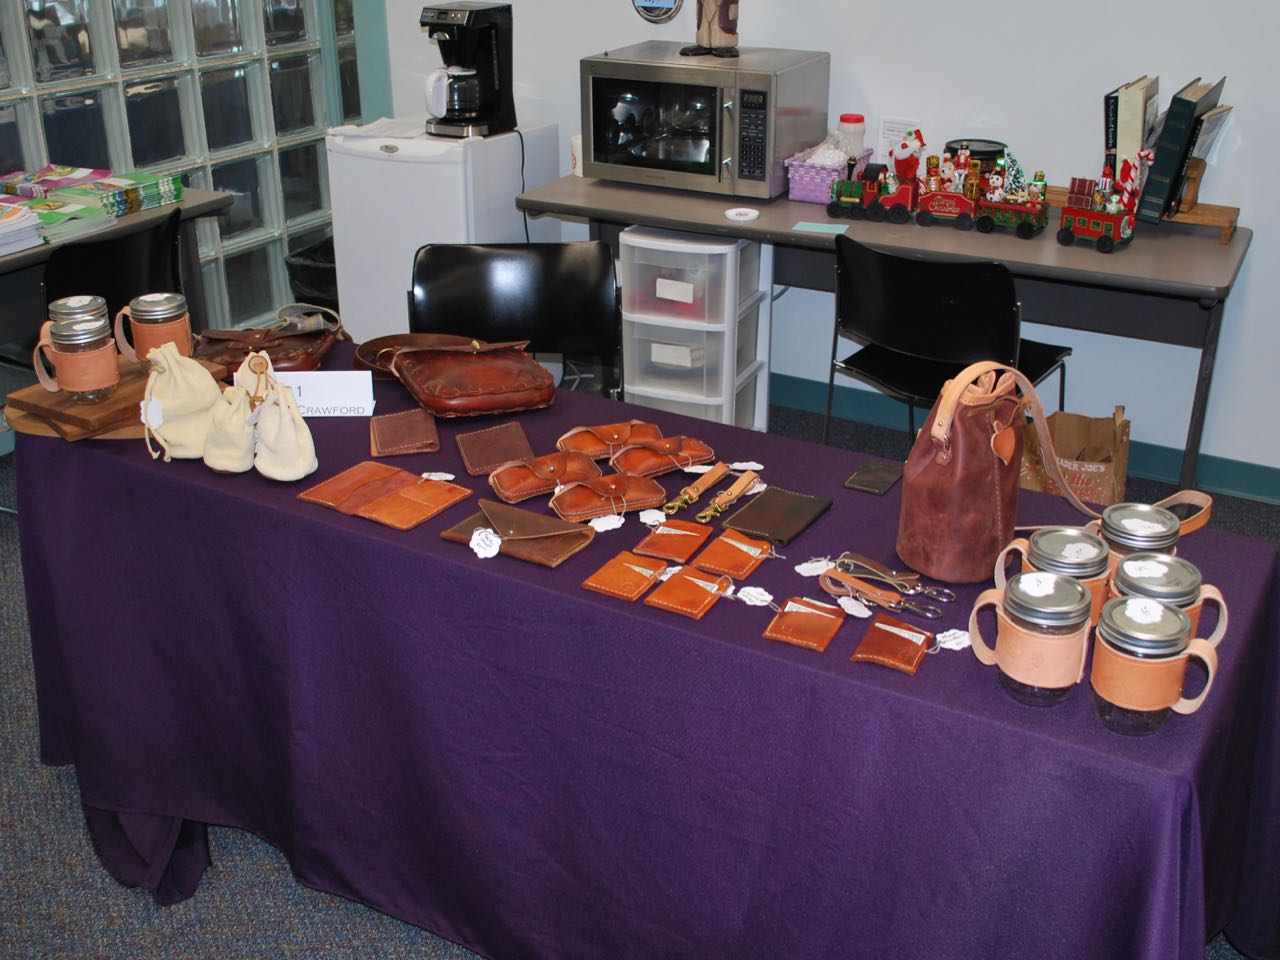
I would not have ever thought myself a craft fair kind of guy yet here we are…
A sneaky photo of the maker discovered this afternoon.
Last year, our local community center hosted an arts and craft fair as a way to bring local artisans together and raise money for public programs (art classes, GED education, computer skills, tax assistance, etc.). Being new to the area we joined in last year and were invited back for a second go around last weekend. It was a good cause and a way for us to make a little extra spending money for the holiday season.
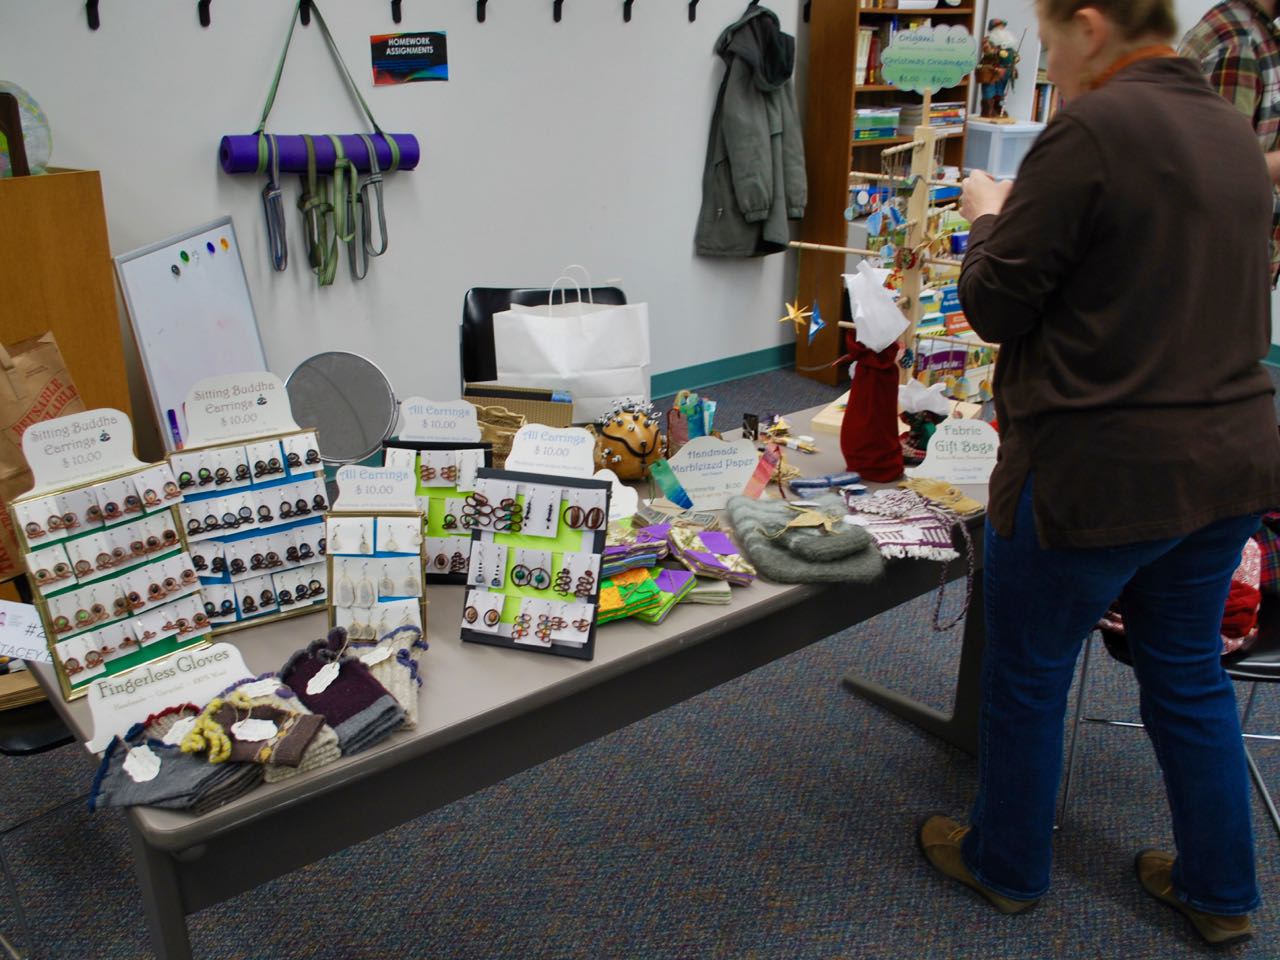
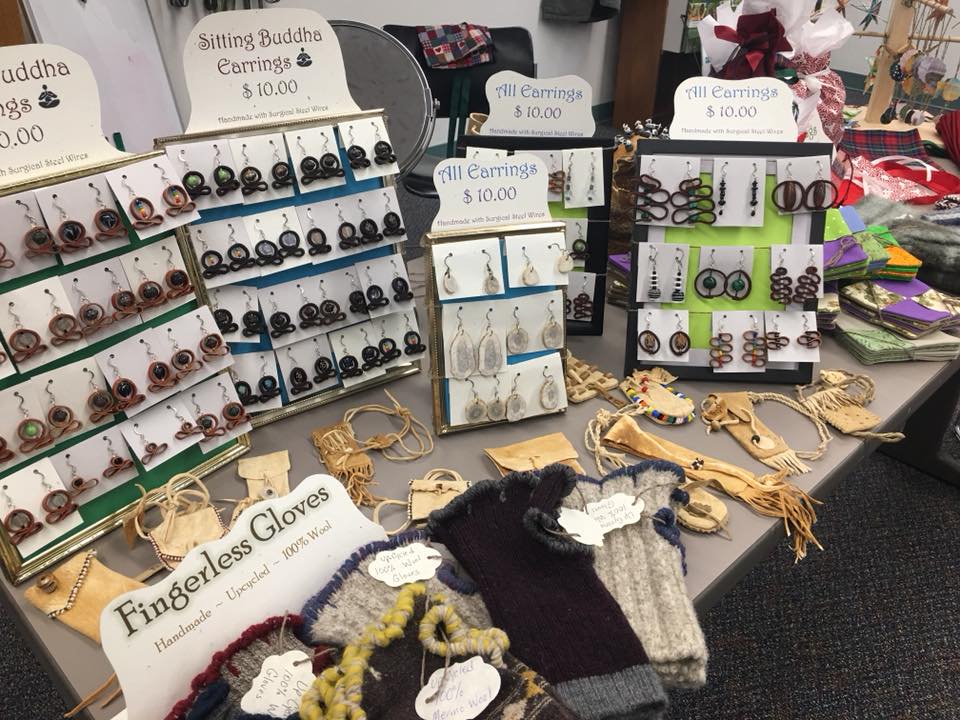
Stacey’s jewelry, sewing, weaving, and holiday arts.
Times are tough and it seems that most people have little to spare on superfluous items this time of year. Despite this, it was still a profitable venture and a portion of everyone’s proceeds went to a good cause.
Details…
Two very good outcomes from joining in this effort were:
Forcing us to buckle down and finish a load of projects in a very short period and
Putting us in touch with a lot of local makers we may not have met otherwise.
There are some very talented people out there and it is often difficult for them to show their work. Venues like this allow the small, part-time players like us to showcase some of what we do. Now, as a primitive tech artist, I steered myself more toward items that were affordable and would appeal to the average person; especially someone looking for gifts appropriate for the holidays. I even brought a few walnut cutting boards as they are fairly popular gifts.
Painters, printers, writers, jewelers, and even wonderful candy and jam makers were there and we a grateful for the opportunity to participate again this year.
I thought I’d share a few bench photos leading up to the fair.
Here is an update on the most recent possibles bag I have been working on:
The buffed leather reflects a lot more than I realized while photographing.
Sorry the photos aren’t so great but here is the description: Made from 7 oz (~3 mm) Hermann-Oak full-grain harness leather top dyed and antiqued Fiebings medium brown with a single patch pocket inside. It still needs a little edge detailing, waxing and buffing before it is truly done but that will happen later today.
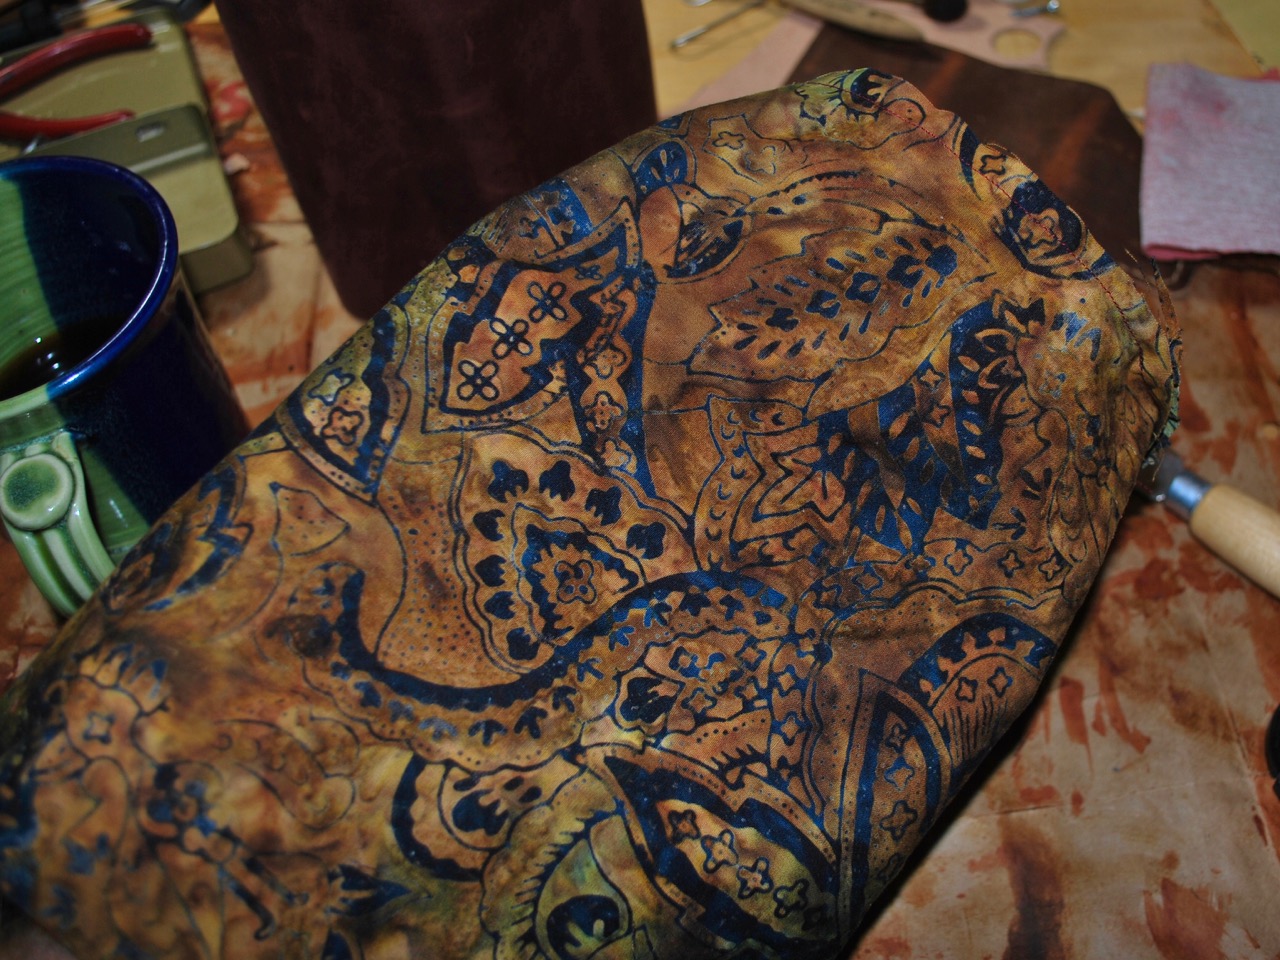
The interior is natural but will darken with use and waxing.
Rustic, laced construction, unlined, 18th century “English-style” bag. The main pocket is 8 x 8 inches (1.5 litre in volume), while the overall body length is about 12 inches.
The edges are all burnished for a smooth and comfortable feel in hand. The thick oak-tanned will soften with time and use.
The eared shape is to keep the bag from riding around to the front or back of the torso during use. This leather will age nicely and will last longer than any of us with normal rugged use.
All sewing is double needle free-hand saddle stitch.
1 1/4″-wide strap extends to about 56″ to fit the most well-padded or heavily coated hunter. Going out for trade in the next couple days.
Here is a shop update on a couple of the many leatherworking projects undertaken lately. I decided to use up all the leather I have been storing and put it to good use. I have about 100 projects I’d like to make for myself but the Yule season is coming, gifts are expected in many quarters, and we have an invite to show our wares at a local crafts fair. So, without further fanfare…
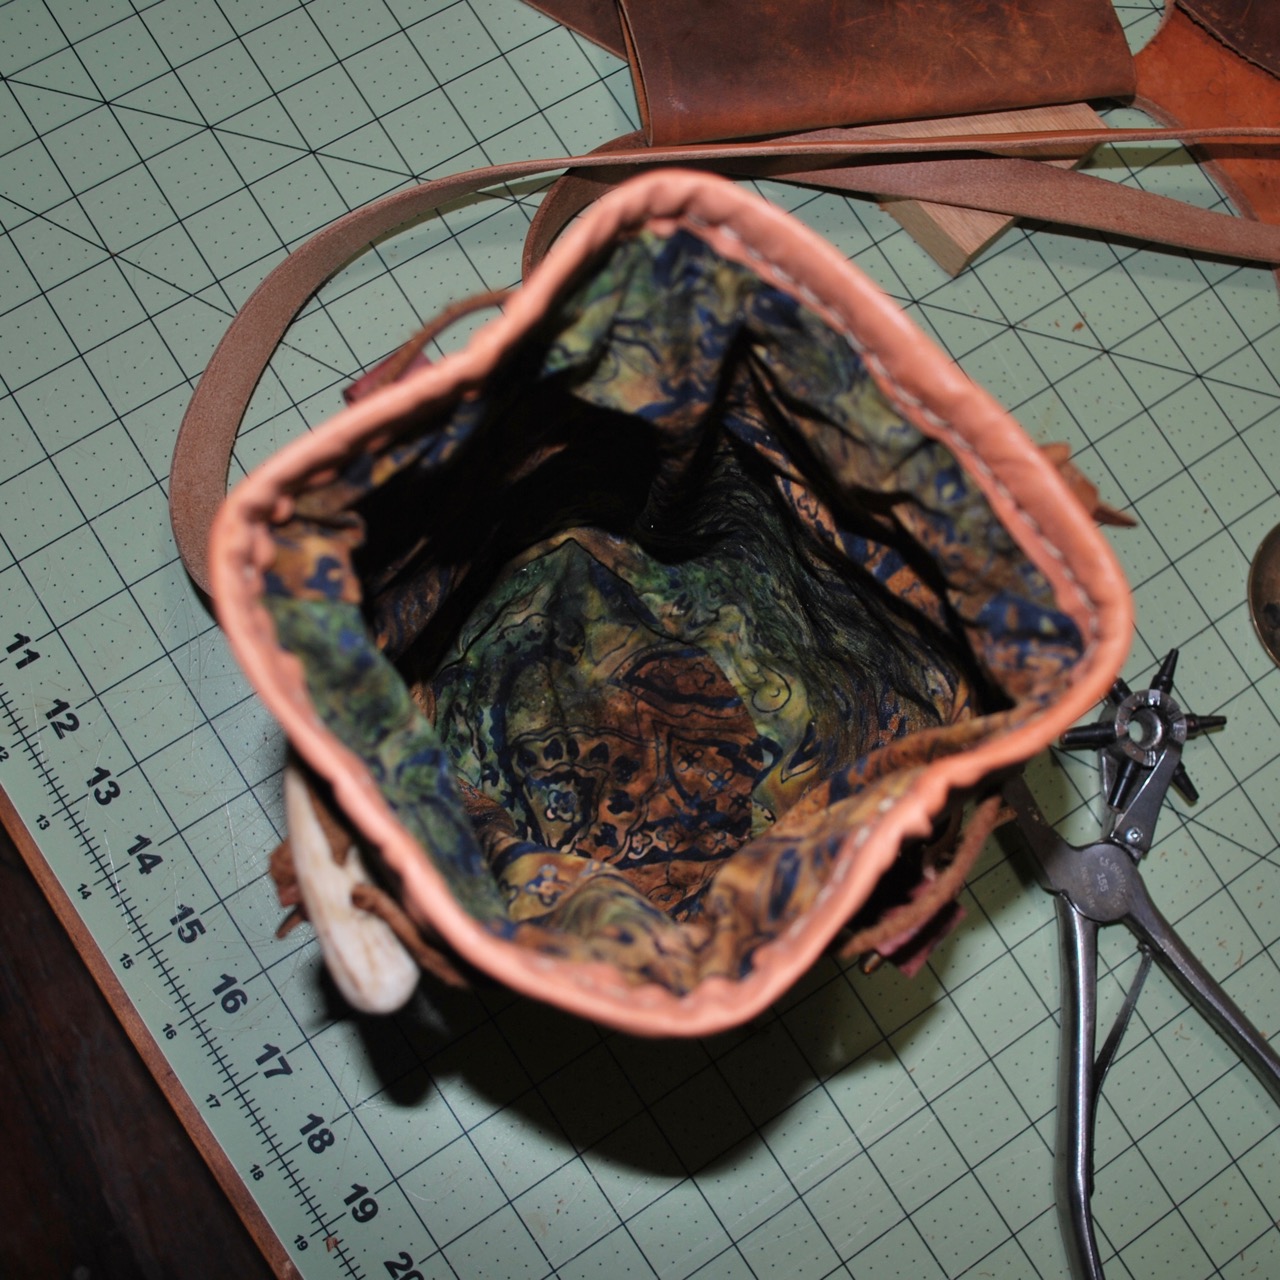
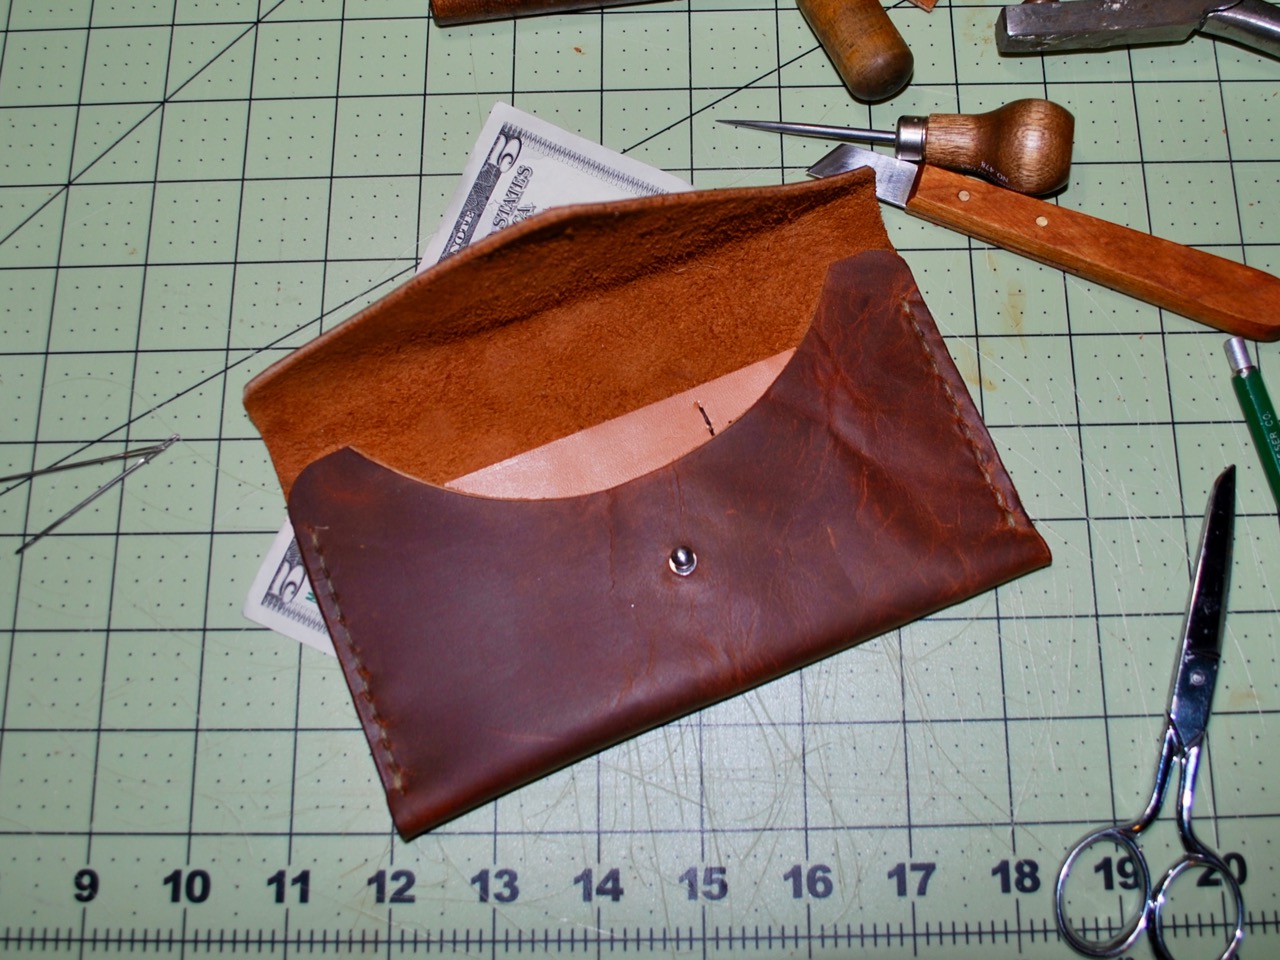
A waxed leather bucket-style purse. I hear these are the rage in certain groups now. I remember seeing many in this style back in the 1980s coming out of Morocco and Spain.And I decided to make a few bomb-proof wallets of various designs to go with it.
A surprising amount of work can go into even a relatively small project like this.
Temporarily gluing the welt to the bottom.Sizing the bottom to the side before sewing.The exposed welt after sewing and turning the bag.Marking and punching the holes. Tiresome for the hands.Choosing an appropriate lining; strong and beautiful.Drawstring added, holding the leather edge biding while sewing.The ‘ears’ for holding the shoulder strap sewn on, strap attached, and it is done!The antler toggle helps keep the bag secure and adds a bit of primitive flash.Difficult to photograph, but the liner gives the bag some class and a feeling of “completeness.”This is a new traveler’s wallet design. Three pockets, large capacity to hold money, cards, and passport.This one might be a bit too small to hold a check book but not a lot of us carry those these days.The button stud is a favorite closure of mine as it is simple and effective without the need for a large hole.After a quick buffing, the wax shines up nicely. This one should last a lifetime.
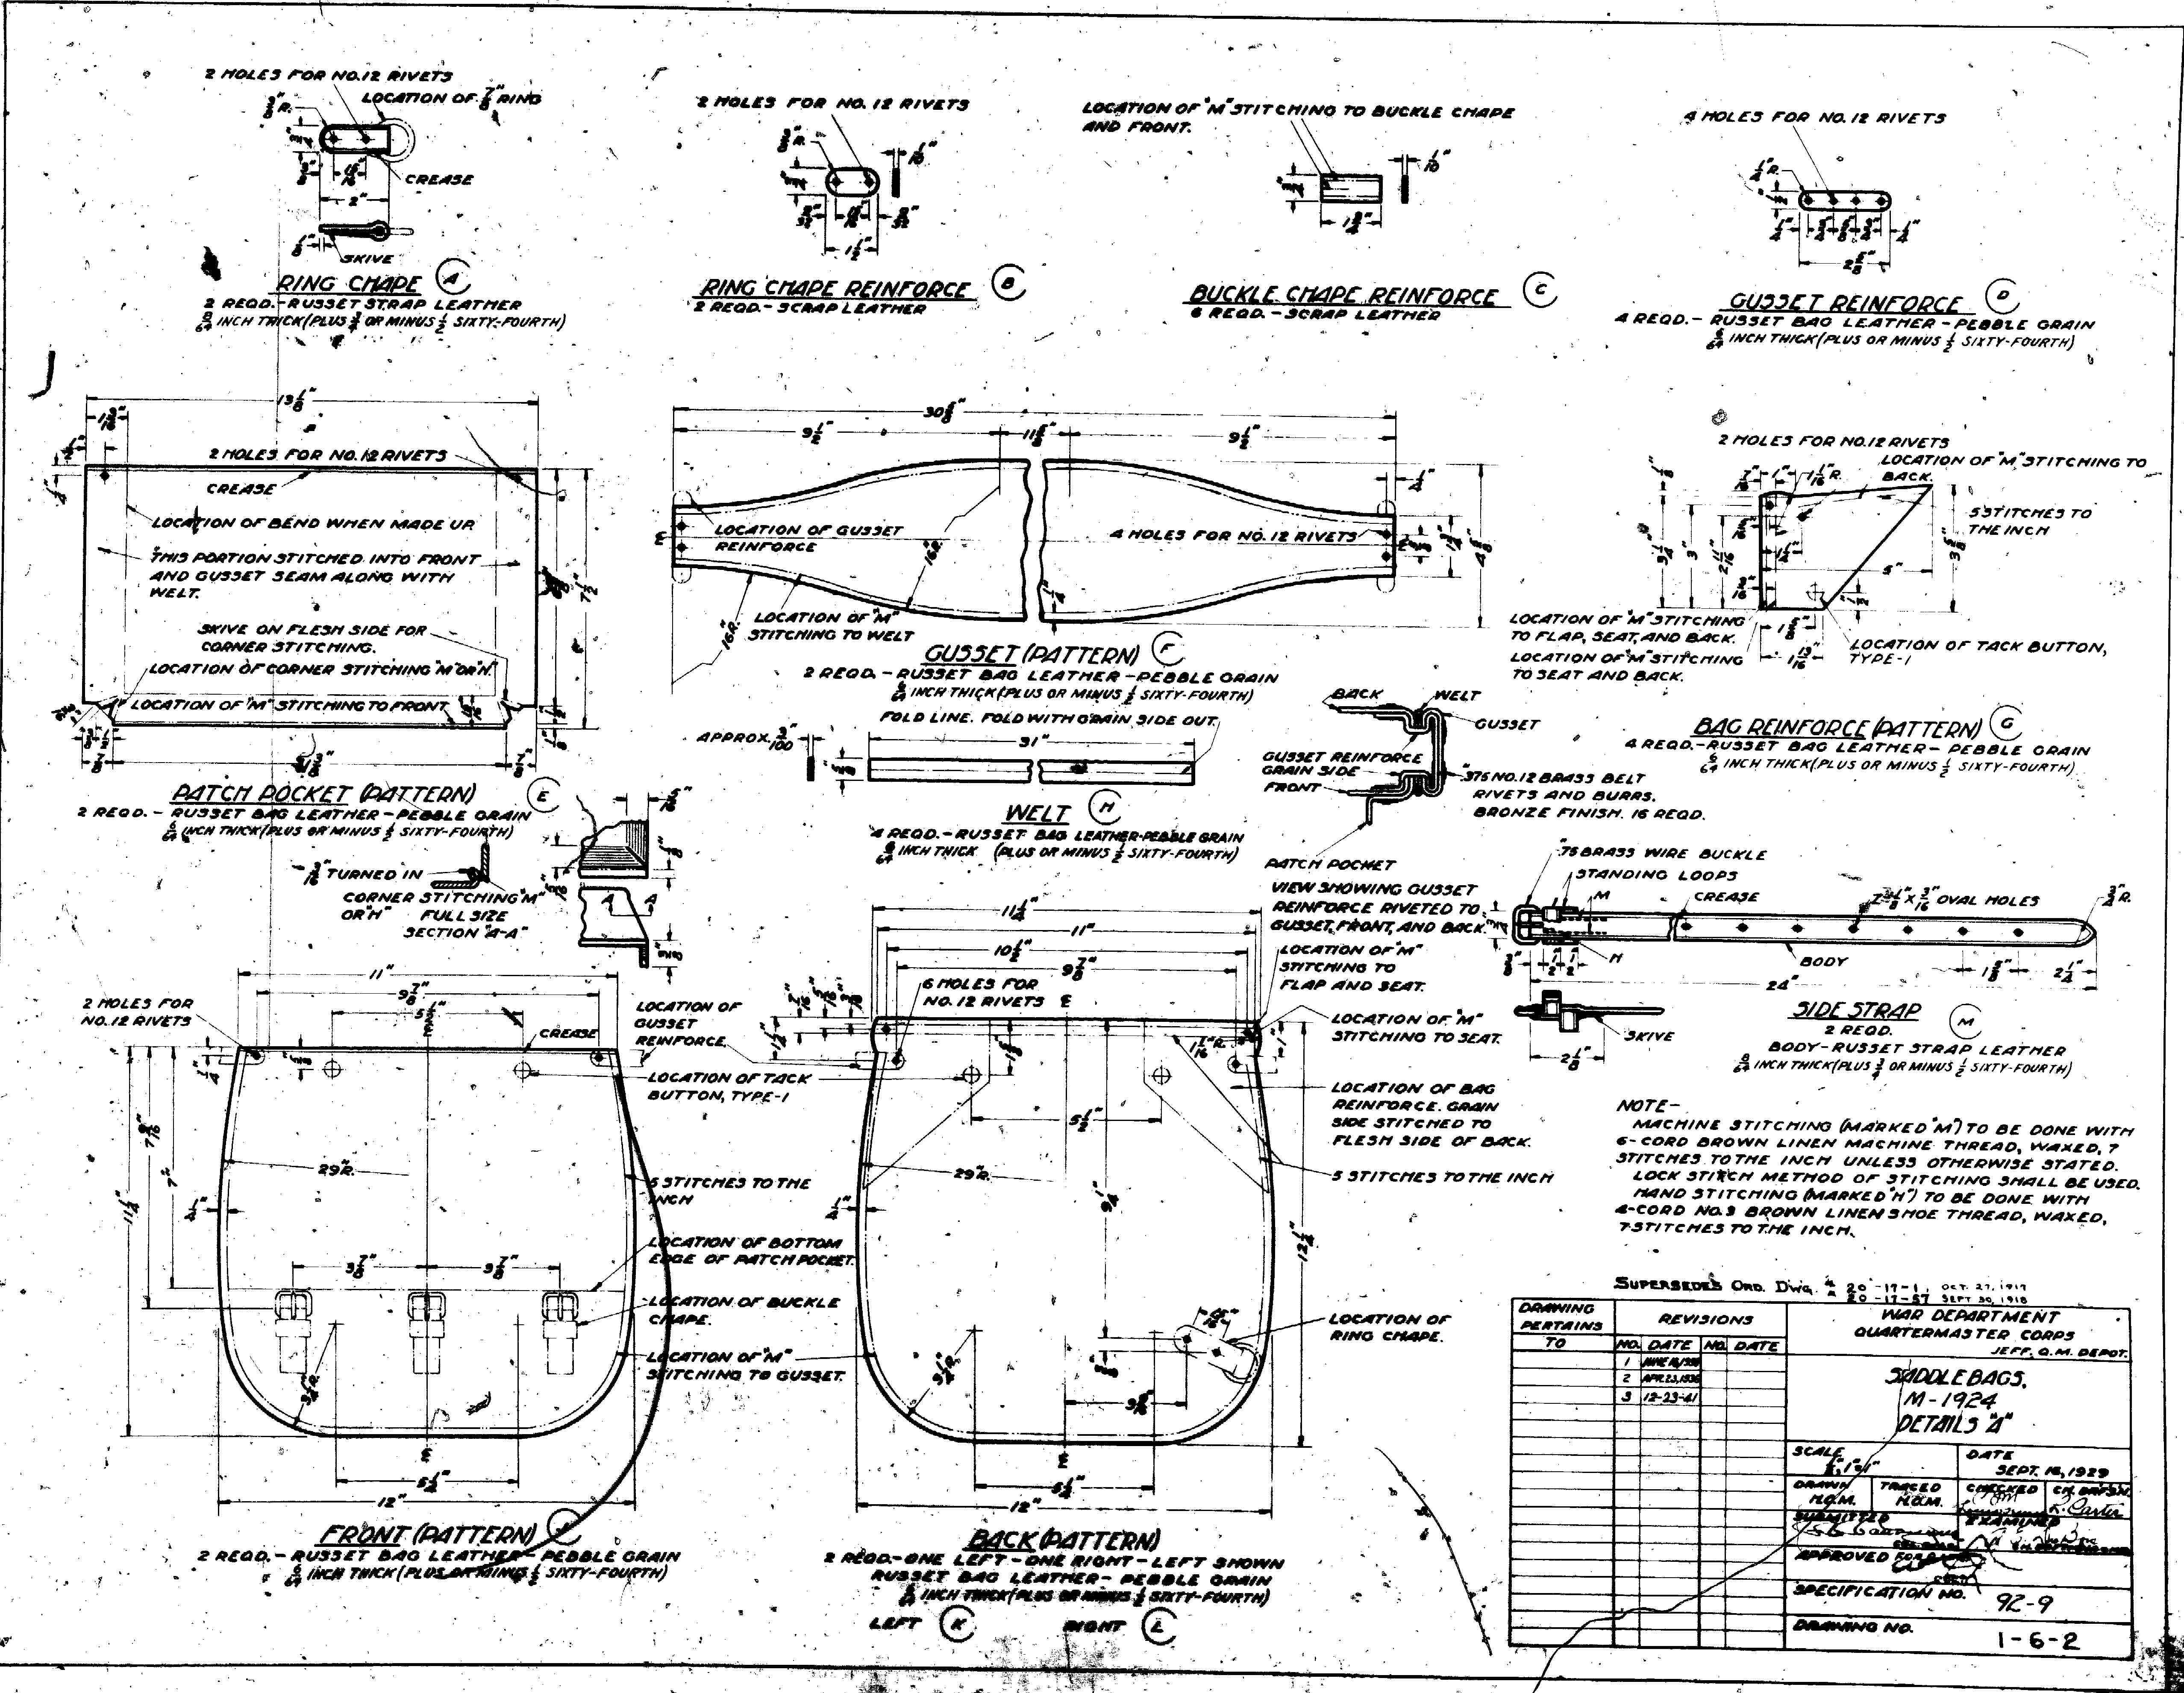
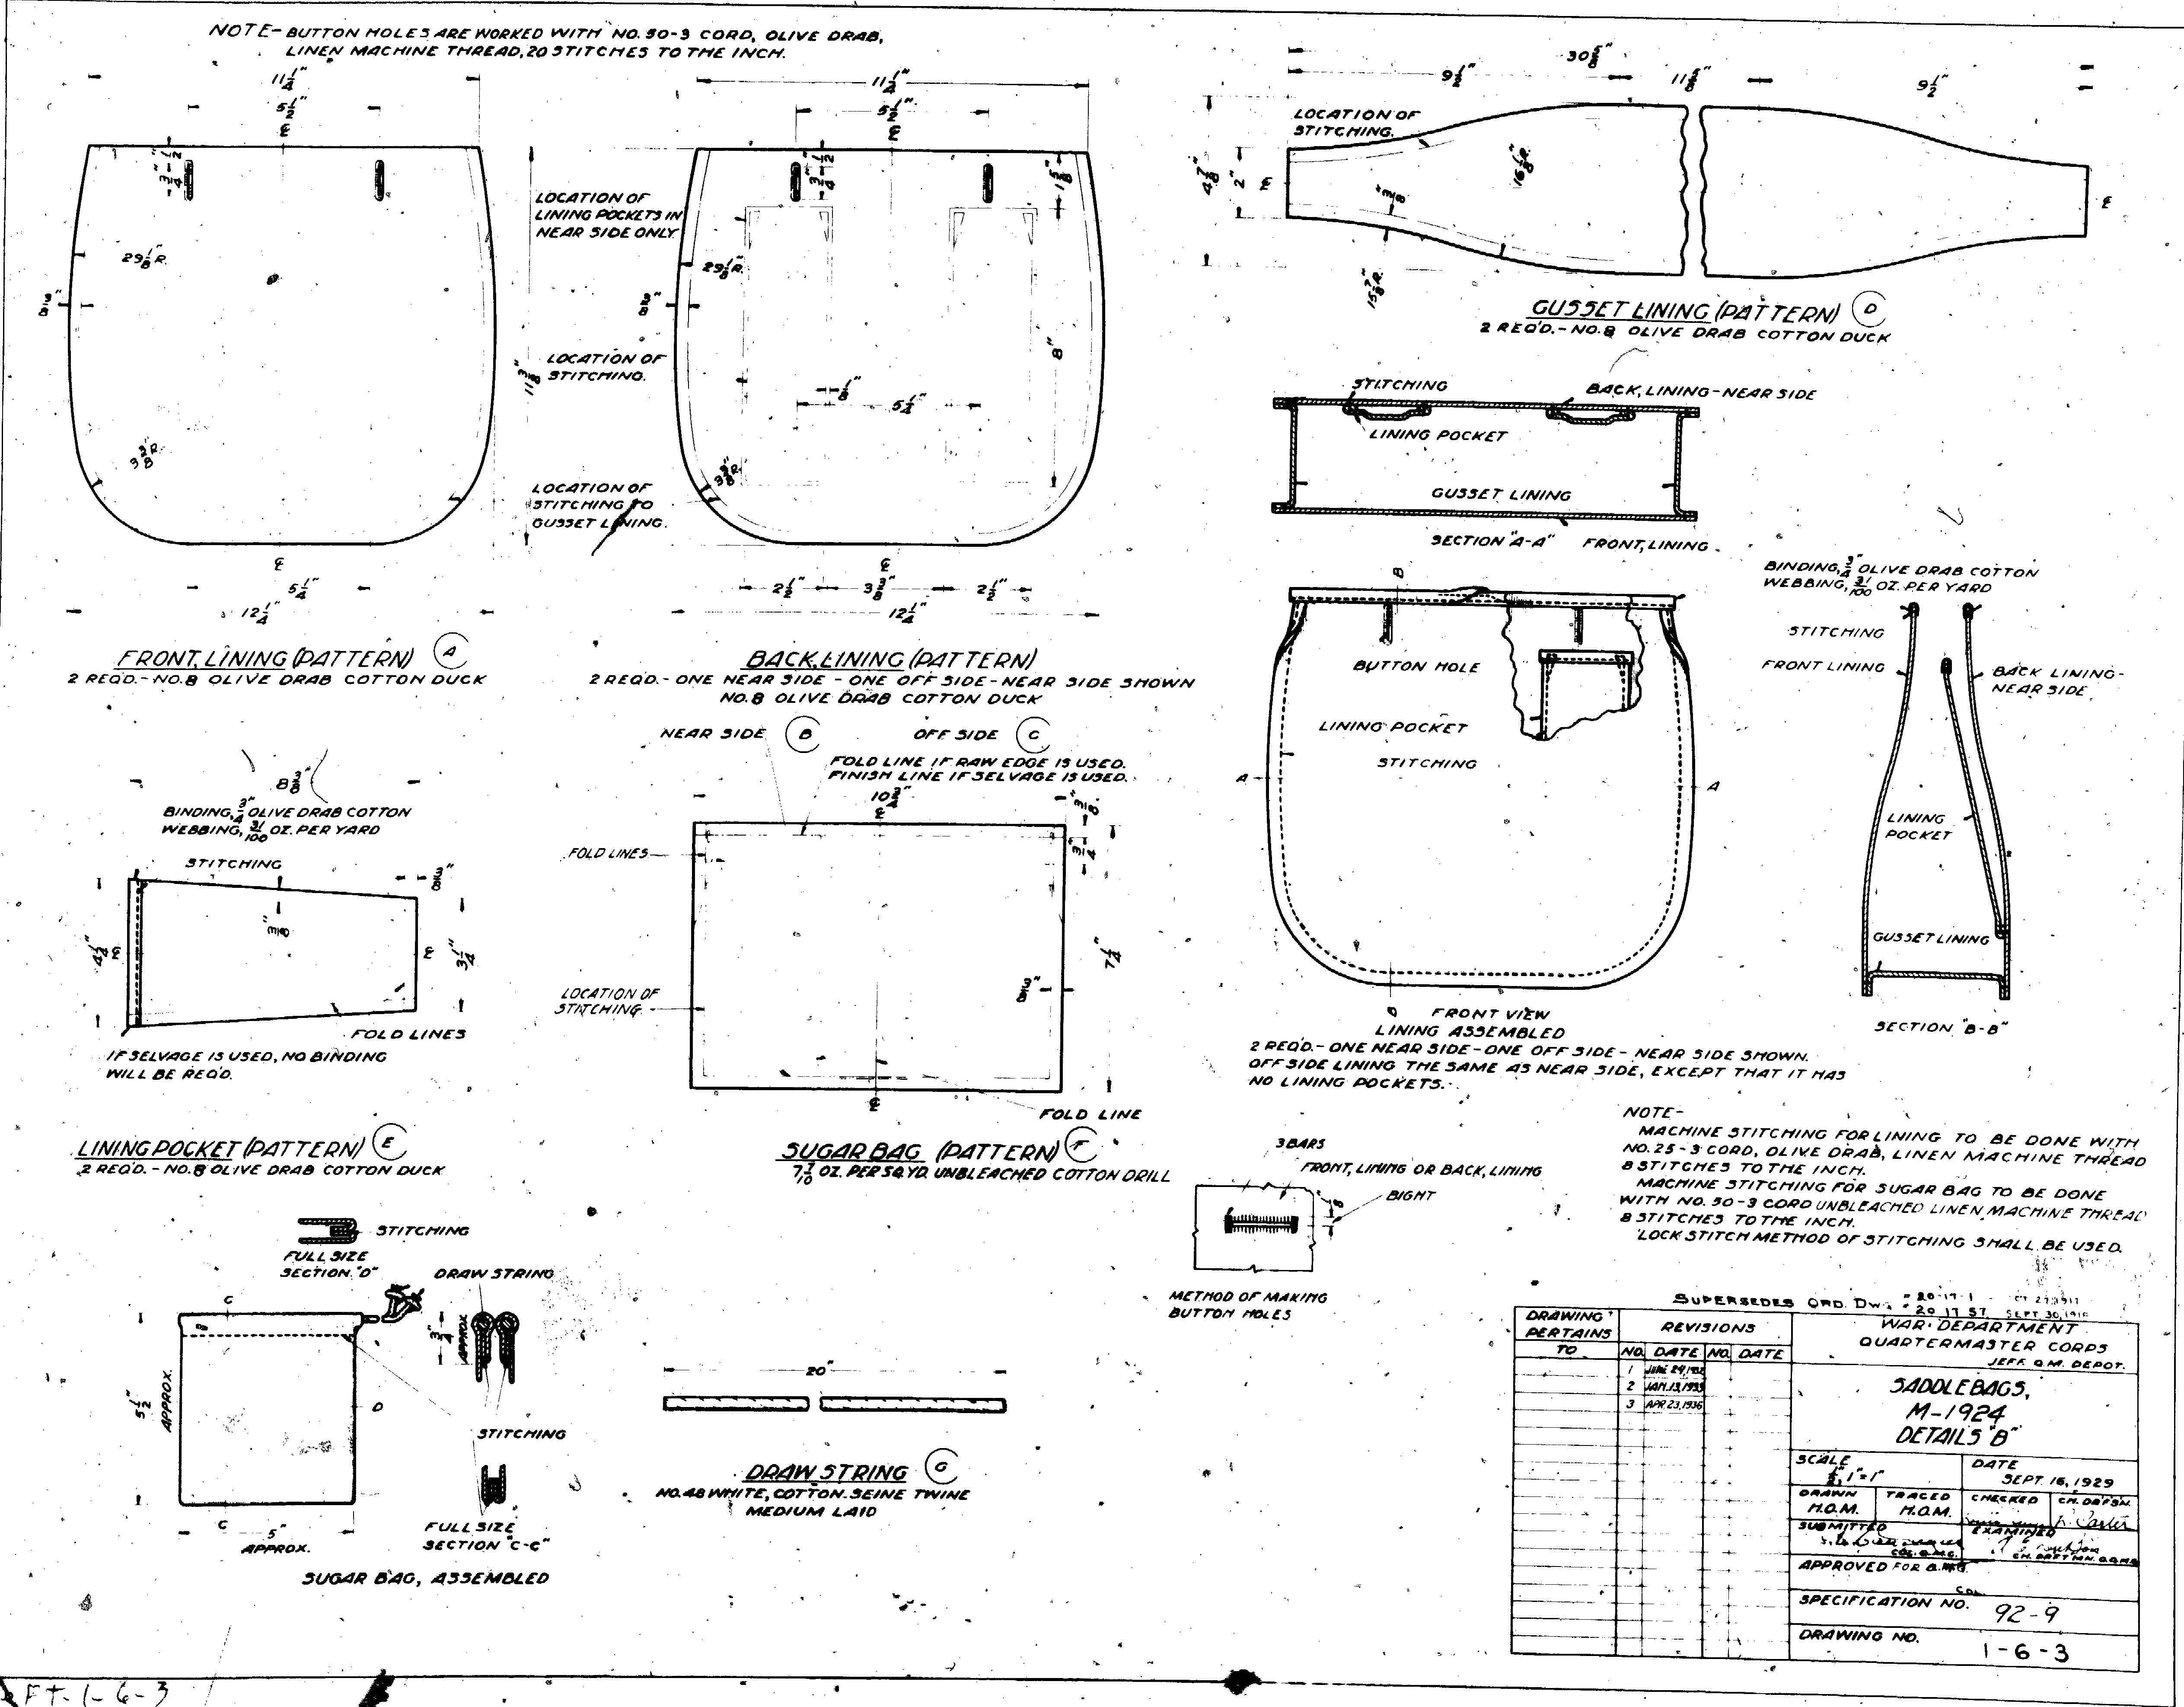
It isn’t cheap to find good saddle bags these days but excellent ones can still be made with a little time and dedication. The U.S. Army M-1924 model is the culmination of a century of design improvements and feedback from real field use. This model, in one form or another, saw service across the West, through multiple wars, the staking of trails and the migration of a people across a continent. Being a government contract item the design specifications are readily available through the General Services Administration.
Complex leatherwork projects depend on good plans and these are above and beyond perfect.
The plans are printable and can be scaled or drafted into patterns to transfer to appropriate leather; latigo or veg tanned. Click the image for a full-screen version. Clicking again should provide oversized, printable versions for easy use and reading.
Even if you don’t own a horse, this design works well equally on a motorcycle or scooter and add a touch of class in any case. Mine ride on a Vespa Super Sport. I’ll share the Quartermaster version when I get them loaded.