About the early shoes…

Adventures of an Imperfect Man In Search of a Handmade Life

About the early shoes…
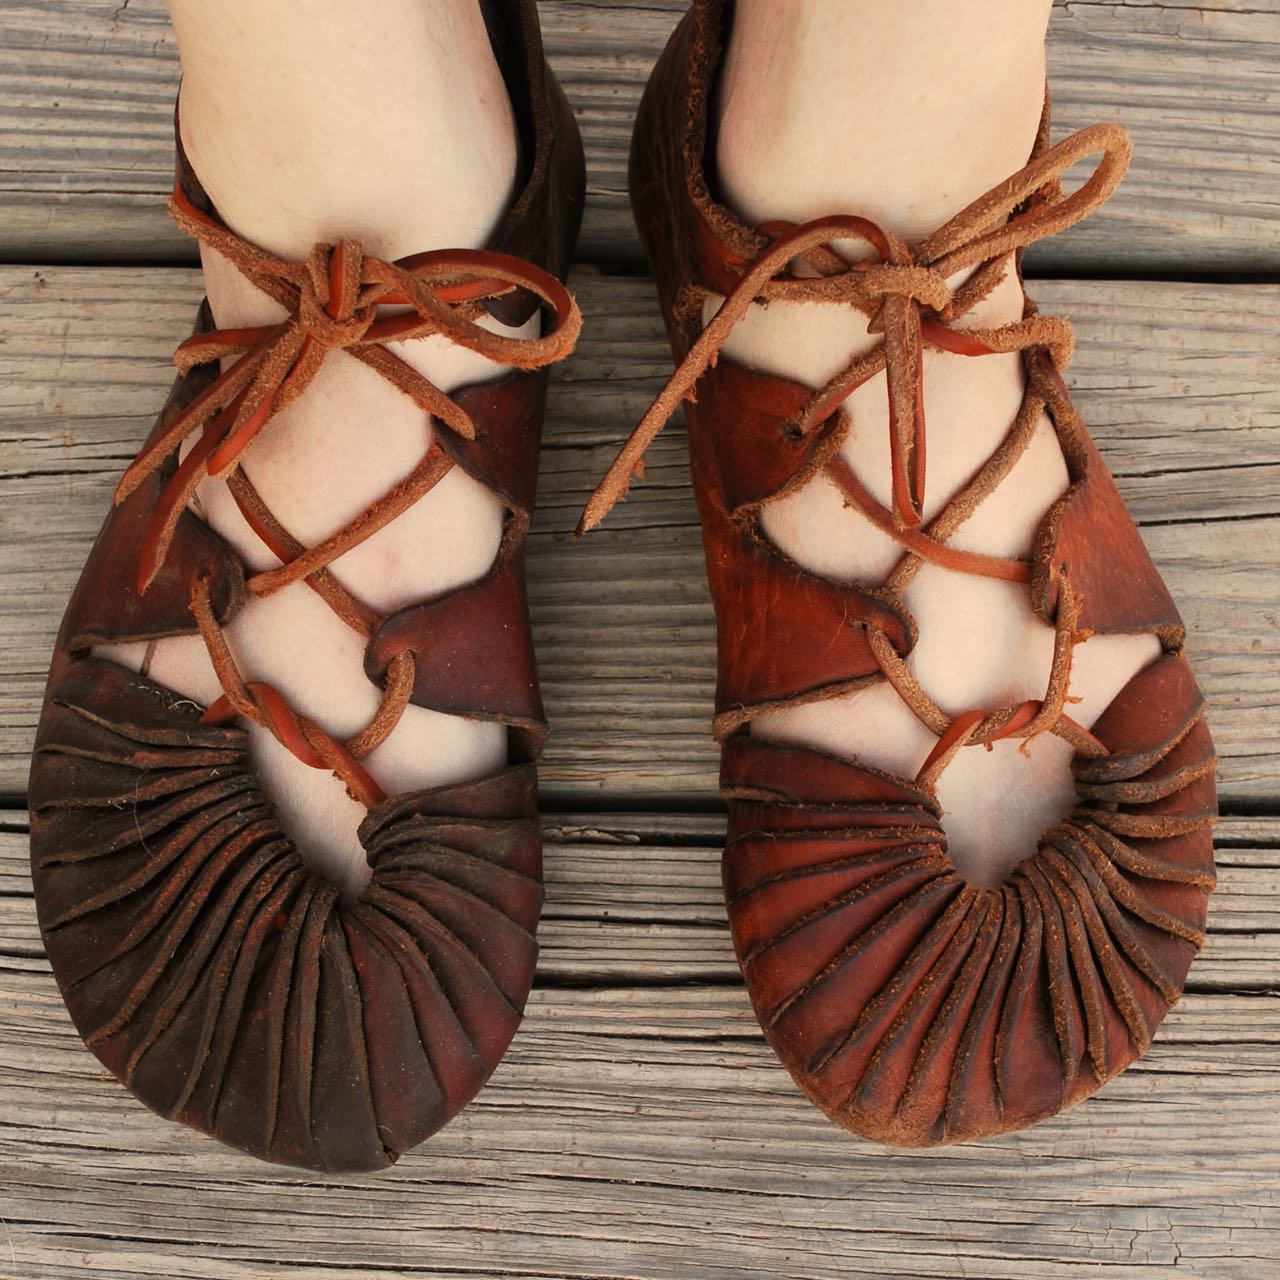
Here’s a simple shoe design that was made by our ancestors before there were shoe shops or Zappos. Much of the Europe population, both male and female wore a variation of this for many millenia, right up into the early 20th century. They are commonly associated with their Celtic cousins in Scotland, Wales, and Ireland but they are essentially the same as the simplest Roman carbatina. Essentially, it’s a basic European shoe.
I made a set of these around 1986 with a little instruction from an Eighteenth Century reenactor and loved how simple they were to make. My experience up that point was with Native American style moccasins the difficulty I had with sewing in those days. This was a perfect option for me and I find that it is a popular class when I offer it as an introduction to leather working and moccasin making.
While this isn’t exactly a tutorial, it does provide the basic information necessary to get started on a pair for yourself. I would suggest a pattern to be cut from heavy cloth before diving into cutting valuable leather just to get the fit right. It’s a forgiving design so,
Don’t Panic.


And finally, six years later, they still function well. The soles are getting thin so it’s almost time to renew them. Fortunately, a pattern can easily be made and adjusted from the old pair by wetting them, letting them dry flat, and using that as a starting point.

 Dive on in.
A rare self-portrait of the Maker responsible all this nonsense…
 I’ll need to make a proper one; more in-focus and with a better mirror next time.

One of the original boots found in the Oseberg Burial Mound dating back to 834 AD. (Photo: skinnblogg.blogspot.no)
A number of complete Viking Age shoes found in Scandinavia and England have the same characteristics. They are flexible, soft and mostly made of cattle hide, but also other kinds of leather was used.
There are complete shoes found in the Oseberg ship burial mound in Norway, Hedeby trading center in Denmark, and Coppergate (York, Viking Age Jorvik, Editor’s note) in England.
All three of these discoveries show a similar construction and form typical for the Middle Ages.
The shoes found in the Oseberg ship consists of two main parts, soles and uppers, and are so-called “turn shoes”.
(Article continues)

Reconstructed boots found in the Oseberg burial mound, by Bjørn Henrik Johansen. (Photo: Bjørn Henrik Johansen/ skinnblogg.blogspot.no)
The shoemaker stitched the shoe together inside out, and then turned right side…
View original post 235 more words
Before looking at the ethnographic literature I experimented with tying up some simple sandals with mixed success. It turns out that it’s not as simple as one might think. Now I’m a connoisseur and am always making mental notes when I see old depictions, or in the old world, images on statues. For simple, soft lace sandals, the Tarahuamara style works perfectly. A single lace does everything you need.

 Learning from the past may save us from losing our future.
For a long time while searching for huarache construction techniques, I could only find the simplest tire sandals and many links to “barefoot” style running sandals. However, a few years ago, I found Markus Kittner’s Huarache Blog and scoured it for inspiration and design secrets from real huaracheros in old Mexico. He has done excellent work in documenting the process.

As a craftsman of sorts, I understand that making a “one-off” of something does not imply expertise. Only replication builds a real understanding and mastery of the object being produced. However, this is not my first leather working or shoemaking project but a major improvement on a theme. This style shoe is made on a last. The shoe lasts I purchased on Ebay have finally been used to actually make a shoe. I documented the process as it came together as best I could; my mistakes and changes included in the process. This is not really a “how to” recipe for making a huarache but shows the process I used.

The last shown here fits me well but are an Oxford dress shoe style, meaning they run a little long in the toe. As I am making an open-toe design, I let the last hang over slightly in the front, squaring the sole to the shape of my actual foot. New lasts are pricey (ca. 50 euros/$70 US), but I think it will pay in the long run to invest in a better design for myself and those people I might make shoes for.

I didn’t show the strap cutting process as there is little to be learned about that. It is a skill in itself, even if you have a strap cutter. My Osbourne strap cutter can be seen in the upper right of this photo
Since this project was experimental, I used scrap leather, meaning I could only get about three foot (one meter) straps. In future, I’ll probably use 6 foot or longer pieces (2+ meters).

I pre-punched holes in the mid-sole and away we go. A little tallow on the straps helps cut the friction of the leather but ended up being not worth the trouble. They were kept damp throughout the process.

This is a signature of the style I chose. The vamp or tongue-like piece was later removed as I didn’t like the way it looked. I’ll experiment more with that later.

Unlike normal, I completely finished the first shoe and removed it from the last to check size and shape to determine any major changes that would need to be made.

The straps running under the mid-sole look like a problem here but are ultimately skived down, dampened, and hammered flat.

I used simple wire nails (as is traditional) to attach the soles but sewing would work too.

Pulled from the last, they actually matched. I don’t know why I was surprised but that made me really happy.

The method I chose to attach the rubber is fast and efficient, and I suspect rather tough. The nails are pressed through the leather and rubber into a thick leather scrap below. Otherwise, you would need to pry it up from the work board. One surprise I learned over time was that the nails actually wore off on the underside before the rubber.


The nails are bent over (inward) to prepare to “clinch” them. There are no photos of this part of the process but this was done by setting the shoe back upright on a small anvil and hammering the nails down tight with a punch. The pre-bending causes the nail to curl inward and back up into the sole. Voila! The Huaraches below have about five miles of hiking on them now and they’re beginning to have some character.
 Huaraches you say? Do tough guys wear such things? In an era of cheap, slave-made garments, its easy to forget how self-reliant our ancestors were for such things as raiment. I include this photo of Capitan Alcantar I found on the Huarache Blog as a great historical image of a man of action wearing his huaraches and ready for war.

I hope this prompts someone out there in the world to take on the project of making their own shoes, whether for survival, uniqueness, or just as a challenge. Making for yourself is a small act of revolution against a bad system.
In a fit of energy I got around to putting proper and better shoulder straps on my pack basket made last summer. The pack is willow and the leather work is approximately 10 oz. Hermann Oak harness leather.

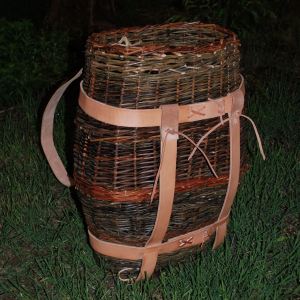
Once the leather ages a bit they will be beautiful and rustic-looking.
Some thoughts on a “useful man” from 1852. Possibly the best thing I’ve read this year.
“The useful man would be the necessary link in the chain that ought connect the man of science and the daily workman, for he would lay one hand on the theory and the other on the practice, and would often take the place of the two.”
Here is a great little instruction set on how to make a European Medieval-style belt bag. You see these in paintings and illustrations on just about every traveler. Not only will you come out with a nice bag but it is a fine and simple introduction into leather working and sewing. All makers need to start somewhere and this might be the right project.
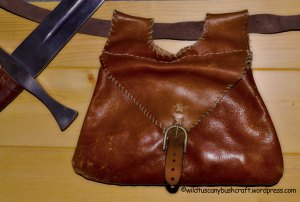 Old style bushcraft: a medieval possible pouch
During the Middle Age was common carrying small items like coins, keys, inside pouches or purses attached to the belt.
There are many archaeological and iconographical documents, you can search for your favorite patterns, but there is a model that in my opinion, is one of the best for a bushcrafter.
View original post 298 more words
I finally got around to replacing my very old shop apron. It was the standard issue split-leather welder style and over many hard years had amassed large quantities of wood glue, grease, metal grime, blood and membrane (from brain tanning), and other unidentifiable smudges over most of it’s surface. It went into the trash a while back when an unexpected leak in my barn allowed it to saturate and subsequently get some very ugly mold patches in a funky tie-dye pattern. I expect it was fairly nutrient-rich and I wasn’t interested in trying to salvage it after all these years.
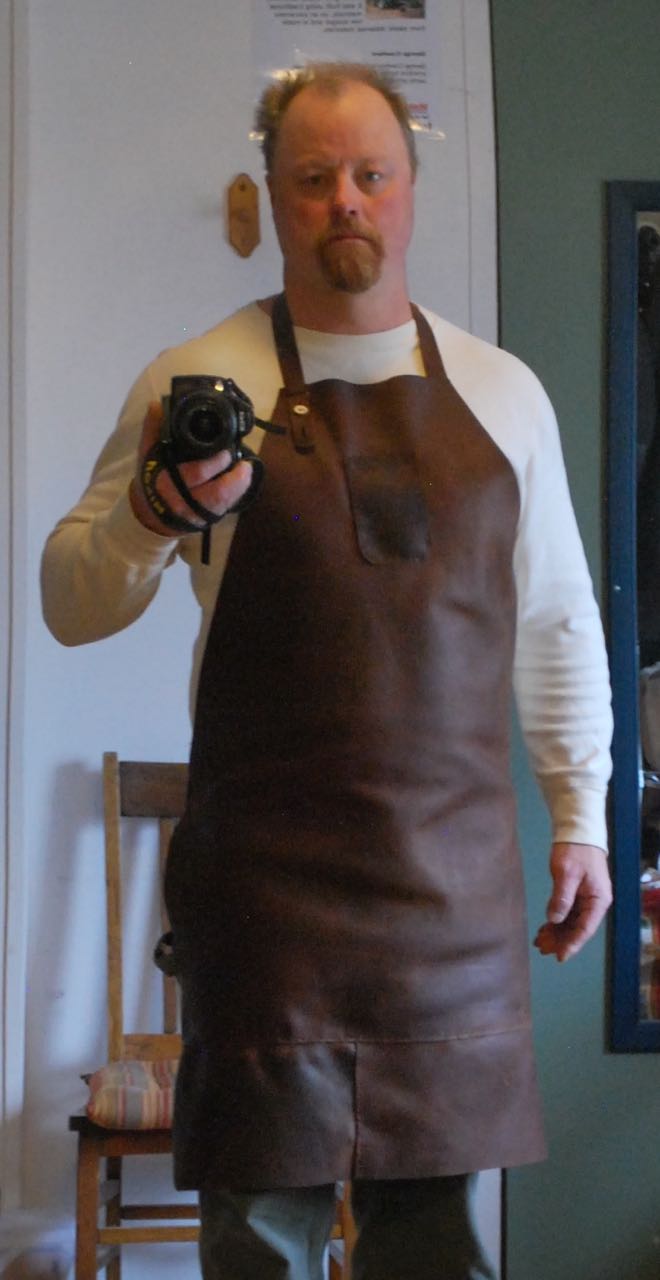 I had some fine oiled leather from a recent project (aprons take a lot of footage) so was able to cobble together a decent shop apron without too much difficulty. I expect this to last another 20 years or more; maybe the rest of my life.
The image is not great. Just a poorly lighted mirror shot “selfie.” Par for the internet I guess. And no, I’m not glaring. That’s just how I look. I guess I didn’t learn to smile well as a kid or it’s just not in the genes.

