Not a pretty little Victorian-style caravan here today but a sturdy, well-thought-out modern living accommodation for someone looking to escape the mortgage anchor most of us have felt.
Here is an extremely well-documented van conversion into a very frugal but comfortable micro house created in 38 days from 2014-2015. Sean (the builder) has done a remarkable job of tracking nearly every aspect of this life-changing event from the decisions that made this happen, to getting rid of everything that didn’t work in his 60 square foot dream, to purchasing and building his version of the perfect live-in rolling home. There’s even a downloadable spreadsheet of the expenses incurred and great details for those seeking some real “how-to” guidance.
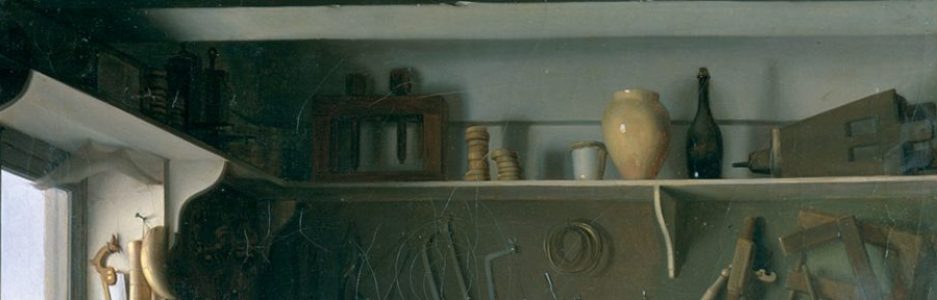
Sean’s blog takes us from the emptying and selling of THIS:
To the purchase and planning of THIS:
And through the entire build and beyond:
It’s a remarkable journey and I thank him for sharing this with the world. If you don’t have time or want just a quick overview, watch the short video:
As usual, Greg Merritt at BY MY OWN HANDS has again shared a great project with his beautiful drawings to illustrate the work. Check out this nice little bookcase below.
As we continue the never-ending unpacking of boxes and putting away of stuff, it has become apparent that the Hillbilly household is in immediate need of a bookcase. This of course means that the nightstands have been bumped from the top of the list to the #2 position. In either case, neither of these projects can be started until I have the new shop space up and running. I’m getting close on that front and might even post about it as early as tomorrow. Anyway, back to the bookcase.
We currently have a standard, tall bookcase that was purchased many years and holds quite a few books. That piece now resides in my office and holds all of my woodworking and craft related tomes. It’s full. Additionally, there are a few built-in shelves in the new house and they hold several books. They too are full. We own a lot…
There are still Huaraches north of old Mexico. As I prepare to resole my huaraches I thought it might be good to look back on them as a very viable hand-made shoe.
For a long time while searching for huarache construction techniques, I could only find the simplest tire sandals and many links to “barefoot” style running sandals. However, a few years ago, I found Markus Kittner’s Huarache Blog and scoured it for inspiration and design secrets from real huaracheros in old Mexico. He has done excellent work in documenting the process.
My first beautiful huaraches drying after being soaked to shape to my foot. They were subsequently oiled and slicked down. I owe much to the Huarache blog for so many great images and descriptions of traditional huaraches.
As a craftsman of sorts, I understand that making a “one-off” of something does not imply expertise. Only replication builds a real understanding and mastery of the object being produced. However, this is not my first leather working or shoemaking project but a major improvement on a theme. This style shoe is made on a last. The shoe lasts I purchased on Ebay have finally been used to actually make a shoe. I documented the process as it came together as best I could; my mistakes and changes included in the process. This is not really a “how to” recipe for making a huarache but shows the process I used.
The lasts I found on Ebay. The sole cut out, punched for strapping and nailed to the last.
The last shown here fits me well but are an Oxford dress shoe style, meaning they run a little long in the toe. As I am making an open-toe design, I let the last hang over slightly in the front, squaring the sole to the shape of my actual foot. New lasts are pricey (ca. 50 euros/$70 US), but I think it will pay in the long run to invest in a better design for myself and those people I might make shoes for.
Wetting out the first strap.
I didn’t show the strap cutting process as there is little to be learned about that. It is a skill in itself, even if you have a strap cutter. My Osbourne strap cutter can be seen in the upper right of this photo
Since this project was experimental, I used scrap leather, meaning I could only get about three foot (one meter) straps. In future, I’ll probably use 6 foot or longer pieces (2+ meters).
Nailing the strap to the last.
I pre-punched holes in the mid-sole and away we go. A little tallow on the straps helps cut the friction of the leather but ended up being not worth the trouble. They were kept damp throughout the process.
Placing the twining thong.
This is a signature of the style I chose. The vamp or tongue-like piece was later removed as I didn’t like the way it looked. I’ll experiment more with that later.
Lacing and twining.
Unlike normal, I completely finished the first shoe and removed it from the last to check size and shape to determine any major changes that would need to be made.
A heel piece was added and laced up the back. I think this step shows the evolution of the strap sandal to the modern huarache.
The straps running under the mid-sole look like a problem here but are ultimately skived down, dampened, and hammered flat.
Straps ends as added in. Longer straps would lessen the ends here.
I used simple wire nails (as is traditional) to attach the soles but sewing would work too.
Ends to be trimmed and skived, and a finished sole.
Pulled from the last, they actually matched. I don’t know why I was surprised but that made me really happy.
Preparing to nail the sole.
The method I chose to attach the rubber is fast and efficient, and I suspect rather tough. The nails are pressed through the leather and rubber into a thick leather scrap below. Otherwise, you would need to pry it up from the work board. One surprise I learned over time was that the nails actually wore off on the underside before the rubber.
Nailing the sole.Bending the nails in preparation for clinching.
The nails are bent over (inward) to prepare to “clinch” them. There are no photos of this part of the process but this was done by setting the shoe back upright on a small anvil and hammering the nails down tight with a punch. The pre-bending causes the nail to curl inward and back up into the sole. Voila! The Huaraches below have about five miles of hiking on them now and they’re beginning to have some character.
Huaraches you say? Do tough guys wear such things? In an era of cheap, slave-made garments, its easy to forget how self-reliant our ancestors were for such things as raiment. I include this photo of Capitan Alcantar I found on the Huarache Blog as a great historical image of a man of action wearing his huaraches and ready for war.
Click the image for more historic photos like this.
I hope this prompts someone out there in the world to take on the project of making their own shoes, whether for survival, uniqueness, or just as a challenge. Making for yourself is a small act of revolution against a bad system.
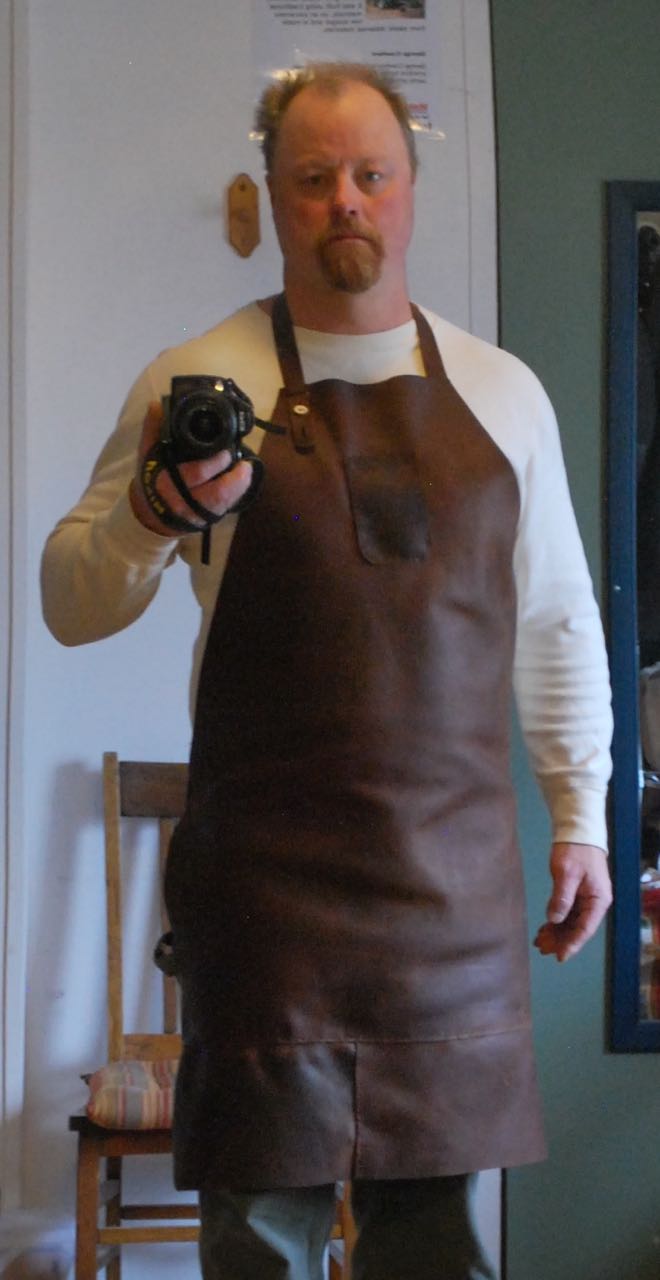
I finally got around to replacing my very old shop apron. It was the standard issue split-leather welder style and over many hard years had amassed large quantities of wood glue, grease, metal grime, blood and membrane (from brain tanning), and other unidentifiable smudges over most of it’s surface. It went into the trash a while back when an unexpected leak in my barn allowed it to saturate and subsequently get some very ugly mold patches in a funky tie-dye pattern. I expect it was fairly nutrient-rich and I wasn’t interested in trying to salvage it after all these years.
I had some fine oiled leather from a recent project (aprons take a lot of footage) so was able to cobble together a decent shop apron without too much difficulty. I expect this to last another 20 years or more; maybe the rest of my life.
The image is not great. Just a poorly lighted mirror shot “selfie.” Par for the internet I guess. And no, I’m not glaring. That’s just how I look. I guess I didn’t learn to smile well as a kid or it’s just not in the genes.
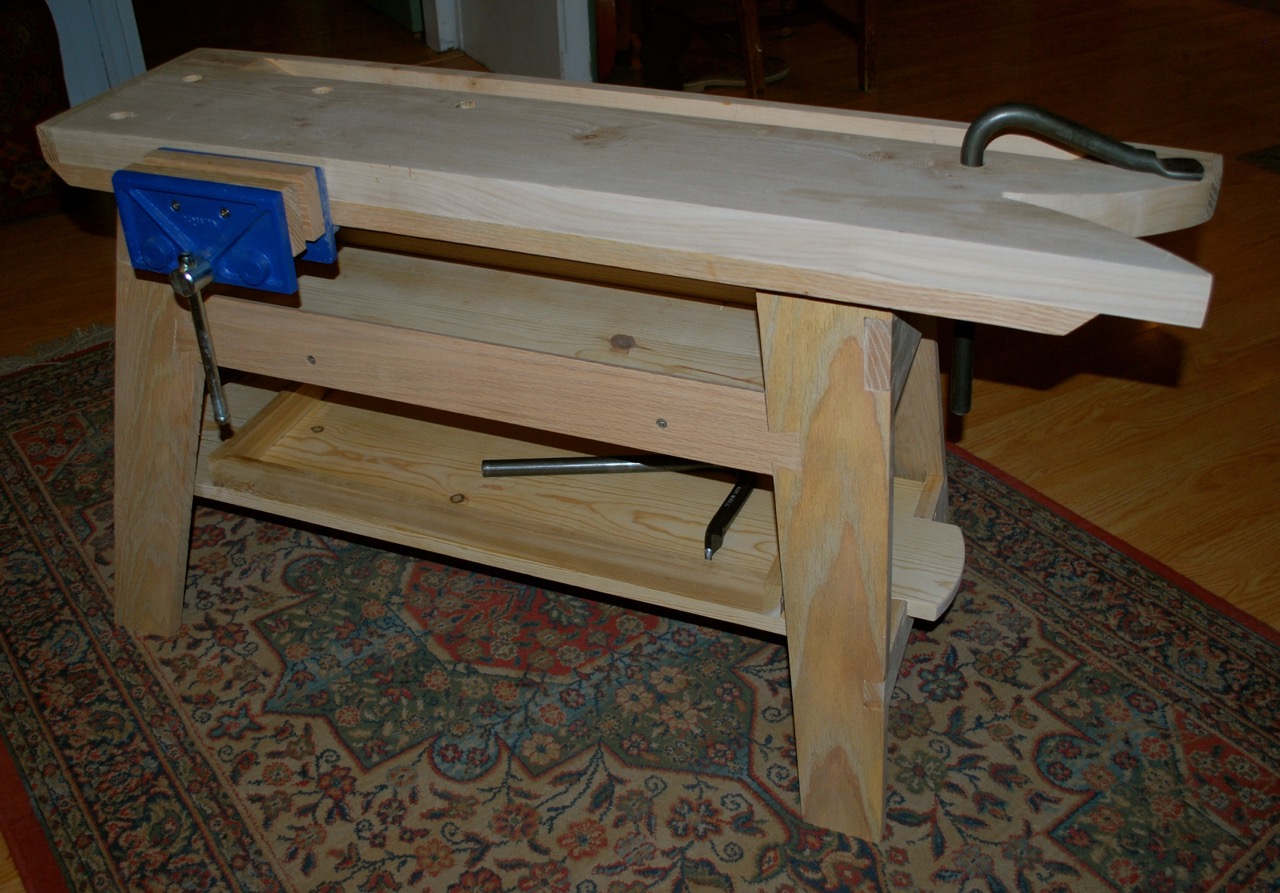
I worked on the bench a little more last weekend and have already put it to work over the last few evenings for some small projects. I have found it’s usefulness and it is a tool I know I won’t regret owning.
Front side.
A second till shelf has been added to store saws, bench hook, etc. and a few holdfast holes have been bored through.
The off-side.
I realize now I didn’t get any low angle shots. I’ll take those when I get it oiled up a pretty.
View of the bottom till.
Sturdy and low-cost, this project allowed me an opportunity to employ some free-form joinery, use some rough-looking scraps and enjoy a bit of wabi-sabi* design. It’s not perfect, but neither am I.
*Wabi-Sabi: an aesthetic based partly on the acceptance of transience and imperfection. The aesthetic of wabi-sabi can be described as a beauty that is “imperfect, impermanent, and incomplete.”
Home-built camper fans will probably really appreciate this remarkable future-retro monstrosity. Conceived, designed, and built by Bill Guernsey while recovering from a broken back, it took two years to complete. Follow the link below to the short write-up on the Makezine Blog or click here to straight to the Instructable: http://www.instructables.com/id/Rocket-Camper-Revealed/
Wise and thoughtful words for Makers. It’s the thoughtfulness that a hand-craftsman puts into his project, not the speed or even cost that makes something worth making in the first place.
“If you remain insensitive to the individual characteristics of the material you are working with and cut regardless to a predetermined, exact measurement, then the finished piece will lack a certain wholeness and be little better than something you could have bought from a factory.” – Graham Blackburn
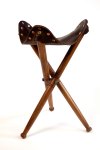
Here’s an interesting piece of “gone native” campaign furniture. There was much bad about empire building (and still is) but the bringing together of foreign cultures often created new and interesting art and craft styles.
While on the topic, if campaign furniture is of an interest, or if you want to even know what it is, head over to Lost Arts Press and check out Chris Schwartz’s new book on the topic.
Here are just a few designs from the genre known as Campaign Furniture taken from Schwartz’s webpage. Click the link below to go right to his book store.