Greetings from the great middle west of the United States, where I currently reside. The vardo is in the outbuilding awaiting some much anticipated upgrades and paint. I have projects and side-projects and unfinished work to complete in every direction I turn; not to mention the fun little things set aside to try on a rainy day. There’s a new energy happening here and I hope to share the good stuff when I can.
I have back-orders I let slide and half-finished items to put out for sale; three upcoming talks to write, an article collaboration, and more. I’ll catch up or die trying.
This post was prompted by a few photos I recently took to document some of my projects.
I fully disassembled , repaired some problems, refinished, and did a full set-up on my Banjo. Not surprisingly, it was a bigger job than I hoped for but really paid off in the end. When I built this one several years ago it was something of a rush job while working and traveling so some details were never attended to as they should have been. The action now is great and the fretting couldn’t be better in my opinion and I already see some real improvements in playability. I’ve been happily sneaking in a little practice after breakfast on most days and even a little at lunch if I’m motivated. Finally, I’m coming back to becoming an actual player reviving skills from 30 years ago. I’m a little sad that I ever let music fall out of my daily life but better late than never I suppose.
Plain and simple; a little like me. I laminated the wooden ring from shagbark hickory with walnut inside and out. The tone ring is a Vega Whyte-Laydie design.I have never inlaid anything but I think I might give it a try sometime. For now, the peg head is an unadorned Mastertone style.The fingerboard, heel cap, and peg head covering is rosewood over a maple neck. The flame in the wood is beautiful in this one.
I you want to read about the initial construction of this one, click HERE or on the image below.
I don’t really know anything about this beautiful rig but I like what I see. A converted mower in front as a tow vehicle and it’s pulling a little trailer of it’s own behind. If anyone knows any more about this one please let me know! I found it on Tumblr but was able to image search it back to this source:
I always enjoy hearing from others who have built their own caravans, especially when accompanied by photos and descriptions. If you follow this blog you probably saw Kevin’s original photos here recently with a short post about his build. If not, you can read about it HERE.
Classic vardo layout with underbed storage, box bench seats, and slide out bed.
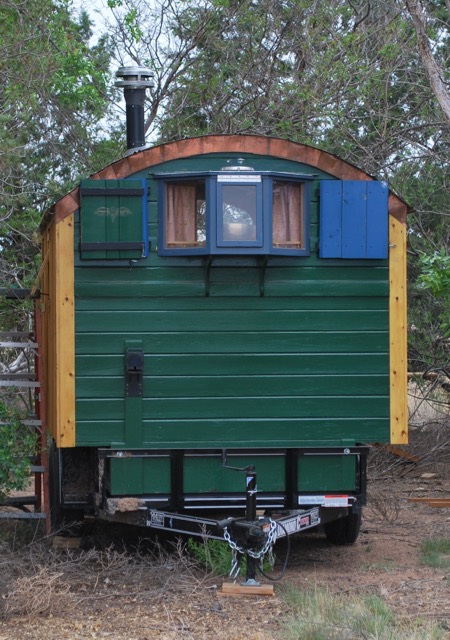
The perfect classic profile combining an arched roof and a beautiful dutch door.
The actual living space of a vardo is the great outdoors with the camper itself serving as a secure sleeping and foul weather quarters.
The promised follow-up is finally here as I have posted the images and text he sent. Honestly, this is my favorite kind of living wagon where old and new technologies are melded into a practical, yet affordable dwelling whether for long-term living or just overnight luxury travel. As shown here, there is a great use of fine woodworking and joinery combined with modern materials and hardware to create a rugged and practical living space that is road (and off-road) worthy.
Here is the rest of Kevin’s mighty fine vardo project (his original text in italics).
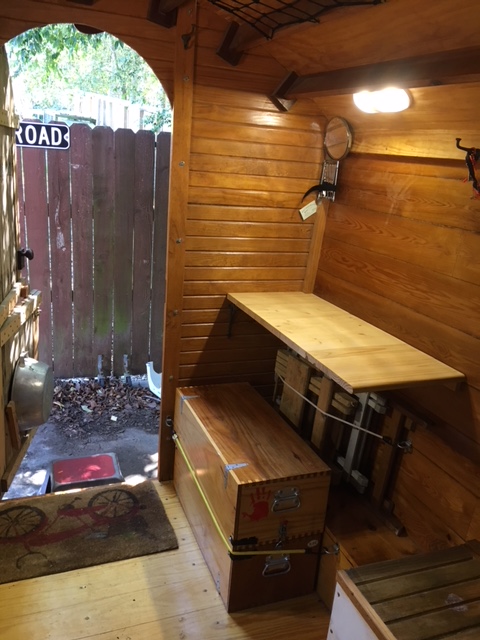
This shot offers a view of the short bench with built-in AC/Heat ducts, one for cooled/heated air (right), and one for return air (left). As well as accommodating air circulation, the bench provides handy storage. Also shown is a 110 volt outlet that provides power to the interior when the Vardo is attached to the generator or some other power supply. There are three interior outlets (the other two are hid pretty well), and three exterior outlets on the camper. There are also 12 volt power plugs inside the camper that are tied to the vardo’s battery. These are great for charging phones and running fans at night. It gets pretty hot along the Texas/Mexican border.
You can see a top view of the access doors to the under-bench storage provided in the long bench. You can also see the flip up section that turns this bench into a single bed. On the side of the door, if you look hard, you can see the hinged corbel that provides some of the support for the flip-up section. At the top of the photo you can catch a glimpse of the bungee net that provides overhead gear storage. This works very nice for carrying fishing poles and a broom.This is how the “chuck box” (cooking box) is stowed when traveling, or when not in use. The small counter top is very handy when brushing your teeth and emptying your pockets at bed time. Underneath, as can be seen, typically is stored a pickers stool, a larger folding camp table, and a folding chair.This wagon can haul a whole mess of Hunting gear. A trip to the desert requires a lot of ice and water. Everything is packed for travel, keeping the weight forward and the trailer stable on the road.A photo of our south Texas hunting camp, with the Vardo set-up. We always get a bunch of comments and compliments along the way. The wagon provides comfortable accommodations for 1-3 hunters.The chuck box gets unloaded and set up for use in camp.
This vardo looks very familiar to me and I think I’d be right at home in it. Thanks so much for sharing this with us and the community.
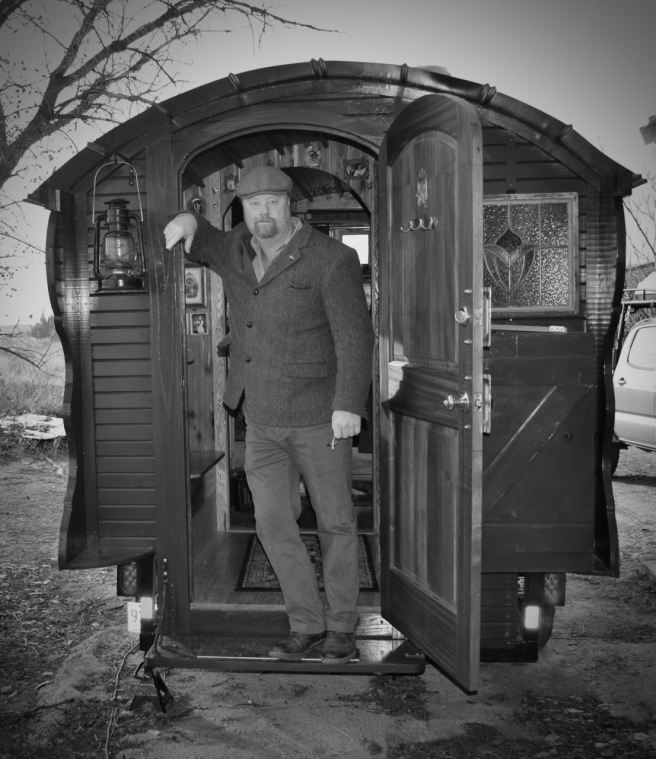
I always appreciate getting mail and comments on the blog; especially when someone is able to take information away and create something of their own. I recently received some fine photos from Kevin with his own Vardo build. I emailed back for more information but haven’t heard anything yet.
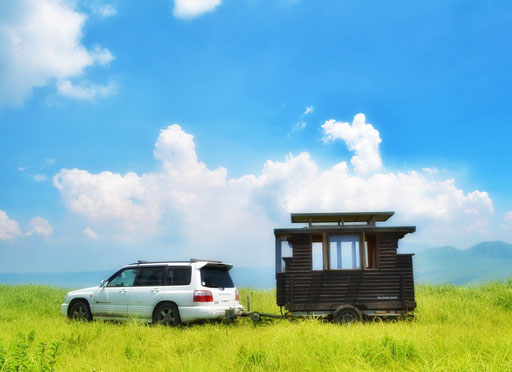
The wagon is a lovely and familiar design and it’s great to see it out in public alongside the more normal modern camp setting.Kevin also builds beautiful coolers that I hope to see more of in the near future. One is visible next to the vardo in the image above. Here’s the email I received and I hope to hear (and see) more from Kevin soon:
George:
Hello. I have been following your blog for a few years. I’m writing to you directly as I want to share some photos of the Vardo that I built, using yours (and a few others) for much of the inspiration. I wasn’t sure how to go about posting the photos to your blog, so I figured I would send them directly to you.
I live near Houston and own property in Buffalo Wyoming, home to a historical population of Basque sheepherders, and many currently rolling sheep wagons. Living in two extremes, I have had some issues with changes in humidity affecting the performance of the wagon and would likely do a few things differently, if I were to do it all over again (but wouldn’t we all).
I haven’t seen any updates on your Vardo-make-over in quite a while. Hopefully there’s more coming. I know the work on mine is never done. There are always items hanging around on the list of future improvements.
Let me know if you have any questions about the construction and performance of the wagon. I’m happy to carry on a discussion if your interested, and willing to send more photos if you request. You’ll notice in the photos some glimpses of one of my hand made coolers. They’re marine fiberglass coated wood on the inside, and out; built sort of like a cedar strip canoe. I built the chuck-box in the first photo as well. It travels in the rear of the wagon to be set out for camp cooking. I figured these were both items that might interest you.
The original link was sent to me by Chris Beneke. Thanks Chris.
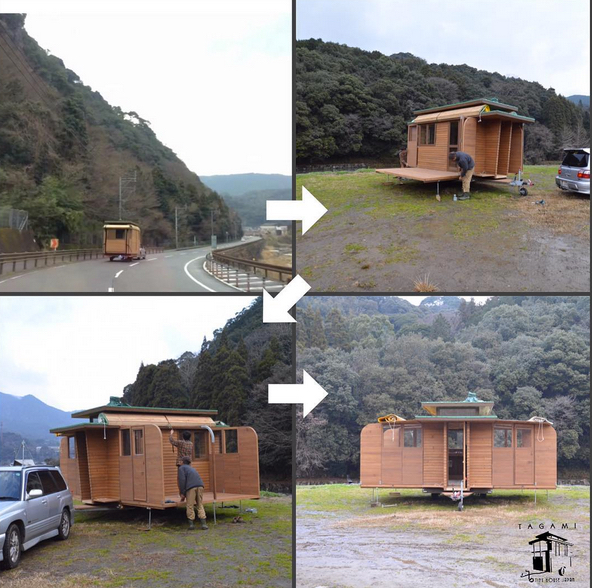
TINY HOUSE JAPAN: Some serious innovation at work.
I do not read or speak Japanese so I’m at a loss over many details but the photos and videos exhibit a world of real innovation in design and construction. The builder, Haruhiko Tagami (製作担当 田上晴彦) has a spectacular web page highlighting some of his designs that are already giving me much food for thought for future constructions.
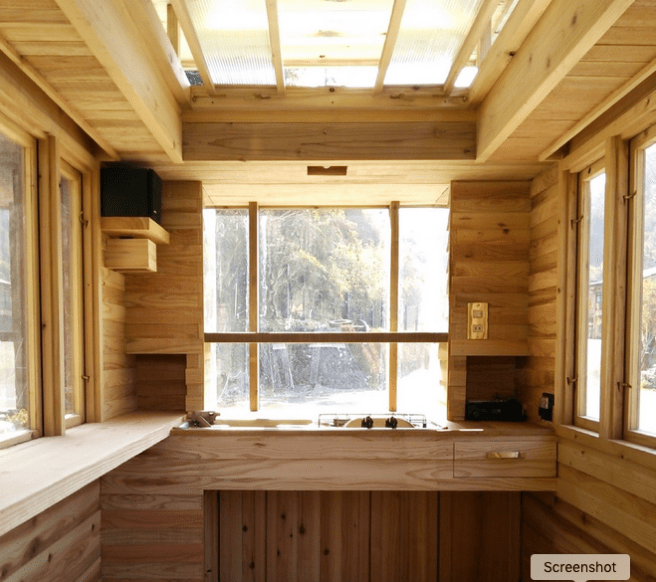
One of the first things that really caught my attention was the pop-up mollycroft which adds and enormous amount of light and circulation but folds flat for travel.
He has designs from the truly tiny (on par with my original design space-wise) to a very substantial house on wheels with pop-out rooms that are incredible works of engineering.
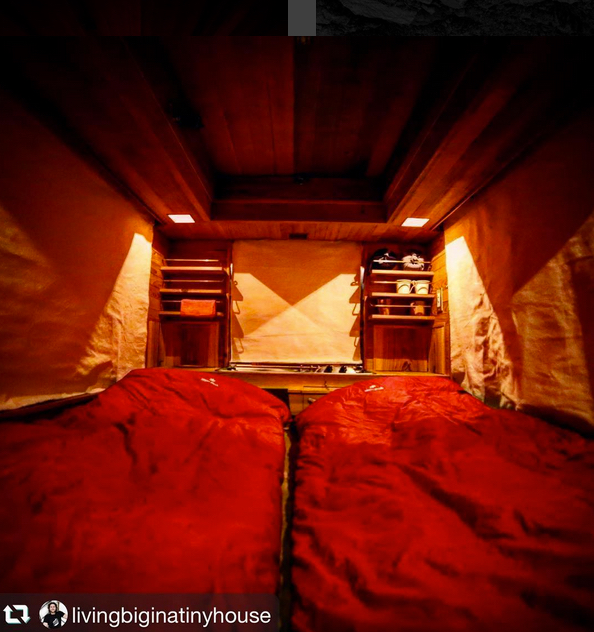
The smallest Baske-T.Roll down canvas curtains block the large windows for the night.
One of the problems with covering the extended space is having roll-up roofs along the lines of an old roll-top desk.
This allows for the modest-sized trailer to become a spacious palace; a big advantage when sharing with others.
This more than triples the available living space and in some of the photos there is even a third room extended as well. This would suit a lot of people as a truly long-term living solution that could be pulled by a relatively small vehicle; not the enormous white aluminum fifth-wheel monsters that haunt the freeways.
Enjoy this small overview of the design and please check out more of his work by clicking the LINKS.
Many more photos of his work are available on his Instagram Page as well. There is much to explore for the budding builder so be prepared to take notes!
“The first rule of Project Mayhem is that you do not ask questions…”
this may be my new teaching mantra
I am considering calling my custom footwear “Mayhem Shoes” (at least until Chuck Palahniuk’s space monkey lawyers make me stop).
I teach a couple classes about low-tech shoemaking a few times per year in the primitive survival skills community. The designs I focus on are styles that can be made by one person in one day; a popular theme in early historic examples. Some require a lot of cutting, some require sewing. There is an off-grid, neo-Luddite attitude about making your own shoes. In fact, I think I will register the name Dystopian Leather Works as my new business. I’m considering a small business venture to go into custom production of the shoes I teach people to make as well as expanding the custom leather work I currently produce.
The author at work.A dedicated student finishes in a day.
The kinds of people that take these classes are from all walks of life, not just survivalists, historical nerds, or experimental archaeologists, but folks who want to make things for themselves for whatever reason. I’m finding that there are others who might just want the handmade product without the labor of making them. In a day, an attentive student can produce a wearable (and good-looking) pair of serviceable shoes like the carbatina (ghillies) above.
An experienced craftsman creating some new sandals in the class.Another finished pair.
For those looking for a more modern look a fine pair of sandals can be made with just a few hours, cutting and sewing. These are easily re-solable and should last the better part of a lifetime. Look familiar? Chaco and Teva didn’t exactly re-invent the wheel; just updated the materials and outsourced the work overseas. Even in the wilds of Canada, traditional ghillies can be a useful part of the wardrobe. Mike made these two years ago and they still protect his sturdy peasant feet.
As long as you can stick with it while safely using a knife, the class is a cinch.
There is something very satisfying about taking a piece of nondescript, vegetable tanned leather and creating a lasting and useful object with your own hands.
Attention to detail makes a fine finished product.
The beauty is truly in the details. Serious students often bevel and burnish edges to give their shoes a “finished” look, suitable for public wear.
A pair of saintly sandals nearing completion.
Above, a student trial fits the uppers before attaching the outsole. In my classes, the outermost sole on any of these shoes may be a durable Vibram material, a softer but grippy Soleflex, or natural leather. The latter option is popular with those who are interested in treading lightly on the earth or those who are concerned with earthing or grounding.
Learning as community. It is always a very social event to teach these courses. No matter the variety of backgrounds, we are sharing an ancient craft in common.
As in all leatherwork, neatness counts. A good hand with a knife is a great asset for shoemaking.
Test fitting the straps for buckle placement and strap length.
This style sandal may be tied or buckled but I have found that a 3/4″ center bar buckle is about the easiest to work with and adjust.
Bowing to modern convenience. For the classes, we use contact cement to adhere the insole, mid-sole, and outsole. This insures a good connection and will hold up even if the stitching doesn’t last forever.
The author demonstrates the wrong way to rough out a pattern. Cutting out oversize pieces for the sake of time-savings.
Tough rubber soles will make these sandals last years and are easily replaced.
Trial fitting a ghillie after soaking in water. They feel ridiculously thick and stiff for the first hour or two but tend to suddenly relax an become a part of the foot after a soak in neatsfoot oil.
Ready for taking part in the highland games or dancing at a cèilidh
Sometimes it helps in shaping to take a hammer to the leather when it is stiff and wet.
It is important to leave the channels free of glue so that the straps may be adjusted in future. You never know when you might need to wear some black socks with those sandals.
Helping a student skive out some particularly stiff areas.
Mom tries on her new shoes before going home to make some for the whole family. Even an old shoemaker is interested in this ancient design.
Happy and diligent students show off their newest creations. These could be directly from the shoe store. But without the satisfaction of knowing you did it yourself.
Above are few photos from previous classes. Thanks to all who come and make!
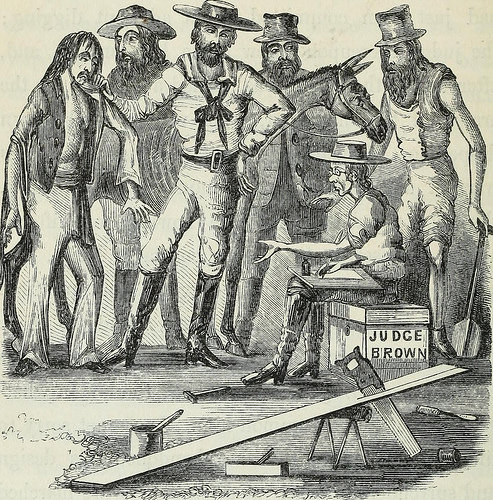
From “Mountains and molehills; or, Recollections of a burnt journal” 1855, page 355.
Looking through old books online I’m constantly reminded of how easy we have it in the 21st Century. I still remember seeing my grandfather and great-grandfather ripping the occasional board by hand. Neither had a table saw and it was often too much trouble for a single cut to replace the blade in the circular saw. I feel like I have rip-sawed miles of lumber in my life and many projects I have undertaken wouldn’t have occurred without the table saw. As I have cut down on the large power tools I own I have a difficult time dismissing even the small table saw.
Roubo framesaw ripping thin planks from a log.
So, I’ve been putting off resawing a wide mahogany plank intended for an instrument back and, because of the width, it will need to be done by hand. I have put it off for over a week now as I realize there is some dread about diving in. It’s a skill that needs practice like any other and isn’t going to kill me. Time to take a deep breath, clamp it down, and start cutting.
A beautiful, dark, wintery day spent in the Vardo, getting things in shape and spending some quality time reading led me to thinking about shooting a few photos. The place is a bit unkempt but I think it shows how the space is used in real life.
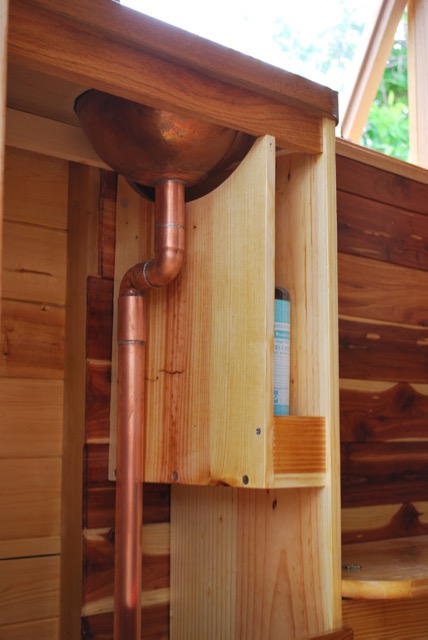
The hearth corner with miscellaneous junk piled on the surfaces. This is the view from where my head lies on the bed.A lot of wood types were used throughout the build as some was recycled and some was purchased based on availability. We are out beyond the end of the realm so supplies are limited. The small photo over the door is my grandparents who played a major role in my upbringing.The samovar corner with sink in place. The wood for this built-in comes mostly from an old (pre-war) desk that had seen better days. They used excellent materials that I really didn’t want to discard so I’ve been hanging onto them for several years now. The mirror is more useful that I would have ever thought and fits the space perfectly. The Samovar is strapped in by a belt connected to the wall and Stacey provided a cute octopus hook for wash cloths and other things. I’m just finishing the windows so they have yet to be varnished.Copper sink made from a french mixing bowl (thanks to Mick for the idea).A view aft from seated on the bed. I won’t lie, cutting all the cedar was not pleasant to conform to the arc but it ultimately turned out fairly successful. Apparently, I was trained well back in my life as a carpenter.My view of the stained glass window from bed with a small candle lantern next to it.Cluttered corner. Things are slowly finding their homes.The dog, trying to figure out what I’m up to but staying close to the heater. She climbs underneath the master bed when it’s time to sleep for the night.
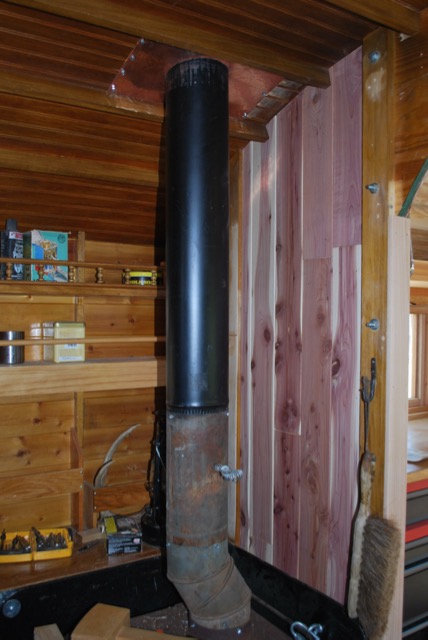
I have not been entirely idle on the vardo project but have not had time to post here. Work life has been eating up my spare time with travel, and fun though that may be, it means nothing else gets done outside the work day. Cutting a hole in my nice, dry roof haunted me for several months but with the aid of a high-temperature silicone stove-pipe flange, I was ready to dive in. I didn’t want to remove the roofing panels so the cutting was difficult. I did what I could with the circular saw and gnawed the rest out by hand with a chisel. Not pretty, but it worked in the end. Then it was just a matter or cutting a hole through the steel and cleaning it up with a file.
The ugly hole. Fortunately it will be hidden.
I created a cover for the hole from an old, solid copper serving platter (see photo below) that looks nice, and will cover the ugly. The gap between the layers was filled with stove gasket insulation.
Matching up old, very old, and new pieces to make the connection. The offset was used so that the pipe lands between the purlins.
The upper pipe will get a coat of high heat paint while the lower portion will get stove polish along with the stove itself. In the background, the new juniper paneling is visible. Otherwise, the place looks like a wreck. The mallet is handy to solve all measurement problems.
The silicone flashing isn’t as ugly as I feared but still hope to pretty it up with copper sometime.
Learning from experience, I created this new chimney setup so that the outside pipe could be easily removed, if necessary, for off-road travel. I will probably shorten the pipe by a few inches as it sticks up fairly high. Once this was completed, I could get back to the good stuff.
Sink area with a new-purpose-built soap holder.
In order to maximize storage space a small shelf was created to hold soap. The size was determined by a standard Bronner’s soap bottle and it holds two comfortably.
A little carpenter’s geometry.
Some scraps from the wood pile were recovered and planed down to rejuvenate them for use. Nothing fancy here, just utility.
The large under storage area is designed to hold the beautiful copper cistern from the tinker Robins.
Everything in the area has another coat of varnish so as soon as create a method of securing the Samovar, the washing-up area will be complete.
First coats of varnish on the oak.
Finally, I have begun varnishing the floor. The new oak contrasts with the old but will darken soon enough.

 Greetings from the great middle west of the United States, where I currently reside. The vardo is in the outbuilding awaiting some much anticipated upgrades and paint. I have projects and side-projects and unfinished work to complete in every direction I turn; not to mention the fun little things set aside to try on a rainy day. There’s a new energy happening here and I hope to share the good stuff when I can.