Explanations were so much simpler once upon a time.

Adventures of an Imperfect Man In Search of a Handmade Life

Explanations were so much simpler once upon a time.
Interesting to learn more of the sacred geometry all the time. Compass and rule work was my favorite bits in high school geometry class. I can’t wait to add this to my layout repertoire!
A true ellipsis is, in my opinion, is one of the most beautiful shapes in the universe. Unlike an oval that is drawn with two mirrored radii (or three in the case of a true “egg” shape), the radii of the ellipsis continually change. It’s incredibly strong shape in structural terms and it’s one of the best shapes for table tops. There are many ways to draw an ellipsis. But here’s an old method that you don’t often see referred to these days. It’s simple and can be extraordinarily precise. This method can also be very helpful if you’re creating domed framing for any type of construction.
First, establish a horizontal base line then raise a vertical line.
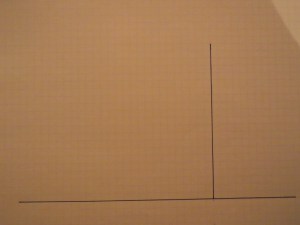
Swing a semi-circle with a diameter based on the minor axis of the ellipsis.

Next, open the compass to the length of the major axis and strike a point to the base…
View original post 206 more words
To aid in downsizing our worldly possessions (and tons of raw materials), I initiated the buckskin bag project. The goal is to produce as many little beauties as possible while experimenting and learning new techniques.
This is the first run of bags, which still require embellishments, closures, and neck straps. More to come…


A short film about a great craftsman. I like this one because the project documented here is so unusual. The almost forgotten art of the tinsmith.
And a longer one that is really worth watching. It’s a treat to see someone who knows his business so well. A dying breed of traditional artisan.
“This is a video of County Mayo native Ted Maughan demonstrating his immense skills as a Tinsmith. Ted is a member of the travelling community and has kept this great craft alive for many years. His work is a credit to him and this is only a small example of the quality work that Ted is able to carry out.”
We just don’t value the artisan or craftsman the way we one did. The Industrial Revolutions have wrecked havoc in our culture.
Instead of this:
 We opt for outsourcing, mechanizing, and abstracting our purchase. These days, for now, are lost in the Industrial world.

I am considering calling my custom footwear “Mayhem Shoes” (at least until Chuck Palahniuk’s space monkey lawyers make me stop).
I teach a couple classes about low-tech shoemaking a few times per year in the primitive survival skills community. The designs I focus on are styles that can be made by one person in one day; a popular theme in early historic examples. Some require a lot of cutting, some require sewing. There is an off-grid, dystopian attitude about making your own shoes. In fact, I think I will register the name Distopian Leather Works as my new business. I’m considering a small business venture to go into custom production of the shoes I teach people to make as well as expanding the custom leather work I currently produce.
 The kinds of people that take these classes are from all walks of life, not just survivalists, historical nerds, or experimental archaeologists, but folks who want to make things for themselves for whatever reason. I’m finding that there are others who might just want the handmade product without the labor of making them.
  In a day, an attentive student can produce a wearable (and good looking) pair of serviceable shoes like the carbatana (ghillies) above.
 For those looking for a more modern look a fine pair of sandals can be made with just a few hours, cutting and sewing. These are easily re-solable and should last the better part of a lifetime. Look familiar? Chaco and Teva didn’t exactly re-invent the wheel; just updated the materials and outsourced the work overseas.
  Even in the wilds of Canada, tradtional ghillies can be a useful part of the wardrobe. Mike made these two years ago and they still protect his sturdy peasant feet.
 There is something very satisfying about taking a piece of nondescript, vegetable tanned leather and creating a lasting and useful object with your own hands.
 The beauty is truly in the details. Serious students often bevel and burnish edges to give their shoes a “finished” look, suitable for public wear.

Above, a student trial fits the uppers before attaching the outsole. In my classes, the outermost sole on any of these shoes may be a durable Vibram material, a softer but grippy Soleflex, or natural leather. The latter option is popular with those who are interested in treading lightly on the earth or those who are concerned with earthing or grounding.
 Learning as community. It is always a very social event to teach these courses. No matter the variety of backgrounds, we are sharing an ancient craft in common.

As in all leatherwork, neatness counts. A good hand with a knife is a great asset for shoemaking.
 Test fitting the straps for buckle placement and strap length.
 This style sandal may be tied or buckled but I have found that a 3/4″ center bar buckle is about the easiest to work with and adjust.
 Bowing to modern convenience. For the classes, we use contact cement to adhere the insole, mid-sole, and outsole. This insures a good connection and will hold up even if the stitching doesn’t last forever.
 The author demonstrates the wrong way to rough out a pattern. Cutting out oversize pieces for the sake of time-savings.
 Tough rubber soles will make these sandals last years and are easily replaced.
 Trial fitting a ghillie after soaking in water. They feel ridiculously thick and stiff for the first hour or two but tend to suddenly relax an become a part of the foot after a soak in the neatsfoot oil.
 Ready for staling the game or dancing at a cèilidh
 Sometimes it helps to take a hammer to the leather when it is stiff and wet.
 It is important to leave the channels free of glue so that the straps may be adjusted in future. You never know when you might need to wear some black socks with those sandals.

 Helping a student skive out some particularly stiff areas.
 Mom tries on her new shoes before going home to make some for the whole family.
  Even an old shoemaker is interested in this ancient design.

 Happy and diligent students show off their newest creations.


Above are few photos from previous classes. Thanks to all who come and make!
I know nothing about this but like it a lot.

Here are a few images to clarify some questions about the wooden topper. It is not a work of art. It was to be used for a single field project last summer but now I really like it so it will be a permanent part of the rolling home.
 Here’s the overview sans roof rack. It has received about five more coats of spar varnish after a good sanding. It is built from recycled lumber so there is some small shrinkage checking and a little discoloration from some mold or fungus but it hardly visible.
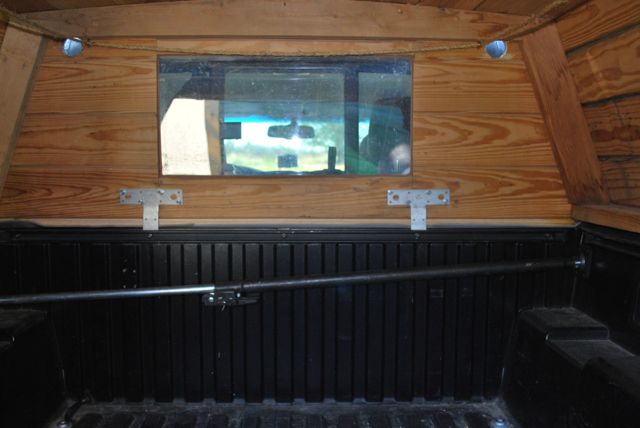 Tacomas really suck for attaching racks and toppers for a couple reasons. The top rails of the bed are plastic over some fairly unsubstantial metal and there are no stake holes. There is however, the nifty rail system inside the bed that is secure. To attach this topper, I used some construction straps from the Big Box Store which are screwed in behind the rails. This is the forward view, blemishes and all. The rope is for hanging up wet stuff like towels, swimsuits, etc.
 Here is another strap at the aft end utilizing one of the bed bolts in a reenforced spot.
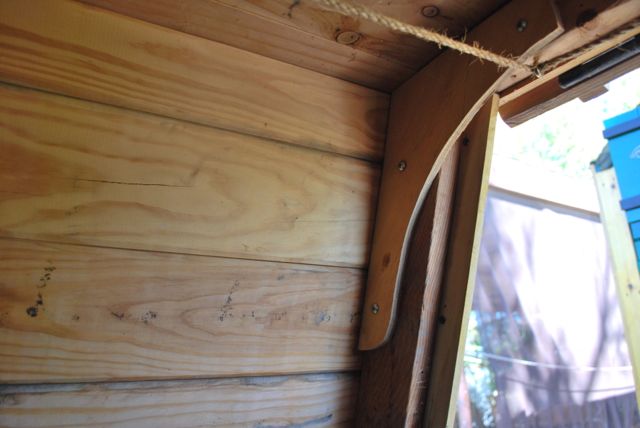 And finally, here is an image of one of the knee braces that are screwed and glued to the frame to strengthen the door area. I hope this helps if someone else wants to construct something like this.
Because there’s always room for improvement. In my case, a lot of improvement. 
Rehung siding, new paint, fresh varnish, little fixes, and lots of cleaning. We’re hooked up to get out of town for a bit.
 Dietz lanterns, Kelly kettle, fuel, and lamp oil packed away in the pan box. The steel disk serves as a heat shield to minimize ground scarring under the fire.
 A view from the bed. Still more to pack up but things are looking good and nearly ready to go.
 The new windows are great and really perk the place up. Bright and airy makes for a pleasant space.
 Still, the little Snail is far from perfect; made on a shoestring budget during snatches of time between work and bad weather. Although I don’t live in it full-time currently I have come to see this as my home.
These are beauties.
Tuxpan in Southern Jalisco is a small town well known for its Tacos “Tuxpenos” and less known for its unique Mid-Cut Huarache style.
That being nowadays said their is so little demand for the Tuxpan Huarache “Tejido con Talonera Alta” that it can only be made on to order by the only remaining Huarachero in Tuxpan, Armando Ortiz, whose other styles can also be seen in The Huarache Directory HERE


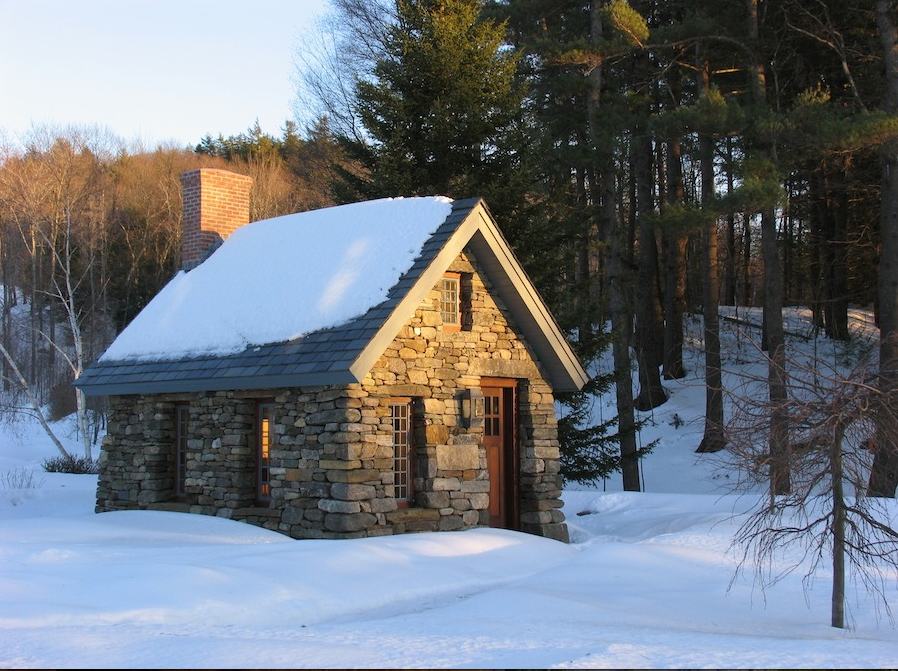
A beautiful stone cabin essentially based on Henry David Thoreau’s retreat. As seen on Tiny House Swoon. Check out more of this great blog HERE.