Fire Kits on the Production Bench

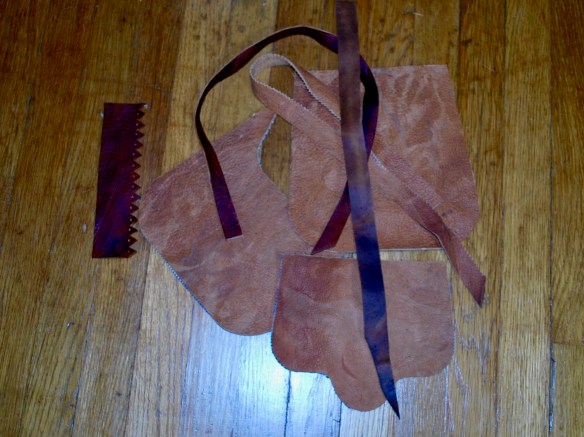
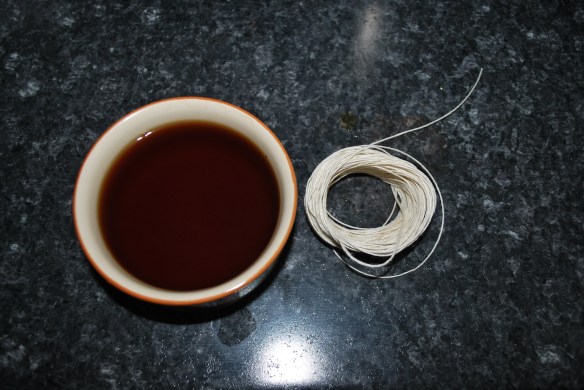
The shop has been a little slow with outside projects and day work taking over my hours. However, I do get a few things done along the way and some projects are coming to a completion. I have a load of FLINT & STEEL fire kits on the way for late winter purchase and have put the first up in the shop today (https://www.etsy.com/shop/LostWorldCrafts). There are a surprising number of steps to getting even a simple composite toolkit like these together from the metalwork, leather cutting, dying, sewing, adding the findings and closures, and finally photographing to get them posted in the shop.

Fire Steels from Eric Bartch of Colonial Iron.

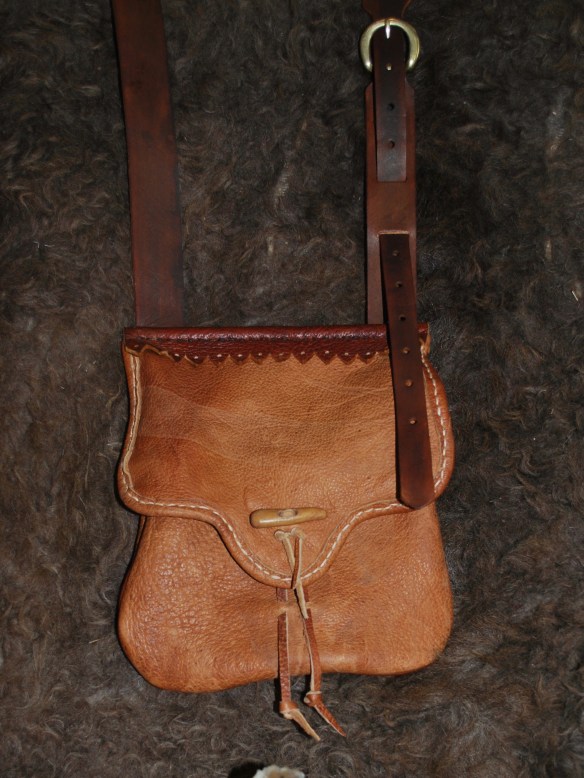
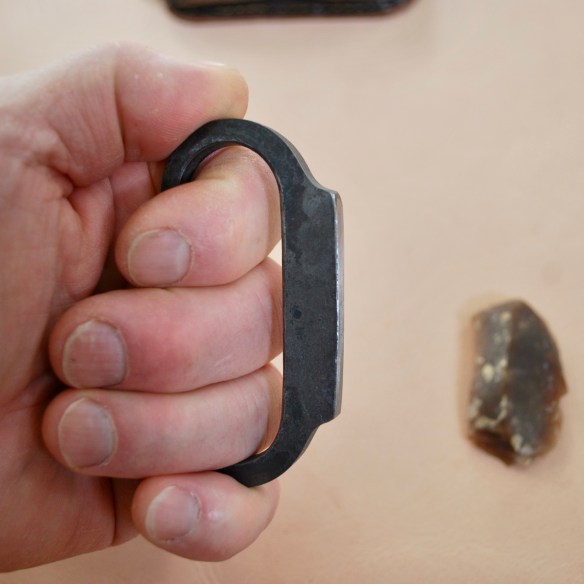
I had already designed the pouch style early in the summer and a few sold quickly so my next step was to get some high quality fire steels from within my Maker Family. I put in the order with my old friend Eric and he produced these extremely beautiful strikers for the project.

Simple pouch design that I feel is perfect for my fire kit.

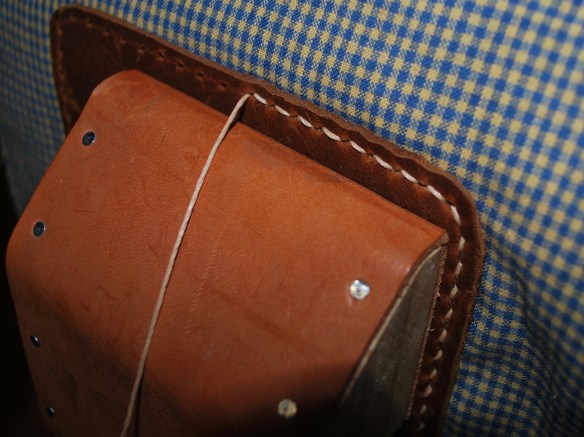
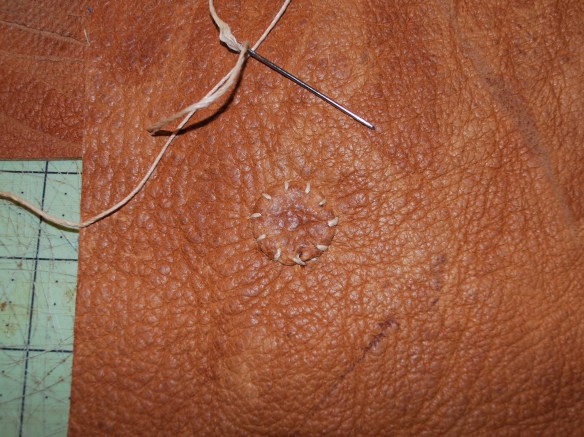
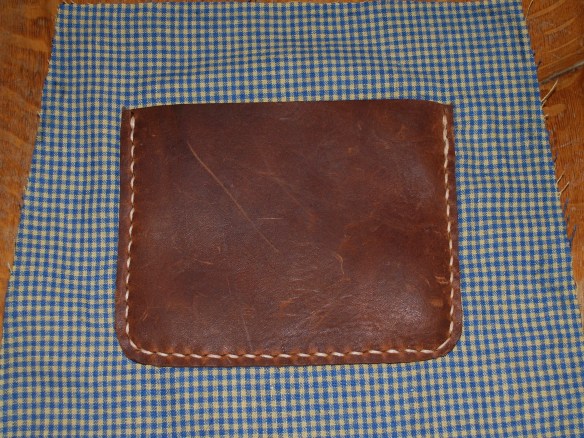
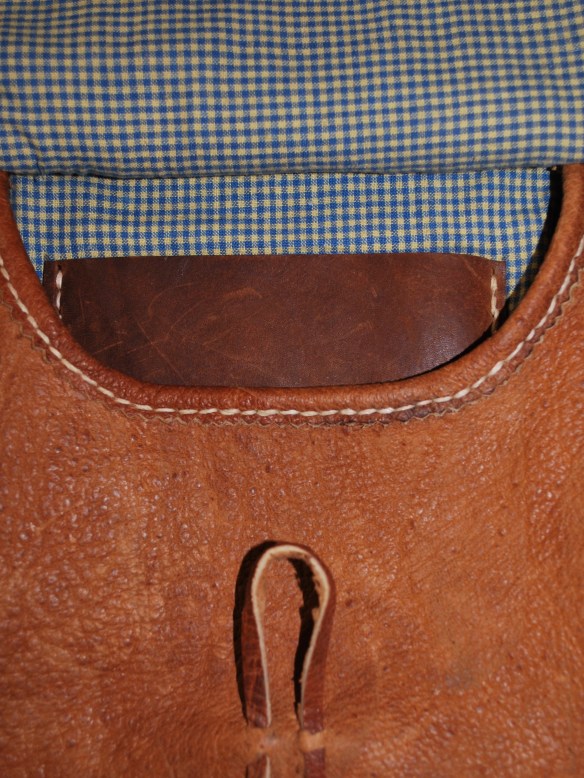
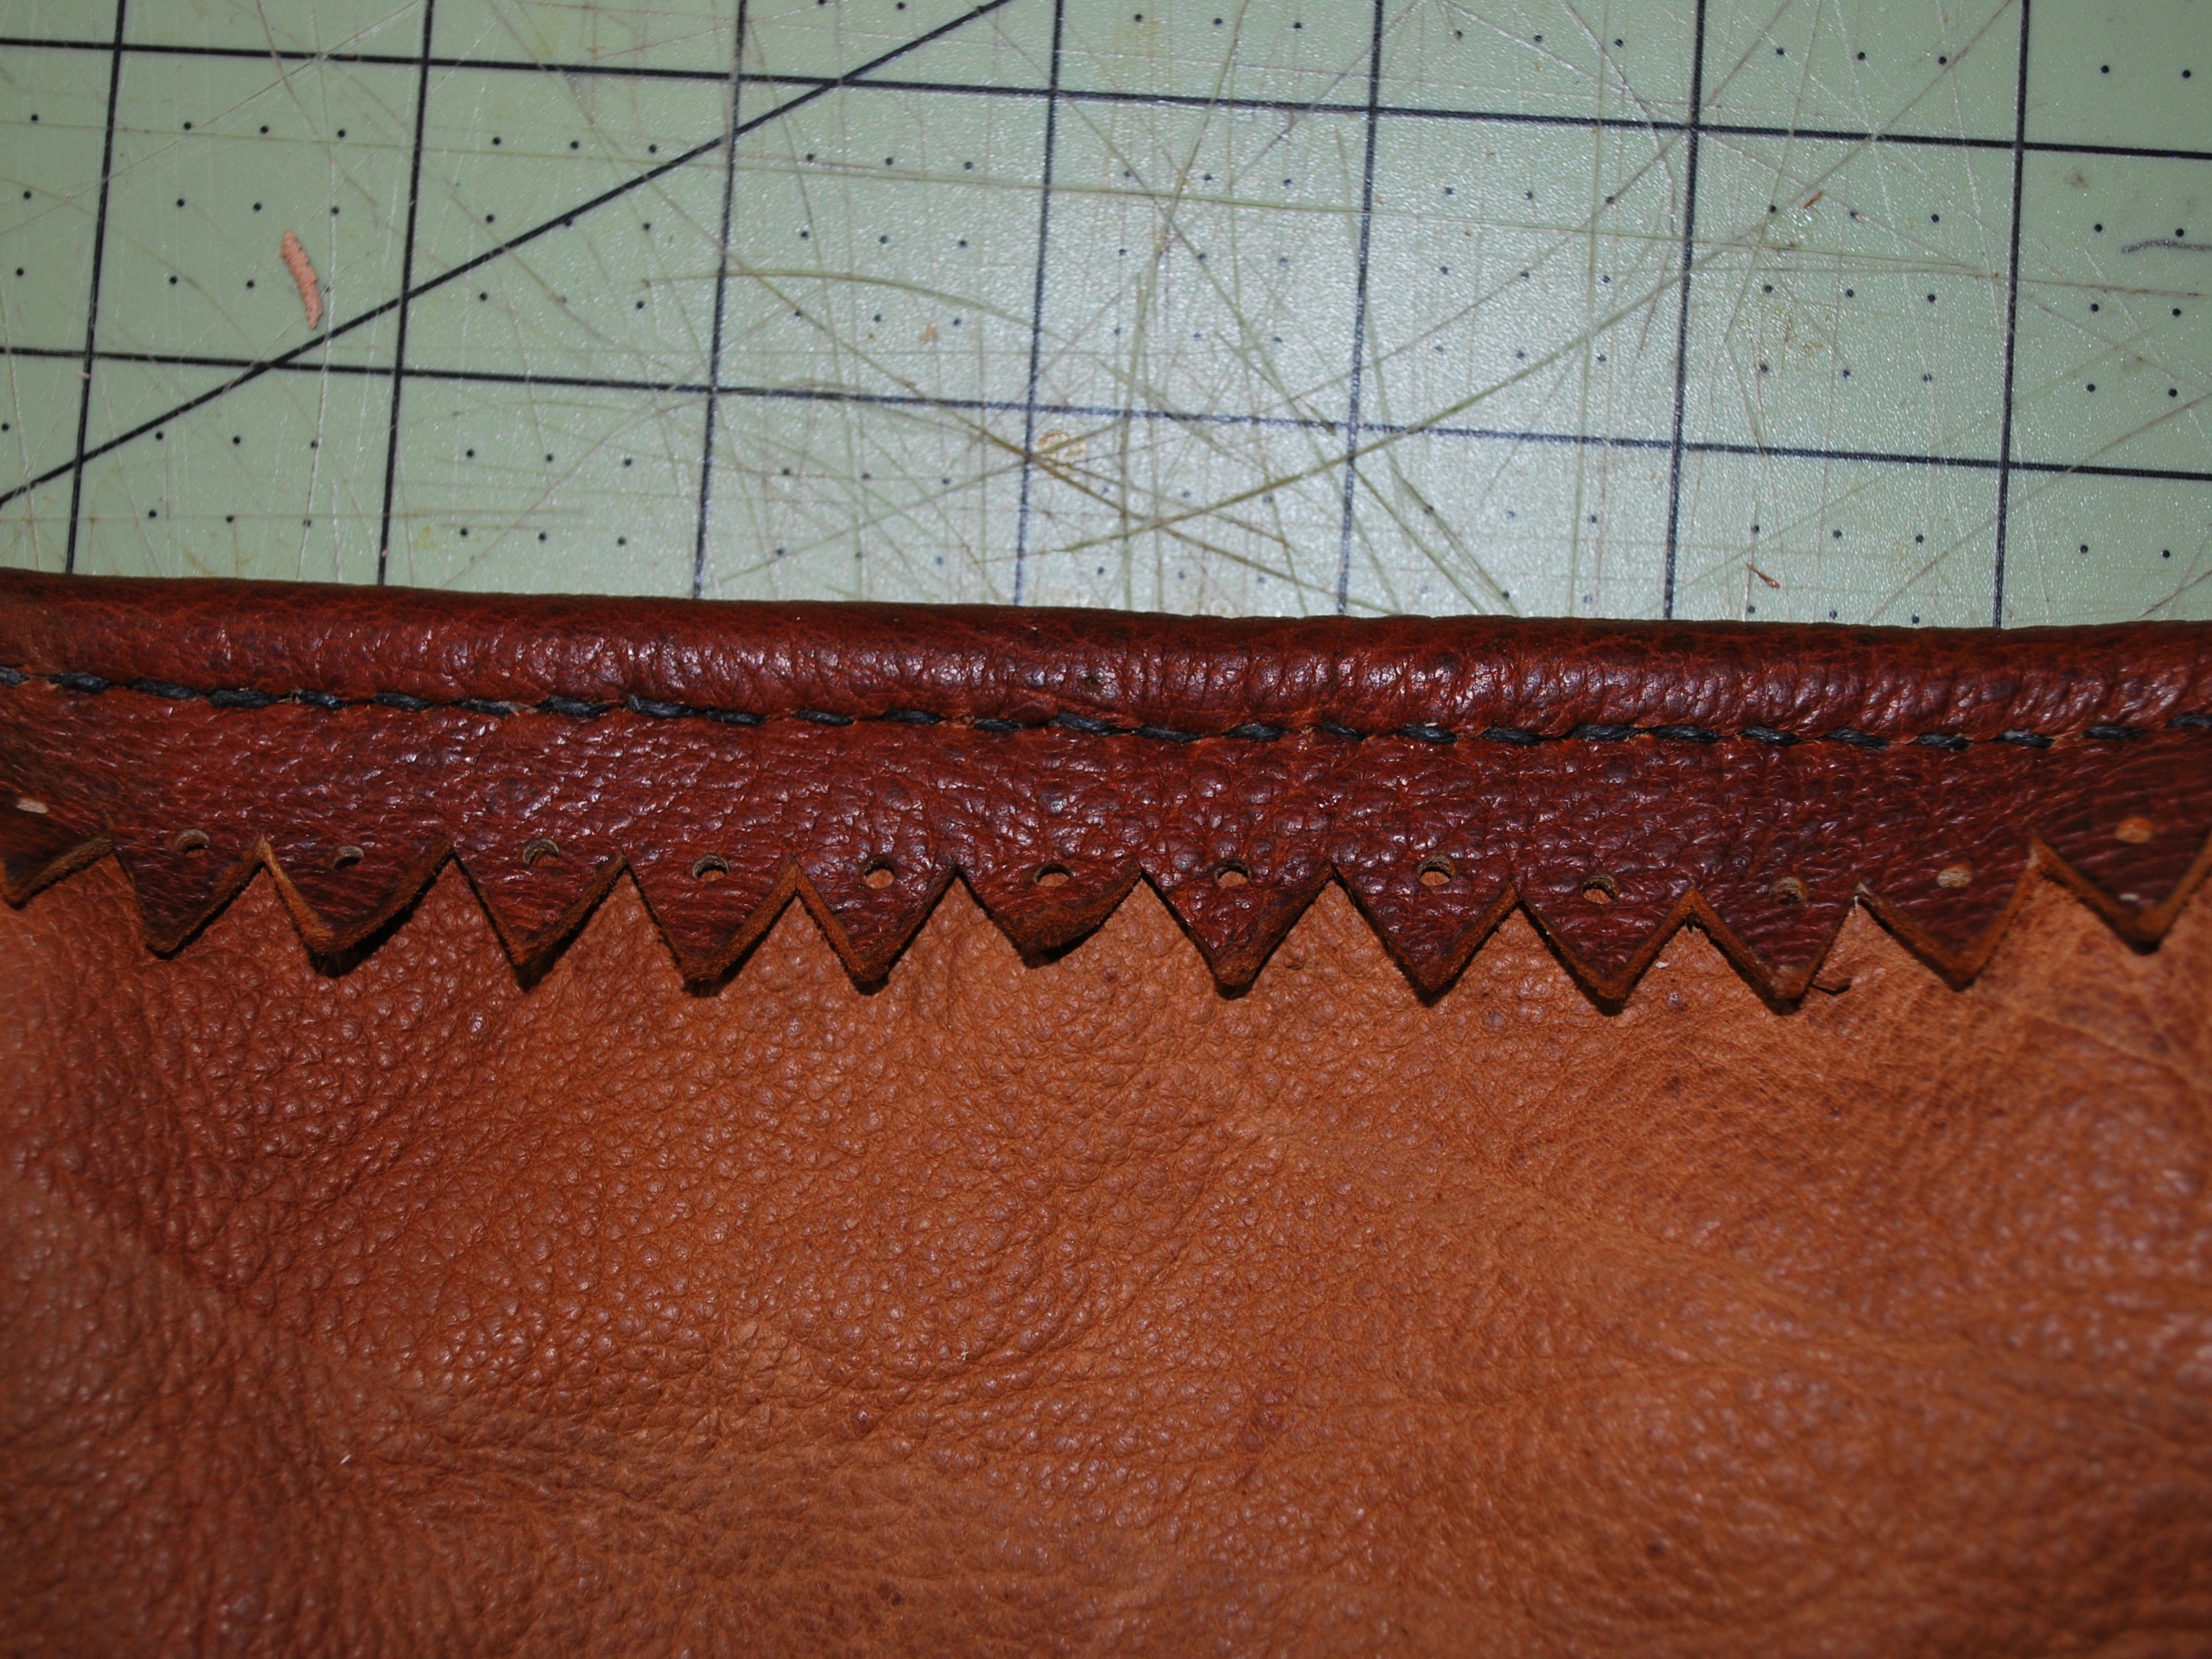
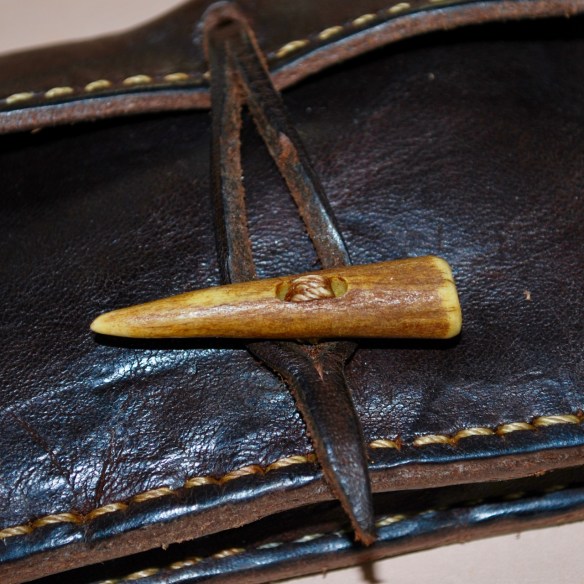
I decided to sew up this round without measuring or marking the stitch line to give them a rustic look. I have mixed feelings about this so I may go back to the more uniform looking stitch marker for the upcoming bags. Each bag will be a little different, with variations on the closures and any added features as whimsy strikes me along the way.

Recycled tinderboxes are an affordable and sturdy option.

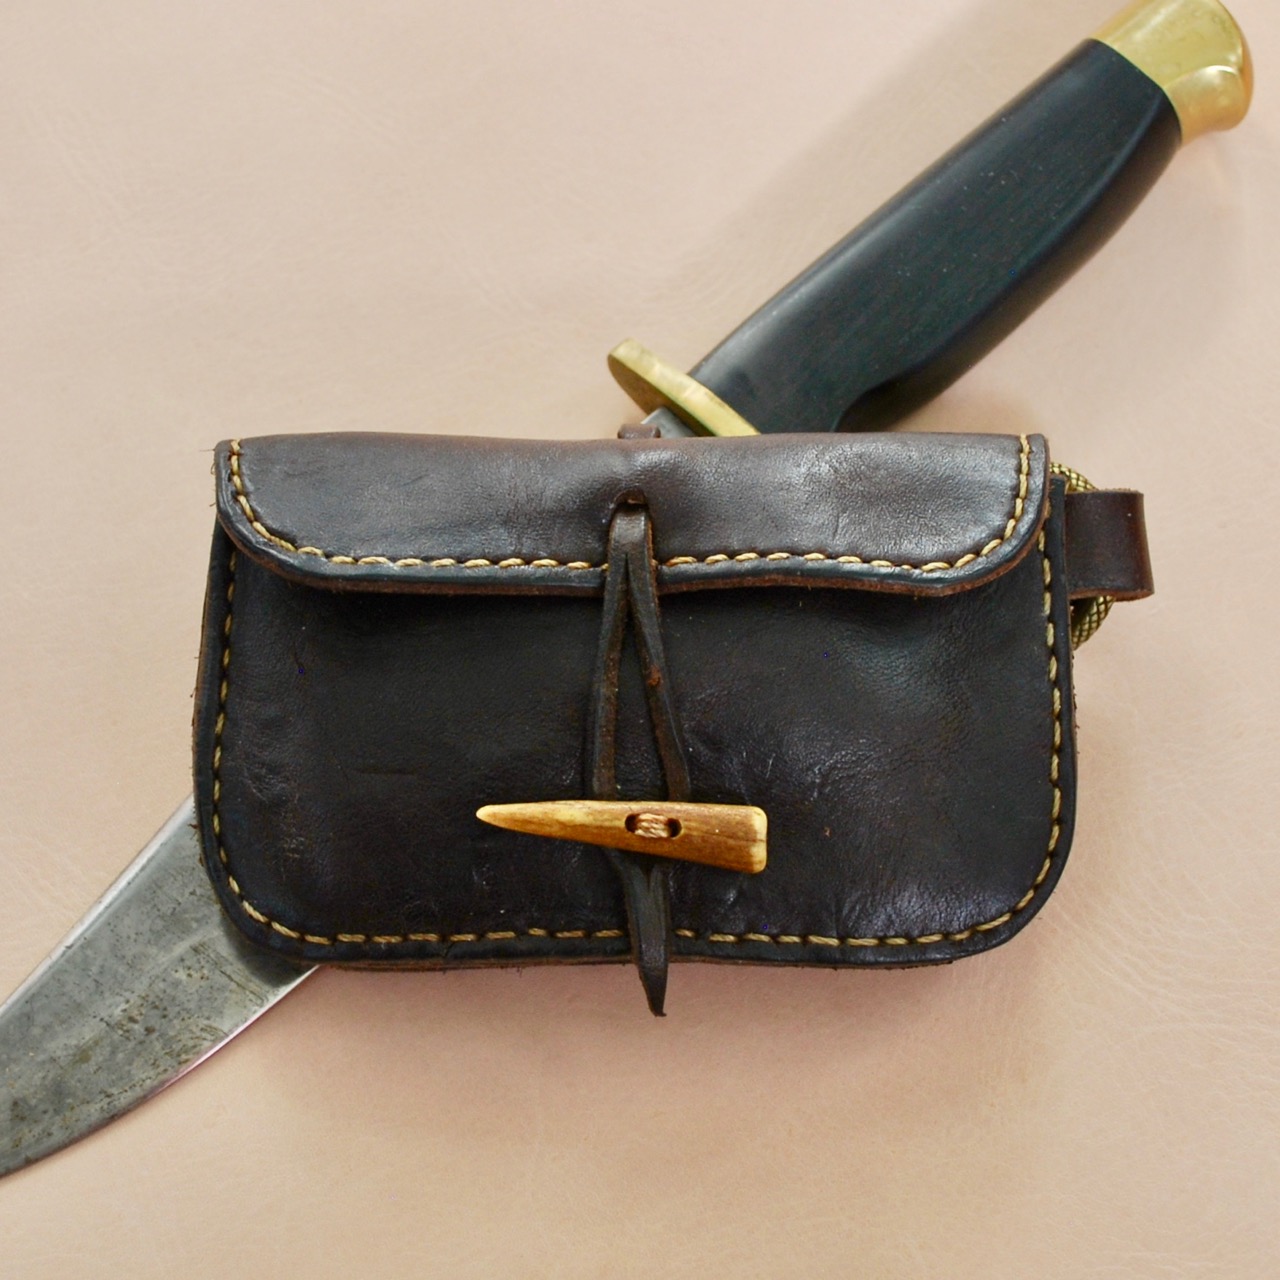
If you aren’t familiar with flint & steel fire-making the tinderbox serves a two-fold purpose; to provide a chamber to make charred tinder and to hold and protect the tinder from moisture over time.

The striker doesn’t have to be this beautiful to be functional but to have both form and function makes for a loved tool.

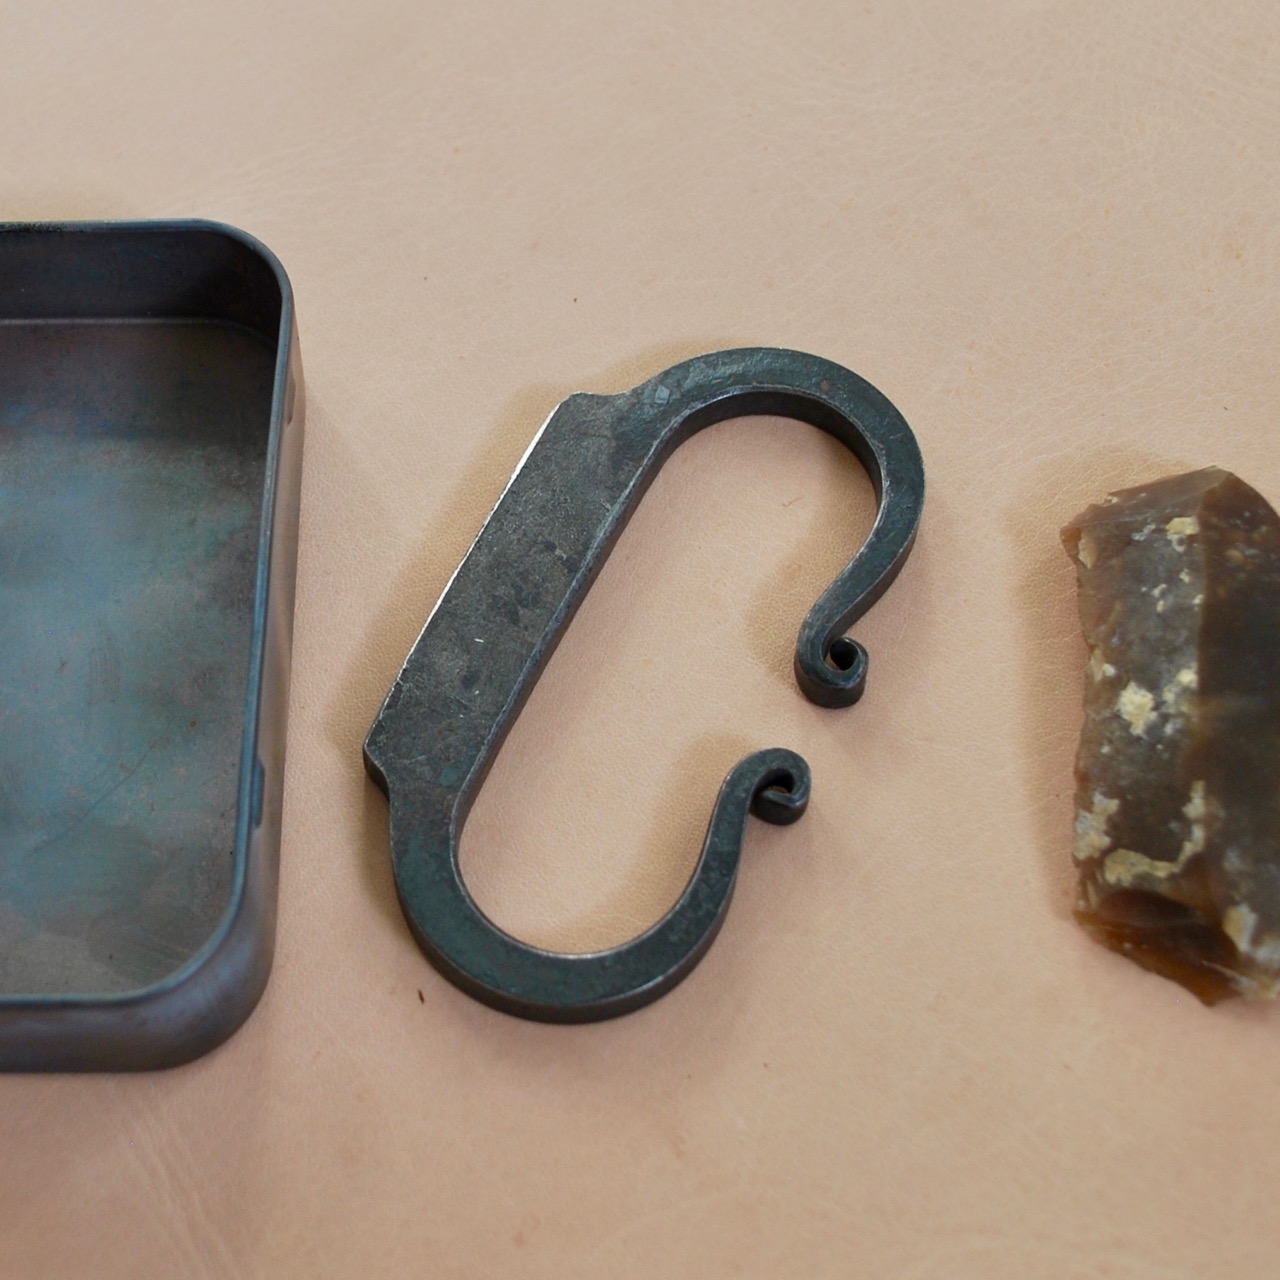
To up the ante, so to speak, on this kit I included a flint from Knife River North Dakota. Some real primo stuff. Needless to say, the high carbon steel strikes very well and produces great sparks. A kit like this will become an heirloom and will only improve with age.

Form and function.

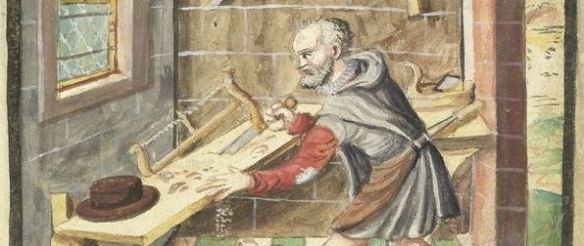
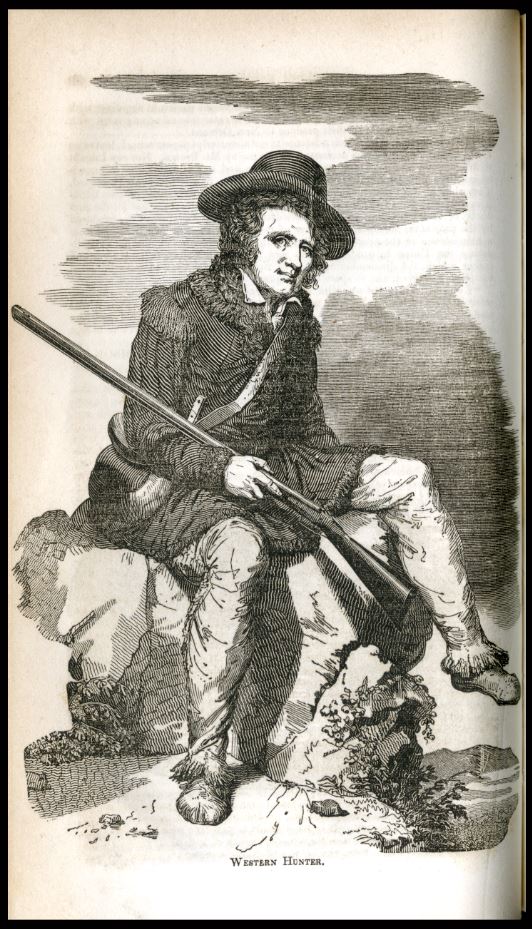
As always, my designs are informed by 18th Century style and are designed for hard use in the wild. If you are interested, wander over to the shop or follow the blog to find out when the next round will be in the market.

All the best to you and thanks for stopping by!

Ghillie Shoe Class

Here are some throwback photos from Ghillie shoe making classes from 2009 and 2011.  The first pair is from a small class at the Bois d’Arc Rendezvous in southwest Missouri (note the lush green of late summer).  Maybe not as sexy as the arrow-making class but it is a very real and useful skill.  I have been honing the teaching method since I was taught how to fit and make these back in 1986.

DSC_0145 (7)

One of the appeals this design has for many people is that they require very little sewing.  If you don’t work with leather regularly, stitching can be intimidating.  Some careful cutting and you can make some stylish shoes in a short time.

DSC_0144 (11)

An hour of work and you’re ready to walk the world. More importantly, with the knowledge in your head you can always make more and keep right on walking.

Winter Count, Maricopa, Arizona 2011.

Save

Moccasin upgrade time again

DSC_0003

These ratty old moccasins have spent a lot of time in the woods.  These have been my winter moccasins for over two decades.  I can’t remember exactly when I made them but it was a quick and dirty sewing job.  They have been re-soled at least twice and need it again.  The uppers are an oil-tanned leather I bought from a saddle and boot maker supply house I found while driving through north Texas.  As can be seen, the tops can be worn up or down.  They aren’t beauties but they are definitely ME.

Handmade Sandals

Sandals in progress…

If you have ever taken a class with me you might know that all the intimidating sewing isn’t as bad as it looks.  The sole is three layers thick but the use of a good, sharp awl makes the double needle sewing go quickly.  A lot more work goes into these than I would have initially thought but I really think they come out great in the end.  It took several pairs to get the pattern just right but research into design and construction led me to this final design.  The sole is three layers thick (or more historically) and have been made this way in Europe and North Africa for more than 2,000 years.

The thickness of additional layers isn’t just to provide safety for the feet but the central layer provides a path for the straps to travel through without lumping under the feet.  The parts consist of an insole (medium weight oak tan leather), mid-sole to allow tunneling the straps through, and an outer sole, in this case, leather.  The straps are 48″ per foot plus the heel yoke.

This is how they looked when I thought I was finished. Shortly after, I added buckles and have since been through a few more soles. Currently they are shod with rubber.

Nine years on and still going strong. The patina that good leather takes on cannot be simulated. They get a coat of dubbin every six months or so but otherwise, need little care. I hope to get back to a time when I can wear them daily again.

Jacob’s Beautiful Leather Backpack

One of the better things about modern communication is the ability to meet and talk to people from nearly all parts of the globe. I have been in communication with Jacob from Botswana for years now and he has shared some photos of the beautiful backpack he made based on my earlier design. That one now resides in Montana and I hope serves some function for its owner. My personal pack has since been replaced by this one and is my new favorite piece of gear. But enough about me.

Right now, according to Google Maps, I am about 13,670 km (8,494 mi) from central Botswana and am unlikely to ever make it there, though not for lack of wanting to.  However, the internet allowed us to connect across a vast distance in space and share ideas with strangers who have common interests.

Anyway, here is Jacob’s very own leather rucksack and the two portmanteaus inspired by this post to carry his gear into the bush of southern Africa. I suspect a backpack like this will outlive us all and become a fine heirloom to pass on to the next generation.     Thank you so much for sharing these Jacob. I hope it serves you well for many years.

Coat of arms of Botswana

Everyone Should Cultivate Manual Training

Does this mean we should neglect our intellect? Absolutely not.

In fact, the opposite. We should strive to cultivate both mind and body to become the most perfect specimen we can become, daily.

I came across this passage while reading a bit this morning from Amateur Joinery in the Home (1916) by George and Berthold Audsley and thought it would be worthwhile to share.

There is a lot of good advice here but the above sentences stuck with me while taking the morning walk. “One never knows when life or limb may depend on the expert use of the hand and ordinary tools.” This could be applied to so many facets of an interesting life and is the basis of human survival that has put us where we are for a million years.

I have been using the down time afforded us by the events of 2020 to catch up on an ever-growing list of books and articles I have been amassing for decades. When I was working in archaeology full-time, the hundreds of pages of reading most weeks necessary just to keep current pushed many other interests into side avenues. I hope you all are using your time in a way that works well for you. In the mean time, this book is available for anyone with an interest in tools and working with their hands. It may even inspire new projects.

Click here to download a pdf file of the book. Amateur Joinery in the Home.

Interview Time

Well this is exciting. I got interviewed at winter count near Florence, Arizona back in February.

It’s heavily edited from a much longer discussion but I don’t think I sound too stupid here talking about the Vardo.  The interview is very close-up and tight but you can get a feel for the interior layout. There is a lot of good stuff on the Cheap RV Living website and I’ve been a reader for a very long time.  Check it out.


https://youtu.be/ktkXcXmR96Q

A Gathering Saw

Here’s another small project happening amidst all the “real work” that needs to get done during this quarantine.

24 inch frame saw made from Missouri grown walnut. The “hanged man” style flapper is a scrap of mahogany from some repurposed shelves. The sheath here is pine.

I seem to sell or occasionally give away the saws I make. I needed a new one. The last one went into the Winter Count raffle as the prizes were looking a little scant this year.

I went into the workshop without much of a specific plan but came out with this little gem. Just a matter of removing the unnecessary bits really.

Finally, the pin sheath is stained and a canvas quiver is made to cover the saw when broken down for travel. This one is from old,, heavyweight canvas salvaged from a truck tarp. It will all fit into a neat 24 inch bundle.

I want to keep this one but after inquiries rolling in, it may go into the shop (or another just like it).

Be Safe!

For your enjoyment: a Carpenter from 1589, Mendel Manuscript.

Hunter’s Pouch

Kentucky Hunter’s Pouch –

Few words are needed to show this project.  It is a Kentucky Hunter style pouch of a style popular throughout the 17th and 18th centuries in America.  Its antecedents come from Britain and mainland Europe but changed with the times as North America was colonized.

Most of the components cut out and ready for sewing.

In the days before the common man had trouser pockets he still had a fair few things to carry, especially while out foraging in the forest. Men and women have carried some sort of bag to hold their essentials for as long as we have supplemented our inadequate selves with tools. Things such as food, fire making supplies, sewing kit, or ammunition.

After lining with a medium-weight cotton fabric, the interior pocket is sewn in.

The poor man’s hunting pouch is essentially a single pocket bag with one or more internal pockets to separate out the smaller items.

Closing a bullet hole in the hide.

I chose some bark tanned elk from Joe Brandl as it is sturdy but with a very soft feel.

When using real linen, I often soak it overnight in a hot cup of tea before drying and waxing. This gives a nice reddish-brown color.

Pocket complete.

The body is sewn with a welt to create a tight seam and edging is added to stiffen the pocket and flap.

Edge-binding and the reveal of the interior pocket.

The inside pocket makes small items accessible that might otherwise be lost in the bottom of the bag. When shooting black powder, this pocket is a must.

Hand-pinked and pierced binding at the top of the bag.

People have been adding fringe, ruffles, and other decorations to seams and edges for as long as there have been makers.

This type of bag is designed to stay closed without any fastener but it is good to have a way to really secure the flap when traveling. This simple closure is a type that I like for a rustic bag. The toggle is carved from antler and is secured by a simple loop.

Completed bag with strap and buckle.

Finally, a shoulder strap is added. This one is 7 oz. veg tanned cowhide and adjusts by more than 12 inches. This will accommodate most people but more importantly will adjust with the seasons as heavier or lighter clothes are worn. The buckle is solid brass and will never rust.

Typical attire of the early frontiersman. Nearly always armed for hunting and protection, our gentleman here sports three essential items; gun, powder horn, and hunter’s pouch. “Western Hunter.” Illustration credit: Lewis Collins, History of Kentucky, 1850.

This bag and others are available in my Etsy shop linked here: