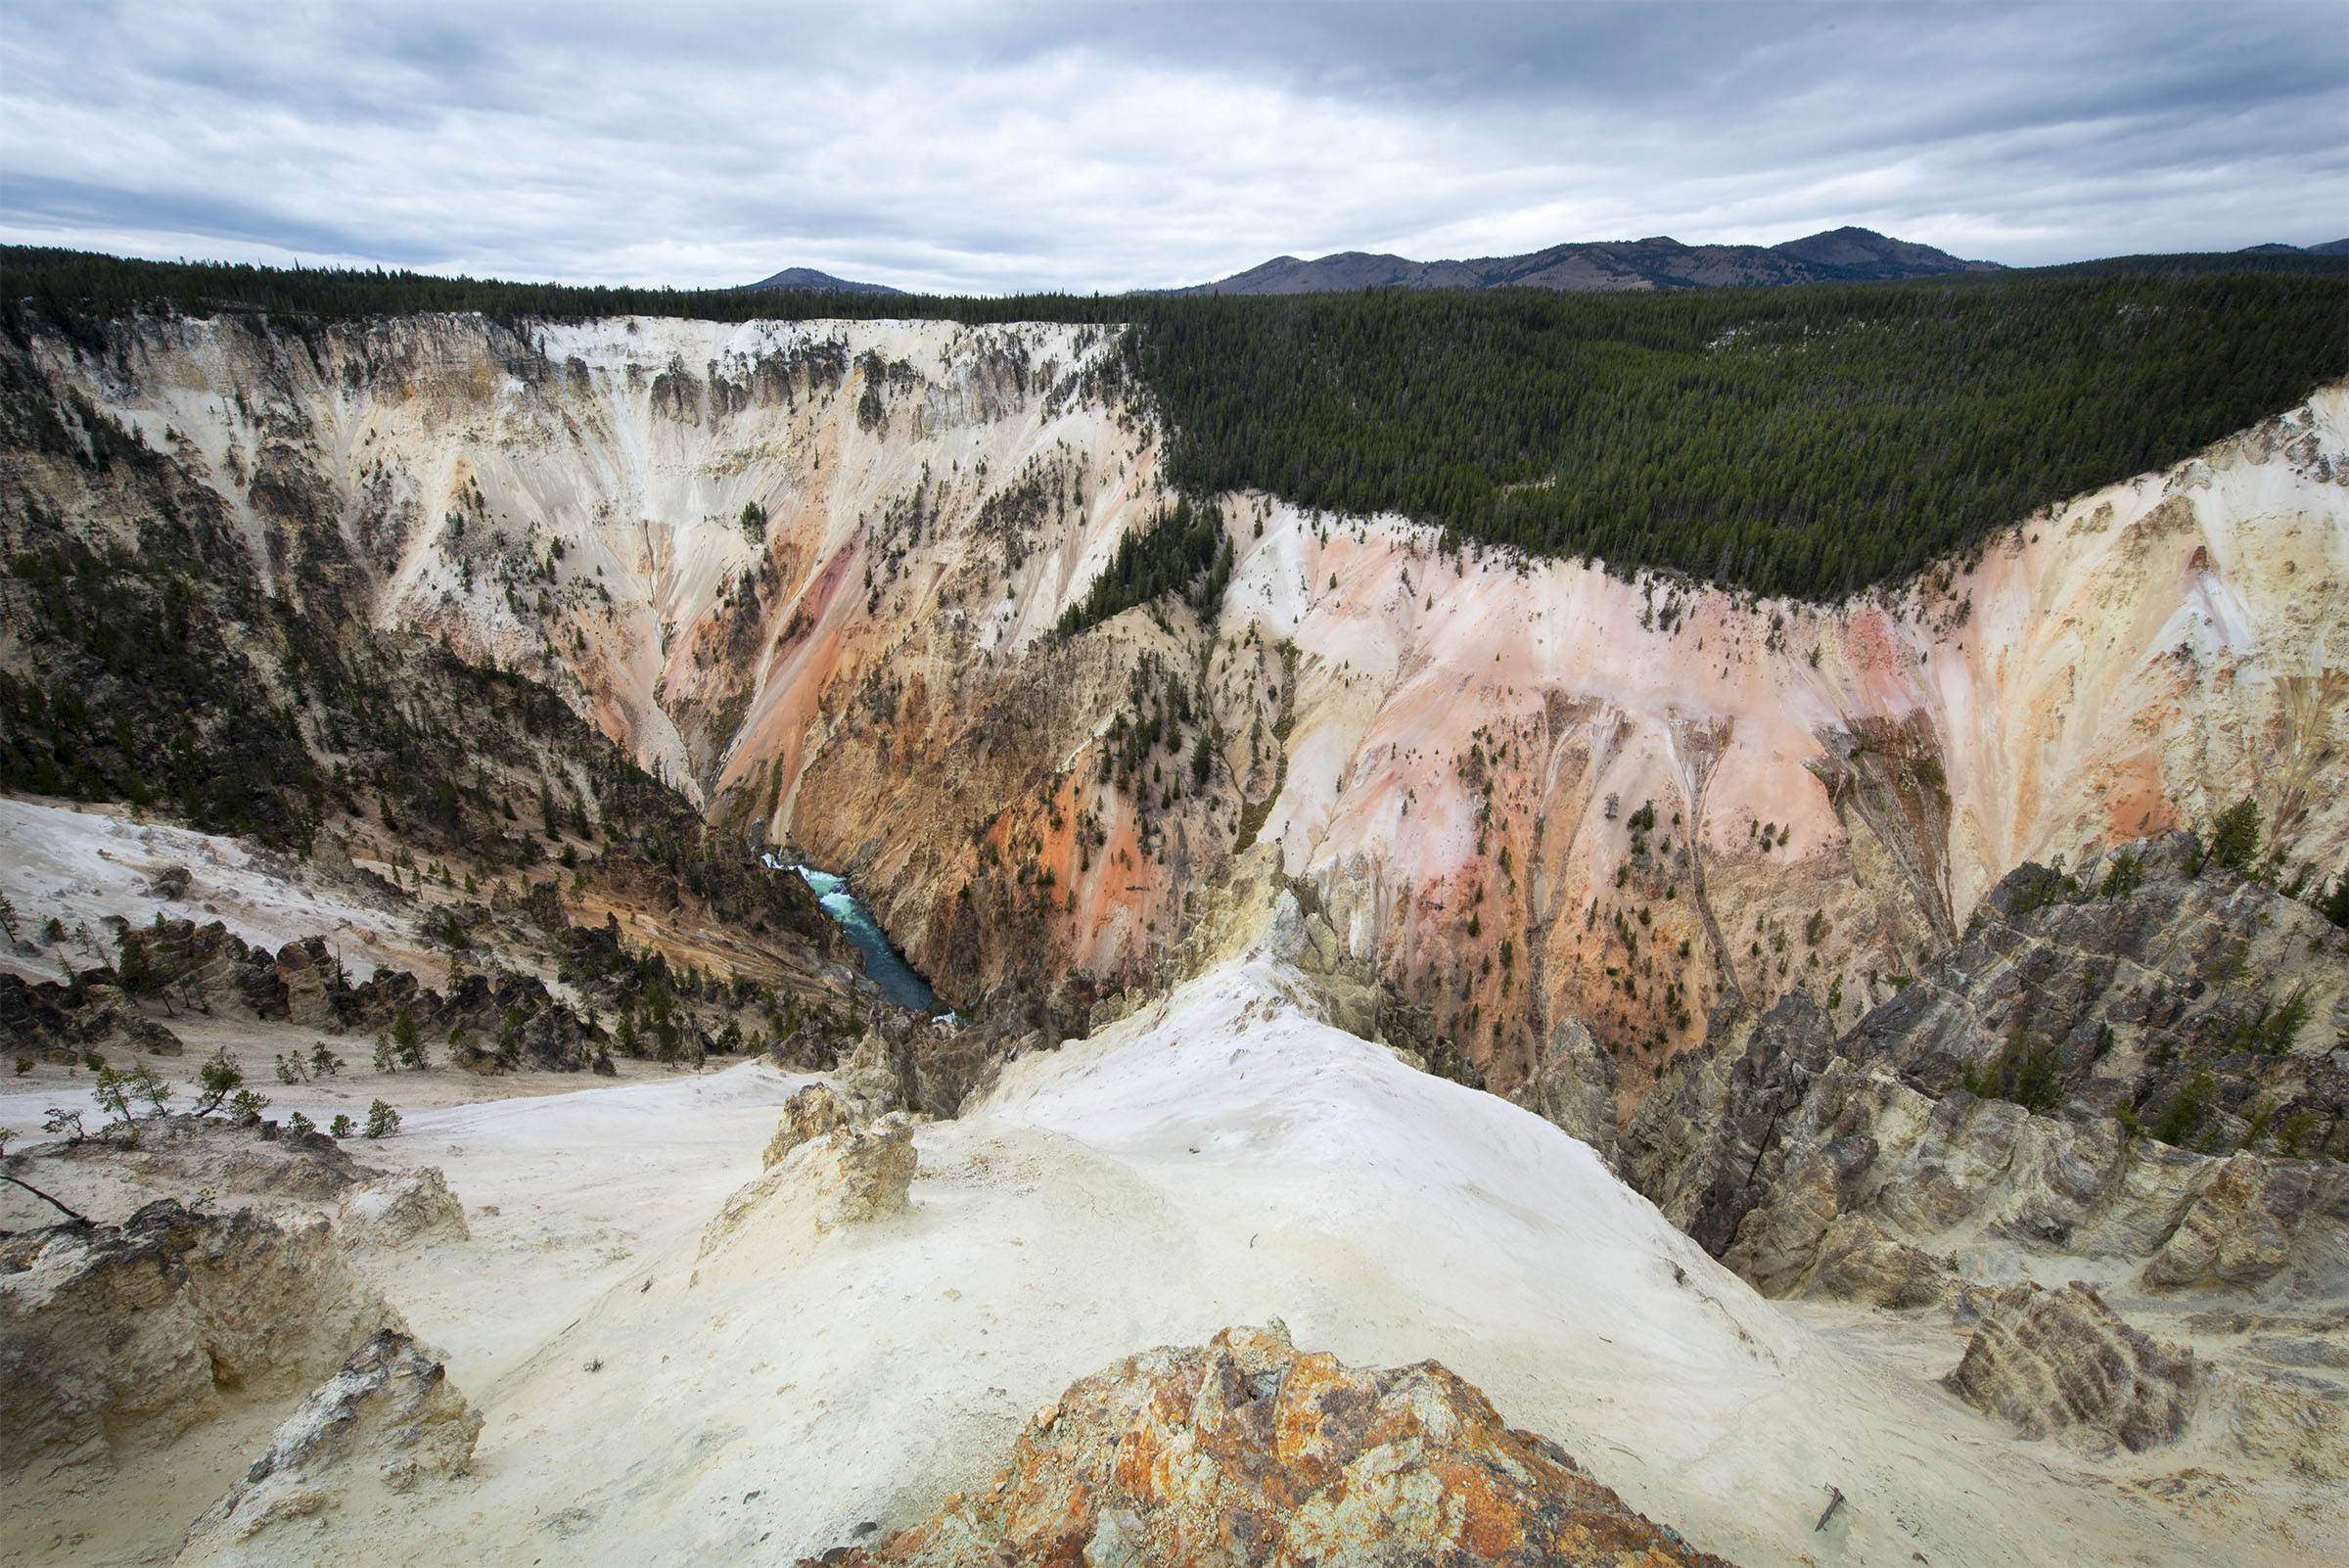
The World Wildlife Fund just released their living planet report for 2018. Up front it seems it seem the report could well be titled the dying planet instead of the living planet report given the summary states “On average, we’ve seen an astonishing 60% declinein the size of populations of mammals, birds, fish, reptiles, and amphibians in just over 40 years, according to WWF’s Living Planet Report 2018. The top threats to species identified in the report link directly to human activities, including habitat loss and degradation and the excessive use of wildlife such as overfishing and overhunting.”
Bamboo container with walnut reel. The background cloth is from some test cloth my wife wove and turned into small lunch napkins.
Here’s a bamboo container I may integrate into the new fishing kit. It’s made from a big stalk we got from a friend in Georgia (USA). I plugged the bottom with a poplar stopper and made the lid from a sotol stalk. I’ve found that the sotal is denser than most yucca but is still relatively soft and easy to work.
The box can fit a lot of gear (lures, hooks, line, sinkers, floats) or could work as a bait box equally well. The top is tightly wrapped with hemp cordage to prevent splitting and will be treated with pine tar.
I’ve been working on a new hand reel to keep in my pack with my travel fishing kit. I didn’t have much of a plan when I started so I drilled out a couple of one-inch holes a little further apart than the width of my hand and started from there. The wood came from the scrap pile and is a very solid chunk of walnut. I’m a little concerned about the possibility of cracking but this piece is old, well-aged, and extremely solid so I suspect it will be okay in the end. It will be heavily waxed to waterproof the wood and I’m working on making and trying a few silk leaders. Anyone with experience with hand-made fishing gear have any thoughts on this?
The hand reel and the primary tools used.
These little projects are a nice way to spend the evening in a productive way. After looking at so many artifacts over my career it becomes apparent that our ancestors often created works of art and beauty that truly come from within maker and their influences throughout their lives.
When you make for yourself, your tools and possessions become a reflection of who you are, not where you shop.
I collect old plans for projects I never seem to get around to making. With winter here, maybe someone would want to build this fine sled. This comes from an old Delta Tool company publication and the procedure is about as simple as can be.
I lived on the flat Plains for quite some time and I’m rediscovering the joys of hill country.
From the book Toys, A Deltacraft Publication, DELTA MFG. DIVISION
There’s not much to it really. An couple large project scraps and two long boards for the runners will just about do it.
The recipe is simple:
The frame is 1/4″ birch and the top boards are 3/8″ birch. Fasten together with countersunk, flat-head wood screws.
The runners are made from ash. Make a simple form with an 8″ radius from scrap wood. Soak the ends Of the runners in hot or boiling water for about an hour, then clamp onto the form and allow to dry for 24 hours. Ash takes to bending very well in my experience.
Finish body of sled with varnish or paint. Apply several coats of shellac to the runners and wax.
Maybe one less plastic tub sled will end up in the landfill.
Here’s the link to the website where I found the plans. There are some fun and simple projects to you busy in the coming fall. I recommend the “retro” section for some good stuff.
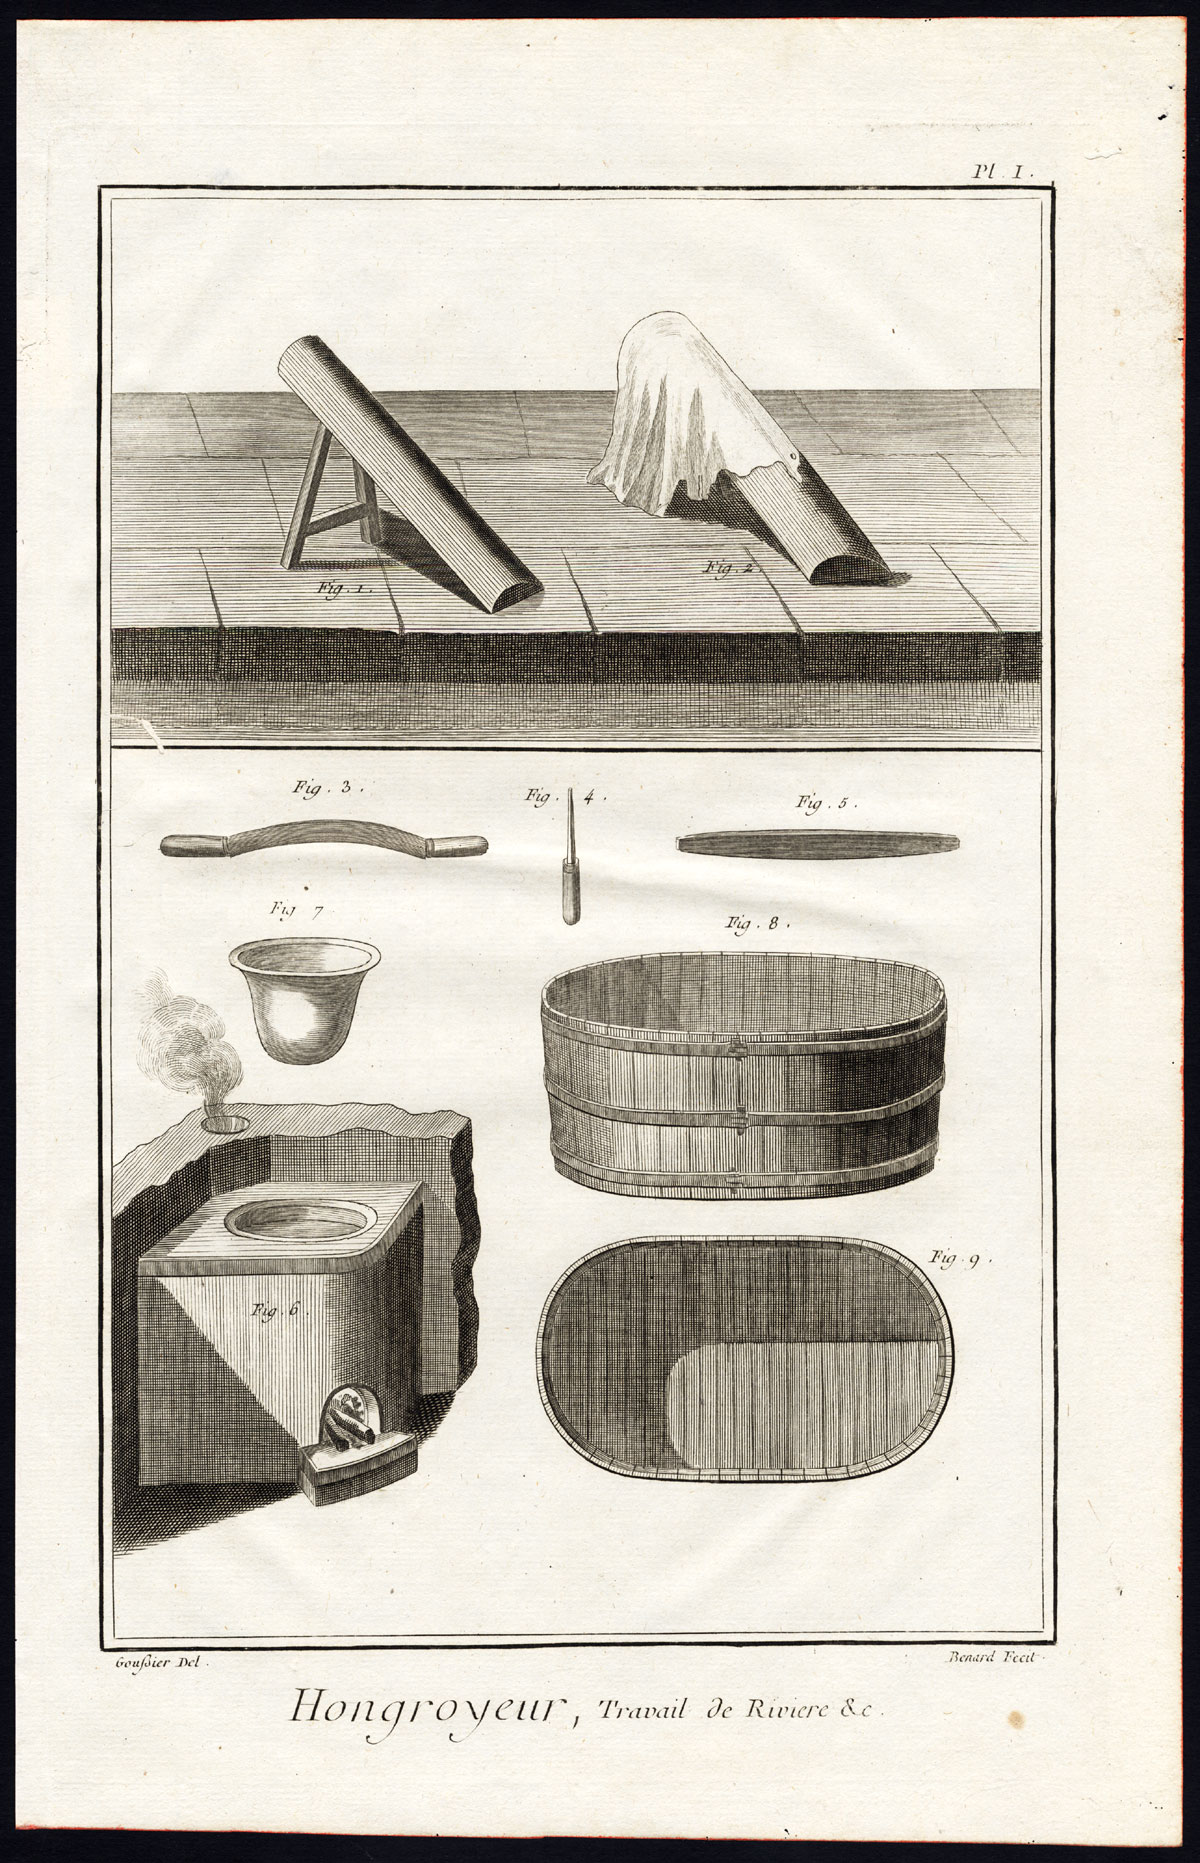
Here are some images from hide tanning workshops from Diderot’s Encyclopedia, 1769 that I found interesting as a leather worker and occasional hide tanner.
Tools for the tanner, the beam, currier knife, slick, tub, and the heater. From the Encyclopedia of Sciences, Arts and Trades, Diderot and D’Alembert.Chamoiseur, From the Encyclopedia of Sciences, Arts and Trades, Diderot and D’Alembert.
If you have done any hide tanning you’ll recognize the tools of the trade. Not much changes for the small-time home tanner.
From the Encyclopedia of Sciences, Arts and Trades, Diderot and D’Alembert.
I suspect this is some hot and smelly work and judging by the way they’re dressed it is a hot room. The only large traditional tannery I have visited was in Morocco and it had an odor on a hot summer day that hit you like a brick wall. I’m not sure what they’re doing with the fire at this stage but maybe adding some amount of smoke rather than heat.
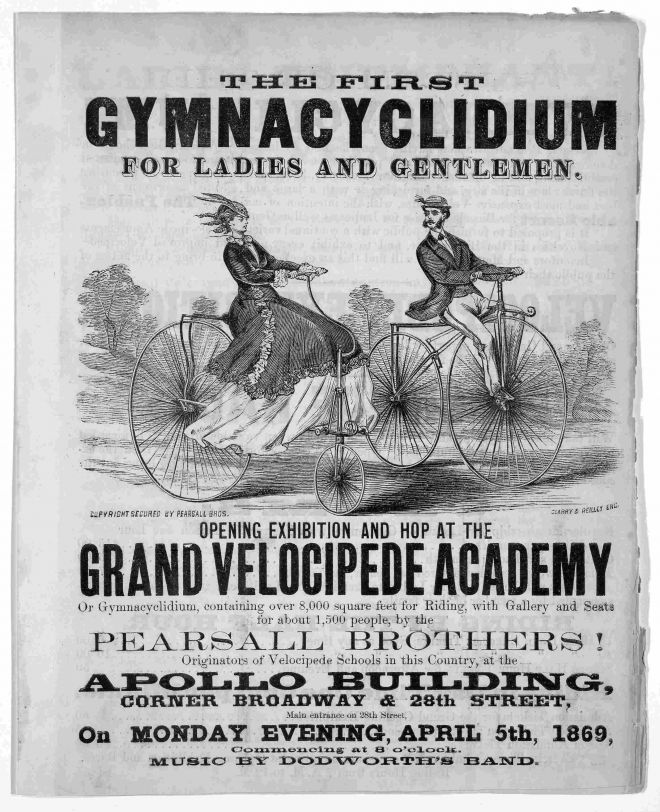
Gymnacyclidium– This sounds like something for which you could be administered a shot to clear it up. I thought these monstrosities worth looking at for the danger factor if nothing else. Let’s hope the young lady is wearing adequate undergarments as it seems certain she will be taking a spill or two in the very near future. I do like the curly cue fender thingy on the front though.
A bit of history about the bicycle: Invented more-or-less as we know it around 1817 with various propulsion systems added from about 1839 through the 1860s when bikes became more like what we know today. A major step forward occurred in 1888 when Dunlop developed the pneumatic tire, making cycling more comfortable and practical.
I’ve added a photo gallery in the sidebar to the right of the main blog feed. I think nearly all these projects have been shared here over the years but this makes for easy viewing. I’ll continue to add images and re-post some older work as I get time so please check back feel free to continue the feedback, and I hope you enjoy.
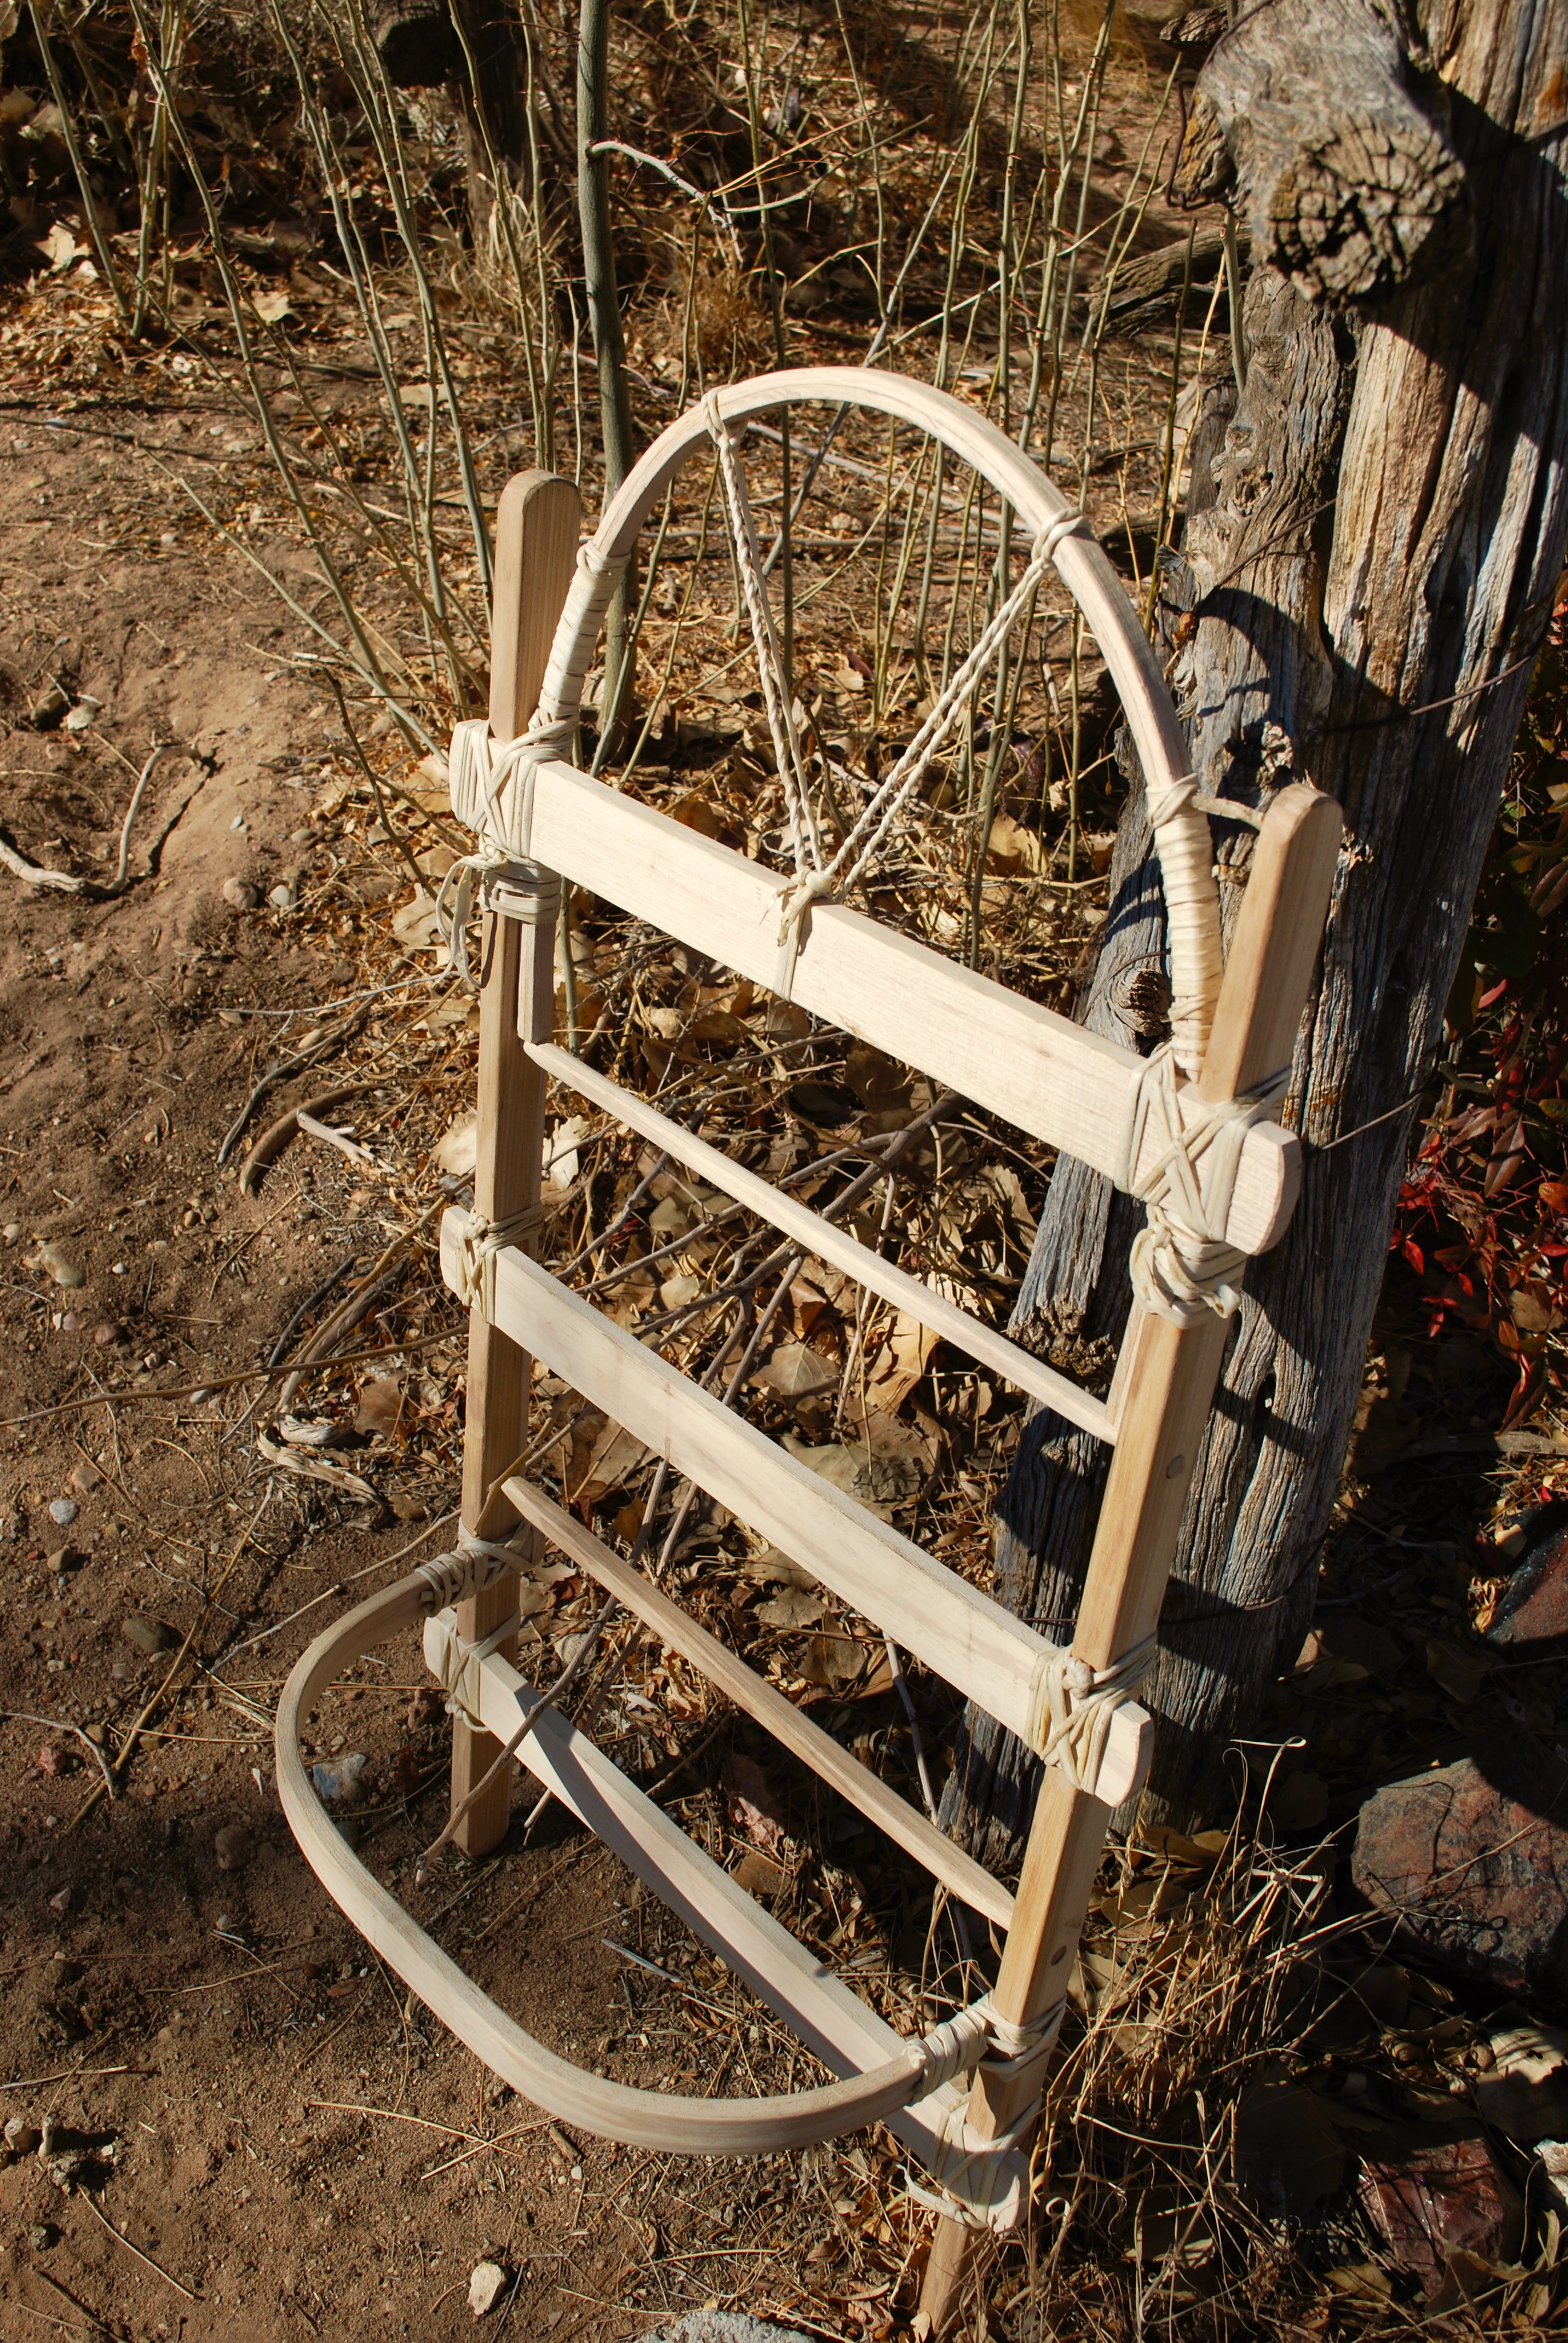
In 2012 I decided to build a wooden packframe. What started out as a Sunday afternoon project led me down many paths, from Iron-Age Europe to 21st Century military designs and it took about a year of stewing around before I actually got around to building something. It was fortuitous for me that Markus at 74 FOOTWEAR DESIGN CONSULTING wrote and excellent little history of frame packs at almost exactly the same time I began researching them myself. Shortly thereafter, I discovered Steve Watts and Dave Wescott were delving into the same subject (great minds think alike I guess). After collecting many photos and drawings I dove in, and using human measurements as much as possible, I built the frame below.
A few hickory boards and some simple steam bending created a design I liked.
I decided against metal fasteners for the original project so everything was pegged and tied with rawhide.
It didn’t take long to build and tying it all up with rawhide was a simple evening job. The next step was to create some sort of support to keep the frame from my back and attach shoulder straps. This wasn’t as easy as it sounded since comfort and strength had to be combined while keeping possible chafing to an absolute minimum.
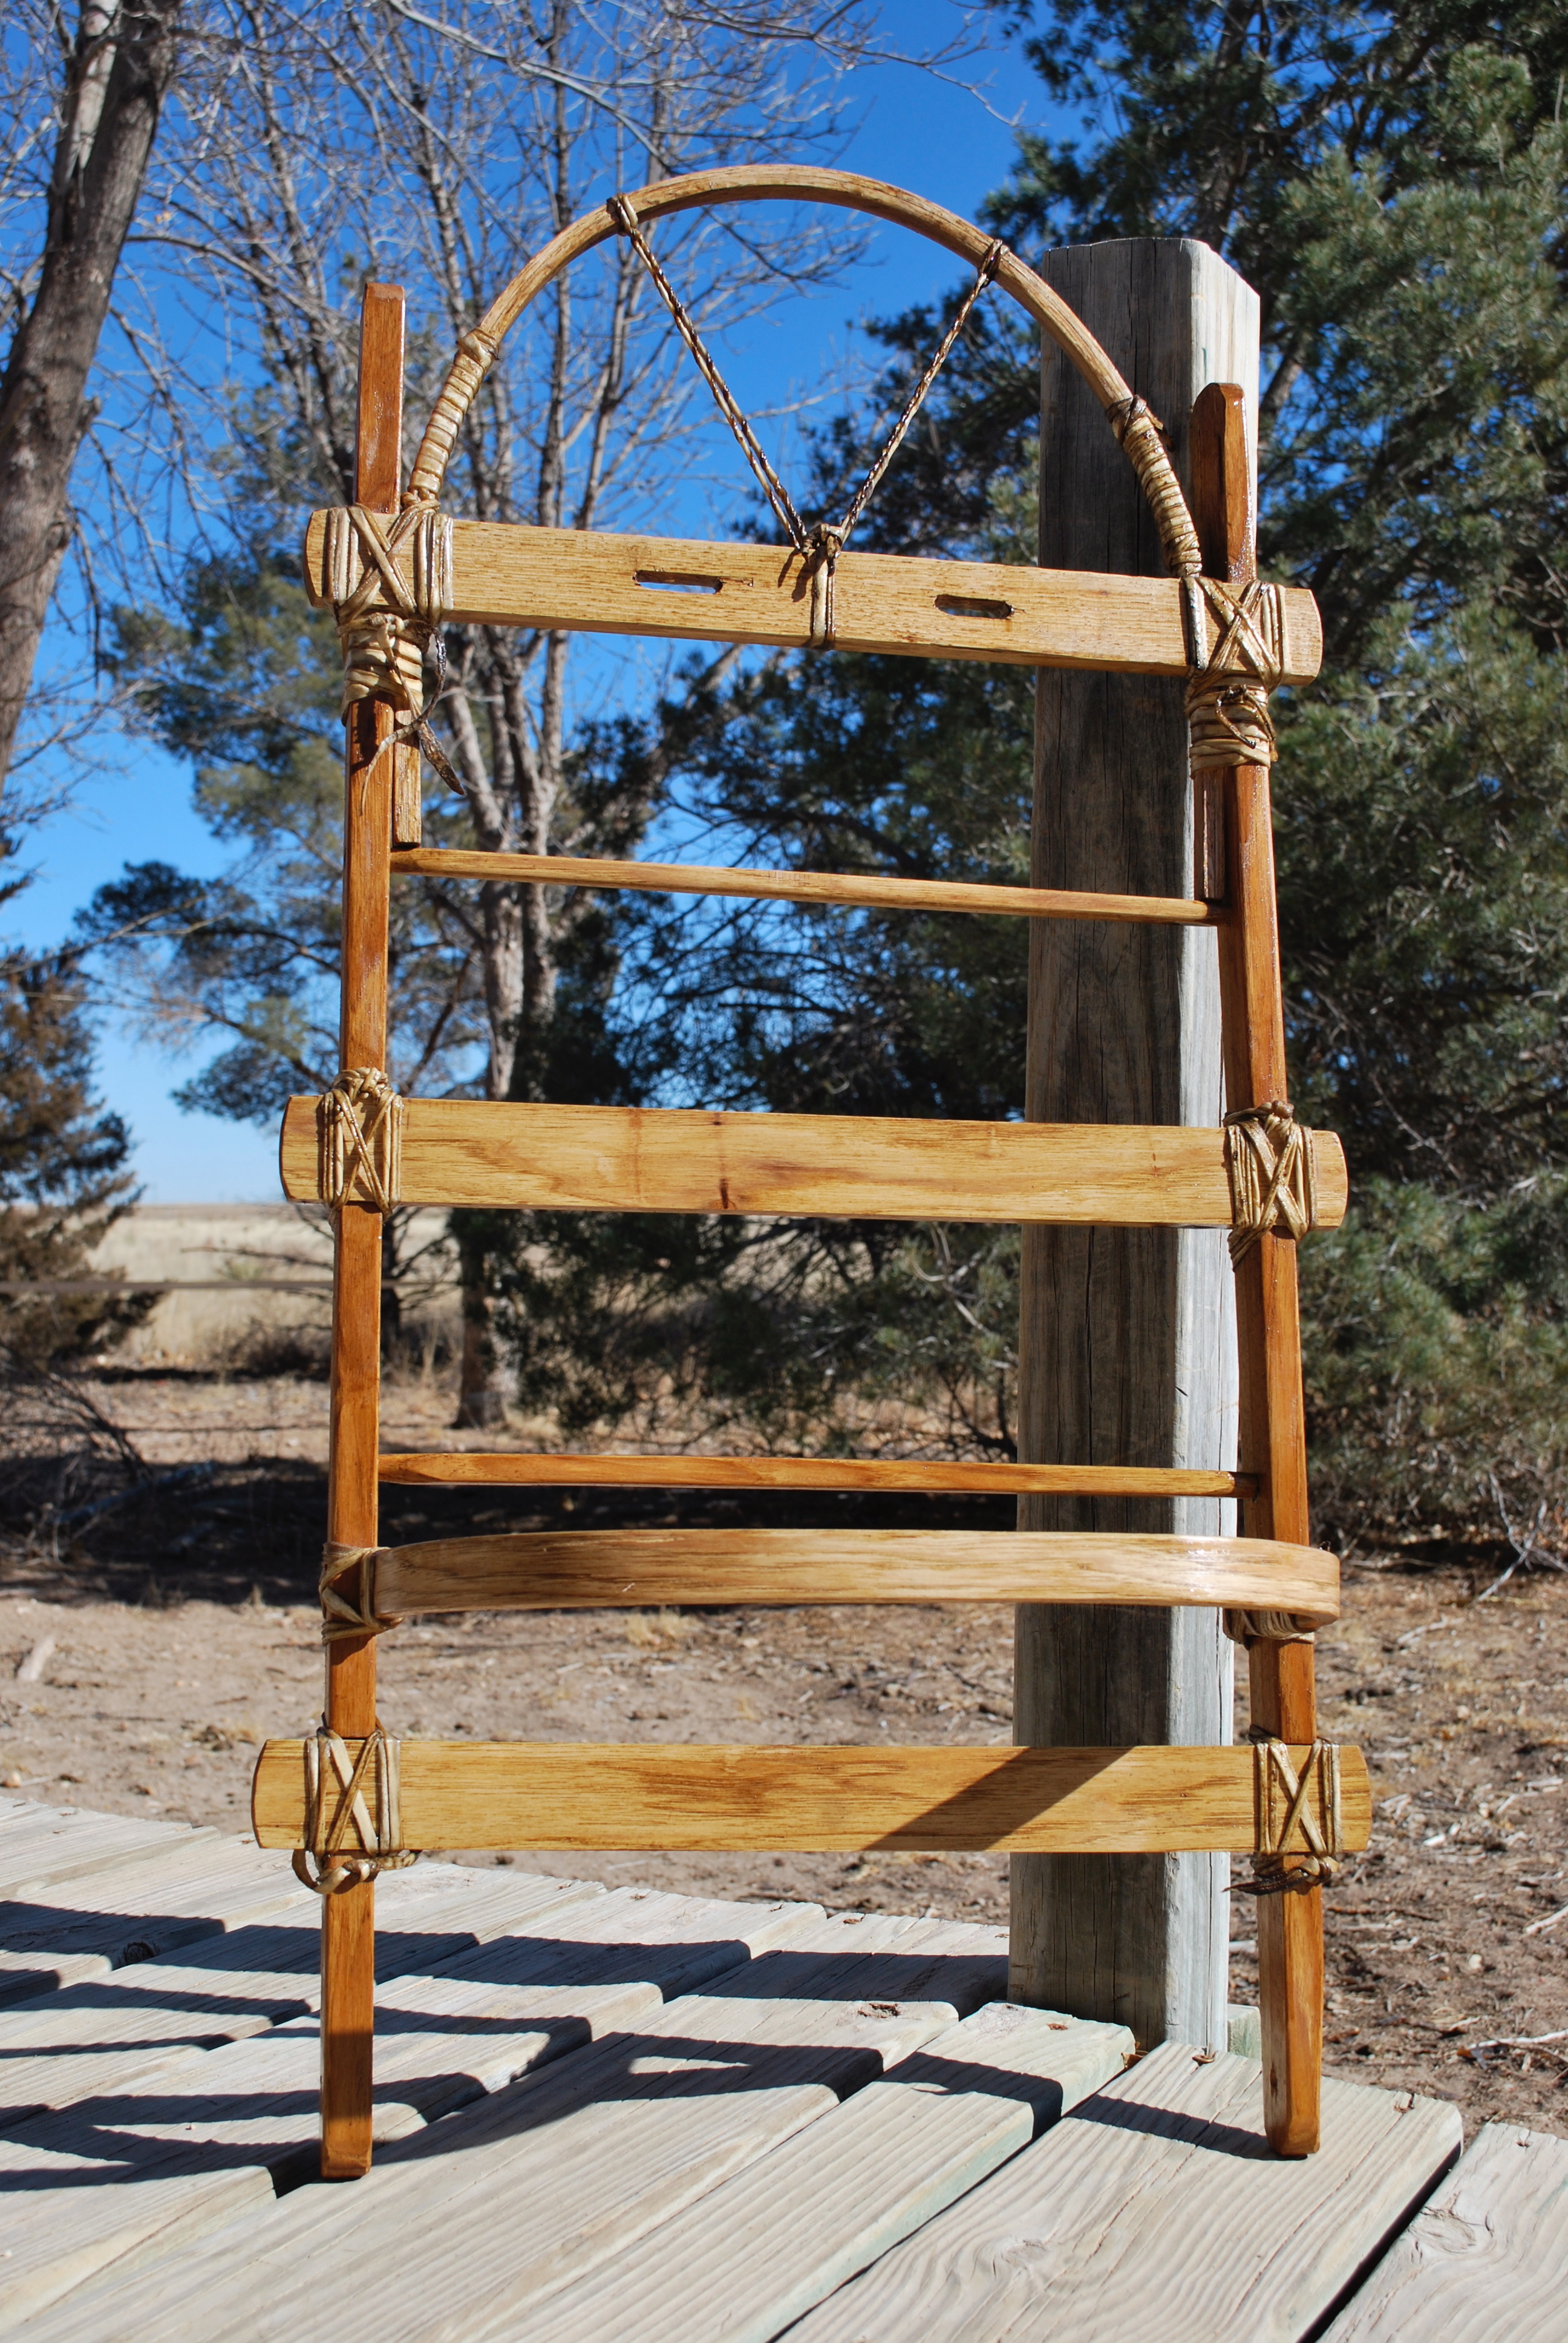
The two horizontal rods keep the uprights from converging under tension and the three cross-strakes are stabilized by being set in grooves on the uprights. The steam bent support and top bar add to the overall sturdiness of the frame.I decided that simple was best so I used heavy leather, stretched tight, across the back kept the straps fairly straight-forward.Several people asked about the need for a curved top bar; well why not? I like curves and I think it reminiscent of the Otzi-style simple frame.
An Otzi reconstruction. Click the image to see the article there.
Was it good enough?
The answer is probably. It was mostly used to pack gear in for demonstrations and spent most of its time as a show-piece. Honestly, over the years I owned it, it only went on one real backpacking trip, and that was even a fairly short one. However, I learned some things along the way. I like the shape, it was fairly comfortable, it was certainly sturdy enough,and it carried a heavy load without much difficulty or discomfort. So the design was more-or-less right for me.
On problem was that I didn’t like the tensioning of the leather back straps as it was difficult to draw them tight enough. That’s how packframe number 2 came to be. I began by deciding to improve the back padding system but with a few other minor changes in mind, this happened.
A bunch of new parts generated themselves on my workbench one lazy afternoon.
Parts –
Recycled fir for the uprights came from a 125 year old door frame, some planks for the cross-bars came from the scrap pile, and a couple pieces were pulled from the first packframe. Before I knew it, I was bending a thicker and better arch for the top piece and construction began. Since I wasn’t working from a plan and there is no real standard for this type frame I pondered the whole thing for a couple days to decide how to fasten the parts (pegs, lashings, screws, or glue) and began assembly a few nights later. I have gathered quite a few old screws of various sizes over the last couple years in my housing restoration so I decided to use those for the basic construction.
After too long a mental debate, construction went pretty quickly.
Construction technique –
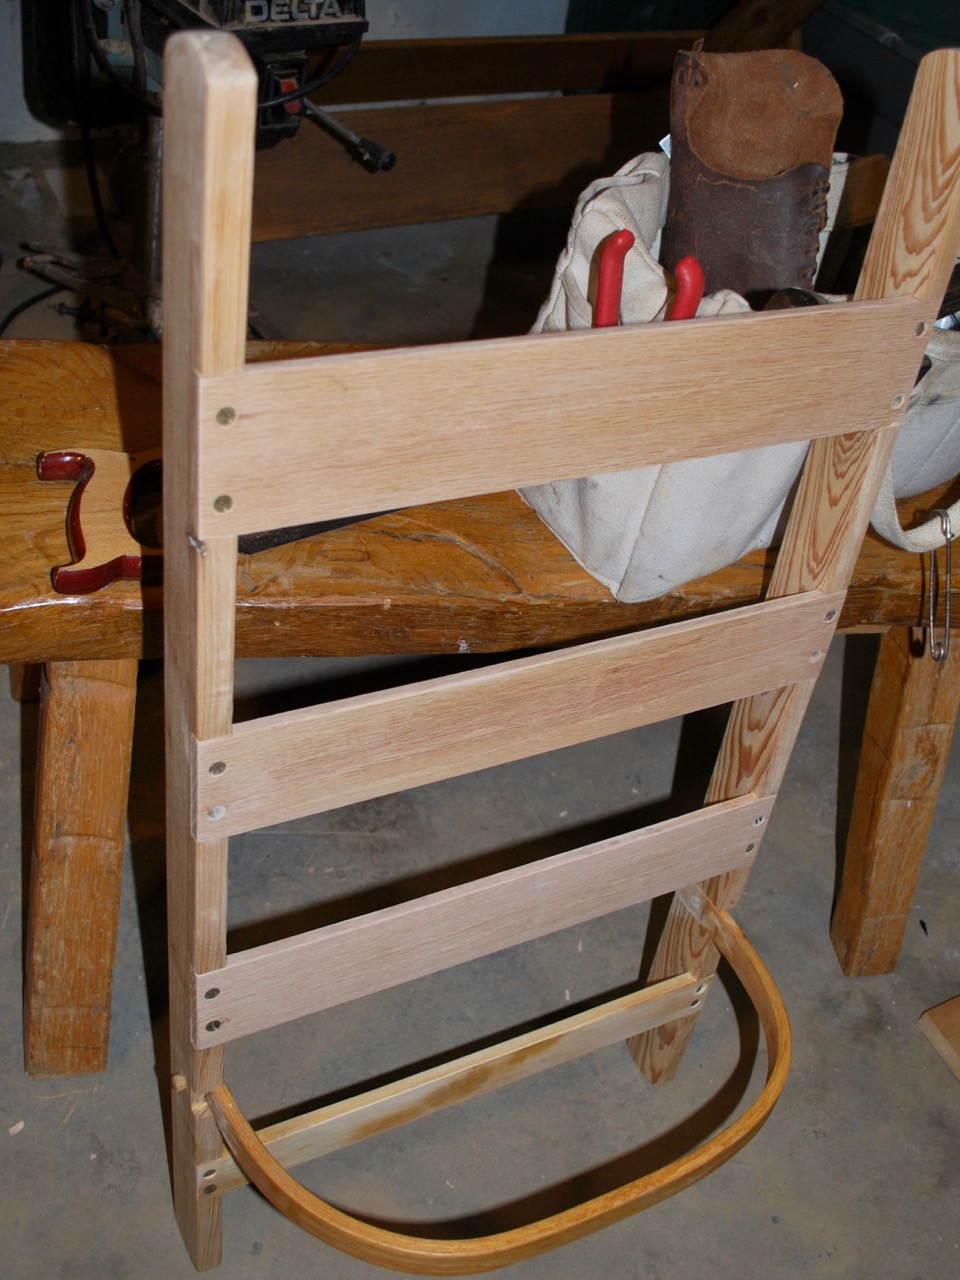
As can be seen in the images, the cross-bars are let into the uprights in a simple lap joint for strength and racking stability and fastened with reclaimed brass screws. The platform support is lapped and pegged with wooden dowels.
Side view showing lap joints and side supports.
I added a small oak angle brace to further support the platform support which is also lapped and pegged. The small missing piece visible here is operator error. When I was cutting the laps I was in such a groove that I cut the low one on the wrong plane. I’ll probably fill the gap with a small wood piece, but for now, I live with the hideous disfigurement. Also visible here are the walnut caps I pegged to the bottom of the uprights. Old Douglas fir is a fine wood but can be very brittle and the end grain would probably not fare very well under hard use on rocky terrain.
The frame in all its glory, waiting to be packed and carried off into the sunset.
Straps and Suspension –
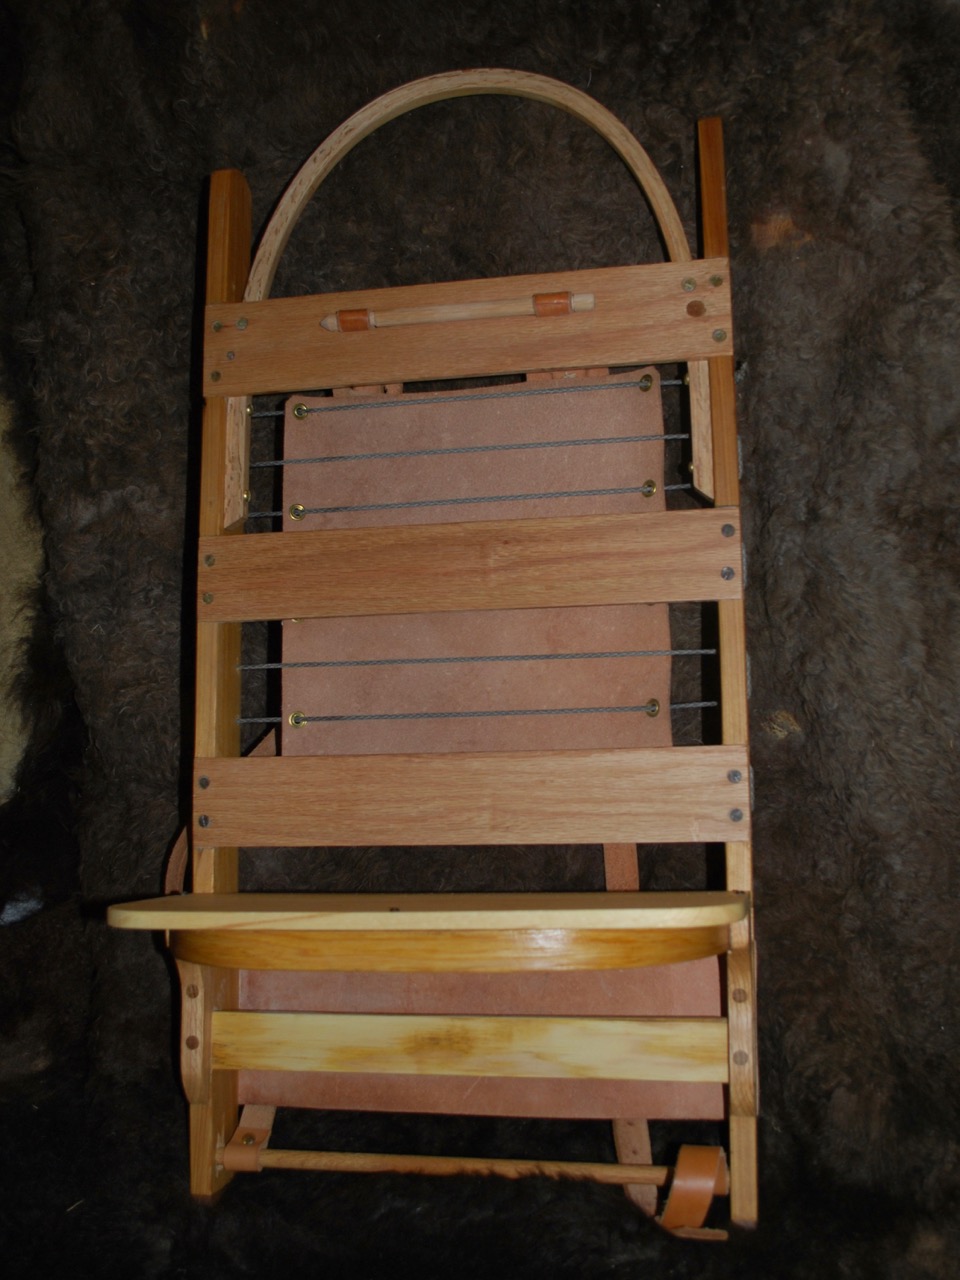
I chose 12 oz Hermann Oak leather for the lower pad stretched tight and permanently fastened to the frame with brass screws and finishing washers. The essential suspension depends solely on the cordage being strung tight while the leather pad distributes to stress across a smooth and wide surface. I think it will be quite comfortable.
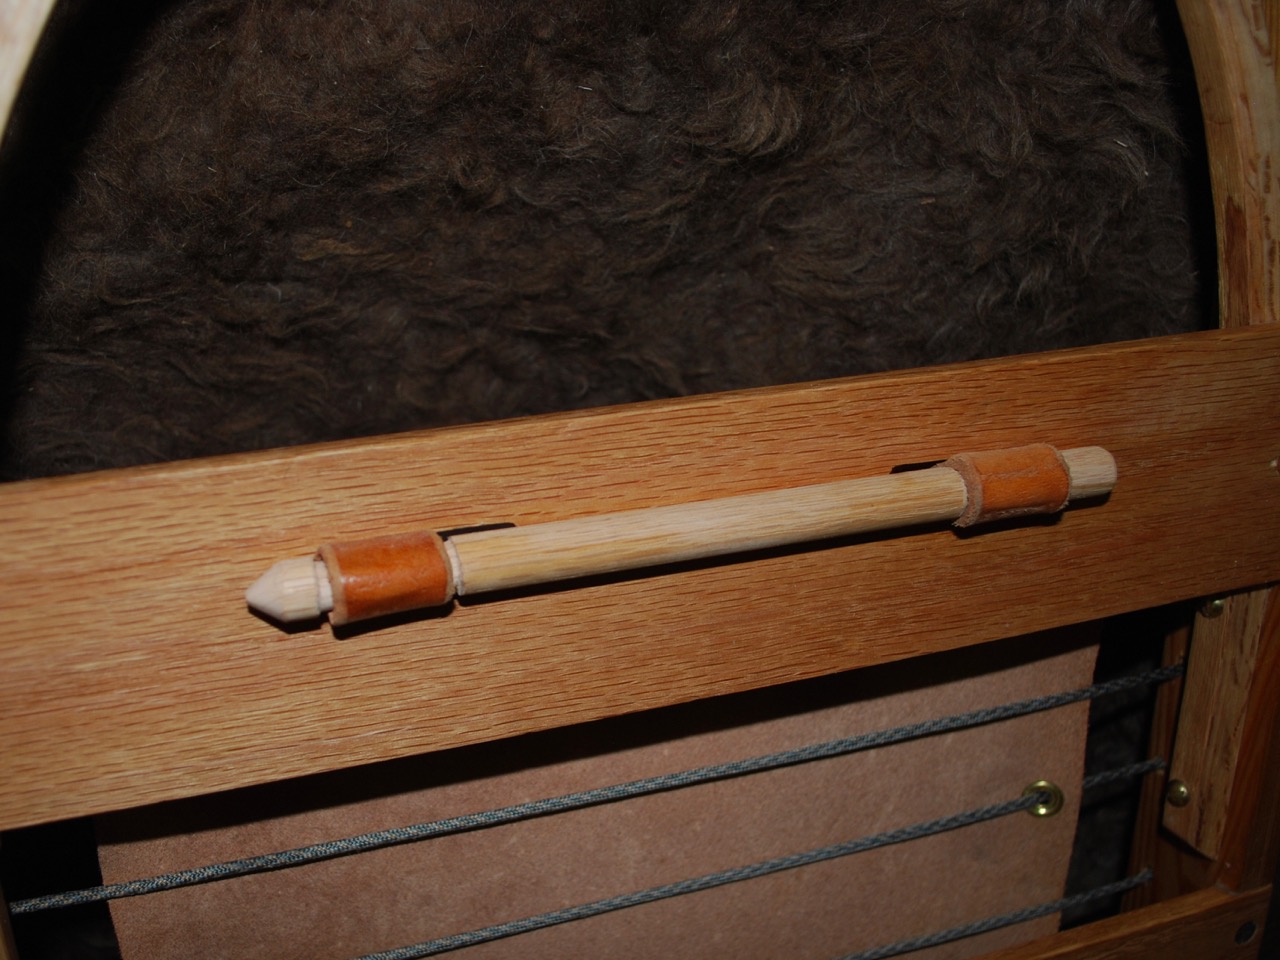
Shoulder strap connection, a whittled oak dowel that is easily removed.
I would like to make a removable rucksack for this frame and would like to be able to utilize the straps either so making them easily removable was a must.
Waist support, 12 oz harness leather. 6-7 oz leather was used for the back pad.
As for hip belts; I’m still undecided at this time but I suspect that sometime soon I will be constructing one.
A better view of the top arc and the overall harness.
I’ll continue to update the progress here and try to remember to take more photos along the way. It really hinders work to have to think about documenting yourself along the way but I know people appreciate seeing the steps.