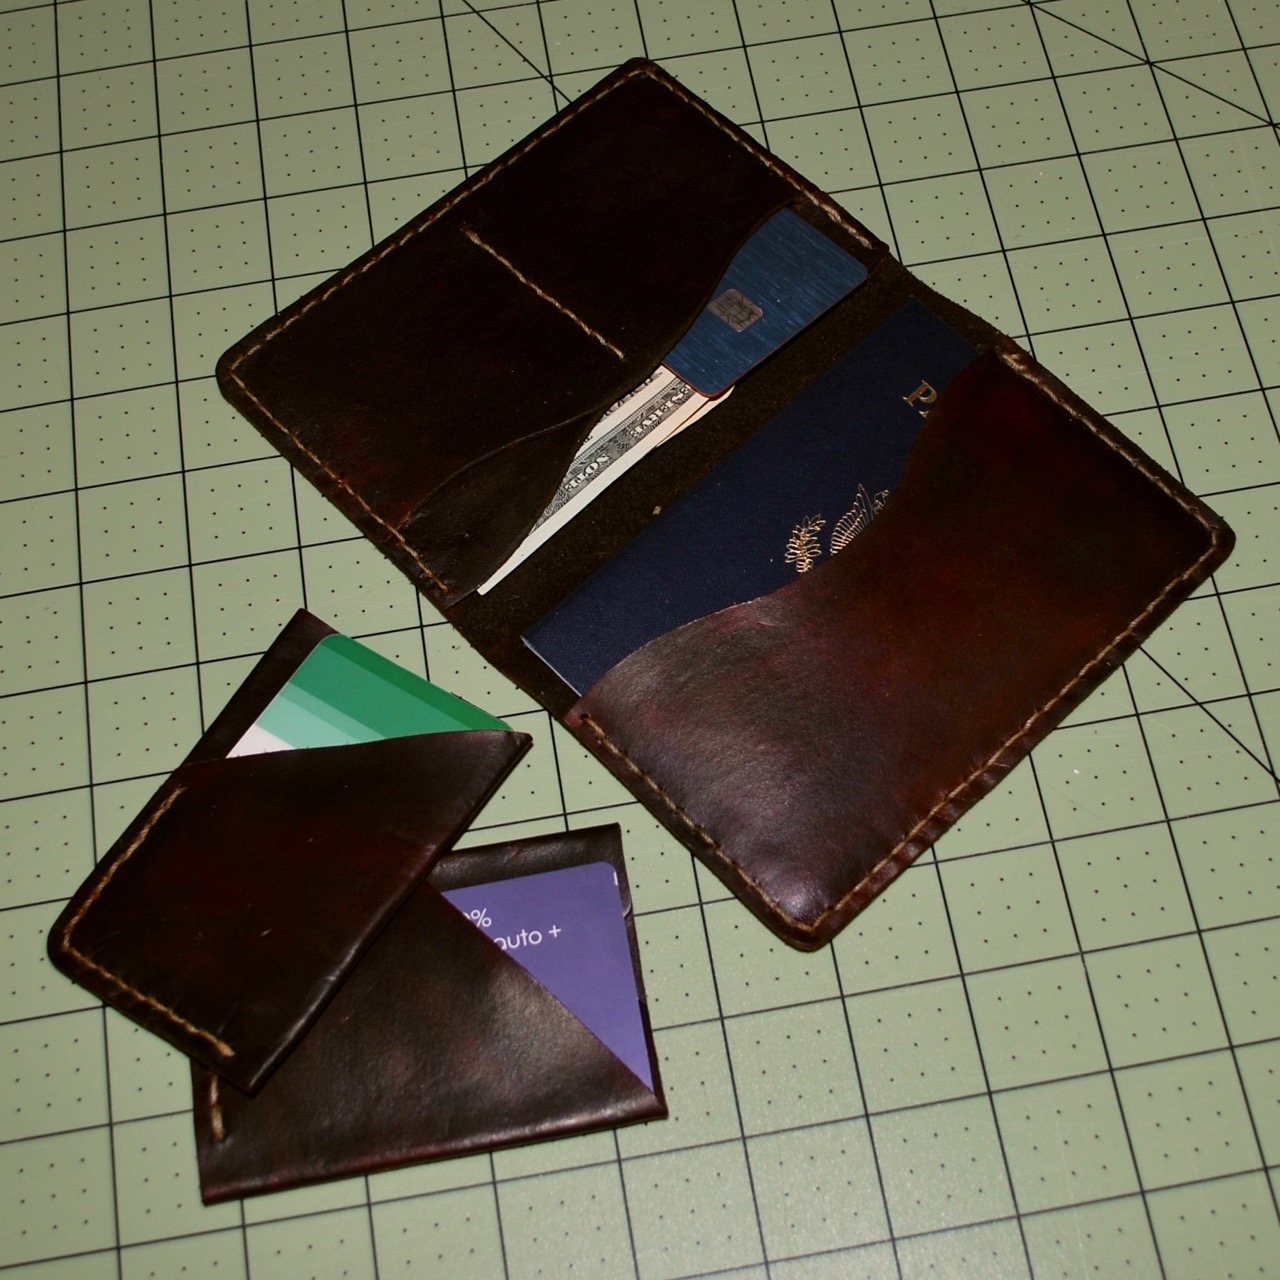
Maybe this is a little mundane but I’ve been using the cold and snowy weather as an excuse to do some cutting and sewing of leather. I completed a passport wallet and finished up another minimalist wallet design. I got the pattern for the larger travel wallet from Tony, the owner/designer at DieselpunkRo. He sells finished goods, patterns, and gives a lot of good advice for makers working from his patterns on his Facebook group page.
My three newest creations.
If you follow his Facebook group, he will occasionally share free, downloadable patterns. I have two patterns from him so far and they are both great.
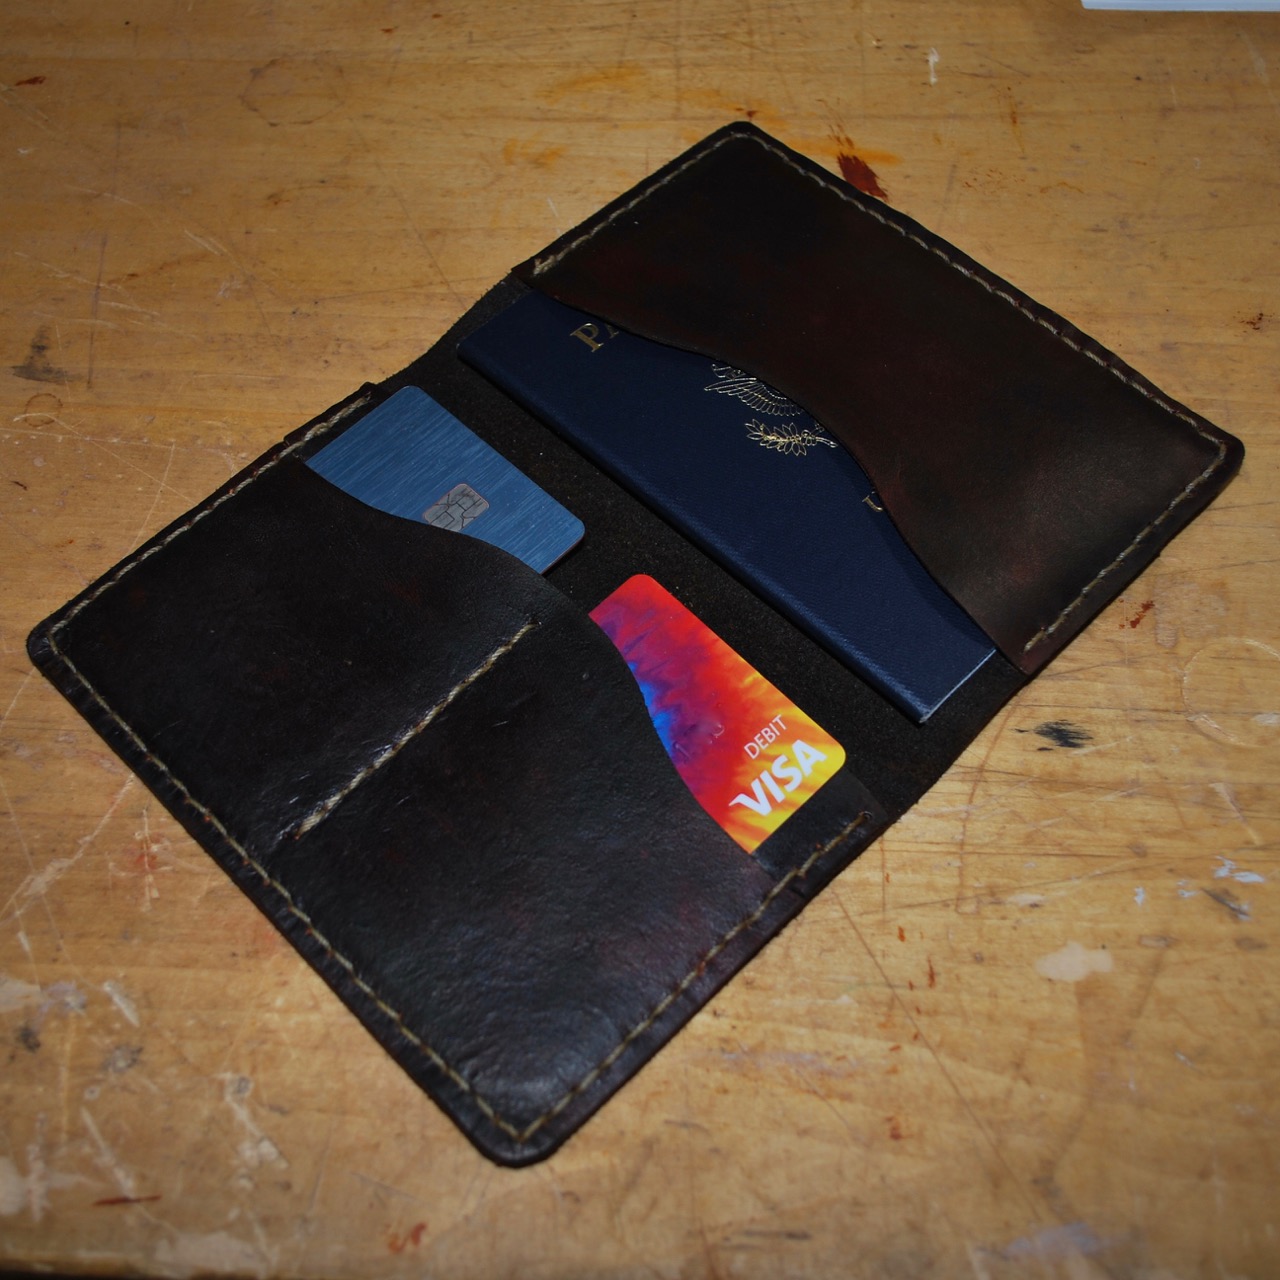
The large wallet is a handy, four pocket affair that snugly holds a standard passport, cards, and cash.
This is another good starter project that easily yields a great product.
We were acting like shut-ins today because of a surprise snow storm so I’ve been able to jump to another leather-related project. I’ll share some photos soon.
I try to live by the creed of learning and making something good every day.
The Minimalist Wallet
As we have been pondering the holiday season it seemed a good time to get a jump on some leatherworking projects I’ve had in mind the past few months. This morning, before getting to work on other chores, I decided to take a little time and work out a slightly modified Minimalist Wallet. If you have followed this blog for long, you may have seen a couple earlier wallet projects we shared HERE and HERE. This isn’t a complicated project and might be a good one to start with if you trying your hand at leatherworking for the first time.
The All-Encompassing Symbol of the Age
Making the Pattern –
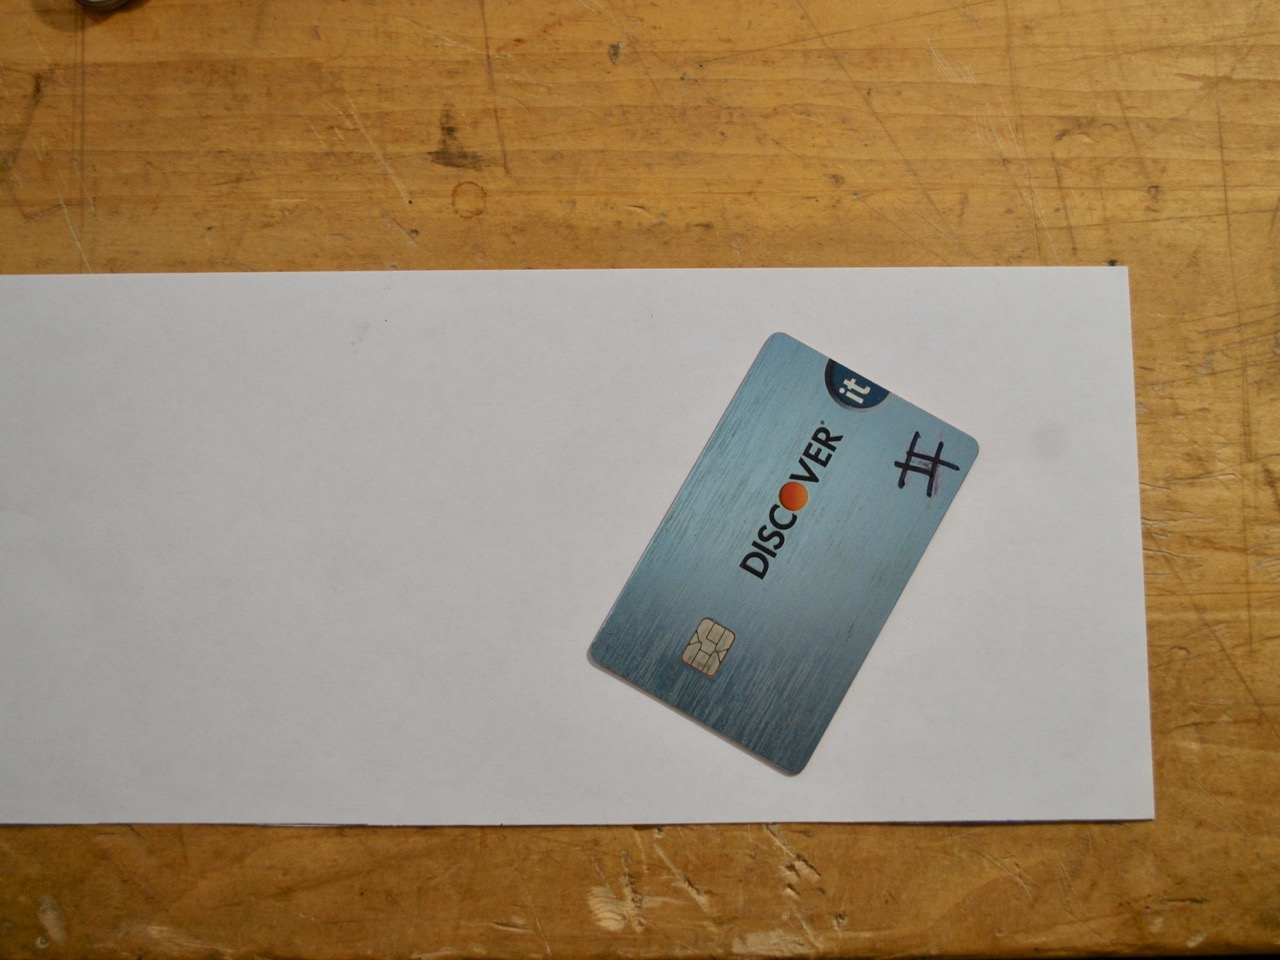
It would be pretty optimistic to just dive in and start cutting out a wallet without knowing what needs to fit. I used a debit card for scale as there will inevitably be a couple of these in just about any modern traveler’s pocket. I didn’t put a lot of time into the pattern as I have made a similar style before and knew the basics of what I wanted; essentially two pockets and very little sewing.
A Bit of Sloppy Origami to Test the Dimensions
To create two pockets, there needs to be three layers; two on the outside and one to divide. To make the cards more accessible, the outer pocket will be a “reveal” and I chose to do this the simplest way possible, by a diagonal straight line.
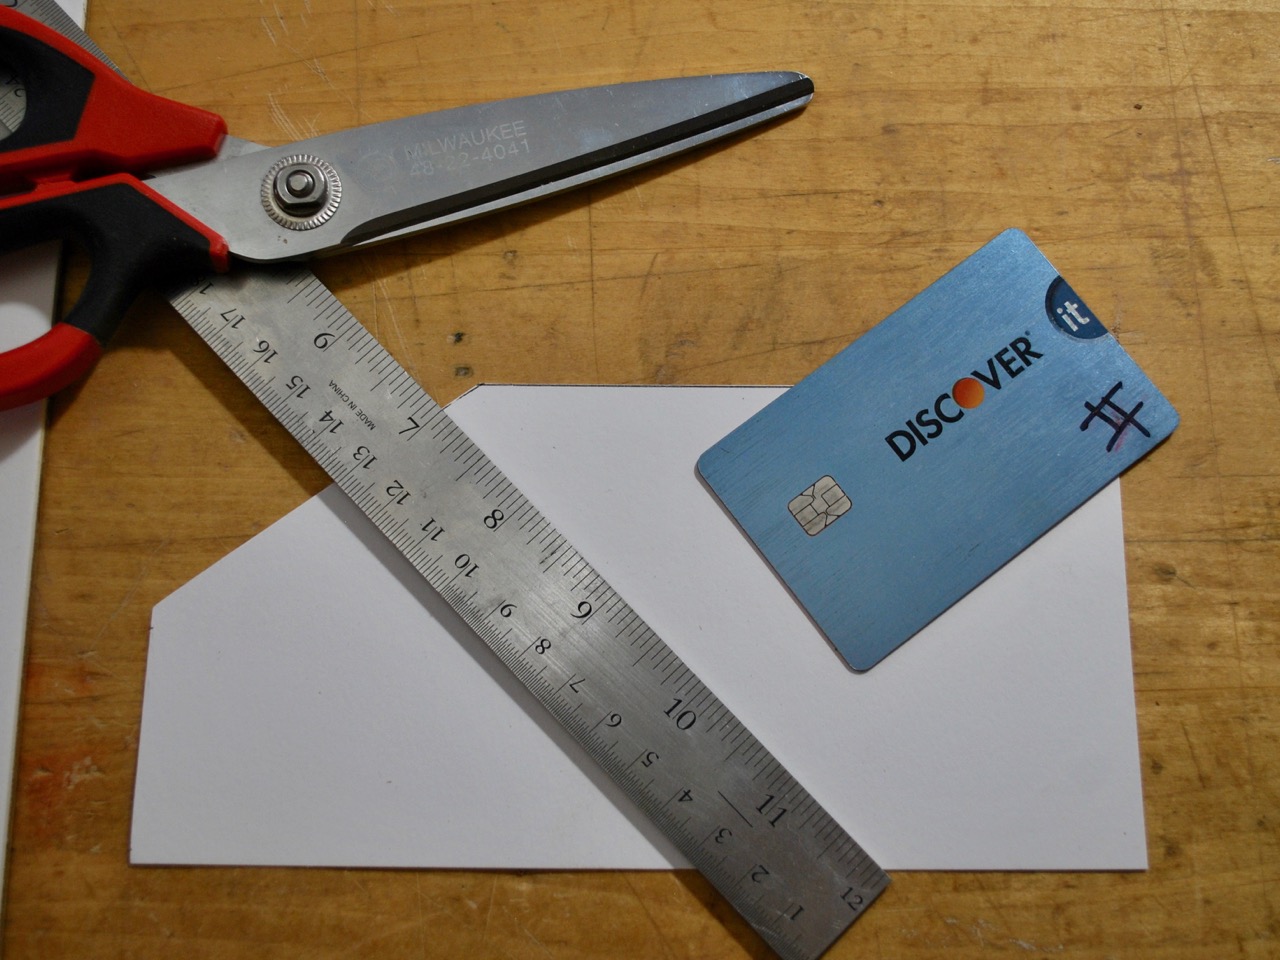
Test Fitting and Trimming the Draft Pattern
I ended up tightening the width and lengthening the entirety just a bit from my original estimates for a better fit. The difficult part is over.
The Draft is Transferred to Stiff Bristol Board for Multiple Uses
After the pattern is transferred to the card stock, it can be used many times without fuss. It is a good idea to label your patterns before storage as they begin to look alike when you amass a large folder of them (was this a pocket, part of a shoe, some sort of handle cover?).
Getting Down to Business –
The next step is to cut out the pattern on appropriate leather. I’m using Hermann Oak 1.5 mm tooling side that was leftover from an earlier project. Neatness in cutting is very important as it will affect the look of the entire piece if the cuts are even a millimeter or two off or wavering in any way. Since most people seem to prefer dark leathers for this sort of thing I chose to dye it Medium Brown with Fiebings Leather Dye.
Wet with Dye
After the dye sets you’re free to move on. I started by marking and awling the stitching holes at about a 5 mm increment. I will admit, this was not my straightest set of stitching lines ever.
Punching the Holes
I almost always use a double needle saddle stitch when sewing leather as it is the best and strongest choice in most cases. I chose a contrasting thread to give it a fine finished look.
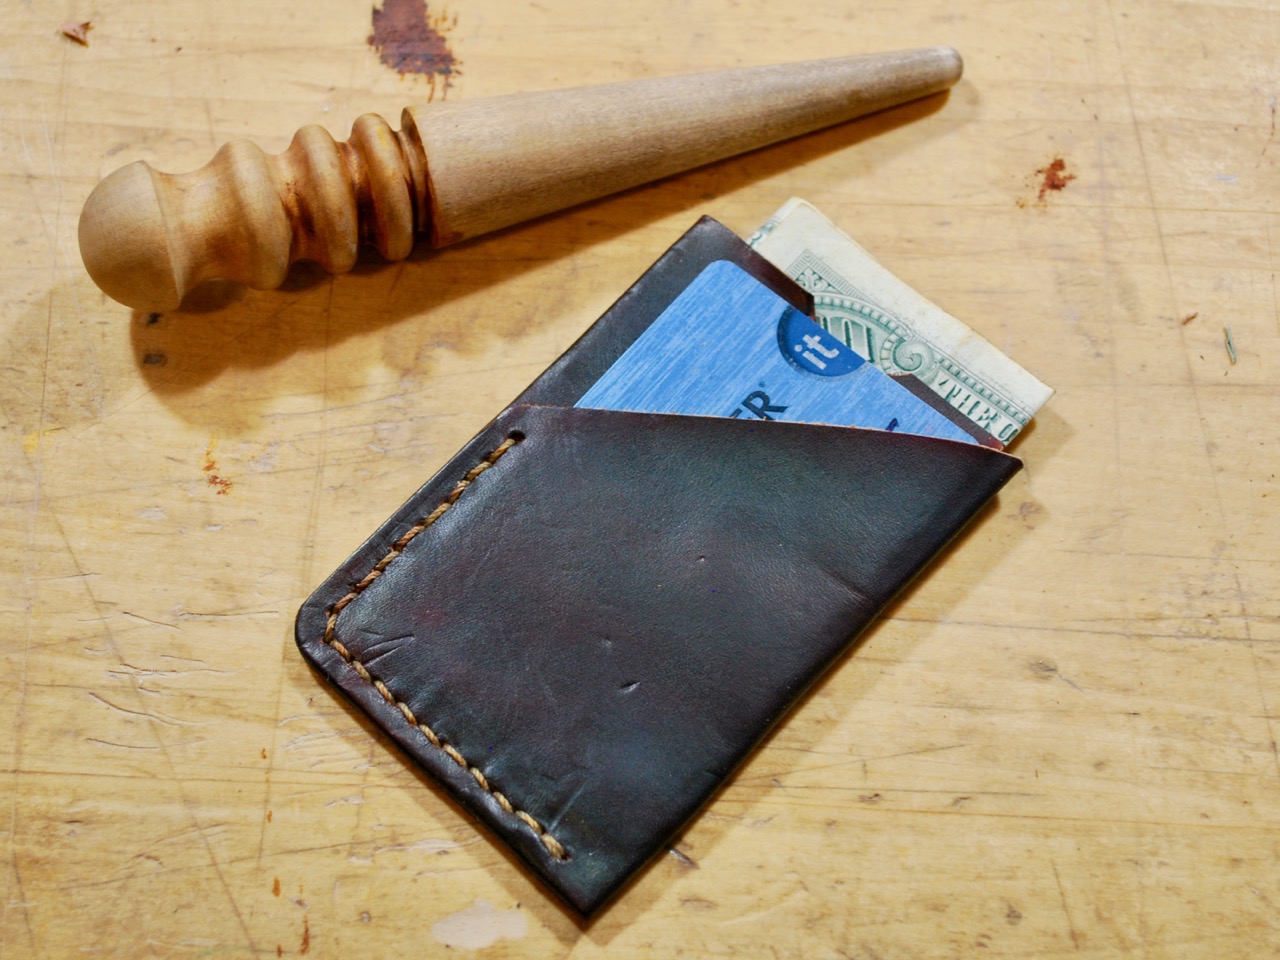
Finishing Up
And finally, the edges were dyed again and burnished to create a smooth, finished look. Overall, I’m quite satisfied with the outcome. This one will be the prototype to work from and I’ll be able to take a little more care now that I have learned from this one. If I ever get around to making enough to sell, I’ll put them on my Etsy Store.
To view this project on Instructables, click the link here: Minimalist Wallet
I have a slightly more complex project laid out for later. If I take the time to document it, I’ll post it up here.
Taking a break from work to make something for myself…
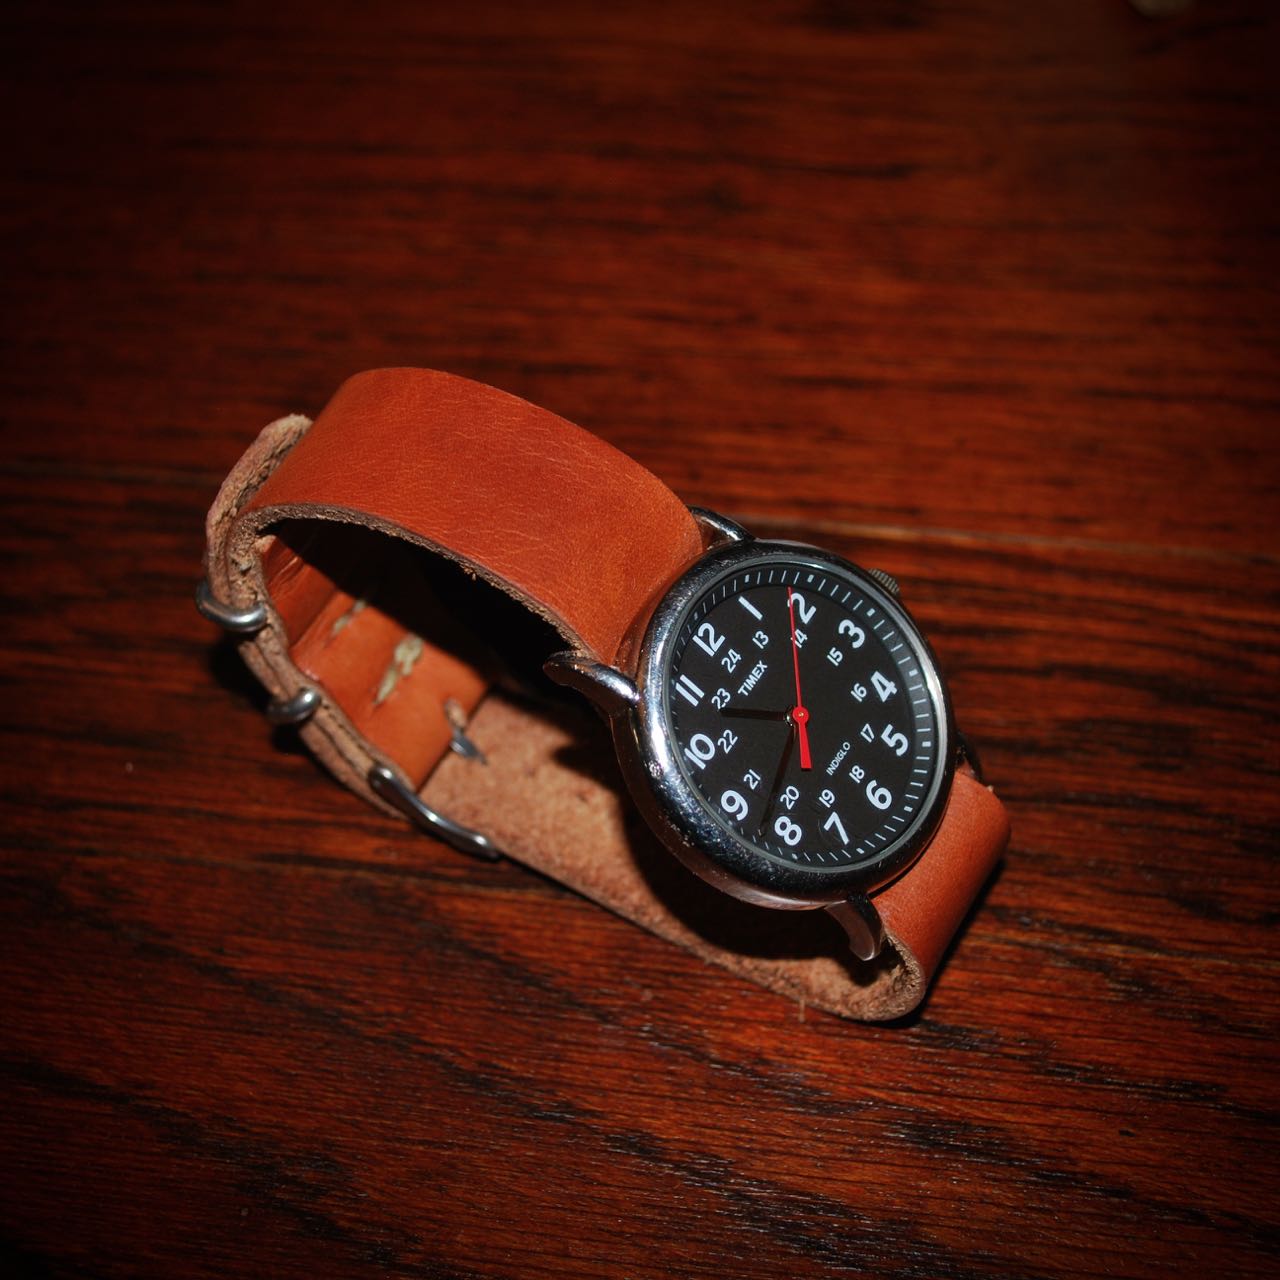
I don’t wear a watch every day but when I do, I like it to be comfortable and not at all flashy. I was never a fan of wearing a watch when I wasn’t working but having a crew who expect regular breaks and a lunch hour made sure I owned one most of my adult life. Now we live in an era of cell phones with fancy clock features, timers, and alarms which makes the humble wrist watch an anachronism at barely 100 years old.
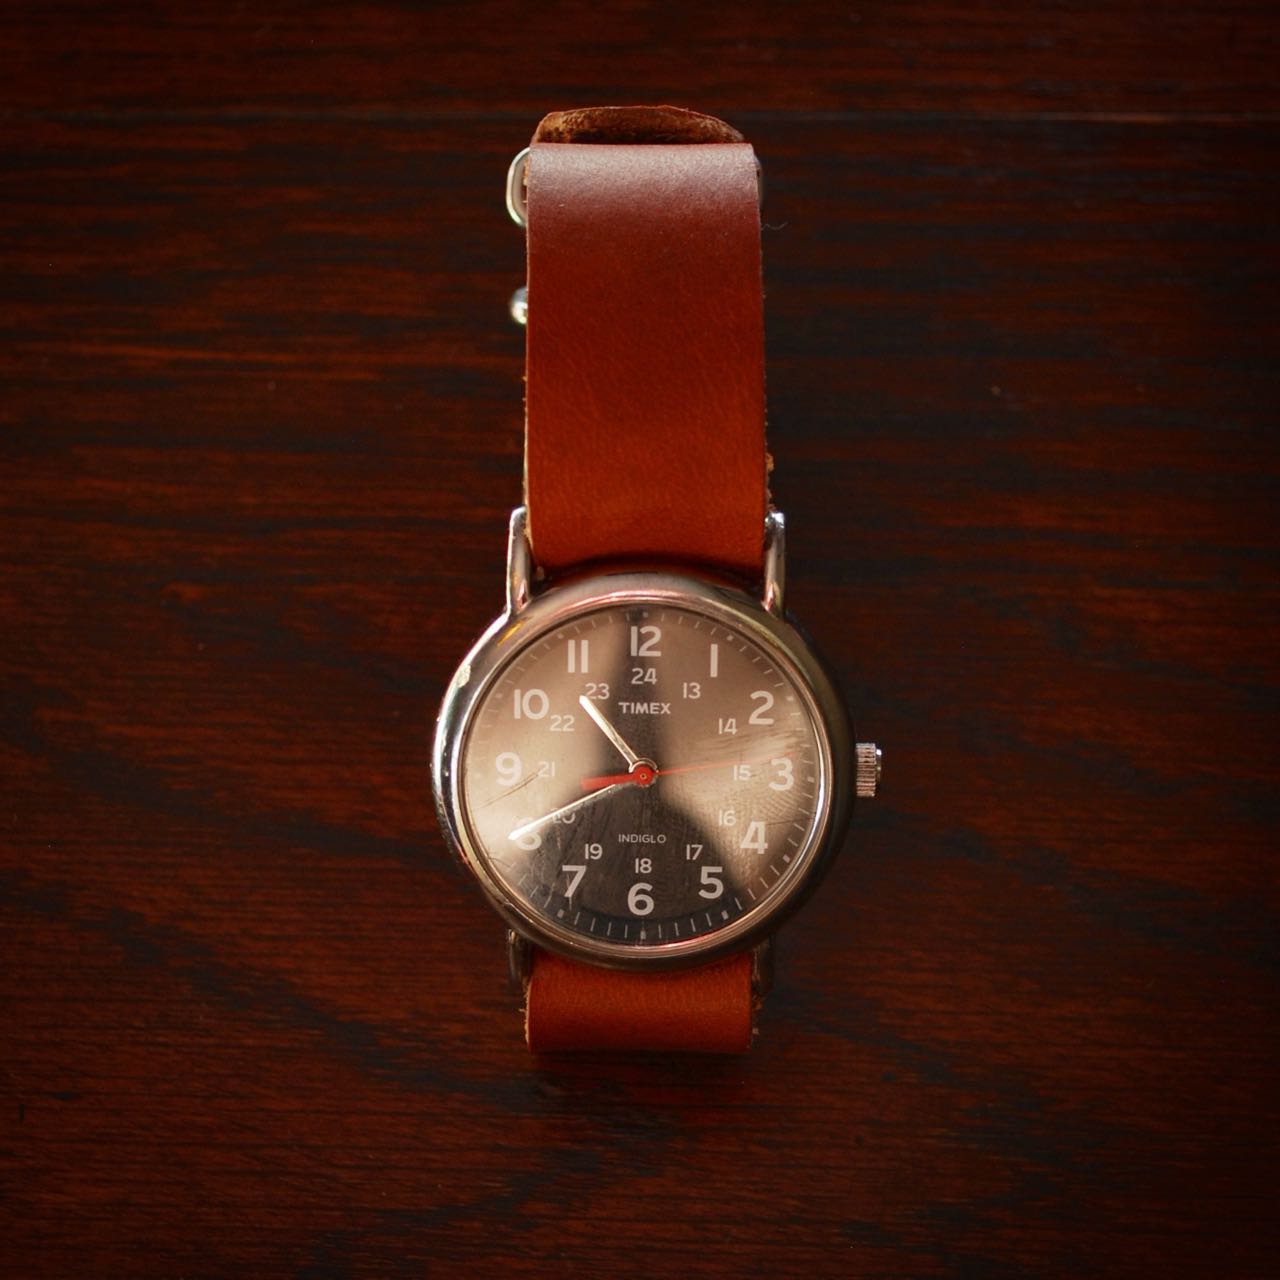
My inexpensive but excellently serviceable watch.
I don’t desire or need an expensive watch and have always considered them to be somewhat disposable. I bang them up pretty badly so it is rare that I ever have one costing more than about $40. If you’ve ever changed a modern band and don’t like to fidget around with the little pop-off axles that hold the strap on you should consider this simple and elegant design long-favored by the military. A quick search on the internet will yield you plenty of cheap and interesting versions of this type and they can be changed in a matter of seconds. It’s even fashionable to have several styles and interchange them regularly. Imagine that… I’m a fashionista.
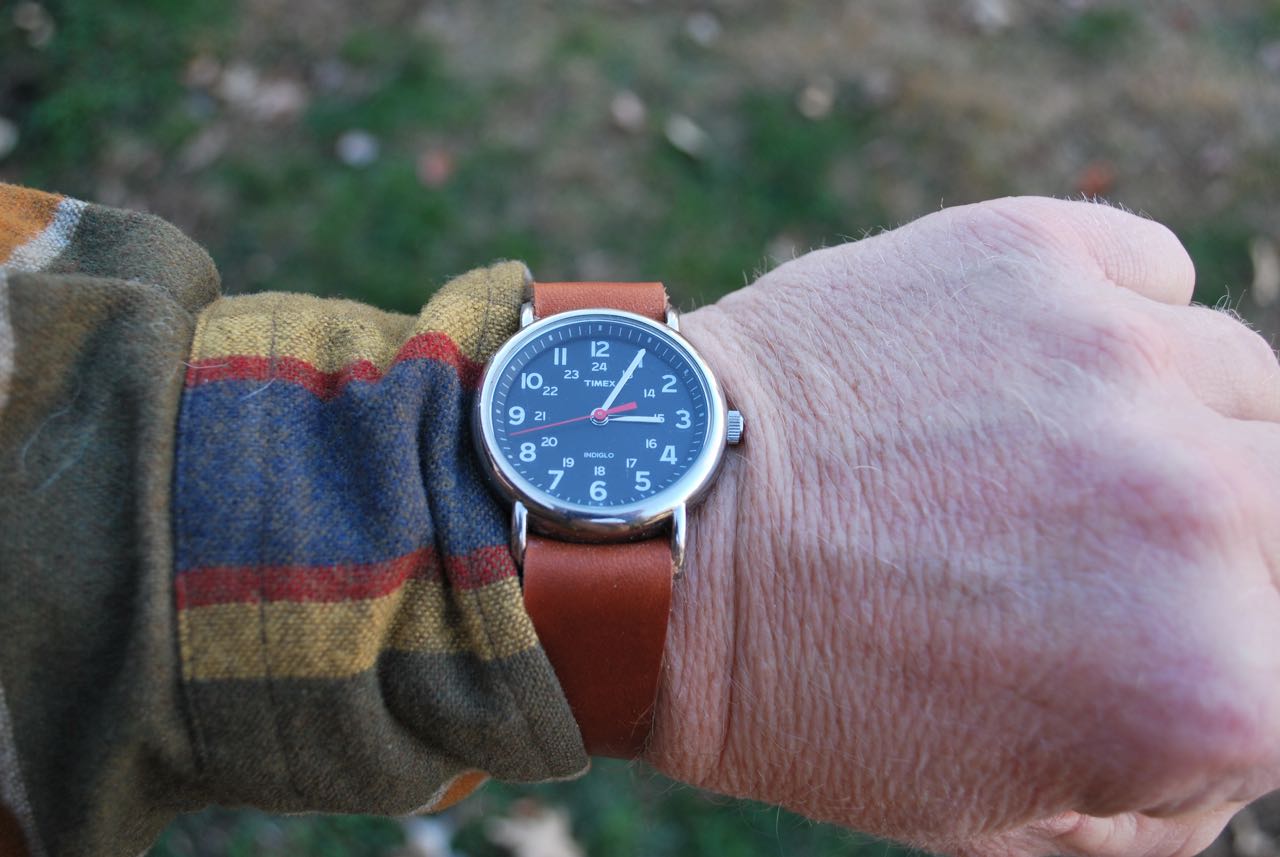
I made this one before dinner.
I considered making an extremely simple tutorial for this style but it is so incredibly simple, I think actual words would only confuse the matter.
Threaded onto the watch.
The real genius of this design is that it is a single belt that goes behind the watch, keeping the metal mostly off of the skin. It should be clear from the photo above that there is really no trick to attaching it to the watch itself. I have rather thick wrists, so I add about an inch and a half to my bands when I make them for a better fit.
Completed strap.
And finally (I know, you shouldn’t start a sentence with a conjunction but we all do it) you don’t have to even limit this design to leather. You can make it from cotton or nylon flat webbing or could even branch out to making your own cloth band. Just save back the buckles and keepers from any old watch and sew them to your own creation.
So, I hung my leather bottle over the wood stove one evening and awoke to find it very dried out and the wax, hitherto virtually invisible had run to the bottom then onto the hearth. While seeking out design ideas, I recalled the excellent tutorial from the Leatherworking Reverend from way down under. I hope he doesn’t mind the publicity as I am reposting his Flacket-style bottle design here. On my ever growing, rarely shrinking list of things to do!
A flacket is a type of leather flask or bottle made from only two pieces of leather, one for the front and one for the back. It has no base, but may additionally have a welt or gasket piece between the front and back. Depending on your cultural prejudices, these are sometimes also known as pumpkinseed- or pear-flasks.
Examples are few, pointing to it being an older design than those we more commonly see, such as costrels and the two- or three-piece leather bottels. Most of the surviving examples come from the Mary Rose (1545) and are regarded as among the last exemplars of the form. Accordingly, Baker is of little help other than on p59, remarking “Flasks (Flascones) as well as bottles are mentioned in Alfric’s Colloquy in the 10th century as being made by the shoe-wright…”
Designed mainly for upright use such as hanging on saddles…
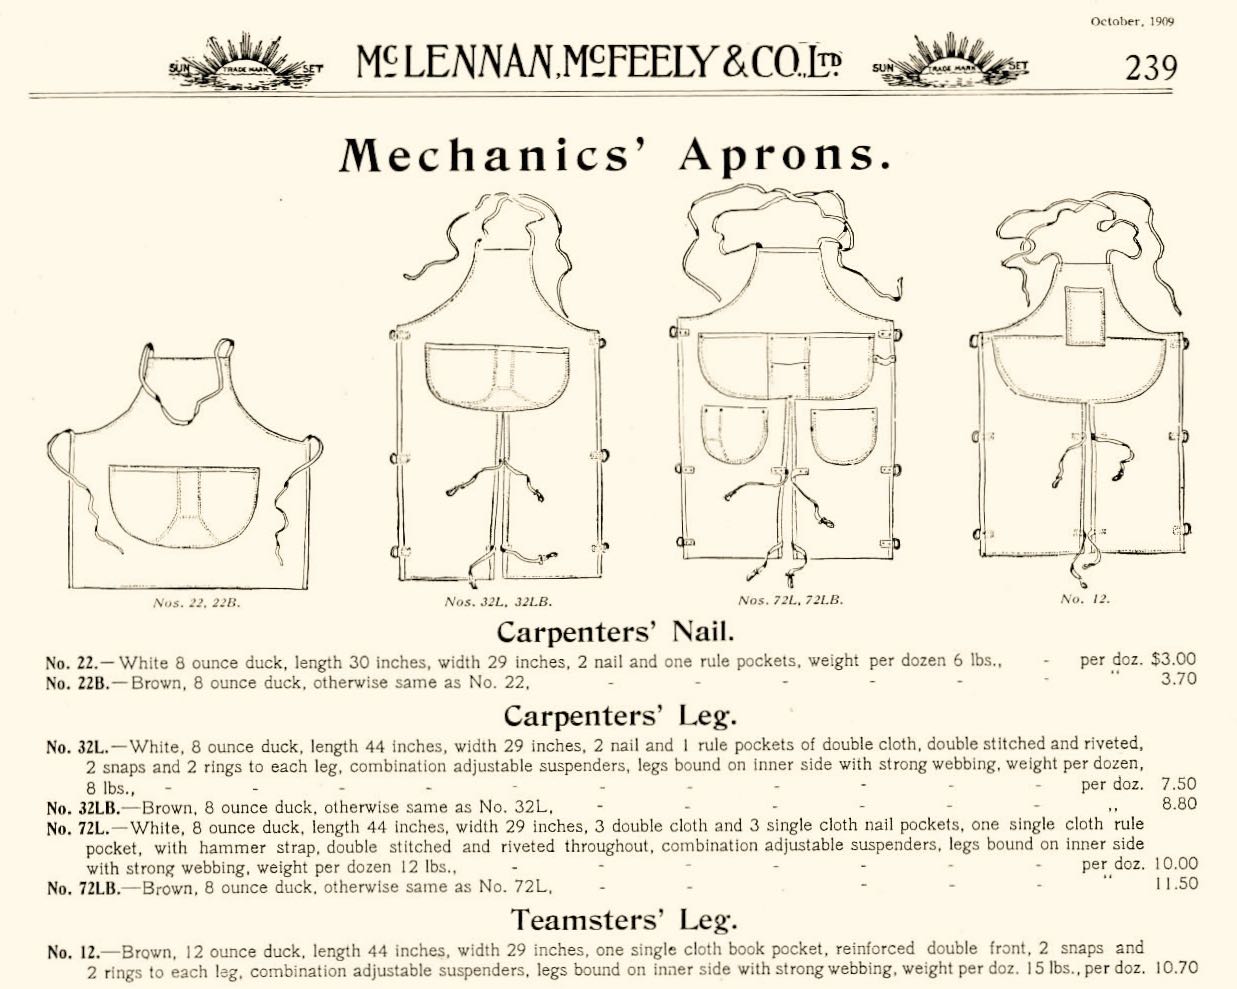
Shop aprons are not as widely used as in the past. I believe this is related to our modern view on clothing and how it has changed over the past century. Not only are we training less in the trades, our clothes are ridiculously cheap in the modern world. Low prices and availability keeps our incentive to protect them pretty low. As I have reduced my quantity of clothing I have grown to appreciate the humble shop apron more than ever. In the past, my only incentive was for protection when grinding metal or welding but now I begin to understand the real role a good apron can play in the shop.
A good shop apron can cost quite a bit of money ($40 – $100 or more) so I present the above catalog page as a starting point for construction. Heavy canvas or leather are the obvious choices for material. Although heavier, I prefer leather as is it is fireproof and offers some protection against cuts. As for protection, here’s an image I found when looking for designs. It’s from a Navy singlestick exercise. Somehow the design seems familiar.
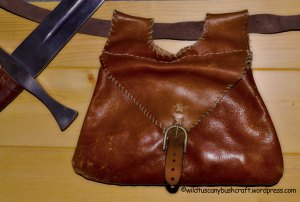
Here is a great little instruction set on how to make a European Medieval-style belt bag. You see these in paintings and illustrations on just about every traveler. Not only will you come out with a nice bag but it is a fine and simple introduction into leather working and sewing. All makers need to start somewhere and this might be the right project.
During the Middle Age was common carrying small items like coins, keys, inside pouches or purses attached to the belt.
There are many archaeological and iconographical documents, you can search for your favorite patterns, but there is a model that in my opinion, is one of the best for a bushcrafter.
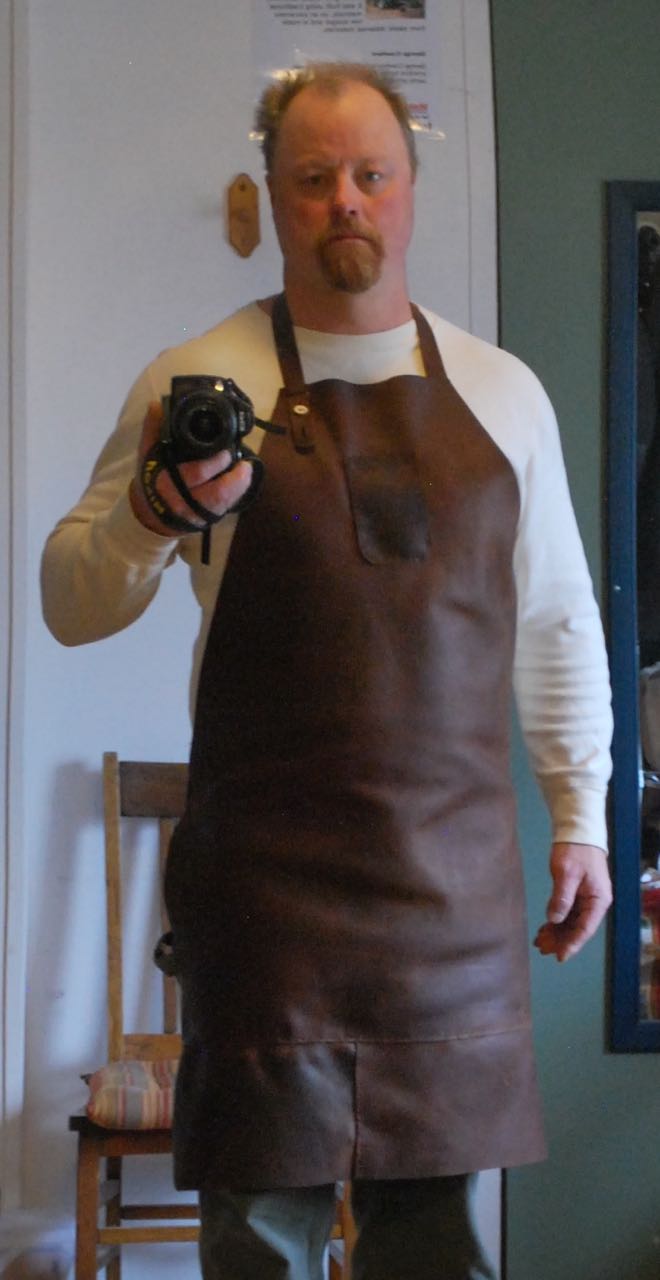
I finally got around to replacing my very old shop apron. It was the standard issue split-leather welder style and over many hard years had amassed large quantities of wood glue, grease, metal grime, blood and membrane (from brain tanning), and other unidentifiable smudges over most of it’s surface. It went into the trash a while back when an unexpected leak in my barn allowed it to saturate and subsequently get some very ugly mold patches in a funky tie-dye pattern. I expect it was fairly nutrient-rich and I wasn’t interested in trying to salvage it after all these years.
I had some fine oiled leather from a recent project (aprons take a lot of footage) so was able to cobble together a decent shop apron without too much difficulty. I expect this to last another 20 years or more; maybe the rest of my life.
The image is not great. Just a poorly lighted mirror shot “selfie.” Par for the internet I guess. And no, I’m not glaring. That’s just how I look. I guess I didn’t learn to smile well as a kid or it’s just not in the genes.
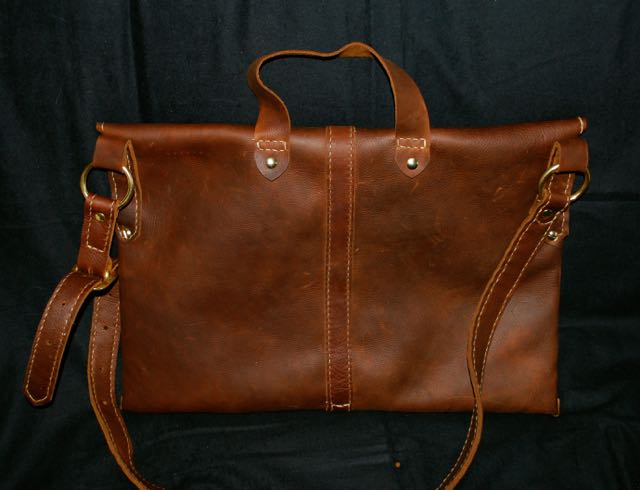
I finally finished the commissioned bag from last month based on the beautifully proportioned Roman design. As far as I know, this design dates back to at least the First Century C.E. and judging by it’s logic, probably much further.
I think the true loculus (satchel) utilized an envelope design from a single small goat hide but as they survive only in art, we have to make a few guesses as to construction. The one I made has a few more modern features including inner dividers and a cell phone pocket.
The leather is an oiled cowhide with a slightly scotched (textured) surface. This type of leather wears well, is weather-resistant, and comes back to life with a wipe down.
A simple button closer secures the flap while the straps cover the seams and give it body. The sewing is all double needle saddle stitch done by hand.
The body is divided into three pockets with an added cell phone holder.
Finally, the handle. Historic examples appear to have used this handle over the end of the staff with a cross piece through the loops, keeping it from sliding side-to-side as the one below.
To remain unencumbered, Roman Legionaries carried this bag on the furca (travel staff).
I hope Gen, it’s new owner, loves it and finds it useful.
To aid in downsizing our worldly possessions (and tons of raw materials), I initiated the buckskin bag project. The goal is to produce as many little beauties as possible while experimenting and learning new techniques.
This is the first run of bags, which still require embellishments, closures, and neck straps. More to come…


 We were acting like shut-ins today because of a surprise snow storm so I’ve been able to jump to another leather-related project. I’ll share some photos soon.