Here is a shop update on a couple of the many leatherworking projects undertaken lately. I decided to use up all the leather I have been storing and put it to good use. I have about 100 projects I’d like to make for myself but the Yule season is coming, gifts are expected in many quarters, and we have an invite to show our wares at a local crafts fair. So, without further fanfare…
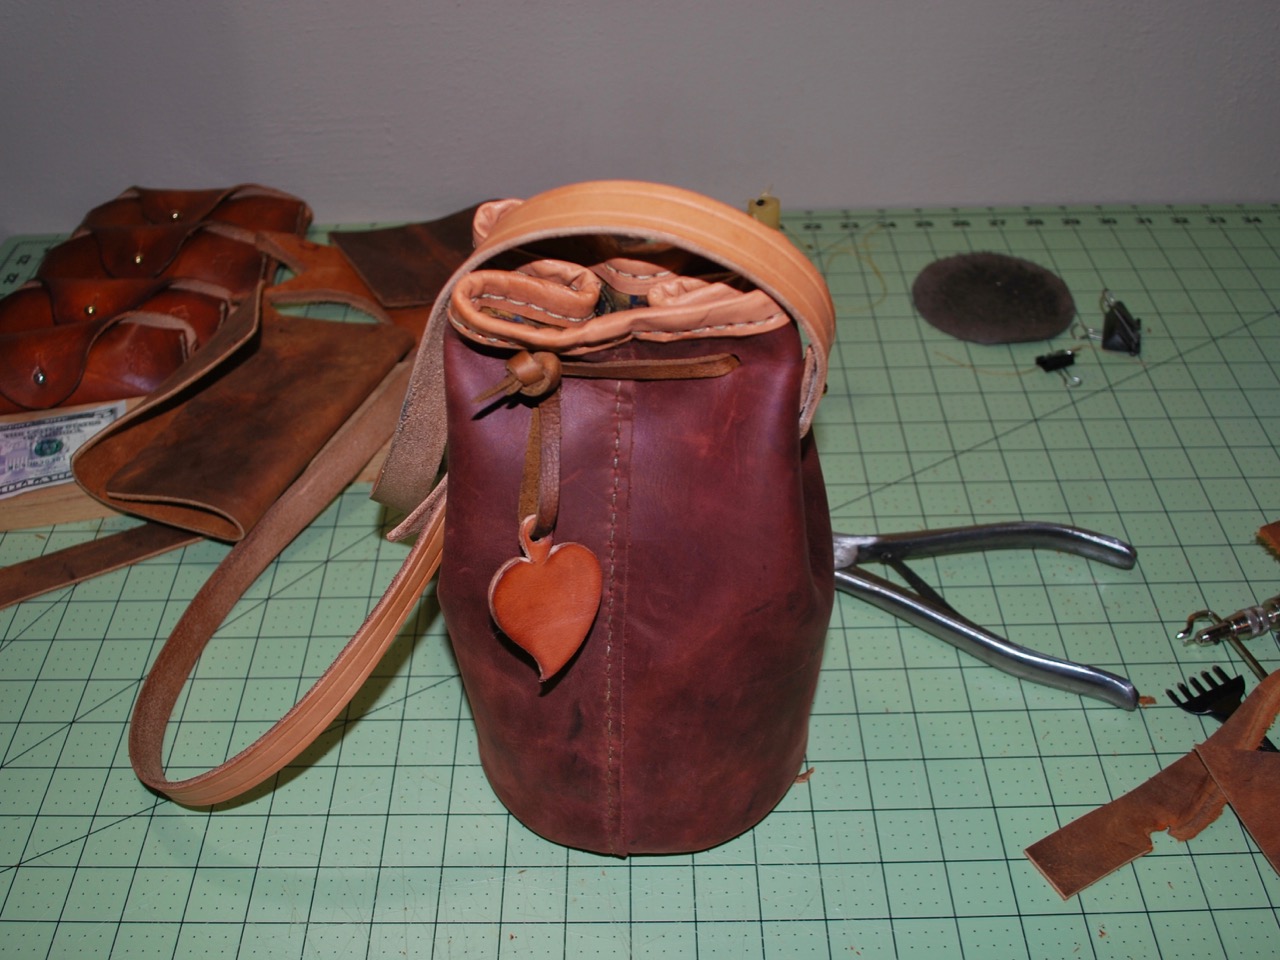
A waxed leather bucket-style purse. I hear these are the rage in certain groups now. I remember seeing many in this style back in the 1980s coming out of Morocco and Spain.And I decided to make a few bomb-proof wallets of various designs to go with it.
A surprising amount of work can go into even a relatively small project like this.
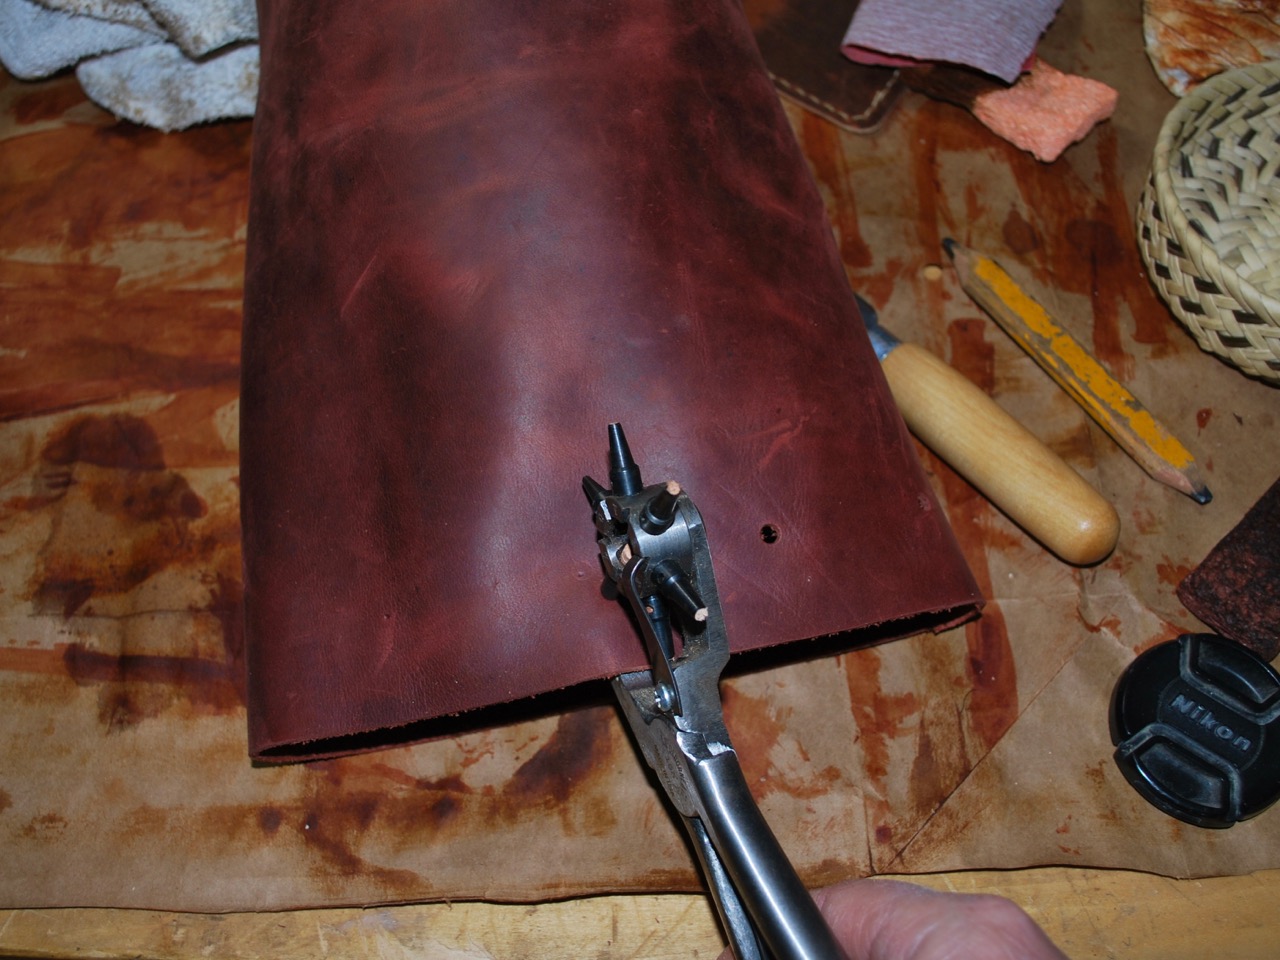
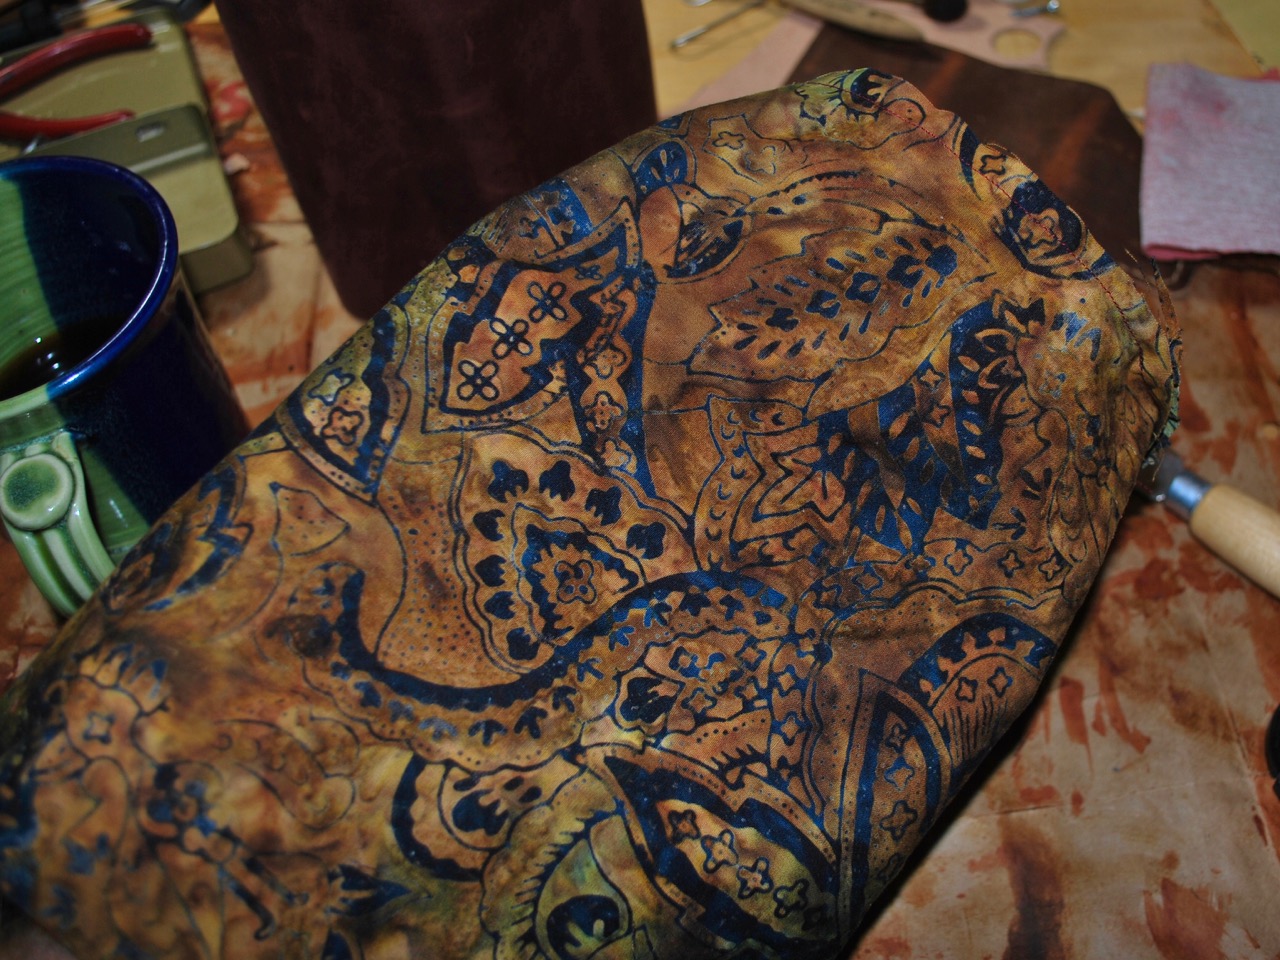
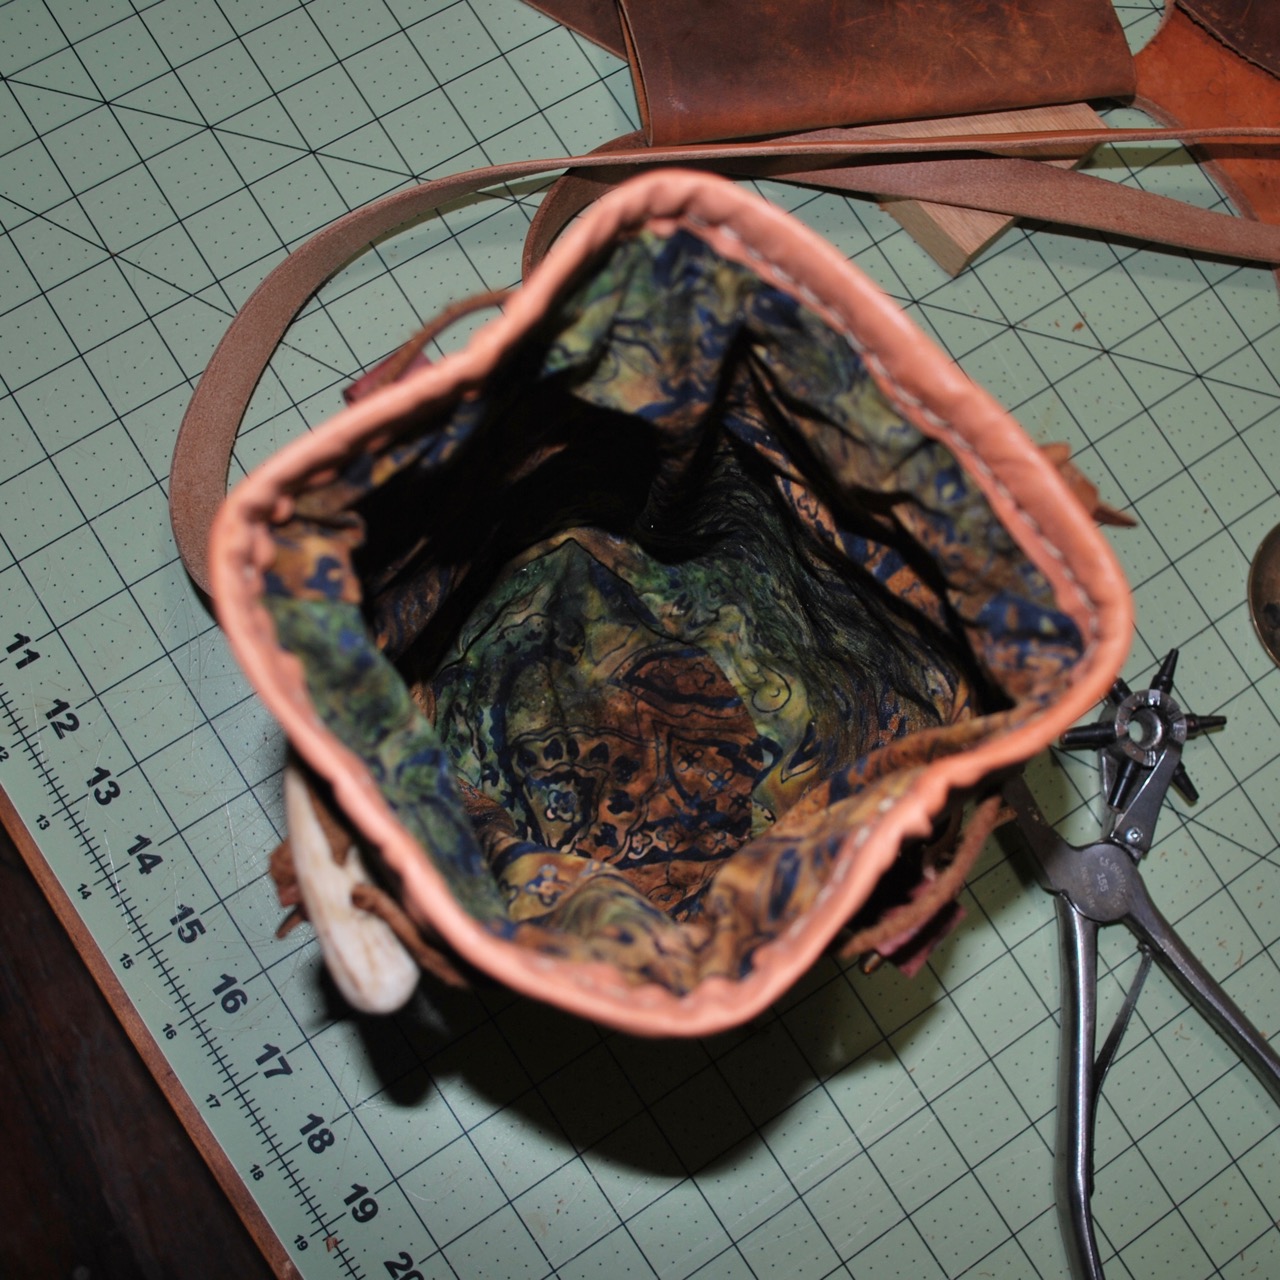
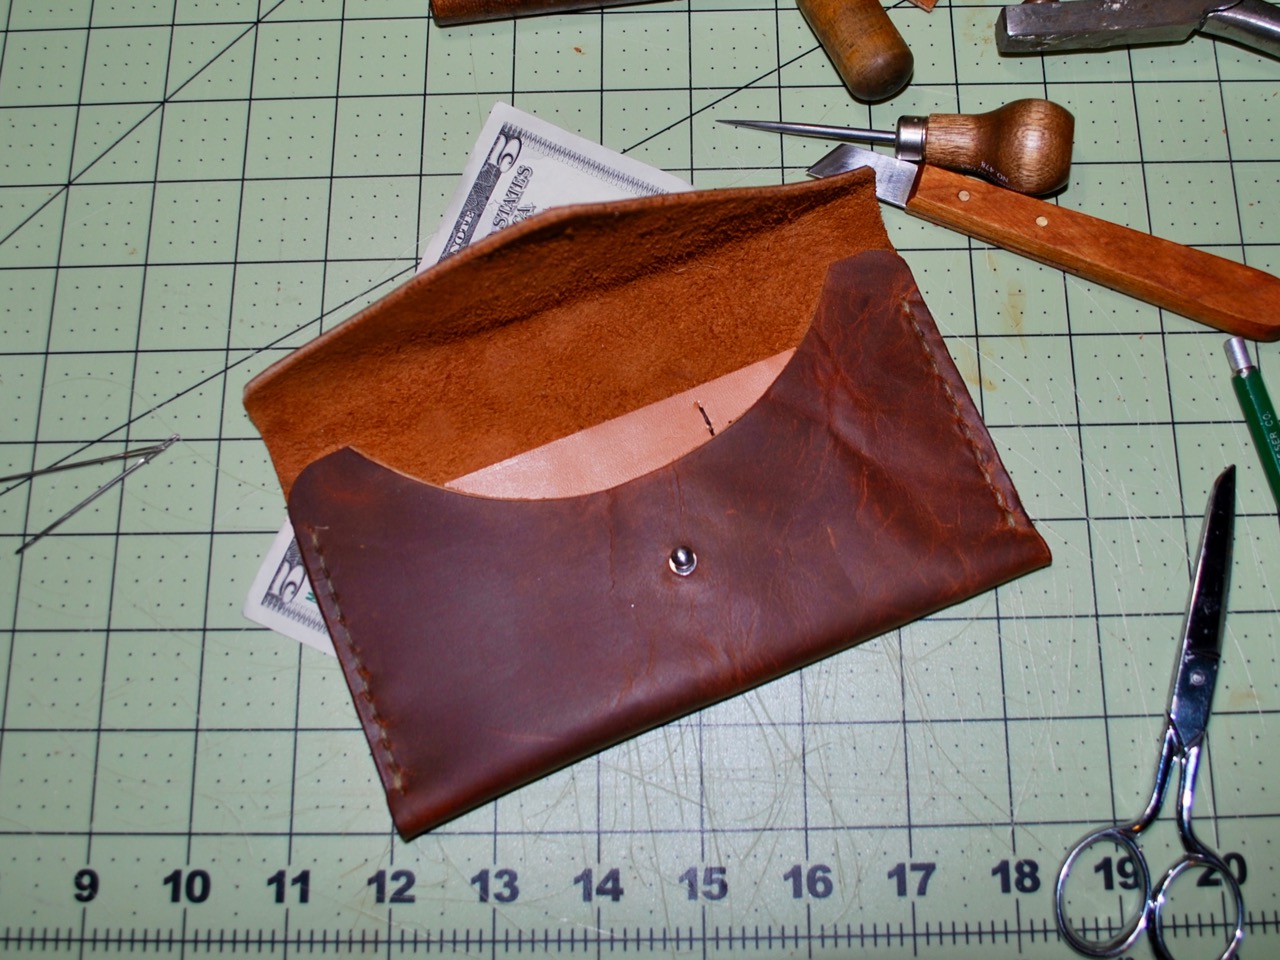
Temporarily gluing the welt to the bottom.Sizing the bottom to the side before sewing.The exposed welt after sewing and turning the bag.Marking and punching the holes. Tiresome for the hands.Choosing an appropriate lining; strong and beautiful.Drawstring added, holding the leather edge biding while sewing.The ‘ears’ for holding the shoulder strap sewn on, strap attached, and it is done!The antler toggle helps keep the bag secure and adds a bit of primitive flash.Difficult to photograph, but the liner gives the bag some class and a feeling of “completeness.”This is a new traveler’s wallet design. Three pockets, large capacity to hold money, cards, and passport.This one might be a bit too small to hold a check book but not a lot of us carry those these days.The button stud is a favorite closure of mine as it is simple and effective without the need for a large hole.After a quick buffing, the wax shines up nicely. This one should last a lifetime.
I try to live by the creed of learning and making something good every day.
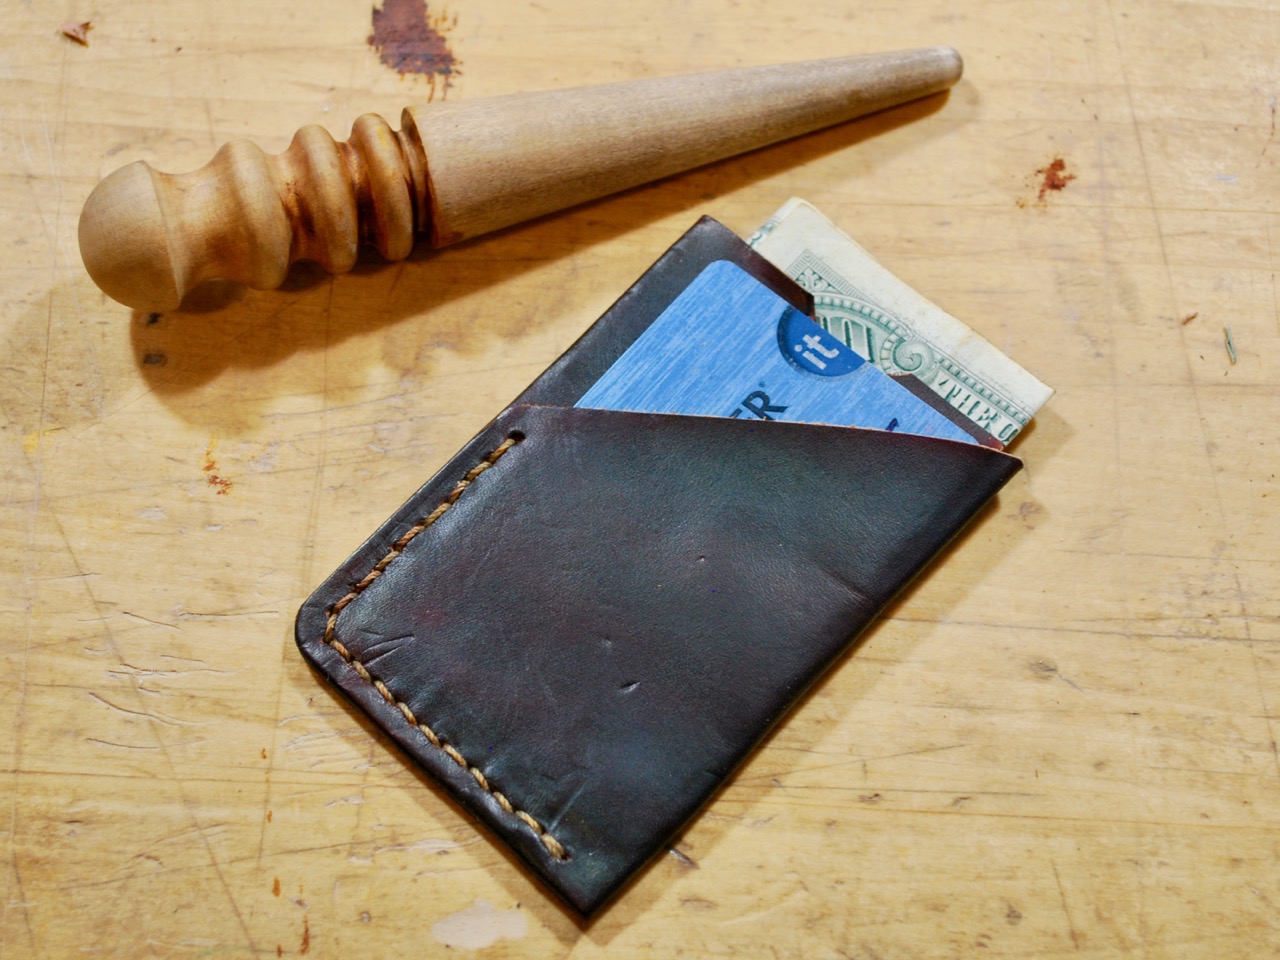
The Minimalist Wallet
As we have been pondering the holiday season it seemed a good time to get a jump on some leatherworking projects I’ve had in mind the past few months. This morning, before getting to work on other chores, I decided to take a little time and work out a slightly modified Minimalist Wallet. If you have followed this blog for long, you may have seen a couple earlier wallet projects we shared HERE and HERE. This isn’t a complicated project and might be a good one to start with if you trying your hand at leatherworking for the first time.
The All-Encompassing Symbol of the Age
Making the Pattern –
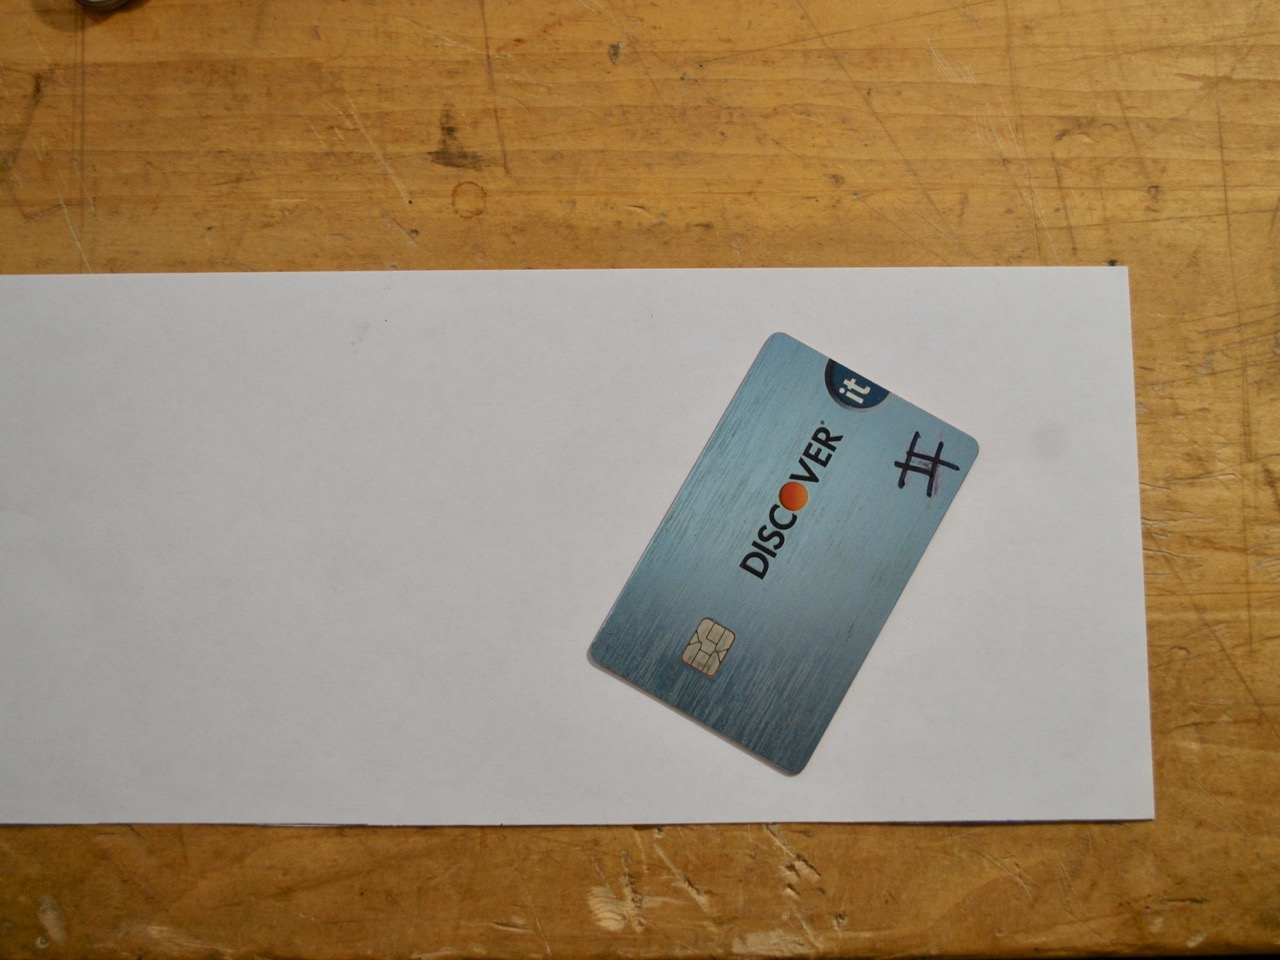
It would be pretty optimistic to just dive in and start cutting out a wallet without knowing what needs to fit. I used a debit card for scale as there will inevitably be a couple of these in just about any modern traveler’s pocket. I didn’t put a lot of time into the pattern as I have made a similar style before and knew the basics of what I wanted; essentially two pockets and very little sewing.
A Bit of Sloppy Origami to Test the Dimensions
To create two pockets, there needs to be three layers; two on the outside and one to divide. To make the cards more accessible, the outer pocket will be a “reveal” and I chose to do this the simplest way possible, by a diagonal straight line.
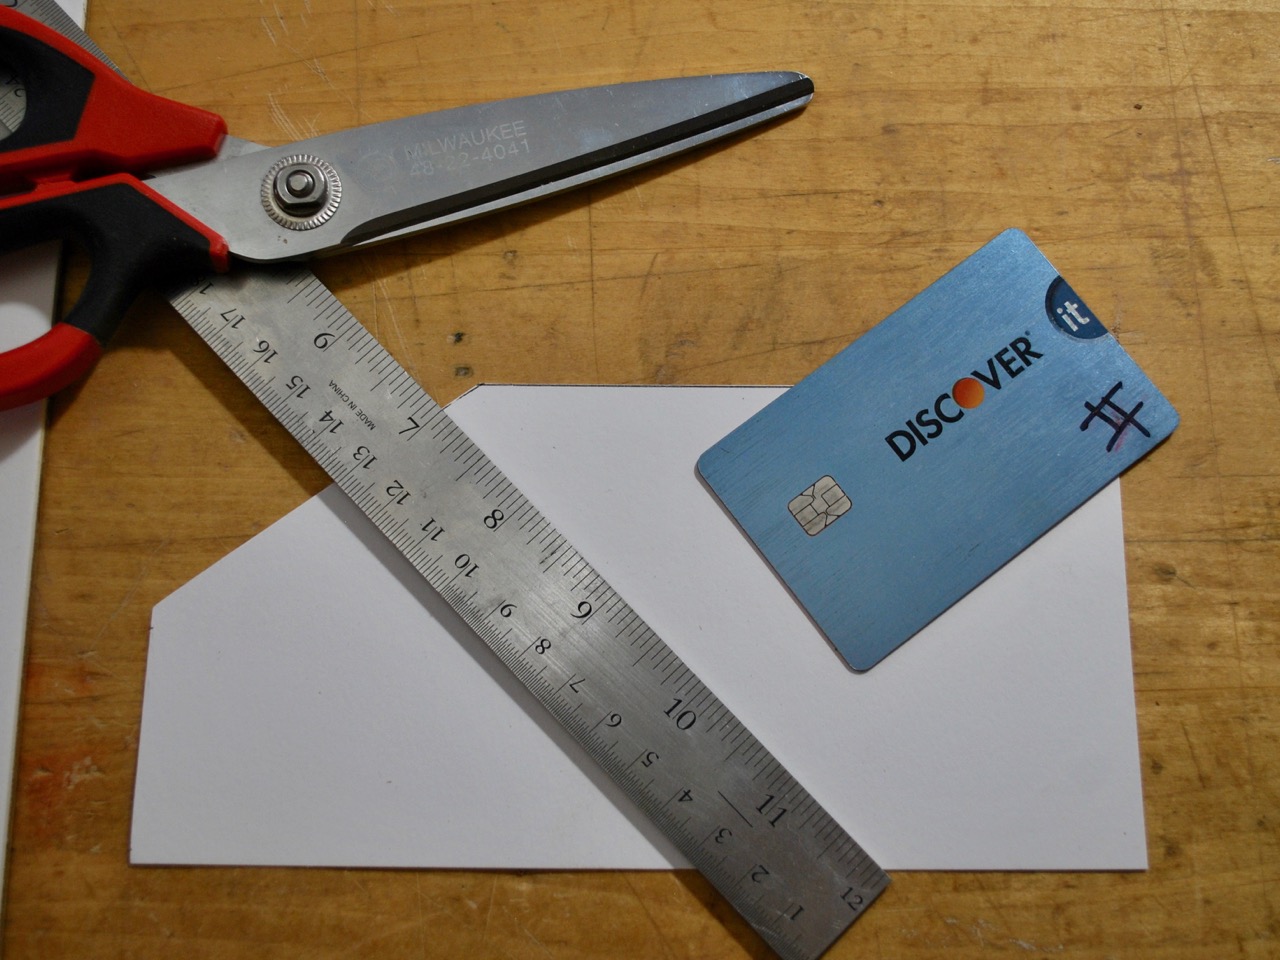
Test Fitting and Trimming the Draft Pattern
I ended up tightening the width and lengthening the entirety just a bit from my original estimates for a better fit. The difficult part is over.
The Draft is Transferred to Stiff Bristol Board for Multiple Uses
After the pattern is transferred to the card stock, it can be used many times without fuss. It is a good idea to label your patterns before storage as they begin to look alike when you amass a large folder of them (was this a pocket, part of a shoe, some sort of handle cover?).
Getting Down to Business –
The next step is to cut out the pattern on appropriate leather. I’m using Hermann Oak 1.5 mm tooling side that was leftover from an earlier project. Neatness in cutting is very important as it will affect the look of the entire piece if the cuts are even a millimeter or two off or wavering in any way. Since most people seem to prefer dark leathers for this sort of thing I chose to dye it Medium Brown with Fiebings Leather Dye.
Wet with Dye
After the dye sets you’re free to move on. I started by marking and awling the stitching holes at about a 5 mm increment. I will admit, this was not my straightest set of stitching lines ever.
Punching the Holes
I almost always use a double needle saddle stitch when sewing leather as it is the best and strongest choice in most cases. I chose a contrasting thread to give it a fine finished look.
Finishing Up
And finally, the edges were dyed again and burnished to create a smooth, finished look. Overall, I’m quite satisfied with the outcome. This one will be the prototype to work from and I’ll be able to take a little more care now that I have learned from this one. If I ever get around to making enough to sell, I’ll put them on my Etsy Store.
To view this project on Instructables, click the link here: Minimalist Wallet
I have a slightly more complex project laid out for later. If I take the time to document it, I’ll post it up here.
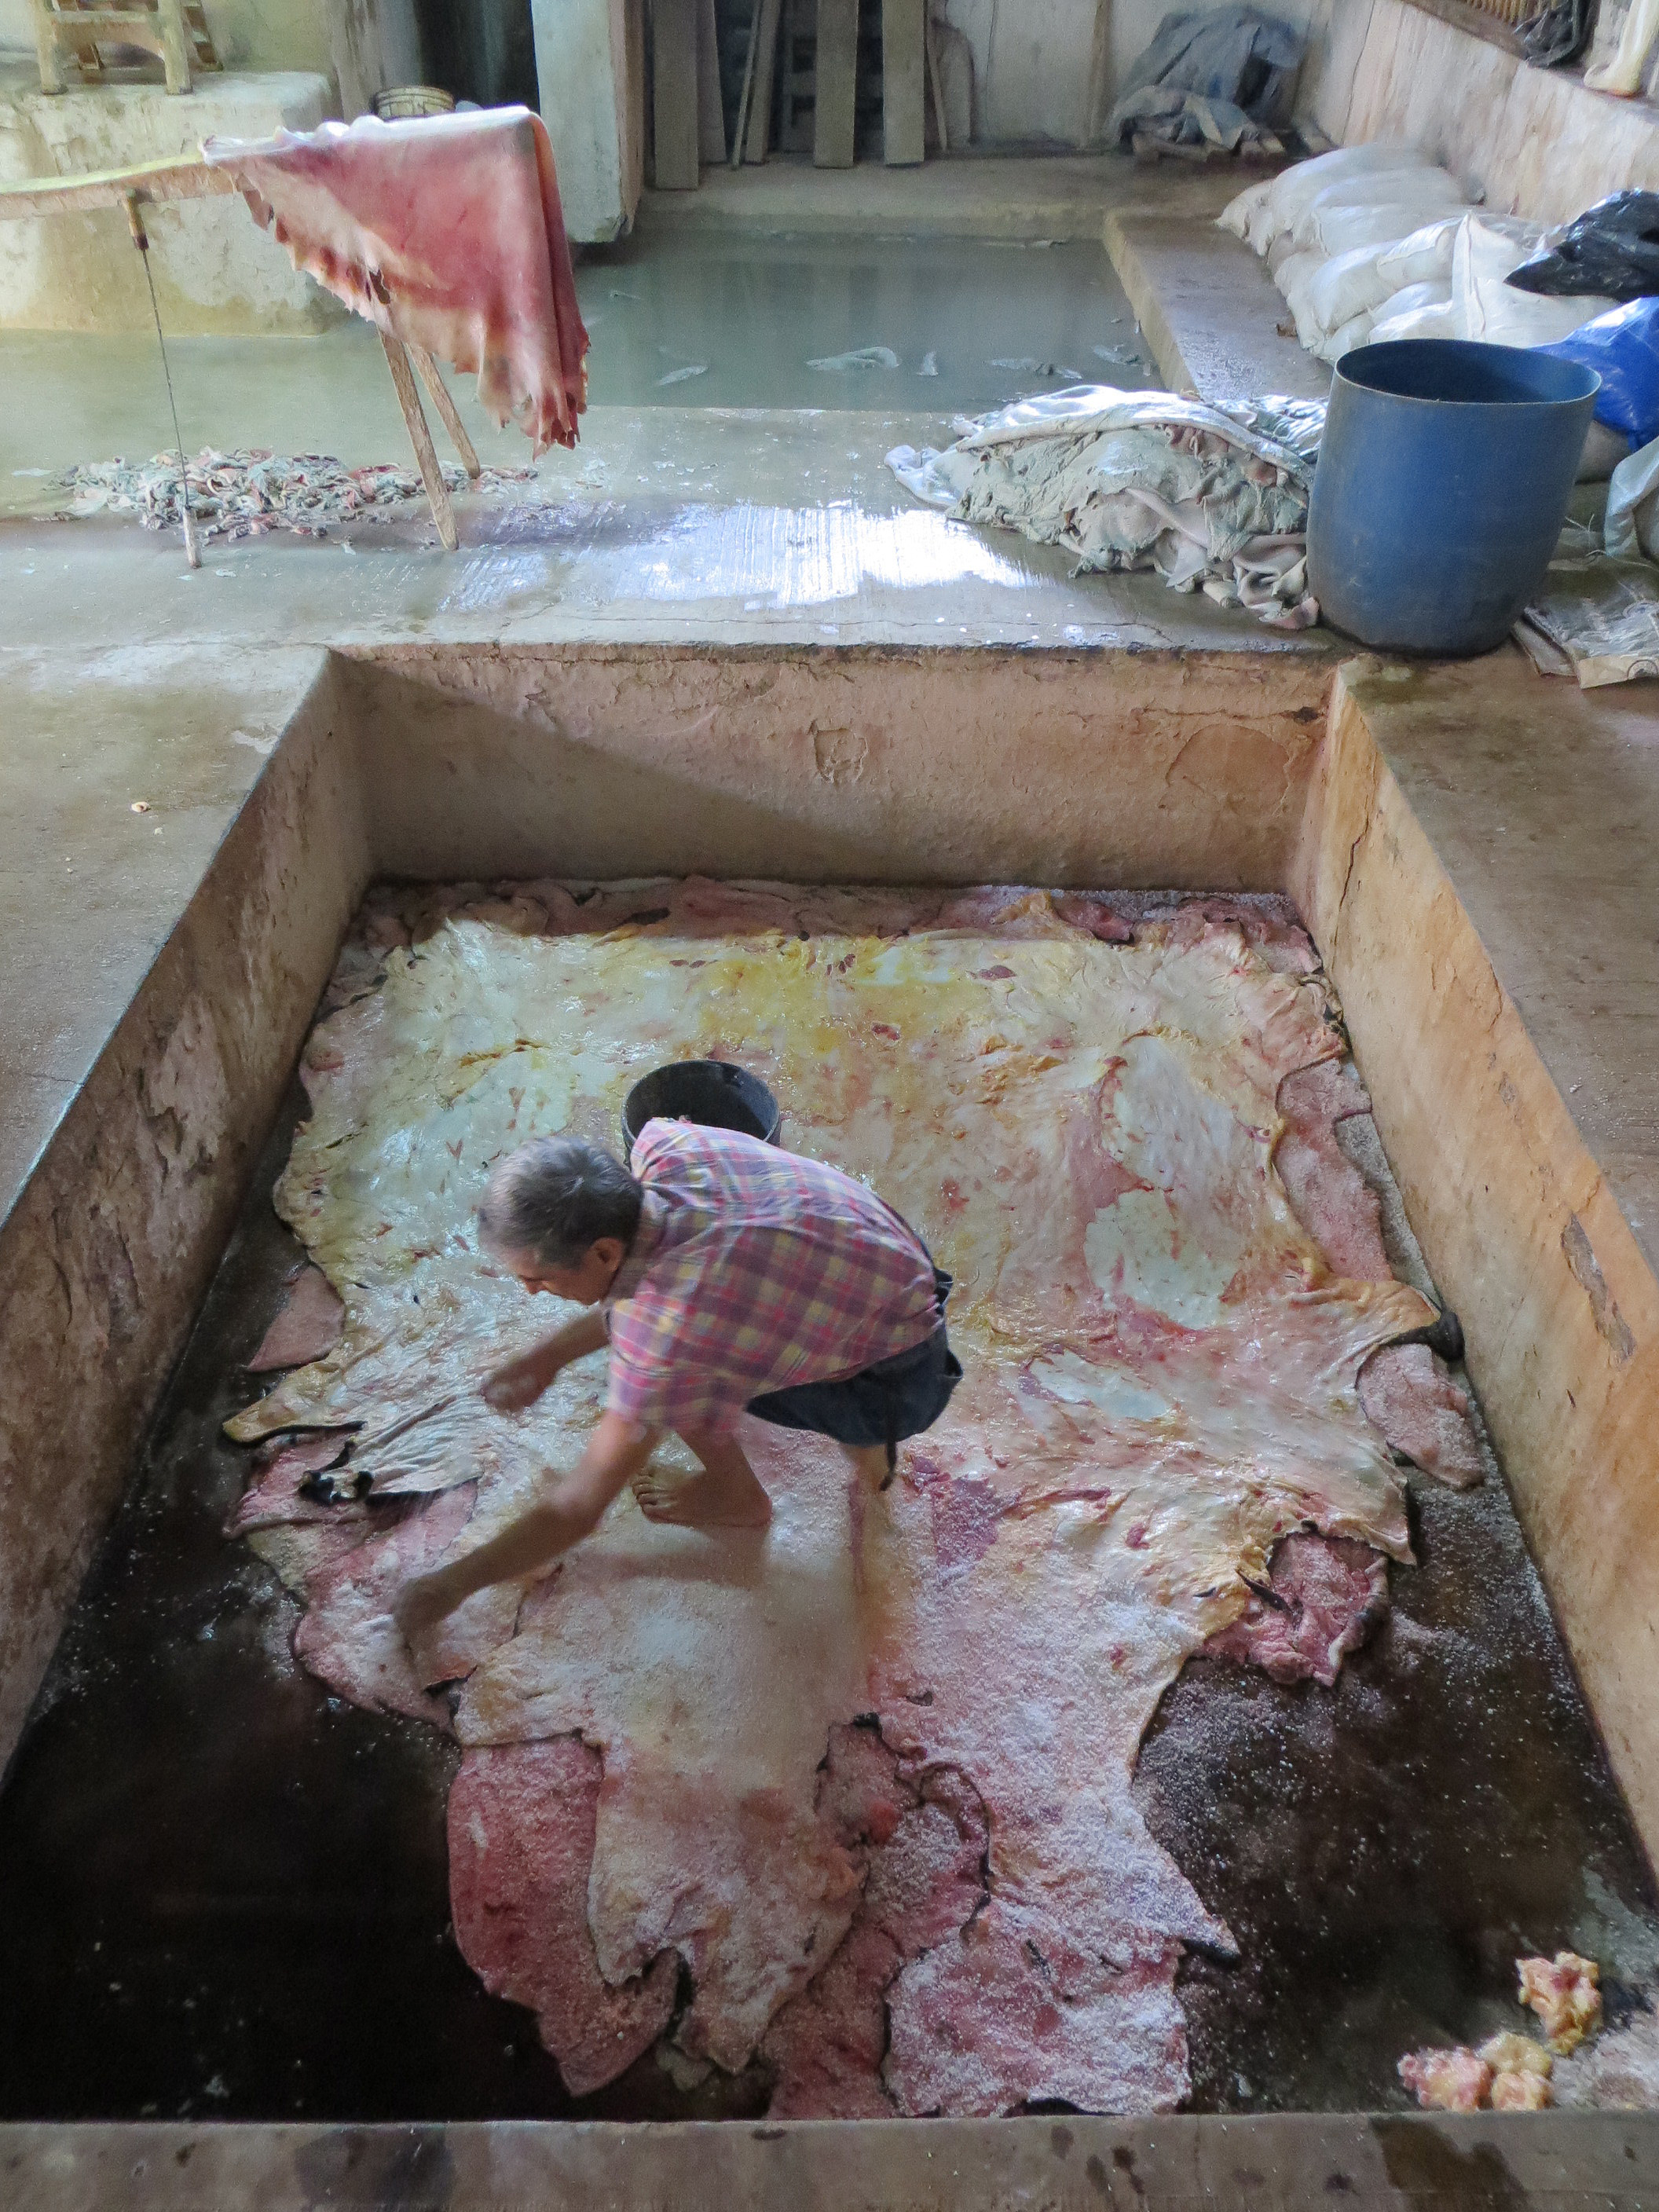
Many years ago, in Morocco, I was able to tour an ancient tannery and see some of the process of creating beautiful leather. I use leather for many projects and although I do some brain tanning myself, I purchase all of my truly “tanned” leathers from others.
Click the image to visit the Moroccan National Tourist Office on Facebook. If you are interested in a description of the tannery at Fez, have a look at Becca’s post about it over on AlwaysCarryOn.
One very important lesson about tanning I learned in Africa was that I never want to work in a African tannery when it’s 100 degrees in the shade. The smell makes a feed lot in Texas almost seem habitable and hits one in the face like a dense fog.
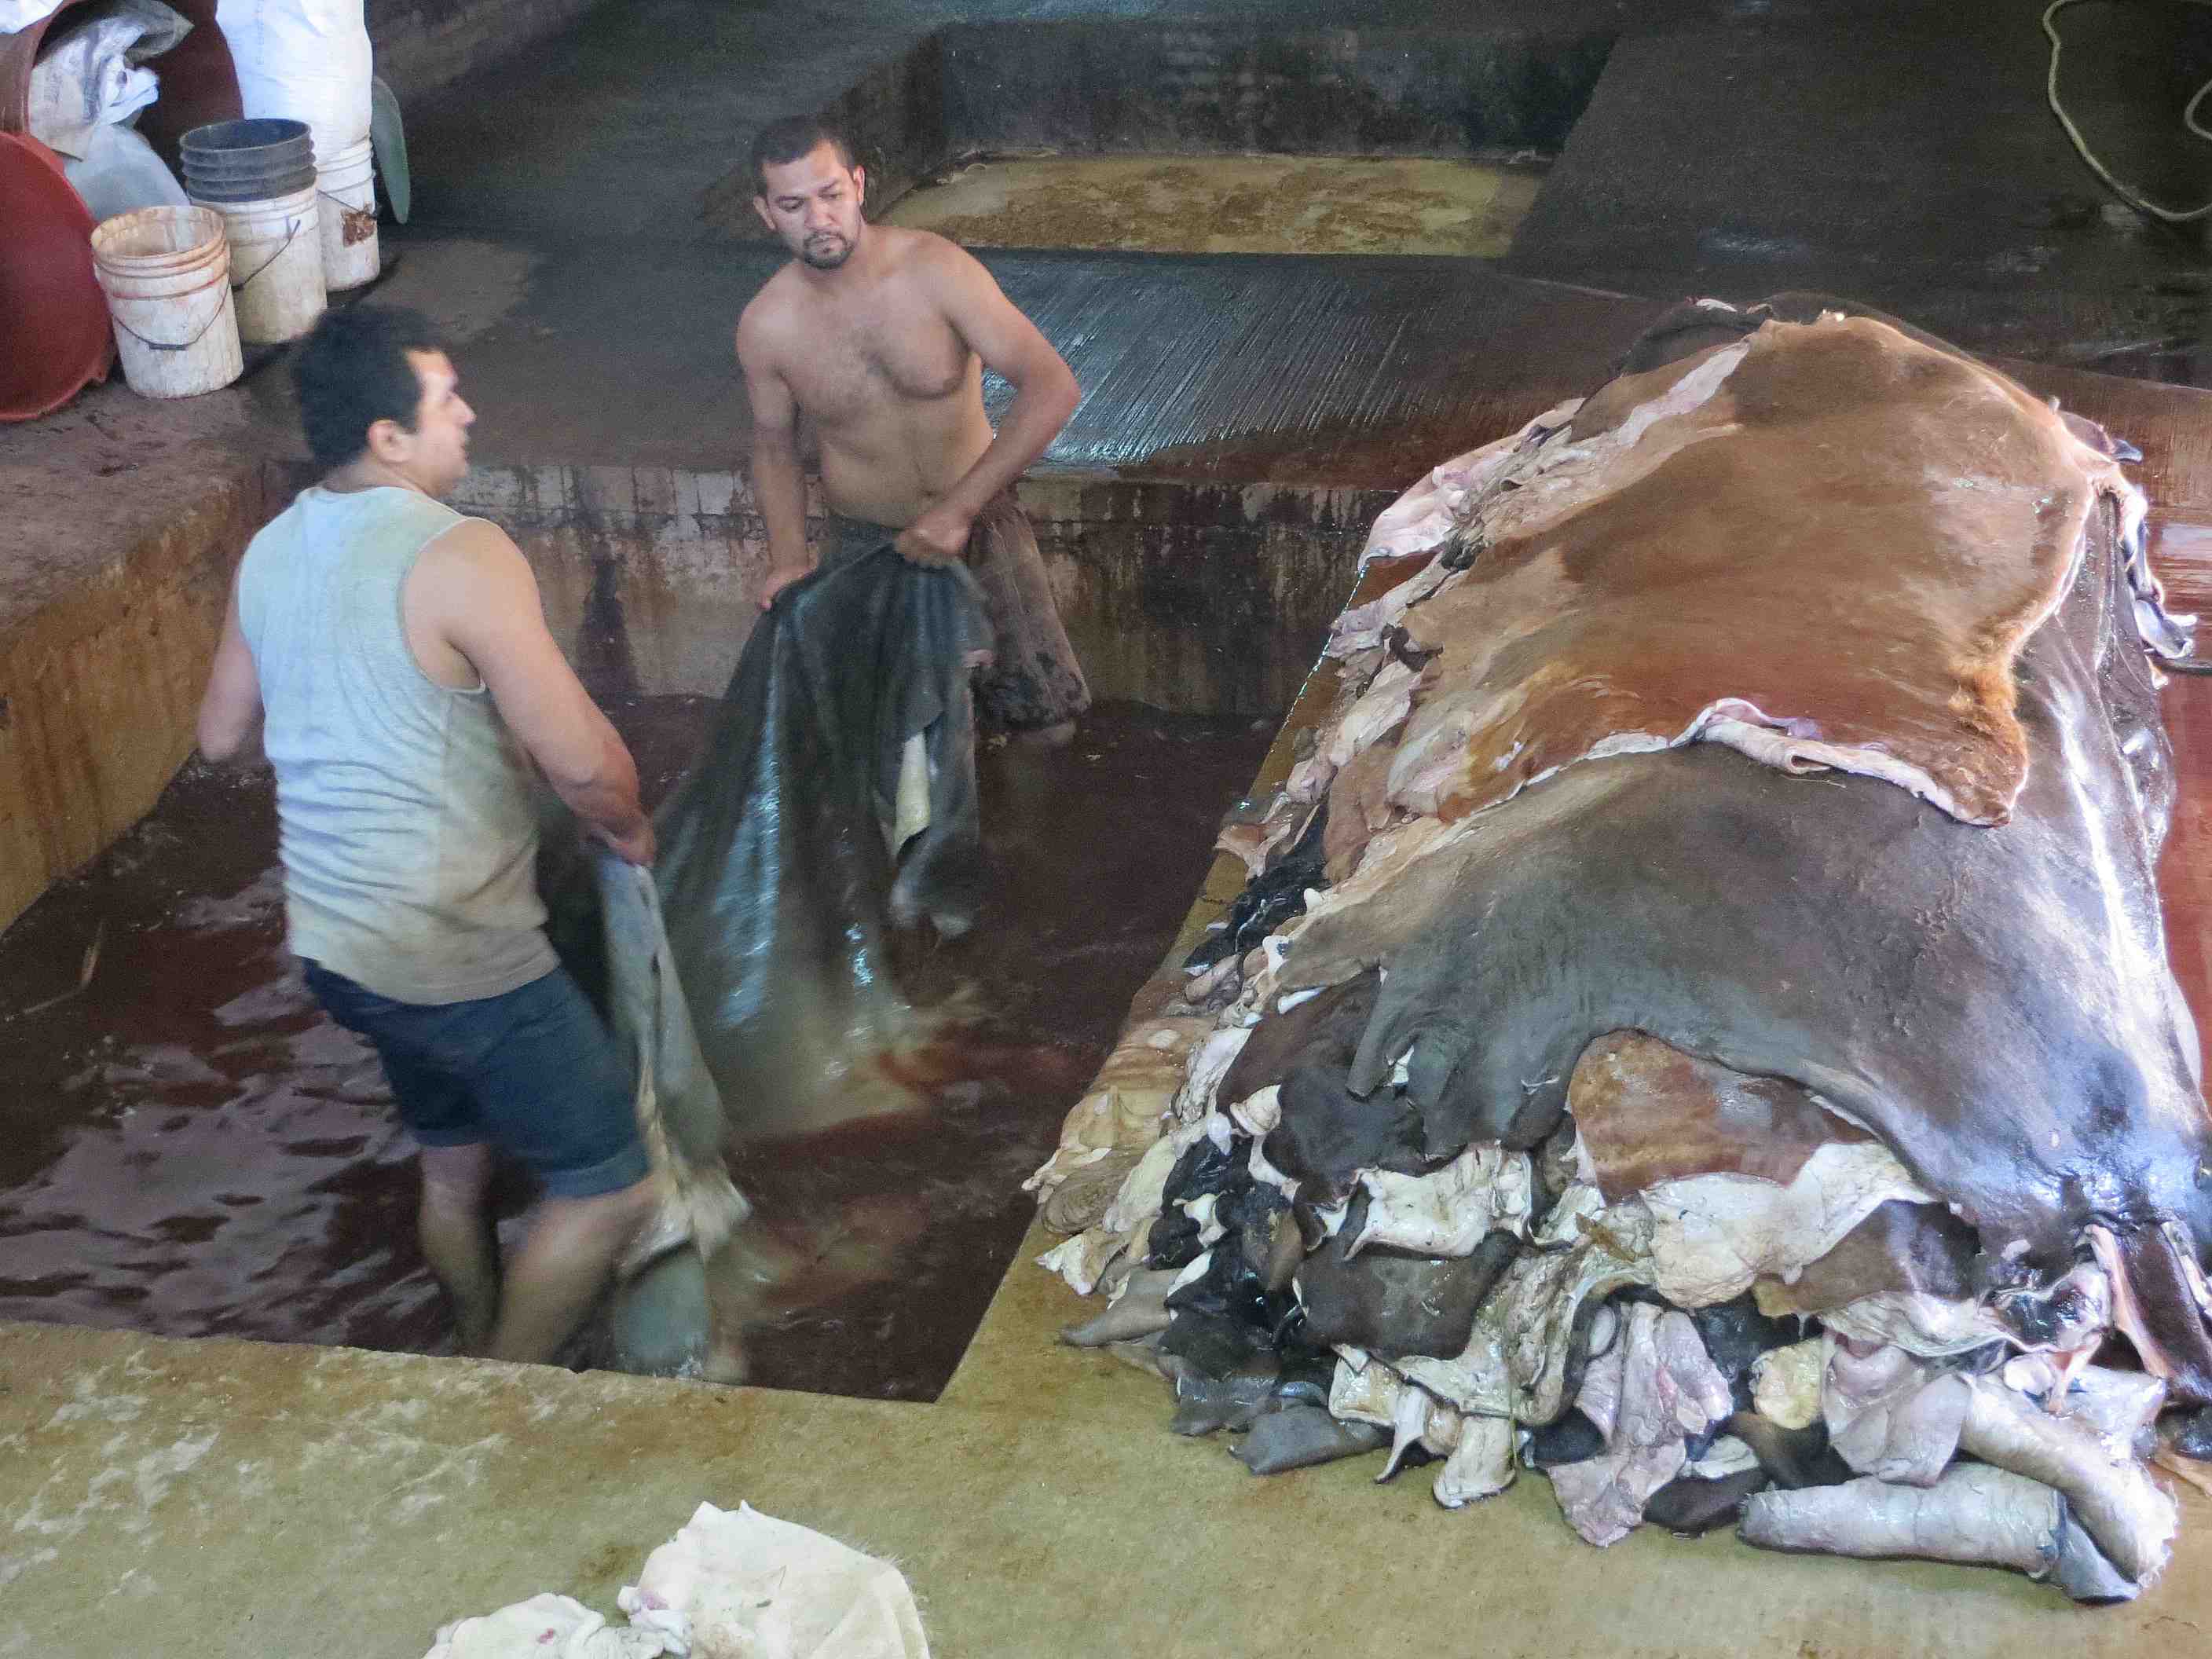
Well anyway, Markus at the huarache blog has done it again… forced me to steal his excellent article and link to his great research in Mexico. The post gets a very close inside look into the tanning process; a somewhat secretive business in my experience.
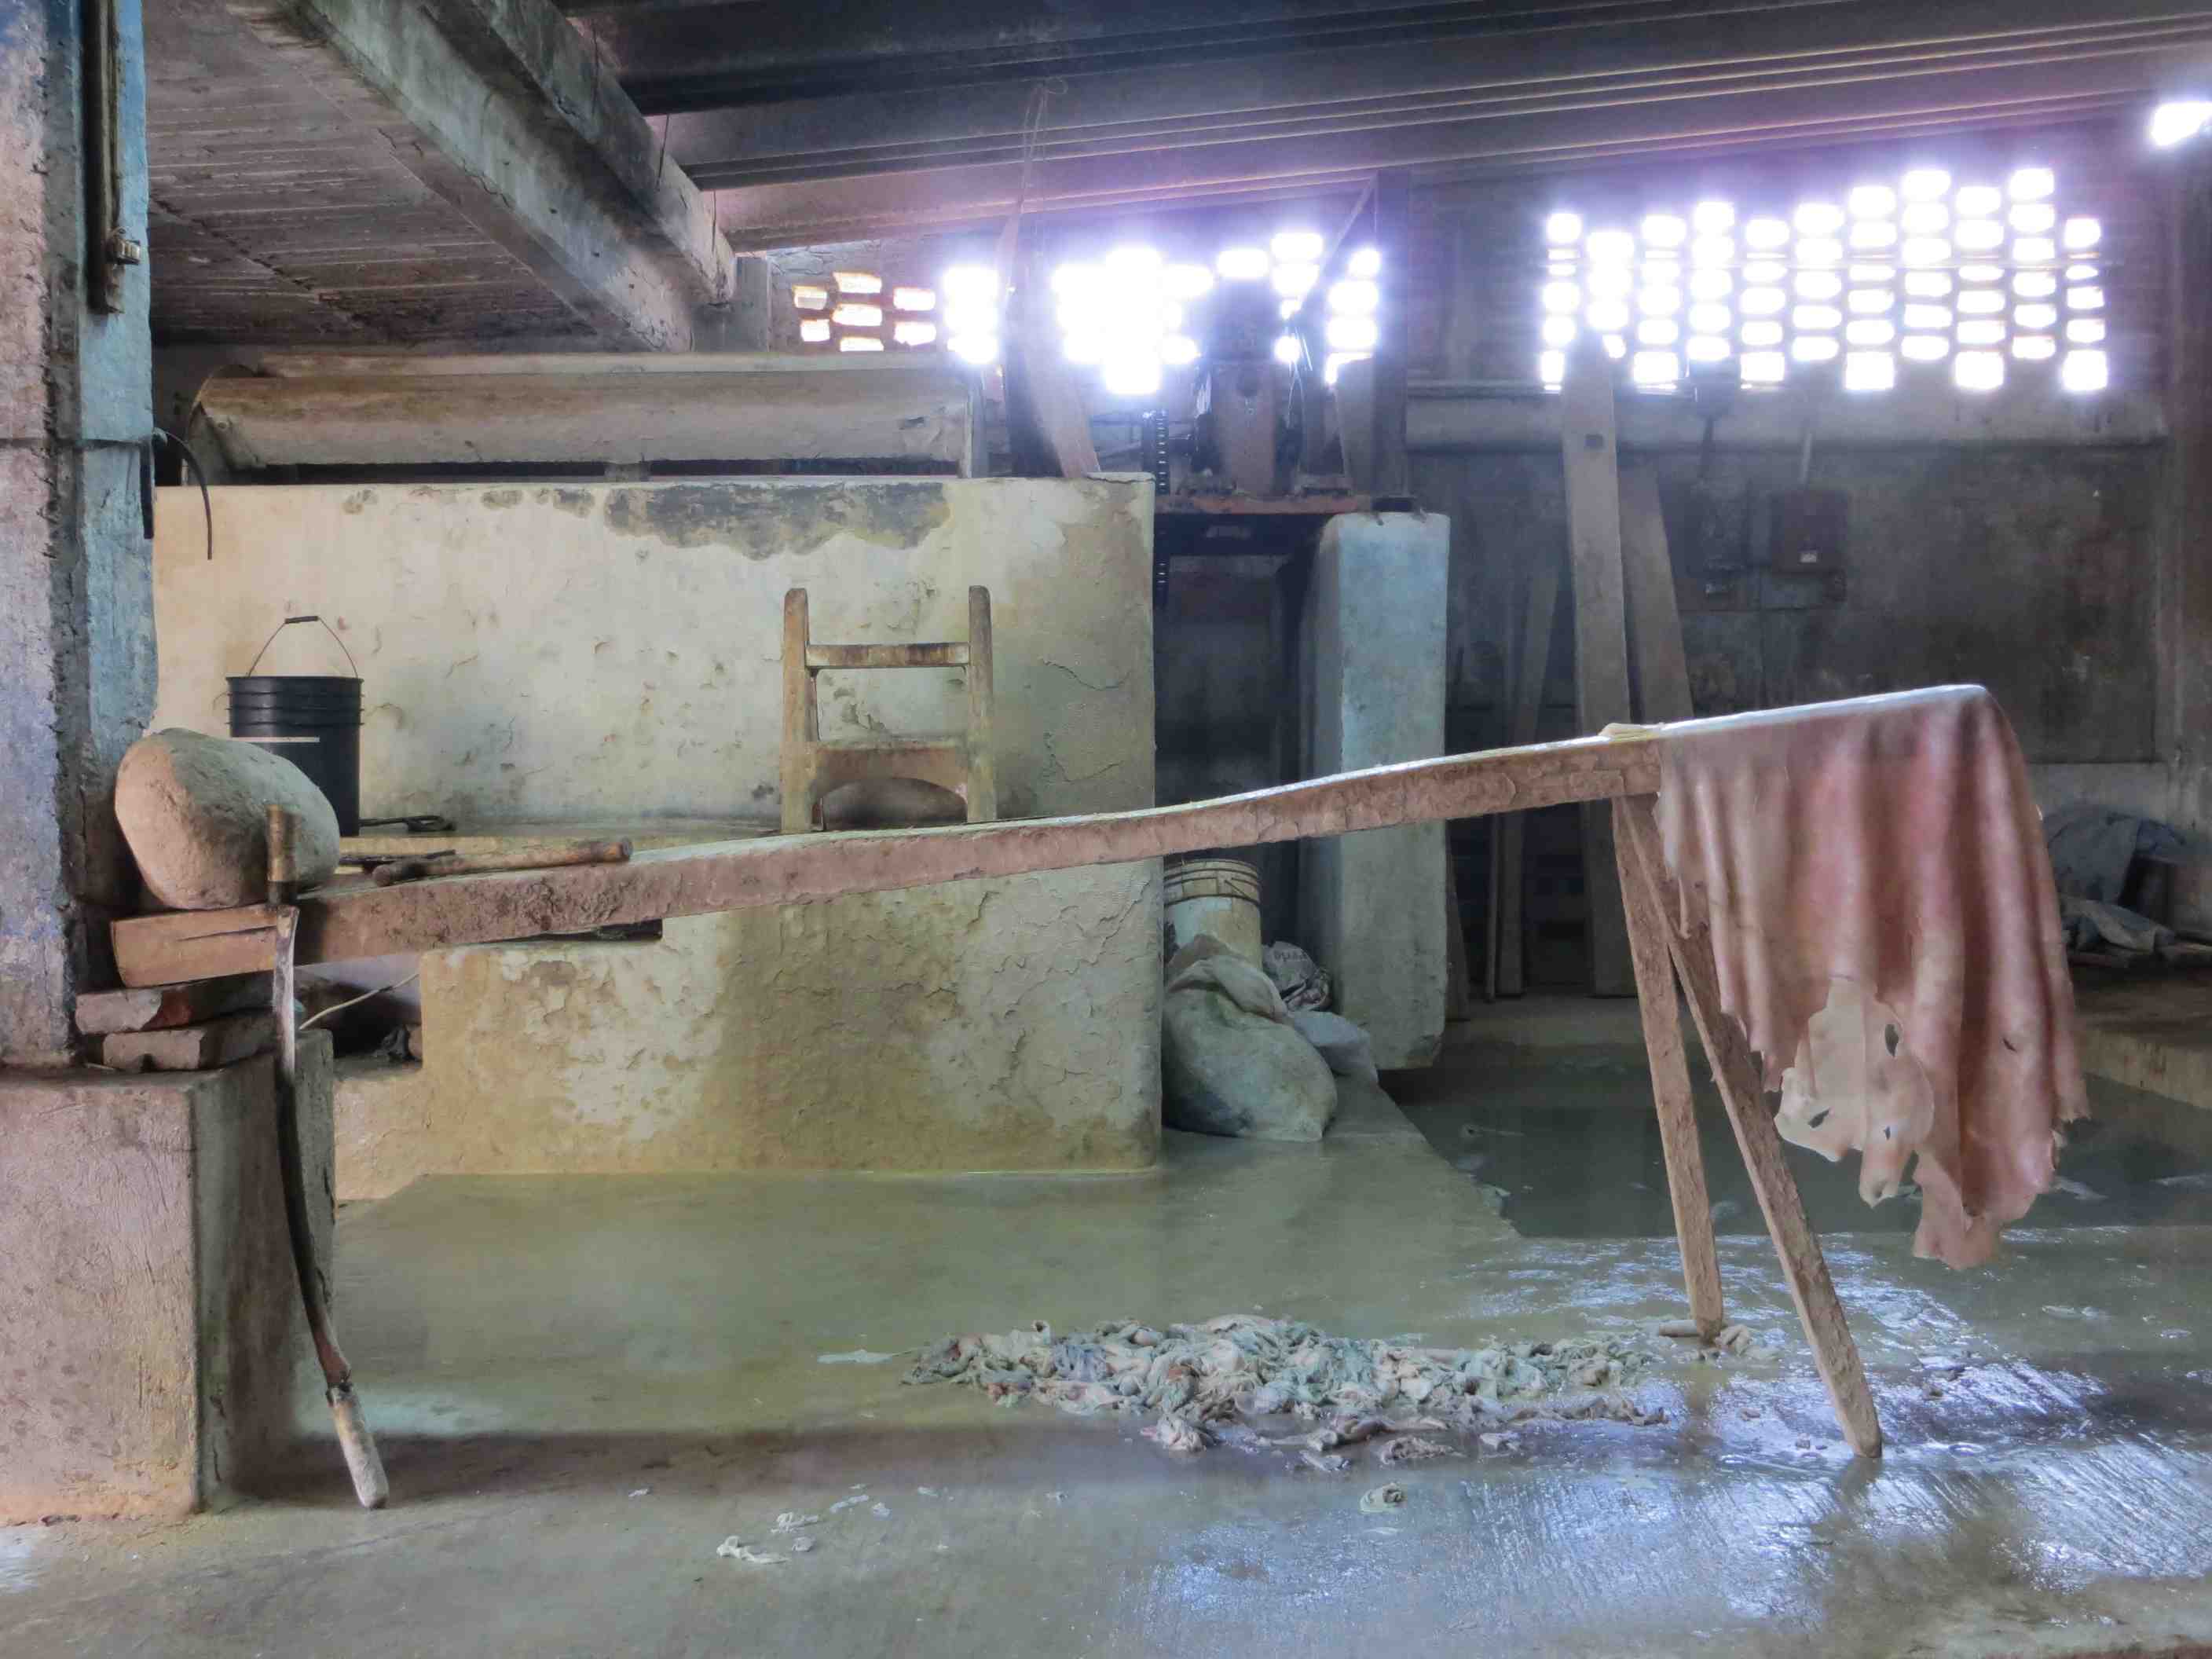
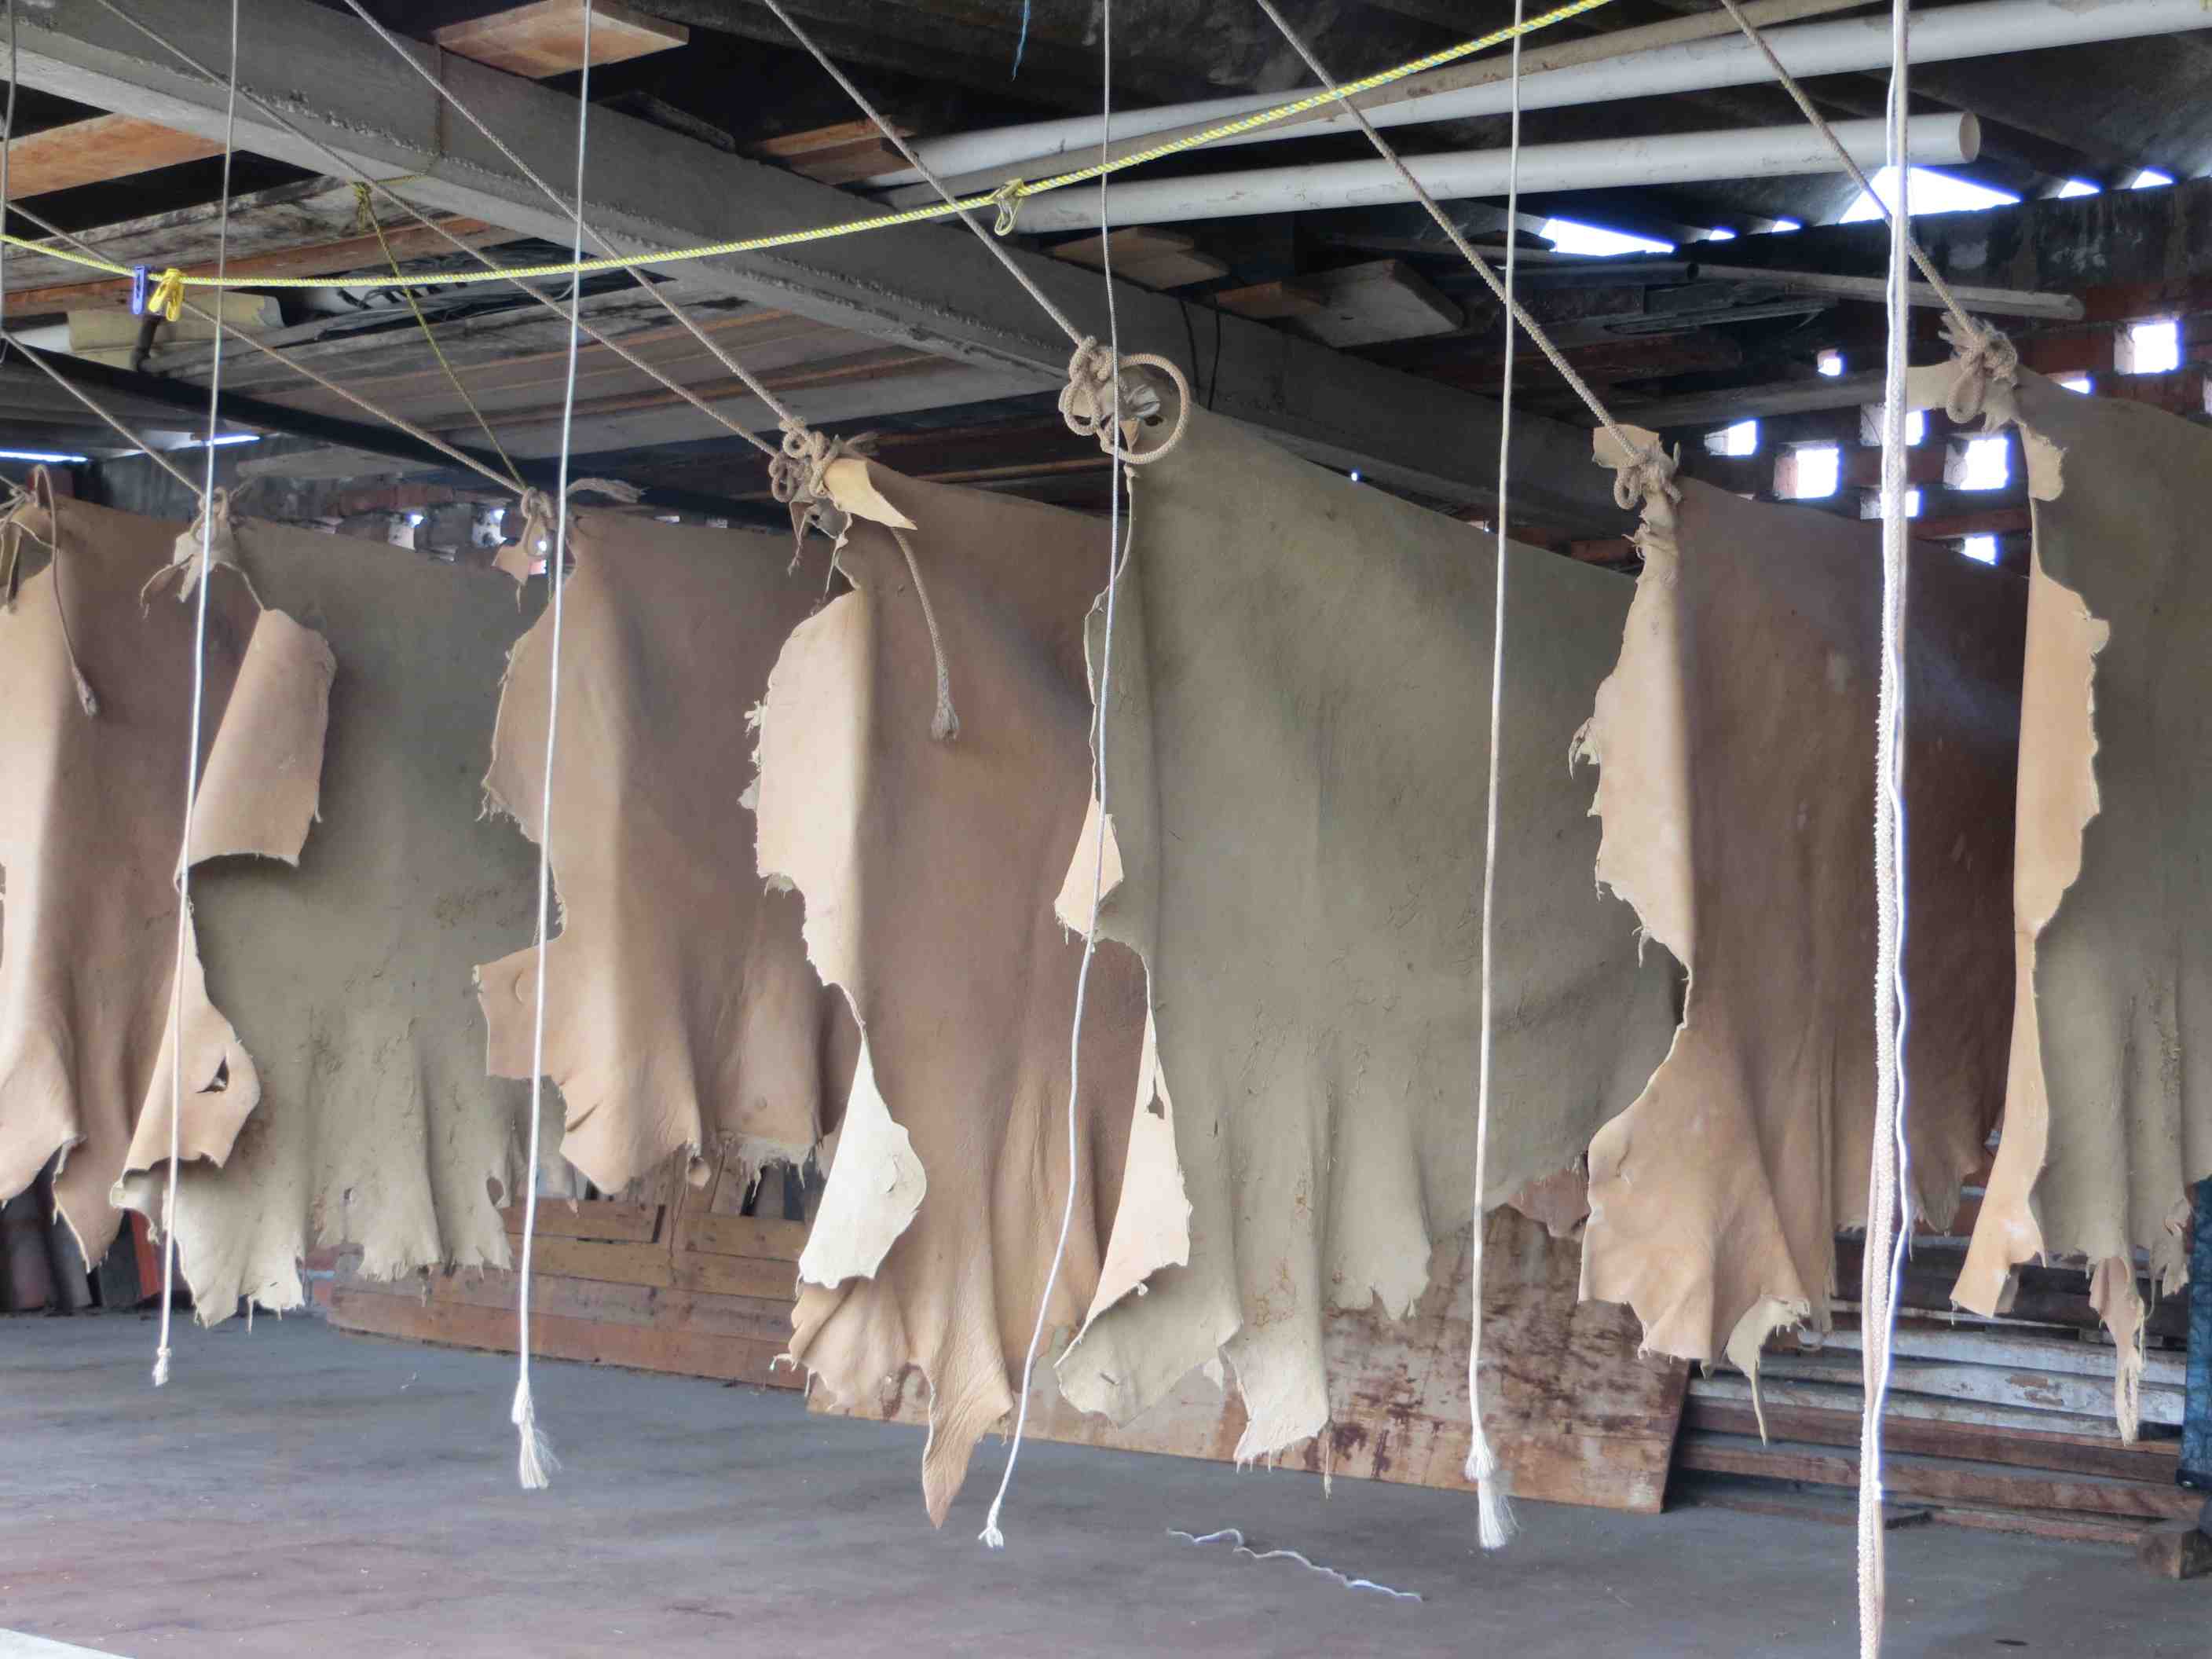
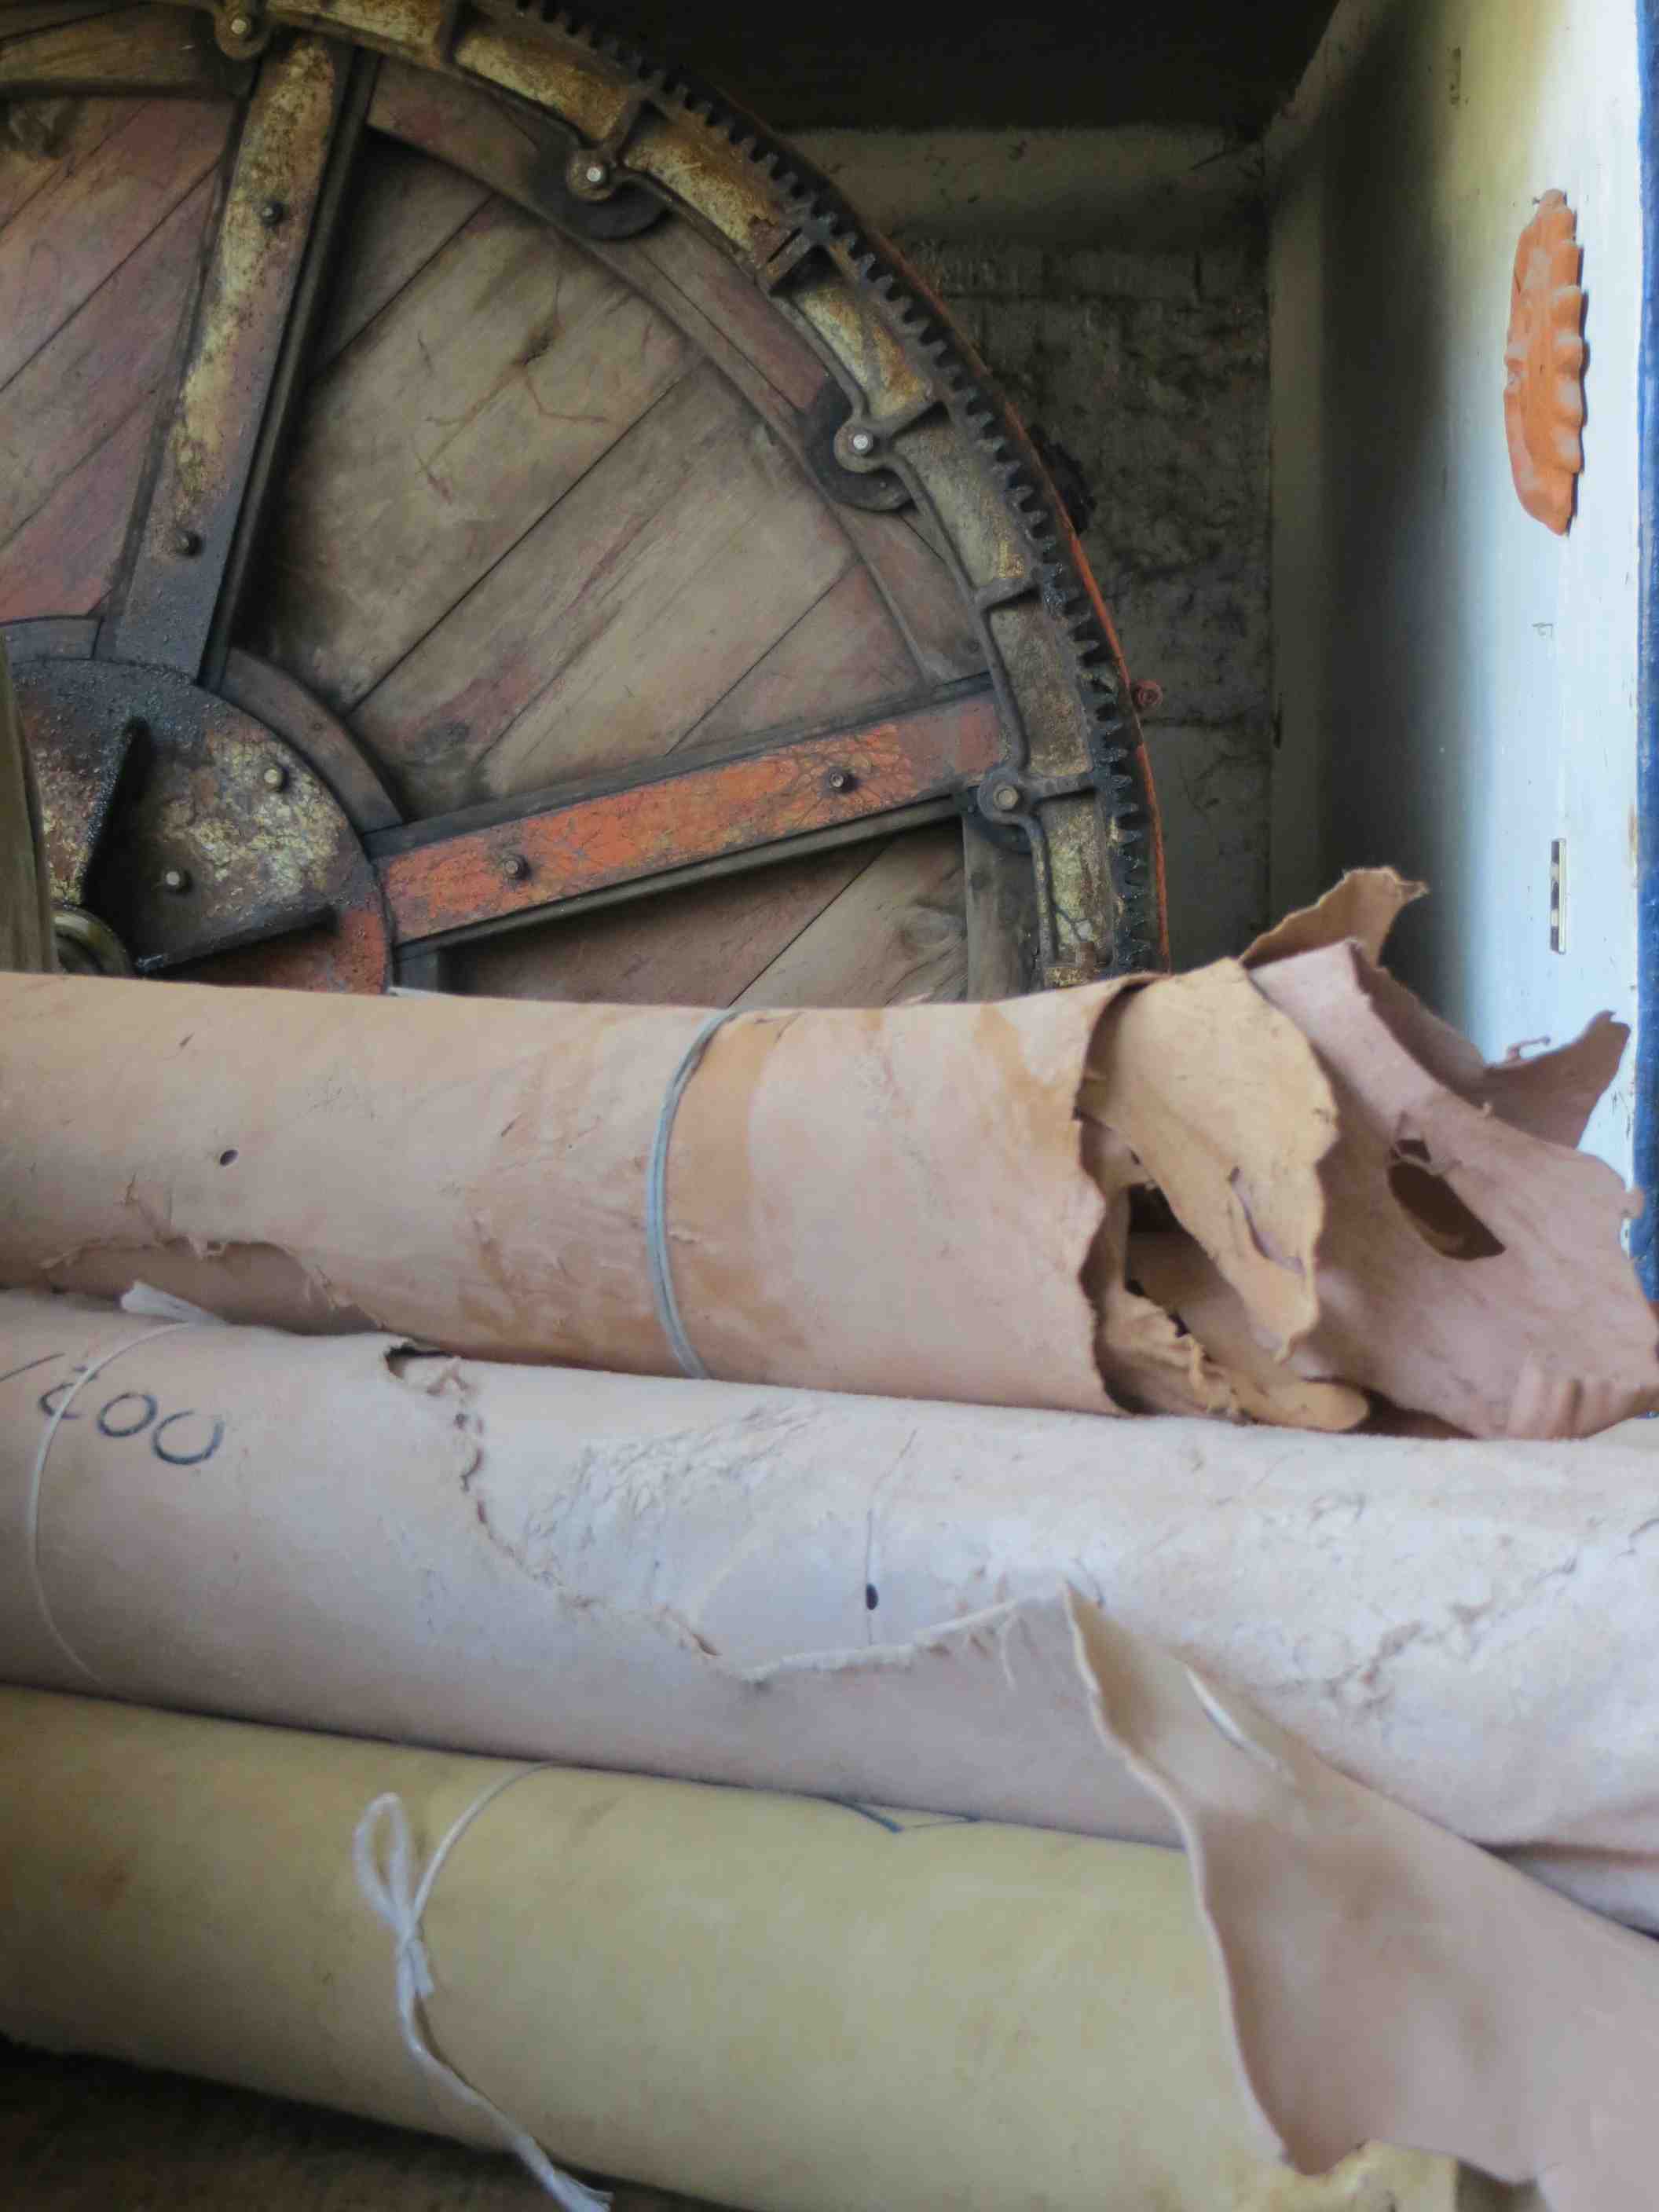
Great set-up for the beams. Spacious, indoors with a cleanable floor.
I think anyone who has tanned hides will appreciate this solid set-up.
This is just a picture preview. For much more in-depth information, have a look at the article on the Huarache Blog by clicking here.
I appreciate this work so much for having done some myself. Tanning hides is tough, back-breaking labor that goes unappreciated. It’s good to know that there are still folks out there keeping these important skills alive. More importantly, to know that there are alternatives to corporate factories producing little more than garbage and waste. It must be tough on these small family businesses but I hope, for all our sakes, that they find a way to survive.
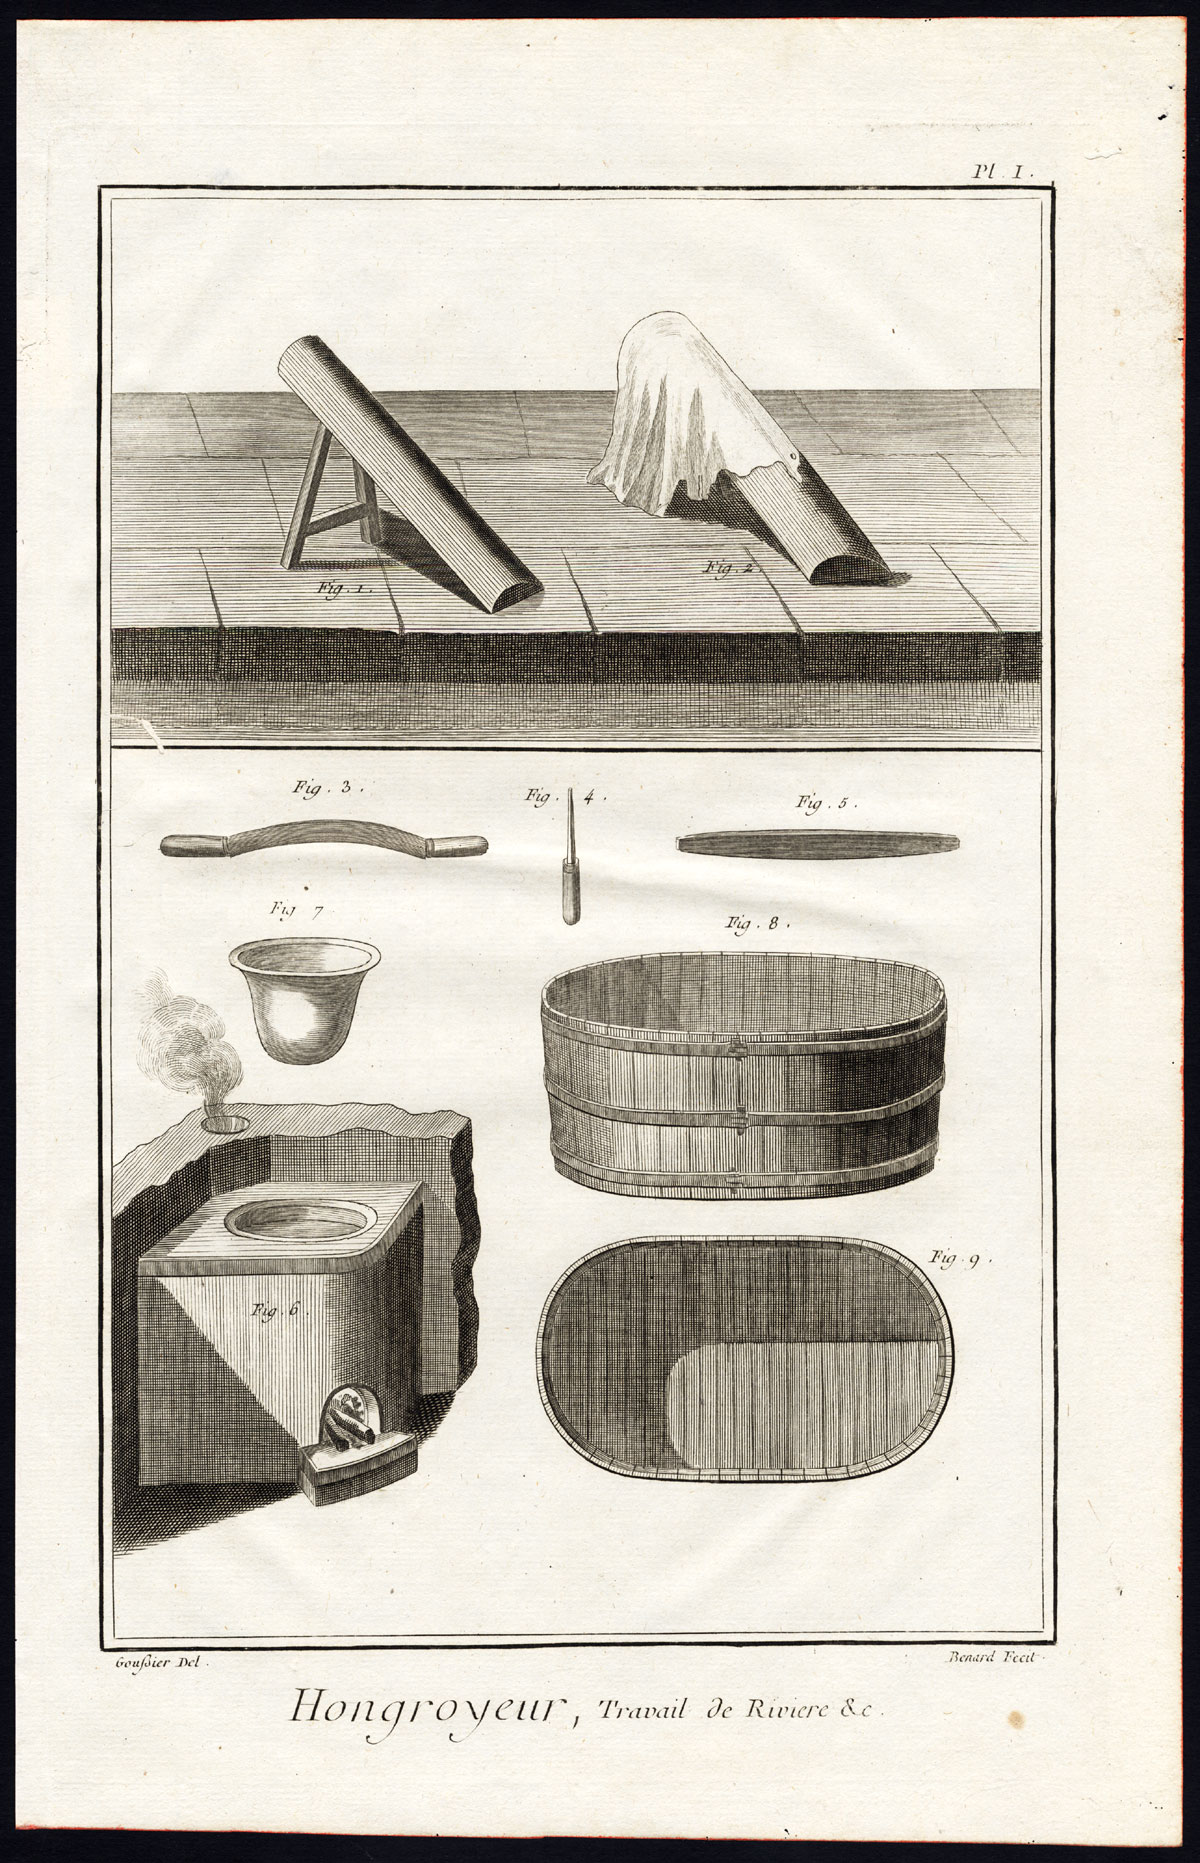
Here are some images from hide tanning workshops from Diderot’s Encyclopedia, 1769 that I found interesting as a leather worker and occasional hide tanner.
Tools for the tanner, the beam, currier knife, slick, tub, and the heater. From the Encyclopedia of Sciences, Arts and Trades, Diderot and D’Alembert.Chamoiseur, From the Encyclopedia of Sciences, Arts and Trades, Diderot and D’Alembert.
If you have done any hide tanning you’ll recognize the tools of the trade. Not much changes for the small-time home tanner.
From the Encyclopedia of Sciences, Arts and Trades, Diderot and D’Alembert.
I suspect this is some hot and smelly work and judging by the way they’re dressed it is a hot room. The only large traditional tannery I have visited was in Morocco and it had an odor on a hot summer day that hit you like a brick wall. I’m not sure what they’re doing with the fire at this stage but maybe adding some amount of smoke rather than heat.
Several years ago, I made a shoulder bag that I still often carry today. It is the perfect size for a small field bag or hunting pouch. It was a lot fun looking at various designs, mostly from the 18th century to try and come up with something that would fit my needs.
My bag, several years and many miles later.
When I first joined Boy Scouts at about age eleven, I envisioned myself as a mountain man-explorer who was going to learn to live off the land. The first merit badge book I bought with my little money was Wilderness Survival and it spoke of the possibles bag that early explorers carried that kept everything they needed to live off the land and cover every emergency. At least, that’s how I remember it. Later, as a an actual wilderness explorer, traveler, and archaeologist, I learned to appreciate the “kit” bag on a more realistic level, and how this bag transforms for different purposes and places one travels. It is the unsealed* survival kit to be used and replenished as needed based on the situation. My current favorites, though too big for general daily wear, are the Mountainsmith Approach pack and my Filson Medium Field Bag. I can live out of either almost indefinitely and both make handsome weekender bags.
On to the Shoulder Bag
After much deliberation and review of mostly 18th century gear I decided I wanted a small outside pocket, a small inside pocket, a larger, closable outside pocket for important things like a compass, and main compartment large enough to hold a notebook and daily essentials. I decided to make the main flap in a stitched-down style so that it would keep things in, even if it wasn’t buckled shut.
In the end, I went with a fairly standard English-American shooting bag style as seen above. It works well for me and after using it for several years now, I don’t believe I would change anything about it.
Large external pocket with button.
Outside open-top pocket
Closed for travel.
Dimensions: the body of the bag is 9 x 10″ with a gusset exposed at 1″. Reinforced ears, riveted for strength. All stitching is two needle saddle stitch, except the body, which is laced. Three pockets, and a 1 1/4″ shoulder strap, adjustable by about 12″.
All the parts of the body except the main gusset.
When laying out a complex sewing project like this, you need to decide in what order to begin the assembly. The back wall of the bag has an internal and external pocket that were sewn down first (beginning with the smaller one inside).
Outer pocket attached.
The outer pocket has a gusset that was sewn inside-out before being sewn down to the front wall of the bag. You’ll probably notice that the edges of the flaps are raw but if I were using thinner leather I would bind them with a soft buckskin or something similar. The raw edges were smoothed and burnished to create a nicer look than just a sharp cut edge.
The assembled bag.
Finished! It’s hard to gauge work time but since that is generally the first thing anyone asks I will estimate about eight hours of stitching and assembly for this project. There is one inside patch pocket, an outside rear pocket, and a gusseted pocket under the flap. Eleven pieces plus the strap (four pieces). Hardware includes a one inch bridle buckle, a 5/8″ buckle, and two solid one inch “D” rings.
The back-side with simple pocket.
Internal pocket just showing.
Now, what to keep in it…
*The modern sealed survival kit was developed for conscripted soldiers and airmen to keep them from rifling through and using up the goods and having nothing when they truly need it. This has carried over into survival-skills-for-morons programs world-wide and creates a product to be sold and consumed by the inept. If you cannot trust yourself to update, change, use, and modify the contents of your personal survival kit, by all means make or buy one and seal it up, awaiting the day it will come in handy. If nothing else, you can enjoy all the surprises you will find while you wait for someone to rescue you. ~GTC
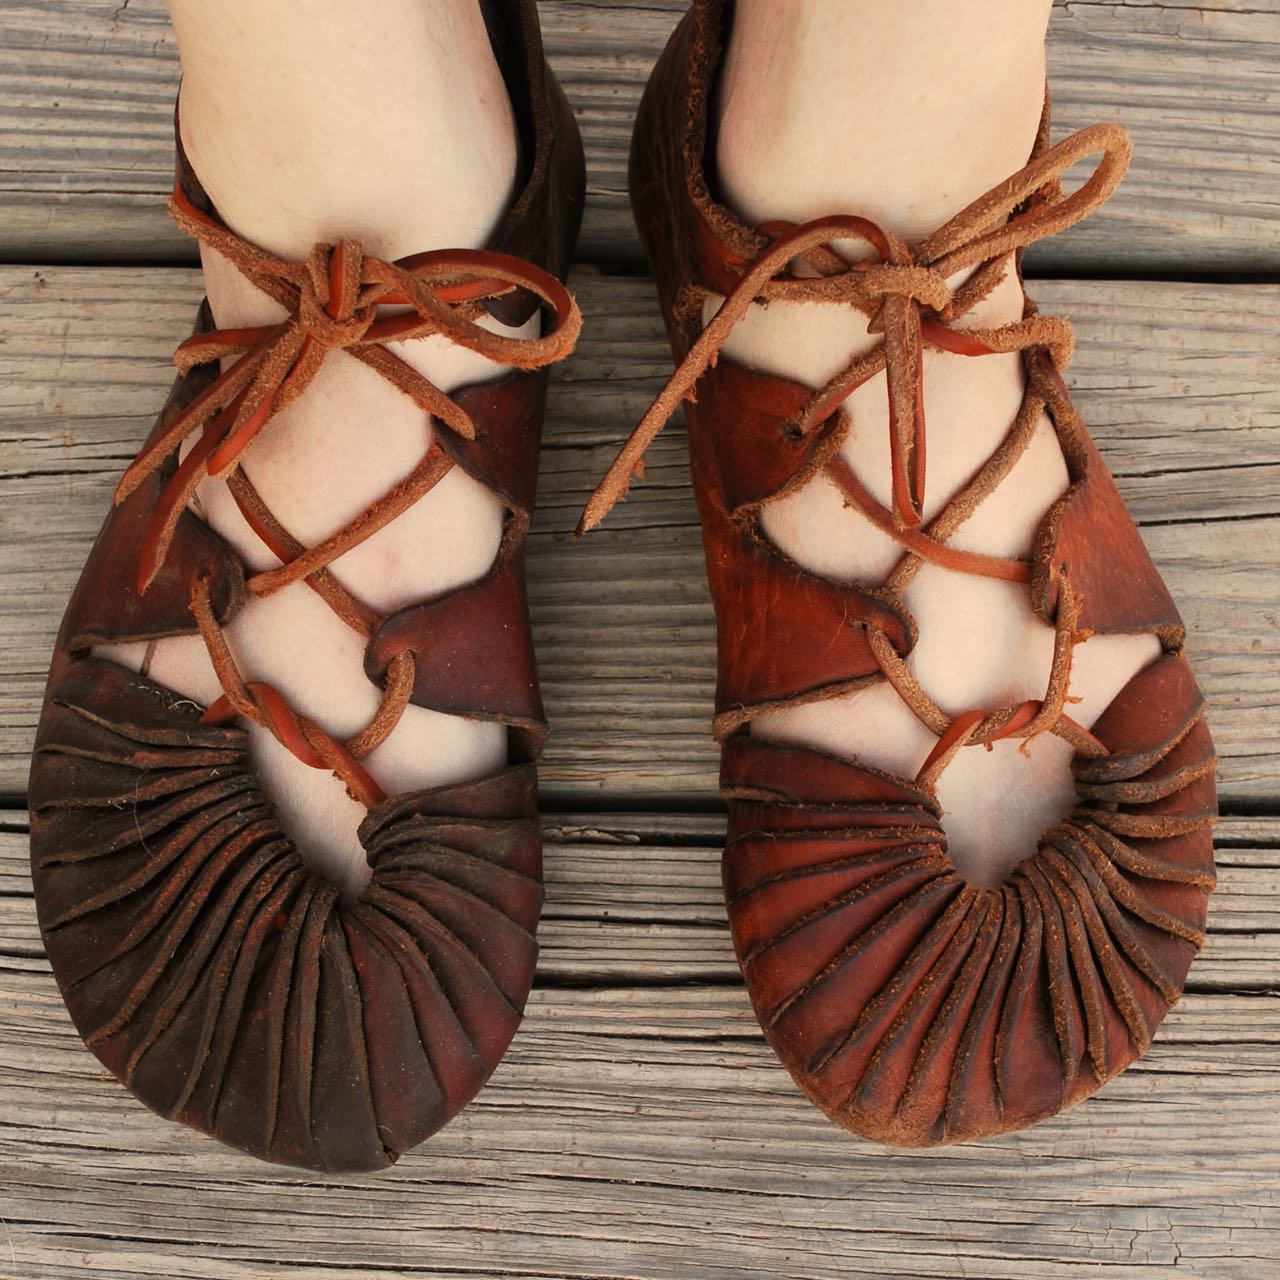
I’m re-sharing an older post of some experimental turnshoes I made quite a few years ago. These were based on some Scandinavian examples from the archaeological record. They came out pretty good for a first try. My only modification would be to tighten the width through the arch and lengthen the toe area slightly. I have since learned that this problem has been well-understood for centuries by shoe makers and is why modern shoe lasts often look long and narrow to the amateur eye.
Finally “finished” enough. These were rubbed down with a “tea” made from walnut juice, worn dry, and later oiled.
This was my first attempt at a proper turnshoe. Basically a variation on the shoes worn in Europe and parts of Asia from the Iron Age (ca. 500 B.C.) through the early modern times (ca. 1700s). This pair is made without a last (form) so construction is similar to other moccasin-type shoes. There are quite a large number of early shoes found in archaeological contexts in Europe so many designs are known. This is inspired by, but not slavish to, shoes found in the British Isles and Scandinavia in the early part of the last millennium.
I was sorry to not document the pattern making but, as can be figured, the upper is a single piece side-seam make by wrapping the foot, marking a rough outline of the plane where the upper meets the sole, cutting off the wrapping, and cutting to shape. Really, I’ll try to make record of this in the future but, for now, I suspect there are other tutorials out there. Besides sewing, the turning is definitely the toughest job as this was some very thick, tough leather.
Still damp from the turning and shaping.My slightly sloppy side-seam.
Here’s a simple shoe design that was made by our ancestors before there were shoe shops or Zappos. Much of the Europe population, both male and female wore a variation of this for many millenia, right up into the early 20th century. They are commonly associated with their Celtic cousins in Scotland, Wales, and Ireland but they are essentially the same as the simplest Roman carbatina. Essentially, it’s a basic European shoe.
I made a set of these around 1986 with a little instruction from an Eighteenth Century reenactor and loved how simple they were to make. My experience up that point was with Native American style moccasins the difficulty I had with sewing in those days. This was a perfect option for me and I find that it is a popular class when I offer it as an introduction to leather working and moccasin making.
While this isn’t exactly a tutorial, it does provide the basic information necessary to get started on a pair for yourself. I would suggest a pattern to be cut from heavy cloth before diving into cutting valuable leather just to get the fit right. It’s a forgiving design so,
Don’t Panic.
pattern and finishedrear viewsewn heellacing the toeafter wetting and shapingdrying before oiling
And finally, six years later, they still function well. The soles are getting thin so it’s almost time to renew them. Fortunately, a pattern can easily be made and adjusted from the old pair by wetting them, letting them dry flat, and using that as a starting point.
There are still Huaraches north of old Mexico. As I prepare to resole my huaraches I thought it might be good to look back on them as a very viable hand-made shoe.
For a long time while searching for huarache construction techniques, I could only find the simplest tire sandals and many links to “barefoot” style running sandals. However, a few years ago, I found Markus Kittner’s Huarache Blog and scoured it for inspiration and design secrets from real huaracheros in old Mexico. He has done excellent work in documenting the process.
My first beautiful huaraches drying after being soaked to shape to my foot. They were subsequently oiled and slicked down. I owe much to the Huarache blog for so many great images and descriptions of traditional huaraches.
As a craftsman of sorts, I understand that making a “one-off” of something does not imply expertise. Only replication builds a real understanding and mastery of the object being produced. However, this is not my first leather working or shoemaking project but a major improvement on a theme. This style shoe is made on a last. The shoe lasts I purchased on Ebay have finally been used to actually make a shoe. I documented the process as it came together as best I could; my mistakes and changes included in the process. This is not really a “how to” recipe for making a huarache but shows the process I used.
The lasts I found on Ebay. The sole cut out, punched for strapping and nailed to the last.
The last shown here fits me well but are an Oxford dress shoe style, meaning they run a little long in the toe. As I am making an open-toe design, I let the last hang over slightly in the front, squaring the sole to the shape of my actual foot. New lasts are pricey (ca. 50 euros/$70 US), but I think it will pay in the long run to invest in a better design for myself and those people I might make shoes for.
Wetting out the first strap.
I didn’t show the strap cutting process as there is little to be learned about that. It is a skill in itself, even if you have a strap cutter. My Osbourne strap cutter can be seen in the upper right of this photo
Since this project was experimental, I used scrap leather, meaning I could only get about three foot (one meter) straps. In future, I’ll probably use 6 foot or longer pieces (2+ meters).
Nailing the strap to the last.
I pre-punched holes in the mid-sole and away we go. A little tallow on the straps helps cut the friction of the leather but ended up being not worth the trouble. They were kept damp throughout the process.
Placing the twining thong.
This is a signature of the style I chose. The vamp or tongue-like piece was later removed as I didn’t like the way it looked. I’ll experiment more with that later.
Lacing and twining.
Unlike normal, I completely finished the first shoe and removed it from the last to check size and shape to determine any major changes that would need to be made.
A heel piece was added and laced up the back. I think this step shows the evolution of the strap sandal to the modern huarache.
The straps running under the mid-sole look like a problem here but are ultimately skived down, dampened, and hammered flat.
Straps ends as added in. Longer straps would lessen the ends here.
I used simple wire nails (as is traditional) to attach the soles but sewing would work too.
Ends to be trimmed and skived, and a finished sole.
Pulled from the last, they actually matched. I don’t know why I was surprised but that made me really happy.
Preparing to nail the sole.
The method I chose to attach the rubber is fast and efficient, and I suspect rather tough. The nails are pressed through the leather and rubber into a thick leather scrap below. Otherwise, you would need to pry it up from the work board. One surprise I learned over time was that the nails actually wore off on the underside before the rubber.
Nailing the sole.Bending the nails in preparation for clinching.
The nails are bent over (inward) to prepare to “clinch” them. There are no photos of this part of the process but this was done by setting the shoe back upright on a small anvil and hammering the nails down tight with a punch. The pre-bending causes the nail to curl inward and back up into the sole. Voila! The Huaraches below have about five miles of hiking on them now and they’re beginning to have some character.
Huaraches you say? Do tough guys wear such things? In an era of cheap, slave-made garments, its easy to forget how self-reliant our ancestors were for such things as raiment. I include this photo of Capitan Alcantar I found on the Huarache Blog as a great historical image of a man of action wearing his huaraches and ready for war.
Click the image for more historic photos like this.
I hope this prompts someone out there in the world to take on the project of making their own shoes, whether for survival, uniqueness, or just as a challenge. Making for yourself is a small act of revolution against a bad system.
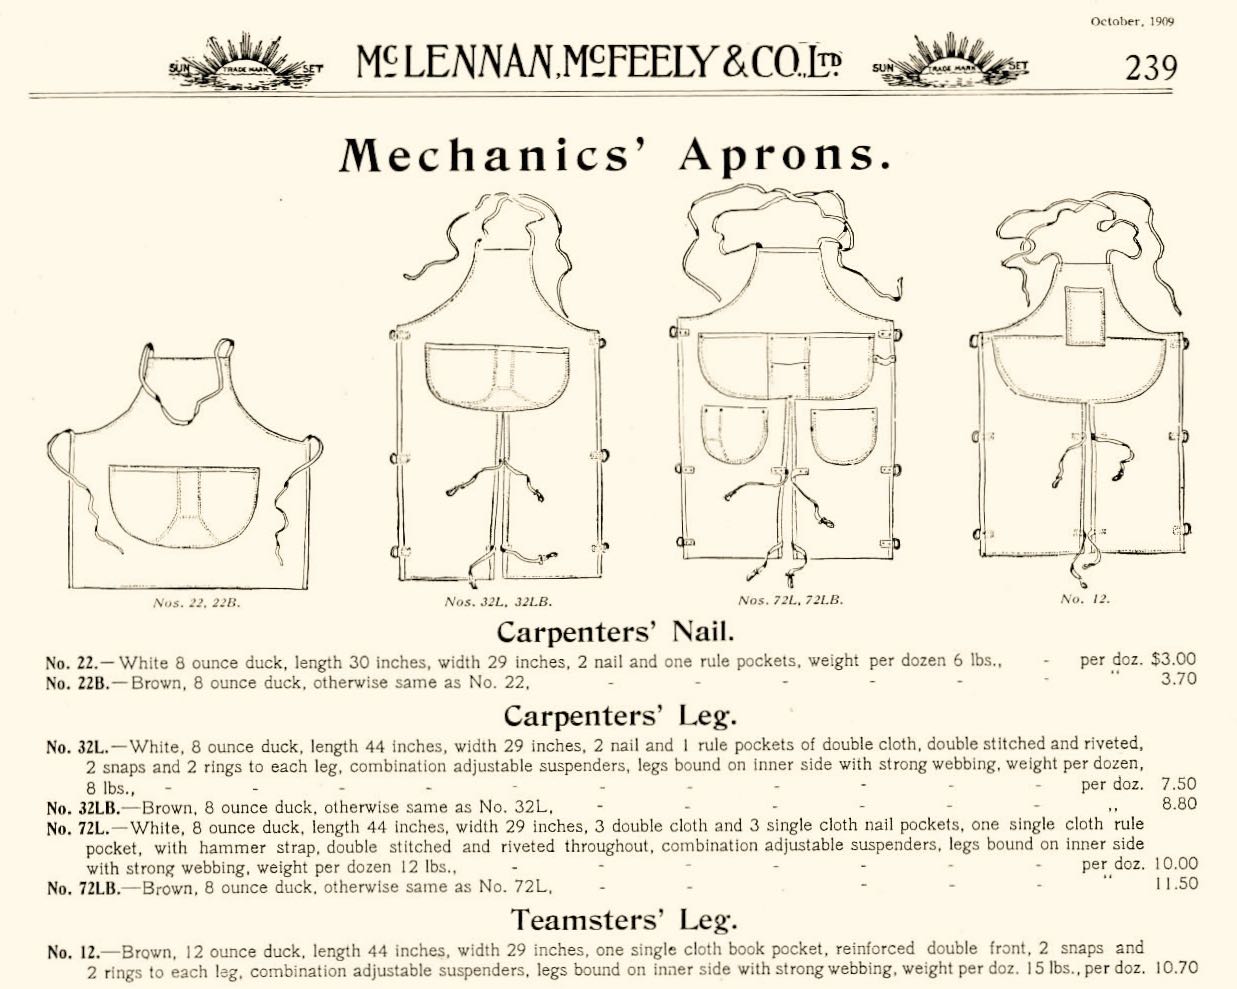
Shop aprons are not as widely used as in the past. I believe this is related to our modern view on clothing and how it has changed over the past century. Not only are we training less in the trades, our clothes are ridiculously cheap in the modern world. Low prices and availability keeps our incentive to protect them pretty low. As I have reduced my quantity of clothing I have grown to appreciate the humble shop apron more than ever. In the past, my only incentive was for protection when grinding metal or welding but now I begin to understand the real role a good apron can play in the shop.
A good shop apron can cost quite a bit of money ($40 – $100 or more) so I present the above catalog page as a starting point for construction. Heavy canvas or leather are the obvious choices for material. Although heavier, I prefer leather as is it is fireproof and offers some protection against cuts. As for protection, here’s an image I found when looking for designs. It’s from a Navy singlestick exercise. Somehow the design seems familiar.
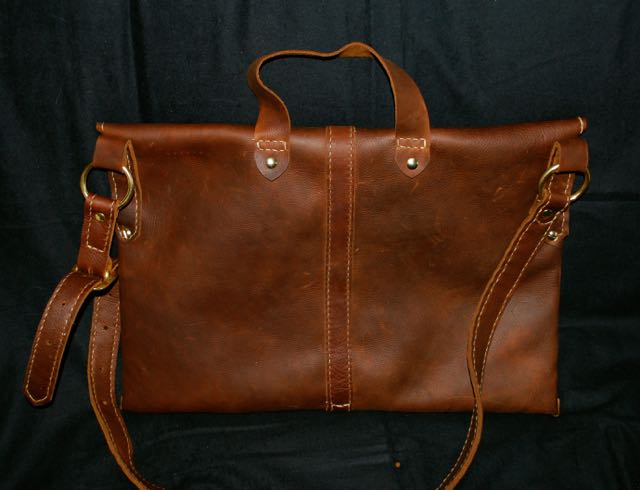
I finally finished the commissioned bag from last month based on the beautifully proportioned Roman design. As far as I know, this design dates back to at least the First Century C.E. and judging by it’s logic, probably much further.
I think the true loculus (satchel) utilized an envelope design from a single small goat hide but as they survive only in art, we have to make a few guesses as to construction. The one I made has a few more modern features including inner dividers and a cell phone pocket.
The leather is an oiled cowhide with a slightly scotched (textured) surface. This type of leather wears well, is weather-resistant, and comes back to life with a wipe down.
A simple button closer secures the flap while the straps cover the seams and give it body. The sewing is all double needle saddle stitch done by hand.
The body is divided into three pockets with an added cell phone holder.
Finally, the handle. Historic examples appear to have used this handle over the end of the staff with a cross piece through the loops, keeping it from sliding side-to-side as the one below.
To remain unencumbered, Roman Legionaries carried this bag on the furca (travel staff).
I hope Gen, it’s new owner, loves it and finds it useful.


")


")