I’m re-sharing an older post of some experimental turnshoes I made quite a few years ago. These were based on some Scandinavian examples from the archaeological record. They came out pretty good for a first try. My only modification would be to tighten the width through the arch and lengthen the toe area slightly. I have since learned that this problem has been well-understood for centuries by shoe makers and is why modern shoe lasts often look long and narrow to the amateur eye.
Finally “finished” enough. These were rubbed down with a “tea” made from walnut juice, worn dry, and later oiled.
This was my first attempt at a proper turnshoe. Basically a variation on the shoes worn in Europe and parts of Asia from the Iron Age (ca. 500 B.C.) through the early modern times (ca. 1700s). This pair is made without a last (form) so construction is similar to other moccasin-type shoes. There are quite a large number of early shoes found in archaeological contexts in Europe so many designs are known. This is inspired by, but not slavish to, shoes found in the British Isles and Scandinavia in the early part of the last millennium.
I was sorry to not document the pattern making but, as can be figured, the upper is a single piece side-seam make by wrapping the foot, marking a rough outline of the plane where the upper meets the sole, cutting off the wrapping, and cutting to shape. Really, I’ll try to make record of this in the future but, for now, I suspect there are other tutorials out there. Besides sewing, the turning is definitely the toughest job as this was some very thick, tough leather.
Still damp from the turning and shaping.My slightly sloppy side-seam.
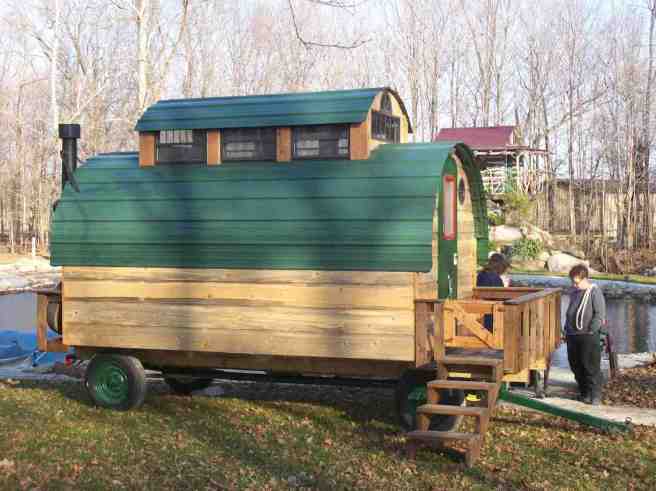
I love these things. I saw quite a few parked on ranches from Colorado to Idaho last week. I know they aren’t highway capable but it seems they could provide a real housing alternative for low-income minimalists. Way better than a housing complex or apartment for sure. The photos link to Ken Griswold’s Tiny House Blog. If you haven’t figured it out yet, I’m a fan of his site.
I took a fair amount of design inspiration from these wagons but added a bit of class along the way. I wouldn’t mind having a cook stove like this one though.
Off-the-shelf or build it yourself? I love these details in hand-built structures. This looks way better to me than the local hardware store option.
With the holiday season just around the corner, it’s time to start making those gifts for friends and family. I collect old plans for projects I never seem to get around to making but here’s a quickie that might be on the table soon. Maybe you know some youngster that will need a sled this year.
Or maybe it’s time to train the useless dog to help out around camp…
There’s not much to it really but a good set of measurements is always welcome in a new project. An old pallet and a couple long boards will just about do it.
And maybe, just maybe, one less plastic tub sled will end up in the landfill. Here’s the link to the original article:
There are still Huaraches north of old Mexico. As I prepare to resole my huaraches I thought it might be good to look back on them as a very viable hand-made shoe.
For a long time while searching for huarache construction techniques, I could only find the simplest tire sandals and many links to “barefoot” style running sandals. However, a few years ago, I found Markus Kittner’s Huarache Blog and scoured it for inspiration and design secrets from real huaracheros in old Mexico. He has done excellent work in documenting the process.
My first beautiful huaraches drying after being soaked to shape to my foot. They were subsequently oiled and slicked down. I owe much to the Huarache blog for so many great images and descriptions of traditional huaraches.
As a craftsman of sorts, I understand that making a “one-off” of something does not imply expertise. Only replication builds a real understanding and mastery of the object being produced. However, this is not my first leather working or shoemaking project but a major improvement on a theme. This style shoe is made on a last. The shoe lasts I purchased on Ebay have finally been used to actually make a shoe. I documented the process as it came together as best I could; my mistakes and changes included in the process. This is not really a “how to” recipe for making a huarache but shows the process I used.
The lasts I found on Ebay. The sole cut out, punched for strapping and nailed to the last.
The last shown here fits me well but are an Oxford dress shoe style, meaning they run a little long in the toe. As I am making an open-toe design, I let the last hang over slightly in the front, squaring the sole to the shape of my actual foot. New lasts are pricey (ca. 50 euros/$70 US), but I think it will pay in the long run to invest in a better design for myself and those people I might make shoes for.
Wetting out the first strap.
I didn’t show the strap cutting process as there is little to be learned about that. It is a skill in itself, even if you have a strap cutter. My Osbourne strap cutter can be seen in the upper right of this photo
Since this project was experimental, I used scrap leather, meaning I could only get about three foot (one meter) straps. In future, I’ll probably use 6 foot or longer pieces (2+ meters).
Nailing the strap to the last.
I pre-punched holes in the mid-sole and away we go. A little tallow on the straps helps cut the friction of the leather but ended up being not worth the trouble. They were kept damp throughout the process.
Placing the twining thong.
This is a signature of the style I chose. The vamp or tongue-like piece was later removed as I didn’t like the way it looked. I’ll experiment more with that later.
Lacing and twining.
Unlike normal, I completely finished the first shoe and removed it from the last to check size and shape to determine any major changes that would need to be made.
A heel piece was added and laced up the back. I think this step shows the evolution of the strap sandal to the modern huarache.
The straps running under the mid-sole look like a problem here but are ultimately skived down, dampened, and hammered flat.
Straps ends as added in. Longer straps would lessen the ends here.
I used simple wire nails (as is traditional) to attach the soles but sewing would work too.
Ends to be trimmed and skived, and a finished sole.
Pulled from the last, they actually matched. I don’t know why I was surprised but that made me really happy.
Preparing to nail the sole.
The method I chose to attach the rubber is fast and efficient, and I suspect rather tough. The nails are pressed through the leather and rubber into a thick leather scrap below. Otherwise, you would need to pry it up from the work board. One surprise I learned over time was that the nails actually wore off on the underside before the rubber.
Nailing the sole.Bending the nails in preparation for clinching.
The nails are bent over (inward) to prepare to “clinch” them. There are no photos of this part of the process but this was done by setting the shoe back upright on a small anvil and hammering the nails down tight with a punch. The pre-bending causes the nail to curl inward and back up into the sole. Voila! The Huaraches below have about five miles of hiking on them now and they’re beginning to have some character.
Huaraches you say? Do tough guys wear such things? In an era of cheap, slave-made garments, its easy to forget how self-reliant our ancestors were for such things as raiment. I include this photo of Capitan Alcantar I found on the Huarache Blog as a great historical image of a man of action wearing his huaraches and ready for war.
Click the image for more historic photos like this.
I hope this prompts someone out there in the world to take on the project of making their own shoes, whether for survival, uniqueness, or just as a challenge. Making for yourself is a small act of revolution against a bad system.
Lovely warm and soft, these shoes (or perhaps slippers) began as an accidentally shrunken wool sweater. These poor, shrunken, often high quality wool sweaters end up in thrift and consignment stores on a regular basis. They also tend to cost next to nothing, so all in all they make perfect material candidates for any felt related project. These shoes are a quick and fairly simple project.
I began with two wool sweaters that had been washed in a washing machine until they were fully felted. Both were good and thick which makes for a warmer and more durable material.
The Pattern: The mid-sole is simply a tracing of a foot. The front upper is made by laying a piece of paper over the foot and tracing around the edges. I cut the sole out of the slightly thicker of the two sweaters because the sole gets more wear, and then…
Just a note to those wishing to replicate some of the projects here…
I am working up some projects for the Instructables library and hope to continue this. I find it to be a wonderful site and you can really find almost anything there. I encourage Makers to post their stuff there as well as it is a great way to pass on knowledge.
My recent Instructables are an 18th Century Possibles or Shooting Bag:
Possibles Bag Layout.
Finished Possibles Bag.
and an overview of the rucksack with the layout sketches included:
From this…
To this…
Visit Instructables to learn more about making, fixing, hacking, or deconstructing just about anything you can imagine:
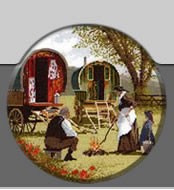
After several requests for information, here is my short list of inspirational sites found on the web. Culling the web for Vardo style so you don’t have to. I will try to morph this into it’s own page soon as a place to add more links as they become available.
Romany and Traditional Style
Great Historical ResourceGypsy Vans by Roth. Beautiful traditional waggons with loads of information about types and styles. Amazing stuff here.Nice, garden variety caravans. These make wonderful retreats and getaway spaces.Solid, permanent and towable vardos from Windy Smithy.Ingham & Fallon, restoration, new and used. The images alone make this page worthwhile.
Sheepherder Wagons
Plan to spend some time on this website. Anvil Wagon Works in Livingston, Montana makes all types of traditional Chuckwagons, Sheepwagons, and Buggies. Lot’s of great photos inside and out.
This image links to their Sheep wagon page but there is so much more here. Serious craftsmen of all things traditional Wagon and Wheel related.The Lazy AA Guest Ranch and Builders of towable Woolywagons.Idaho Sheep Camp. This is the interior of just one of their many featured wagons. You can’t be more authentic than this. I want one! Pages of images to inspire the builder of tiny homes.Old Western Wagons are builders of Sheep Wagons, Vardos, Freight Wagons, and other horse-drawn vehicles. Located in Seattle, Washington.Engel’s Coach Shop Joliet, Montana. Master Wheelwright and makers of horse-drawn vehicles.Plankbridge Shepherd Huts from Dorset, England. Traditional huts, not for long distance travel but fine for short moves. Nice designs.Blackdown Shepherd Huts. Handcrafted in Somerset, England. Posh and spiffy little cabins with lots of style.Everything you need to know about historic Shepherd Huts.Ranch Willow Wagon Co. builds and restores wagons to the highest quality standards. Company owner Lynn Sedar has been in the wagon business for over 20 years and is also an acclaimed artist, design consultant and furniture designer. Wagons designed by Ranch Willow Wagon Co. are the ultimate blend of history and art.
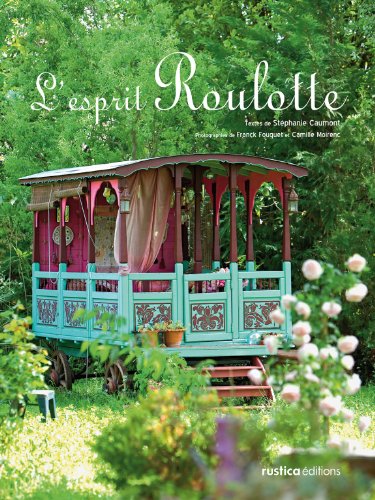
French Style
In French. The website contains some good old images as well as information about various types of travelers’ wagons (a.k.a. Roulottes).
An Interesting mix of Hippie vehicles from Britain and Europe:
In 1997, in San Andrés Itzapa in Guatemala, Maya Pedal Association began recycling scraps of bicycles into Bicimáquinas.
Bicimáquinas are pedal-powered blenders, washing machines and threshing machines, eliminating the need for fuel and electricity. Pumps are also possible, and are capable of extracting 30 liters of water per minute from 30-meter deep wells (electronic pumps reach just to 12 meters).
The idea of these ingenious contraptions emerged from the desire to help the farming families of the San Andrés community. The issue that gave rise to Maya Pedal was the expense and shortage of electricity and fuel in the village.
Carlos and Cesar, creators of Maya Pedal, have achieved an extraordinary result: a worthy project that does not pollute and is extremely fascinating in its involvement of volunteers from around the world who are building a fantastic pedal revolution.
This is not furniture worthy of the great builders like Peter Follansbee, Chris Schwartz, or Chris Hall. However, it is a piece of functional furniture created from nearly all recycled materials and will hopefully be with me for the rest of my life. I’ve wanted a sea chest for about as long as I’ve known they exist. These are the unit of personal possessions of the old mariners during the heyday of wooden ships and work well as a low table. I’ve put off building one for many years now as I’m fairly lazy at heart (and intimidated by the huge number of dovetails and other joinery involved). But I’m also a schemer and a planner…
When I took up my current post it had a fairly rocky start and I prepared for the worst. Instead of filling my small house with bulky furniture, I built nearly everything from dimensional lumber, primarily 1 x 12″ pine as it is ultimately recyclable. While rearranging the house over the winter I decided to remove a large set of shelves that were not being used very well. This left me with a hefty pile of very dry, aged pine that now needed a purpose. I decided these would just about serve to make a trunk of some sort and convinced myself to knock up a sea chest.
Being a 21st century guy without huge swaths of time for fine woodworking, I built this fancy box without any complex joinery, just stainless steel fasteners and wood glue. The only purchased materials were the hinges, hasp, and Cabot’s Wood Finish (color: Midnight). So, for a few bucks, a few weekends and evenings, and a little labor, I now have a sea chest to hold my coveted earthly possessions.
The chest is based on several 18th and 19th century sea chests I have seen with a lift out tray and a solid box for small objects. The outer dimensions of the chest are 34 1/2″ x 19″ deep x 18″ high giving an internal volume of nearly 8700 cubic inches or a little over 5 cubic feet. That is about two large backpacks worth of space for possessions. Not too bad.
I should note that some scraps from the barn were added to complete the project. The strakes that hold the handles are oak and the floor of the chest is made from tongue-and-groove yellow pine, left over from previous projects. At the time of this post, I consider the chest about 90% complete. The 5/8″ manilla handles will soon be covered with leather, and the lid support will be replaced with something a little nicer (it is just black para-cord at the moment). Also, the interior needs a finish, probably shellac, to avoid the off-gassing of regular varnish.
I hope this motivates someone else to forgo garbage, mass-produce, pressboard furniture. It is more than possible to make something worthwhile and lasting from the poor end of the lumber yard.