Popular Mechanics, 1927
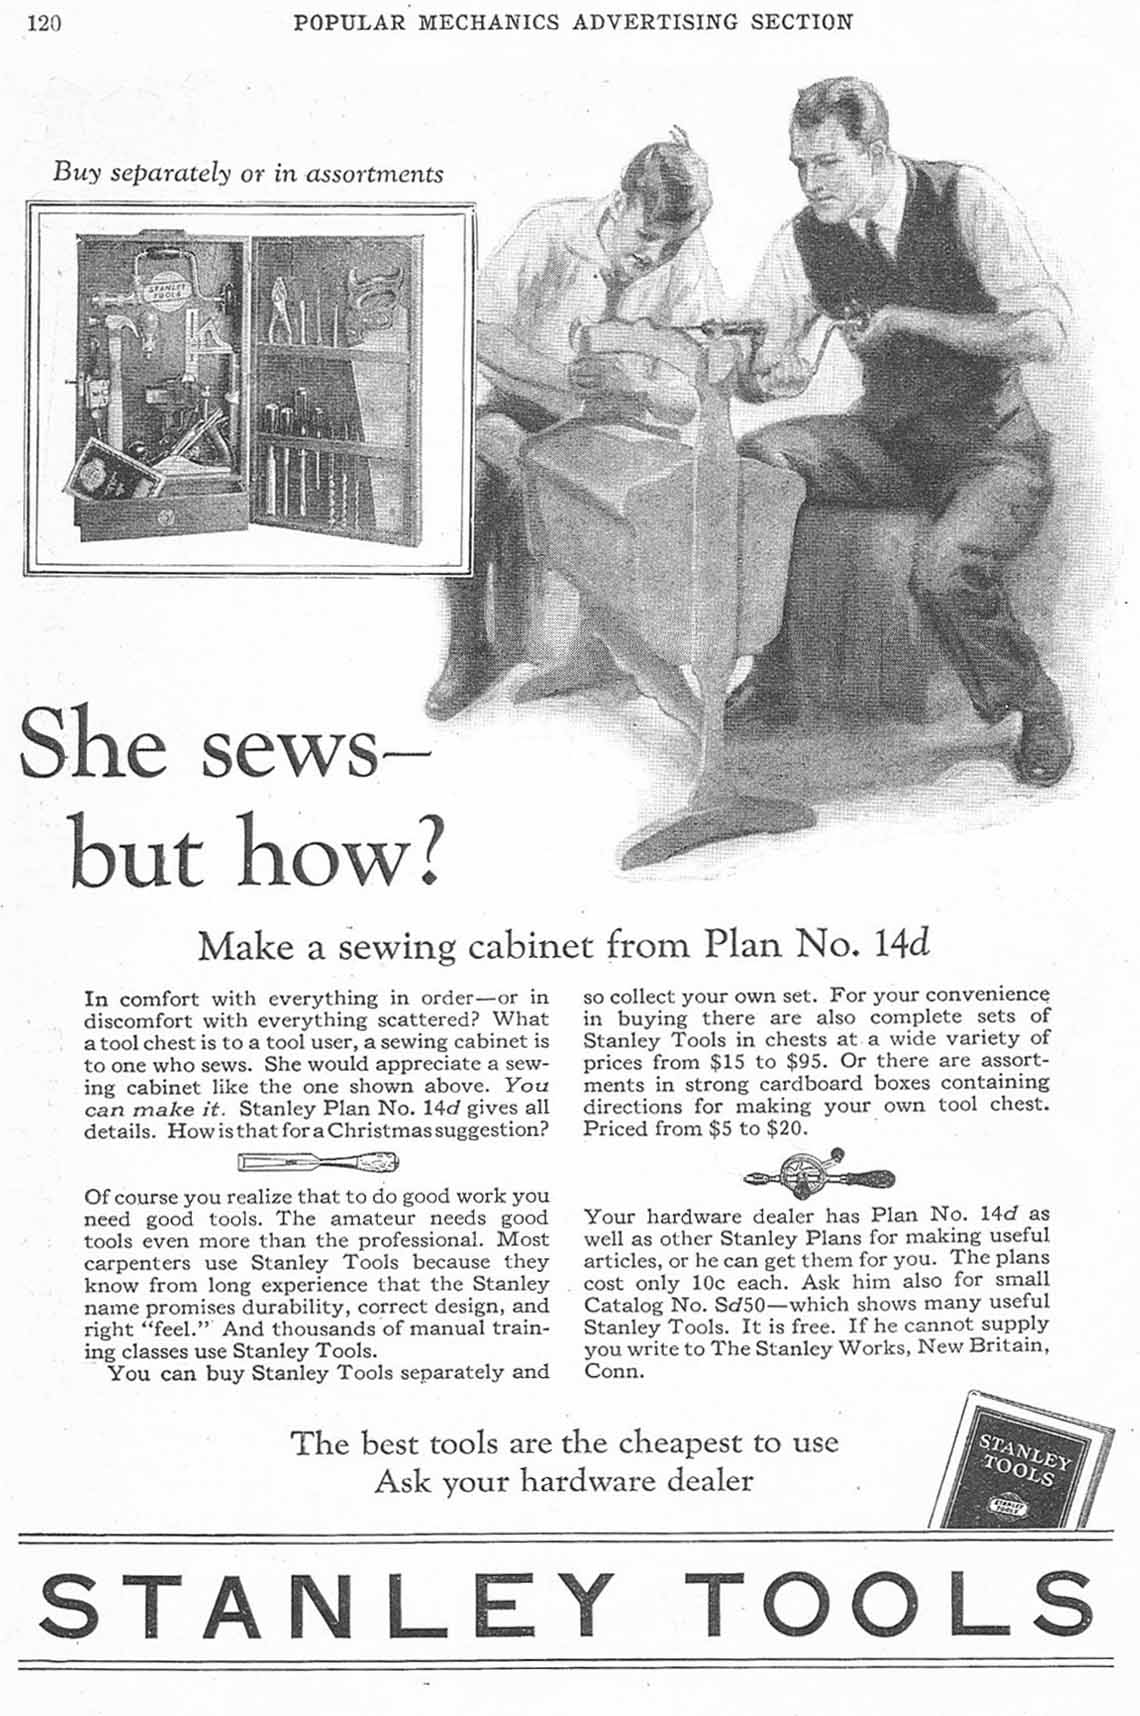
At least the son looks like he was allowed to loosen his tie!
Adventures of an Imperfect Man In Search of a Handmade Life

Popular Mechanics, 1927
At least the son looks like he was allowed to loosen his tie!
Here’s some images from a short eBook on woodworking by Peter C. Welsh. A quick read with some good stuff in it.

Not just eye candy, there is good information contained in this study of tools. But really, I’m just in it for the tool porn.

I particularly like the comparison of tools owned and used by actual people. For instance, in a Virginia workshop of 1709:
“John Crost, a Virginian, owned, in addition to sundry shoemaking and agricultural implements, a dozen gimlets, chalklines, bung augers, a dozen turning tools and mortising chisels, several dozen planes (ogees, hollows and rounds, and plows), several augers, a pair of 2-foot rules, a spoke shave, lathing hammers, a lock saw, three files, compasses, paring chisels, a jointer’s hammer, three handsaws, filling axes, a broad axe, and two adzes.”
A man could get a lot done with that tool kit.

In 1827, a Middleborough, Massachusetts, a carpenter lists his tools and their value. This is likely a representative set of tools for an actual tradesman of the time.
1 set bench planes $6.00 1 Broad Axe 3.00 1 Adze 2.25 1 Panel saw 1.50 1 Panel saw 1.58 1 fine do— 1.58 1 Drawing knife .46 1 Trying square .93 1 Shingling hatchet .50 1 Hammer .50 1 Rabbet plane .83 1 Halving do .50 1 Backed fine saw 1.25 1 Inch augre .50 1 pr. dividers or compasses— .71 1 Panel saw for splitting 2.75 1 Tennon gauge 1.42 1 Bevel .84 1 Bradd Hammer .50 1 Architect Book 6.50 1 Case Mathematical Instruments 3.62-1⁄2 1 Panel saw 2.75 1 Grafting saw 1.00 1 Bench screw 1.00 1 Stamp 2.50 1 Double joint rule .62-1⁄2 1 Sash saw 1.12-1⁄2 1 Oil Can .17 1 Brace & 36 straw cold bits 9.00 1 Window Frame tool 4.00 1 Blind tool 1.33 1 Glue Kettle .62-1⁄2 1 Grindstone without crank 1.75 1 Machine for whetting saws .75 1 Tennoning machine 4.50 Drafting board and square Bevel— 1.25 1 Noseing sash plane with templets & copes 4.50 1 pr. clamps for clamping doors 2.17 1 Set Bench Planes—double irons.— 7.50 1 Grindstone 300 lbs @ 6.25 1 Stove for shop—$7.25, one elbow .37 & 40 lbs second hand pipe $4.00 11.62 1 Bed moulding 2.00 1 Pr. shears for cutting tin.— .17 1 Morticing Machine 10.75 1 Grecian Ovilo 1.13 1-3⁄16 beed .67 1 Spirit level 2.25 1 Oil stone .42 1 Small trying square .48 1 pareing chisel .37 1 Screw driver .29 1 Bench screw .75 1 Box rule .50 1-3⁄4 Augre .41 11 Gouges 1.19 13 Chisels 1.17 1 small iron vice .52 1 pr. Hollow Rounds .86 4 Framing chisels 1.05 1 Grove plough & Irons—Sold at 4.50 5.00 1 Sash plane for 1-1⁄4 stuff 1.50 1 Copeing plane .67 1 Bead 1⁄4— .75 1 Bead 3⁄4 1.00 1 Rabbet (Sold at .92) .92 1 Smooth plane 1.50 1 Strike Block .92 1 Compass saw .42 6 Gauges 1.83 1 Dust brush .25 1 Rasp, or wood file .25 1 Augre 2 in. .76 1 Augre 1 in. .40 1 Do 3⁄4 .30 1 Spoke shave .50 1 Bevel— .25 1 Box rule .84 1 Iron square 1.42 1 Box rule 1.25 1 Spur Rabbet (Sold—1.17) 1.33 1 Pannel plane 1.25 1 Sash plane 1.25 1 pr. Match planes 2.25 1 Two inch chisel or firmer— .42 1 Morticing chisel 3⁄8 .25 1 Large screw driver 1.00 1 Pr. small clamps .50 1 pr. Spring dividers .92 1 do-nippers .20 1 Morticing chisel 1⁄2 in. .28 1 Ovilo & Ostrigal 3⁄4— 1.25 1 Scotia & Ostrigal 5⁄8— 1.08 1 Noseing— 1.08 1 Pr. Hollow & rounds 1.33 1 Ogee— 1⁄2 inch 1.00 1 Ostrigal 7⁄8 inch 1.00 1 Bit— .15 1 Beed 1⁄2 inch .83 1 Claw hammer .67 1 Fillister 2.50 2 Beeds at 5⁄8 1.83 1 Pair Quirk tools 1.50 1 Side Rabbet plane .83 1 Large steel tongued sq. 1.71 1 Saw & Pad .67 1 pr. fire stones .50 1 small trying sq. .50 1 Set Bench planes double ironed without smooth plane 6.00 1 Bench screw .75from “A Yankee Carpenter and His Tools,” The Chronicle of the Early American Industries Association (July 1953), vol. 6, no. 3, pp. 33–34.
I could ponder this list for a long time and find only a few things to add from our modern arsenal of gadgets and labor-savers.

Overall, Welsh does a decent job of outlining the changes in woodworking tools over the last three centuries, and provides great period illustrations too. Read the complete book for free HERE.

Bucksaws, bowsaws, and other frame saws are often lumped together into a single category in modern American or British English (unless you happen to be a traditional hand woodworker of course). And why should anyone care anyway? Bucksaws are replaced by chainsaws, bowsaws have become cheap, pot-metal, throw away abominations, and turning saws are replaced by band saws, scroll saws, saber saws, or even cheap coping saws.
The firewood bucksaw is the biggest of this family and one I’m glad to have in my toolkit. Yes, I still own a chainsaw but find I use it less and less in favor of the quiet bucksaw that takes no petroleum and spews out no noxious fumes. I have read that most homes kept a big bucksaw handy as the easiest means of creating firewood and I can certainly understand why this would rank above the axe for cutting logs to length.
Skipping even the practicality of being able to make your own excellent tools for a few dollars (or less if you are energetic), there is a great beauty and practicality in this ancient design that our ancestors hit upon a couple thousand years ago. The basic premise of this design is to create a structure that will put a very thin strip of serrated metal under immense tension to simulate the stiffness of a much thicker material.
I regret that we’ve come to a point in our history where making a tool is odd, yet making something with our tools is not (yet). Where working for hours at some other thing, we get tokens of cash to purchase something we could have made ourselves in far less time and probably less energy spent. I believe Thoreau was on to this sort of thinking.

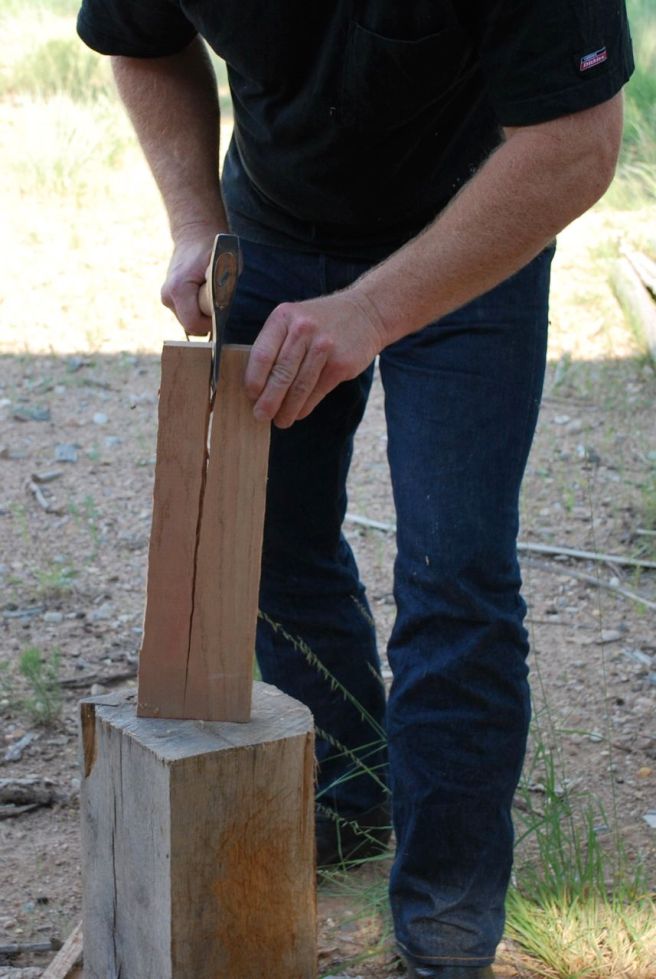
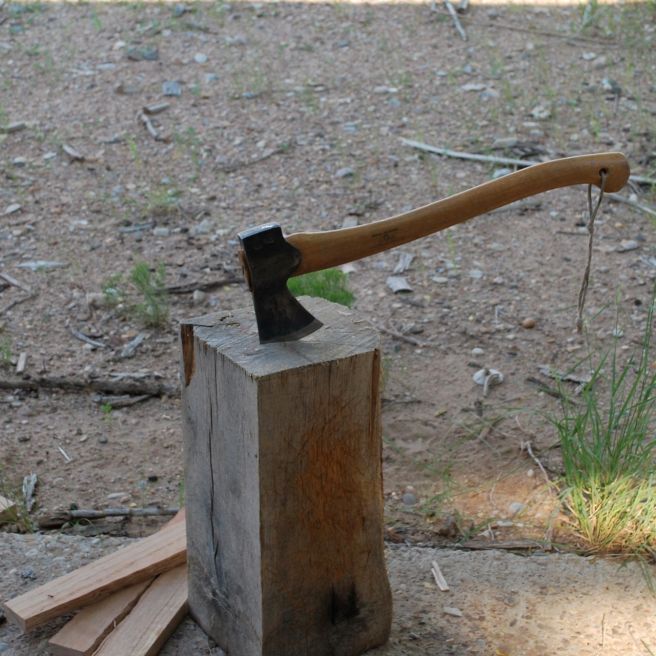
Choosing a length of straight-grained oak in this case, an axe is, by far, the fastest method of reducing it into the constituent pieces for the saw parts. This is far faster and better than sawing, creates no noise or dust, and ensures that each part is exactly in alignment with the grain.
For a quick and dirty saw, these could be worked almost instantly into the mortice and tenon. However, as we always intend to make a tool we will cherish and pass on, some shaping is in order with an eye for form and comfort.

I have a file of templates I keep from past projects so I don’t have to continually reinvent these things and I highly recommend this. I find it helpful to write the details on the card stock, as well as label and date them (the notes on the one above are on the underside). Now comes the somewhat tedious task of shaping the arms for which I didn’t take a photo (maybe I’ll remember next time). I saved a few minutes by using the belt sander to taper the upper portions of the arms to save on shaping later.

After marking up the arms, I cut the mortices with a bench chisel. These are easier than many people think but do take a very sharp chisel and a little practice.

I used a 5/16″ doweling bit for this as it leaves a very clean, precise hole for the 1/4″ brass rod to run through and turn freely.

Cutting the tenon is very easy if the lumber is split precisely with the grain as opposed to sawn out on a table saw (ignoring the natural grain). After the cheeks are cut, its a quick matter to pop off the waste with a sharp chisel.

I used a spare file handle for the primary handle. A 1/4″ hole is augured about 1 1/2″ deep for the 1/4” brass rod that will become the connection for the blade.

The rod is driven into the handle and will be cross-pinned for security.
Come back for Part 2.
For this project I moved my little operation into the living room of the house. Creating sawdust and wood chips for the dogs to track around in their boredom is a real bonus. But, on to the show…
Making a Bucksaw for carpentry, bushcraft, or just because they’re cool.
 The little bucksaw I built last winter had never been “finished” even though I’ve been using it for a while now. Having a few hours to spare I pulled out the knives, rasps, and scraper and decided to finish this once and for all before getting down to the next project.

I hope to put this together soon as a sort of “Instructable” for making frame saws, buck saws, and turning saws but for now, this will have to do. Although common enough for the last couple millennia, frame saws have lost their place in the tool kits of carpenters and craftsmen, having been replaced by sabre saws, band saws, and the like. There is a lot of beauty in the old design and a serviceable saw can be built in a short time with very few tools. In fact, the one pictured here cost about $4 for the partial band saw blade, maybe a dollar for the screws and a few bucks for the long-toothed firewood blade. The lumber was created from a less-than-perfect bow stave; a well-seasoned shagbark hickory bodged down to about 7/8″ thick. The genius of this design is that it allows for an extremely thin blade to be stretched very tight for ease of work and a very clean cut.

A new, high quality band saw blade can be purchased for under $14 from a decent hardware store. The above is a Delta brand 1/2″ blade with 6 teeth-per-inch (TPI) and is only 2/100ths of an inch thick. That makes for very little waste which can be especially valuable when working harder to acquire materials like antler or bone.
 Band saw blades are made in a continuous loop and are great for what they do but the first thing we need is to break the loop. The metal is extremely hard, and fairly brittle which works to our advantage. The edge of a sharp bastard file, like that pictured above can be used to score cross the blade. You don’t need to cut all the way through, but just make a solid scratch across the surface. Then the blade can be snapped by hand, making sure to not put any unnecessary bends in the blade. Drilling the holes in the ends is the tough part. As I said, the metal is very hard so, either you can use a punch to make a starter spot and drill through as is (but this will severely dull most drill bits), or the ends can be gently annealed in a forge or with a torch and drilled soft.
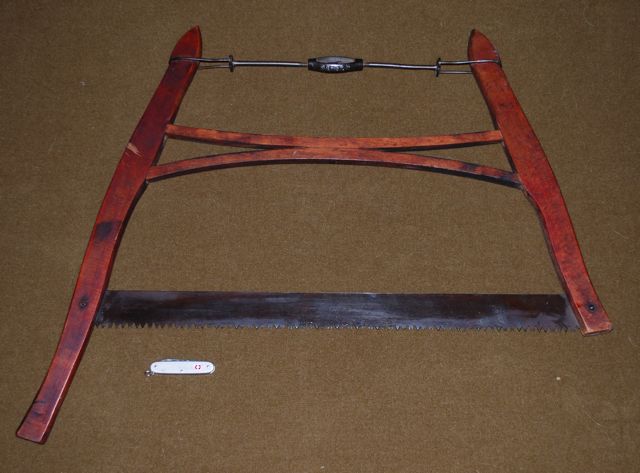
 Here are all the components of the new buck saw with the new linseed oiled surface glaring in the sun. The tensioner can be made from any strong cord (in this case 550 paracord), but any strong line can be built up or bailing wire will work (but is a little low-class and ugly and difficult to remove quickly). The spreader bar (the horizontal piece) is morticed into the legs but is not fastened by anything other than the tension on the whole system. Thus, the whole saw can be taken down in a few seconds and stuck into a toolbox or backpack for easy travel.
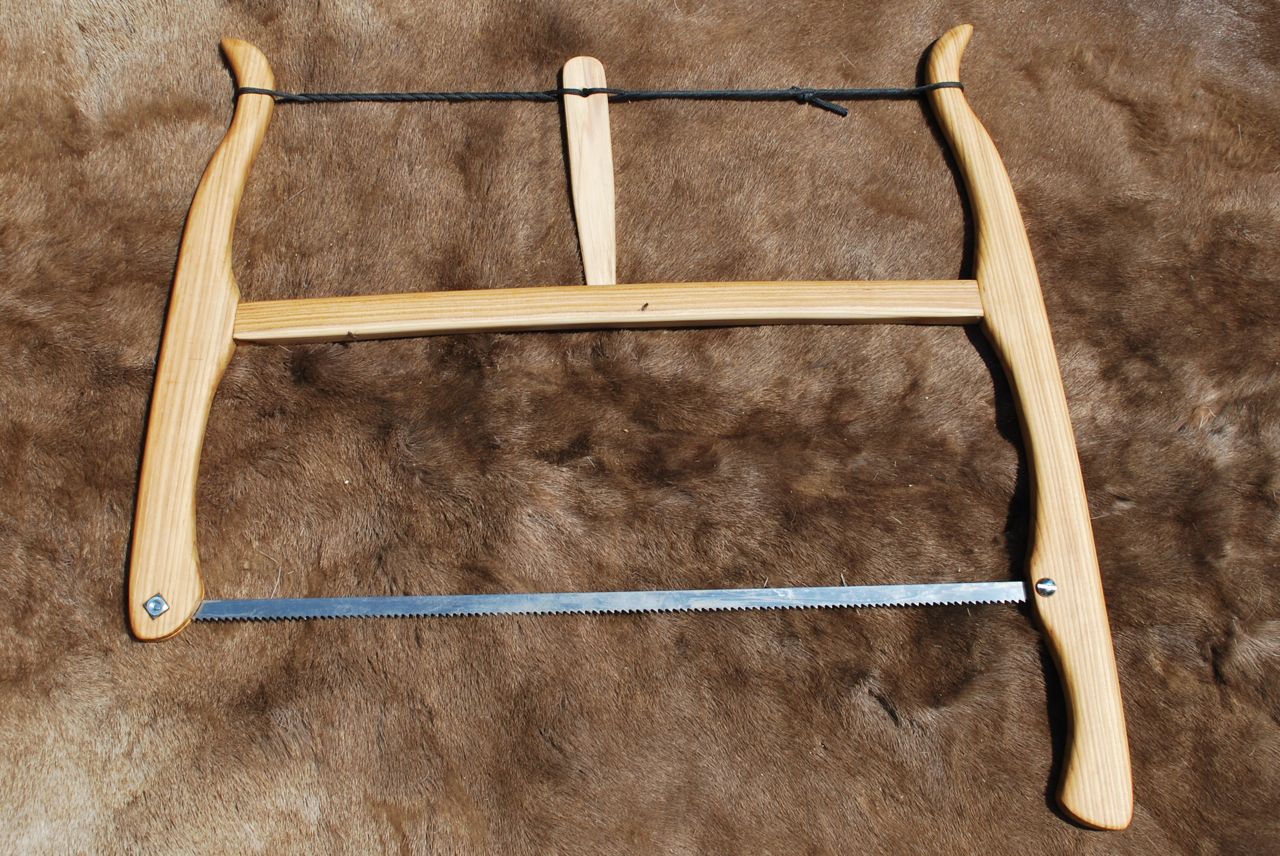 Above is the assembled saw under tension and ready to cut. A good question was already asked as to “why the spreader is curved in this case?” Because this was made from real wood, split with and axe, following the grain. I could have worked to straighten it for looks but I like the fair curve it created and, as it has no bearing on the function, left it as is.
Hope this helps anyone wanting to make a saw like this. Maybe I can offer this as a short, one day class at Rabbitstick or Winter Count soon.
Up soon: a turning saw.

This, or something like it, would be a nice little project for the shop or even to keep in the truck.
From the Army and Navy Co-operative Society Store, London 1907.
I know I’ve been on a big kick of old gear and tools from the late nineteenth and early twentieth century lately but its good to see the range and availability of these essential items. I find it interesting though, how poor the descriptions are and the arrangement of the catalog. It’s like they just invented this whole idea…
 Above you can get an anvil, axe, and workbench on the same page as an Alpine climbing rope, Alpine belt, and a wrist sling (in case the Alpine rope breaks I presume). I would really like the upper “foreign” work bench.
 Fretsaws, forges, and blacksmiths’ tools oh my.
 I know people who would give almost any left appendage for this nice selection of planes.
 The woodcutters’ frame saw isn’t even pictured (too common most likely) but I would be happy with a few others from this page. In all the tools I’ve ever used or seen, I have never come across a “walking stick pruning saw.” German invention, of course.
 I think I own that very same “saw set” as pictured above. When I was given by my grandfather I was warned I’d probably do more harm than good if I didn’t know how to use it. Of course, I was probably ten years old at the time.
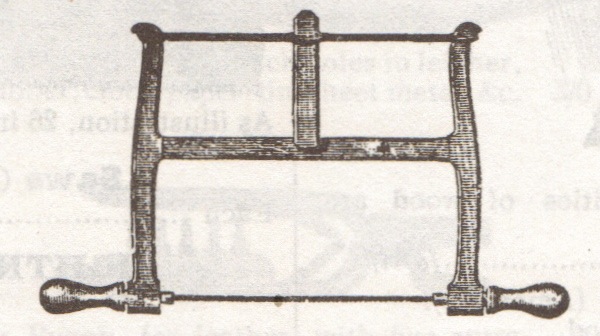
 And in the middle of the page, voila! The very frame saw I plan to make this weekend, and hopefully make a good instruction set to give out or post. Known as a turning saw, frame saw, or nowadays, a coping saw, this design goes back a couple thousand years. Maybe this will be a nice class project for Rabbitstick this year.

What a starter set for a Gentleman. My birthday is just around the corner.
From the Army and Navy Co-operative Society Store, London 1907.

18th century tools of the bootmaker’s trade. Click for the source.

A real treat from the Sifting the Past blog. It is worth checking out if you are interested in researching the past through images of the period just prior to mass industrialization. The Townsend’s have a couple excellent websites including an interesting 18th century cooking blog with videos. There is so much in this painting that describes the time and the craft of the cordwainer. There is a palm awl and lasting pinchers in the lower right, the ever critical strap for holding the shoe while sewing, the sewer’s palm for pulling tight the lock stitch, as well as the hammer, mallet, and knife of the trade. He is holding the sole awl in his left hand. The basket on the work bench contains a great bone tool made from a metapodial bone as so often found prior to the 20th century when craftsmen made their own tools. I want my shop to look this great sometime soon.
